
Table of Contents >> Show >> Hide
- Why Rag Curls Work (A Tiny Bit of Hair Science, With Zero Homework)
- What You’ll Need
- Before You Start: Prep That Makes or Breaks Rag Curls
- Tutorial #1: Classic Rag Roll Curls (The OG Ringlet Method)
- Tutorial #2: Rag “Halo” Wrap Waves (Comfy, Loose, and Surprisingly Cute)
- Pro Tips for Better Rag Curls (So You Don’t Wake Up Mad at Fabric)
- Troubleshooting: Quick Fixes for Common Rag Curl Problems
- How to Make Rag Curls Last Longer (Without Turning Hair Into Crunch)
- FAQ: Rag Curls Edition
- of Real-World Rag Curl “Experience” (What It Feels Like, What People Learn, and Why It’s Weirdly Addictive)
- Conclusion
If you’ve ever looked at your curling iron and thought, “We’ve had a good run, but you are literally a tiny wand of doom,”
welcome. Rag curls are the delightfully old-school, heatless way to get curls or waves using nothing more than fabric strips
(a.k.a. rags), a little patience, and the bravery to go to bed looking like you’re starring in a vintage prairie reboot.
The best part? You’re not blasting your hair with high heat, which can be a recipe for dryness, breakage, and that
mysterious “why do my ends look like straw?” situation. Instead, rag curls use gentle tension and drying time to “set” hair
into a new shapelike origami, but for your head.
Why Rag Curls Work (A Tiny Bit of Hair Science, With Zero Homework)
Hair becomes more flexible when it’s damp. When you wrap damp hair around a rag and let it fully dry in that shape,
it tends to hold the curl pattern longerespecially if you add a light styling product for grip (think: mousse, setting foam,
or a lightweight curl cream). Heatless curling is basically “shape + time” instead of “shape + sizzling.”
What You’ll Need
- Soft cotton fabric (old T-shirt, pillowcase, or flannel) cut into strips
- Water spray bottle (or start after a shower)
- Wide-tooth comb or detangling brush
- Optional styling helpers: leave-in conditioner, mousse, light gel, or curl cream
- Hair clips for sectioning
- Satin/silk scarf, bonnet, or pillowcase (optional, but your frizz will send a thank-you card)
Before You Start: Prep That Makes or Breaks Rag Curls
1) Aim for “damp,” not “dripping”
If hair is too wet, it may not dry overnight, which can leave you with half-set curls and the emotional state of a soggy
croissant. If hair is too dry, it may resist reshaping and drop fast. The sweet spot: towel-dried, slightly damp hair that
feels cool but not soaked.
2) Detangle like you’re defusing a tiny drama
Detangle gently from ends upward. Rag curls can be very friendly… unless you wrap knots into them. Then they become
rag curls’ evil twin: rag snarls.
3) Add a little “grip,” especially for straight or silky hair
Fine, straight, or super-smooth hair often benefits from a light mousse or a small amount of styling cream. You don’t need
a crunchy helmet. You just want enough hold to help the curl pattern stick around past your first “good morning” stretch.
4) Decide your curl vibe: ringlets vs. waves
- Tighter curls: smaller sections + narrower rags + more wraps
- Looser waves: larger sections + wider rags + fewer wraps
- More volume at roots: start wrapping closer to the scalp (comfort permitting)
- More relaxed ends: leave the last 1–2 inches out (optional, for a modern beachy look)
Tutorial #1: Classic Rag Roll Curls (The OG Ringlet Method)
This method is the classic: wrap hair around rag strips from the ends up toward the scalp, then tie the rag to hold it.
It’s great for medium to long hair and gives you bouncy curls that can lean vintage or modern depending on how you style them.
Step 1: Cut your rags
Cut 8–16 strips of soft fabric. A good starting size is about 1–2 inches wide and 10–14 inches long,
but adjust based on your hair length. Long hair may need longer strips; shorter hair may do better with shorter strips and smaller sections.
Step 2: Section your hair
Split hair into 4–6 main sections (more if you have thick hair). Clip each section up. Then work one small subsection at a time.
Smaller subsections = tighter curls.
Step 3: Place the rag at the ends
Lay the rag strip at the end of your subsection so the hair ends sit on the middle of the strip. Pinch the hair and rag together.
If your ends are prone to flipping out, smooth a tiny bit of leave-in or cream onto the last inch.
Step 4: Roll upward
Roll the hair up around the rag, like you’re making a tiny cinnamon roll that will later become your personality. Keep tension
firm but not painful. If you feel scalp tugging, you’re doing “tight ponytail on picture day” energyback off a bit.
Step 5: Tie the rag to secure
Once you reach near the scalp (or as high as you want), tie the rag ends together in a simple knot or bow. It should be secure,
but you should still be able to smile without your roots protesting.
Step 6: Repeat and let fully dry
Repeat around your head. Let curls dry completelyovernight is ideal. In the morning, untie gently and unwind each curl.
Don’t yank. You’re not starting a lawnmower.
Step 7: Separate, shape, and set
- Use fingers (not a brush) to separate curls.
- For softer volume, flip your head over and shake gently at the roots.
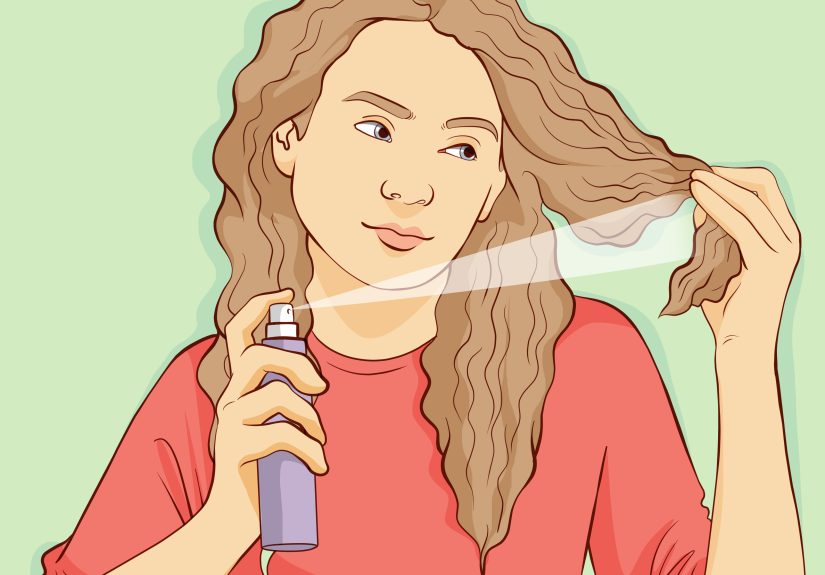
- Finish with a light hairspray if you want longer hold.
- Optional: rub a tiny drop of hair oil between palms and lightly scrunch ends to reduce frizz.
Results & Best For
- Best for: medium/long hair, defined curls, “I woke up like this (after doing a whole craft project)” volume
- Texture notes: straight hair may need product + smaller sections; wavy/curly hair gets a more uniform curl pattern
Tutorial #2: Rag “Halo” Wrap Waves (Comfy, Loose, and Surprisingly Cute)
Think of this as the “soft waves” sibling of the classic method. Instead of multiple rag rolls, you create a fabric “halo”
around your head and wrap hair around it. This is especially nice if you want looser curls, a blowout-y bend, or something
easier to sleep in.
Step 1: Make your halo rag
Use one long soft strip (or braid/loop a few together) so it can wrap around your head like a headband. Ideally it’s
1–2 inches wide and long enough to tie at the back or top. If you have slippery fabric,
it may feel luxurious but can slidecotton often grips better.
Step 2: Place and secure
Place the rag over your head like a headband or crown. Tie it at the back of your head or slightly off-center on top.
If you have a claw clip, you can clip it at the crown for extra stability.
Step 3: Wrap hair around the halo
Part hair down the middle (or side, if you’re feeling main-character). Start on one side near the front:
- Take a section of hair and wrap it around the rag away from your face.
- Add more hair as you move down (like a loose French twist around the rag).
- Continue wrapping until you reach the ends, then secure the ends with a soft scrunchie or small fabric tie.
Step 4: Repeat on the other side
Wrap the other side in the opposite direction (also away from your face) for symmetrical waves.
Step 5: Sleep, dry, release
Let hair dry completely (overnight is easiest). In the morning, unwrap gently. Separate with fingers and shape the waves.
If you want more polish, smooth a pea-sized amount of lightweight serum over the surface.
Results & Best For
- Best for: loose waves, “soft blowout” look, medium to long hair
- Bonus: fewer knots, fewer individual rolls, often more comfortable for sleeping
Pro Tips for Better Rag Curls (So You Don’t Wake Up Mad at Fabric)
Use satin/silk at night to fight frizz
Cotton pillowcases can create friction. A satin or silk scarf/bonnet/pillowcase helps hair slide instead of snag, which can
mean smoother curls in the morning.
Don’t crank the tension
Tight wrapping can stress hair and scalp. Secure is good. Headache is not a beauty goal.
Short hair or layers? Go smaller
If your hair is shorter or heavily layered, use narrower rags and smaller sections so the ends can wrap and stay put.
You can also focus on the top layers only for a “styled” look without trying to rag-curl every last strand.
Make ends behave
The ends are often the first place curls go rogue. Smooth the last inch with a tiny amount of cream, and make sure the ends
are wrapped neatlynot folded like a crumpled receipt.
Let it dry. Fully.
This is the big one. If you remove rags while hair is still damp, curls can fall fast. If you’re short on time, you can
air-dry longer before wrapping, or wrap earlier in the evening to buy drying time.
Troubleshooting: Quick Fixes for Common Rag Curl Problems
“My curls fell out in 20 minutes.”
- Hair may have been too dry when wrappedstart slightly damp.
- Try smaller sections and more wraps.
- Add a light mousse for hold (especially for straight/fine hair).
- Make sure hair is 100% dry before removing rags.
“My curls are too tight / I look like a startled poodle.”
- Use larger sections and wider rags.
- Wrap with less tension and fewer rotations.
- Finger-comb gently (don’t brush) to soften the shape.
- Try the Halo Wrap for looser waves.
“My hair is frizzy.”
- Use a satin/silk scarf or pillowcase.
- Apply a small amount of leave-in conditioner before wrapping.
- After removing rags, use a tiny drop of oil on palms and smooth lightly.
“I couldn’t sleep in them.”
- Try fewer, larger sections (less hardware on your head).
- Switch to softer fabric strips (old T-shirt beats scratchy towel).
- Use the Halo Wrap method, which is often more comfortable.
How to Make Rag Curls Last Longer (Without Turning Hair Into Crunch)
- Set smart: a light mousse before wrapping can boost longevity.
- Hands off: avoid over-touching as you style (frizz loves attention).
- Refresh: next day, mist lightly with water and scrunch; or re-wrap a couple front pieces for 15–30 minutes.
- Sleep strategy: loose pineapple bun + satin scarf can help preserve shape overnight.
FAQ: Rag Curls Edition
Do rag curls work on straight hair?
Yesstraight hair can absolutely curl with rags. You’ll typically get the best results with slightly damp hair, smaller sections,
and a bit of product for hold.
Do rag curls damage hair?
They’re generally gentler than heat styling, but any style that pulls too tightly can cause stress. Keep tension comfortable,
avoid tight knots, and detangle gently.
How long should I leave rag curls in?
Until hair is fully dry. Overnight is common. If your hair is thick or takes a long time to dry, start earlier in the evening.
Can I do rag curls on short hair?
Yes, but you’ll want smaller sections and shorter rags. Many people focus on top layers for a soft wave rather than trying to
wrap every inch.
of Real-World Rag Curl “Experience” (What It Feels Like, What People Learn, and Why It’s Weirdly Addictive)
Rag curls have a funny way of turning a normal evening into a tiny, cozy ritual. It usually starts innocently: you see a
heatless curls video, you think “Cute, but no,” and thensomehowyou’re standing in your bathroom holding scissors and an old
T-shirt like you’re auditioning for a role as “Resourceful Person Who Definitely Has Their Life Together.”
The first “experience” most people have is the mild shock of how low-tech it is. No fancy tool, no temperature settings,
no accidental forehead branding. Just fabric and determination. The second experience is realizing that your hair has opinions.
Some hair types behave immediately (wavy hair often snaps right into soft curls), while super-straight hair might require a
little convincingsmaller sections, a bit of mousse, and enough drying time to make the curls commit emotionally.
Then there’s the comedy phase: figuring out how you’re going to sleep. The classic rag roll method can feel like you’re
wearing a crown made of tiny fabric dumplings. If you toss and turn, you might wake up once or twice thinking, “Why is my head
lumpy?” (Spoiler: it’s your hairstyle, not a new personality trait.) This is where the Halo Wrap method becomes a fan favorite:
fewer knots, fewer pressure points, and a vibe that’s more “soft romantic waves” than “pioneer cosplay.”
Morning is where the emotional payoff happens. There’s a specific kind of suspense when you start untying the ragslike opening
a gift you wrapped yourself. If you pull them out too early while hair is still damp, you learn a classic lesson: patience is a
styling product. If you let everything dry fully, you get that “wow” moment where your hair falls into curls that look like you
tried… even if the most athletic thing you did was tie fabric into bows.
The next layer of experience is styling the results. People often discover that less is more: finger-separating keeps curls
defined and soft, while brushing can create instant fluff (sometimes cute! sometimes “static balloon”). Many also learn that a
tiny drop of oil or serum can be the difference between “effortless” and “why do I look like I fought a sweater and lost?”
And once you’ve had one successful rag curl day, it’s easy to get hookedbecause now you know you can get curls without heat,
without tools, and without the smell of sizzling hair in the morning.
Over time, rag curls become customizable. You’ll learn your personal formula: the exact dampness level your hair likes, whether
you need product or not, and how big your sections should be for your favorite curl shape. You’ll also start eyeing fabric
differently. Old T-shirt? Potential curl kit. Soft scarf? Luxury curl kit. That random flannel you never wear? Congratulations,
it has been promoted to “hair stylist.” Rag curls don’t just curl hairthey turn your linen closet into a beauty supply store.
Conclusion
Rag curls are proof that great hair doesn’t require high heat, expensive gadgets, or a complicated routine. With two easy DIY
optionsthe classic Rag Roll for defined curls and the Rag Halo Wrap for soft wavesyou can tailor your results to your hair
type, comfort level, and desired vibe. Start with slightly damp hair, keep tension gentle, let it dry completely, and finish
with minimal fuss. Your hair (and your ends) will thank you.


