
Table of Contents >> Show >> Hide
- What “download from Figma” actually means
- How to download the Figma desktop app on Windows or Mac
- How to export a design, screen, or asset from Figma
- The best export format to choose
- Browser versus desktop app: where your Figma download goes
- How to save a local copy of an entire Figma file
- How developers can download assets in Figma Dev Mode
- Why you might not be able to download from Figma
- Smart tips for smoother Figma downloads on Windows and Mac
- Examples of common Figma download tasks
- Final thoughts
- Experience Notes: What Real Users Learn After Downloading from Figma a Few Hundred Times
If you have ever typed “how to download from Figma” into a search bar and felt like the internet answered with a confident shrug, you are not alone. The phrase can mean at least four different things. Maybe you want to download the Figma desktop app on a Windows PC or a Mac. Maybe you want to export a PNG, JPG, SVG, or PDF from a design file. Maybe you need to save a local copy of an entire Figma file. Or maybe you are a developer trying to grab one icon without accidentally exporting half the universe.
The good news is that Figma can do all of those things. The slightly annoying news is that each one lives in a different corner of the product. So this guide walks through the whole thing in plain English, without the usual “click here, maybe cry a little, then refresh the page” energy.
If you work on Windows or Mac, this article will show you how to download Figma itself, how to download assets from Figma, how to save a local copy of a file, which export format to pick, and how to fix the most common download problems before your patience files for divorce.
What “download from Figma” actually means
Before clicking buttons at random like you are playing a very expensive game show, it helps to know which kind of download you need. In Figma, “download” usually falls into one of these buckets:
Download the Figma desktop app: This installs Figma on your Windows or Mac computer so you can use a dedicated app instead of working only in the browser.
Export a design asset: This is when you select a frame, image, icon, logo, or screen and save it as PNG, JPG, SVG, or PDF.
Save a local copy of a file: This downloads the actual Figma file to your machine so you can store it, move it to another account, or re-import it later.
Download assets in Dev Mode: This is the developer-friendly route for pulling out images and icons without rummaging through the entire design like a raccoon in a kitchen cabinet.
How to download the Figma desktop app on Windows or Mac
Let’s start with the easiest version. If you simply want Figma on your computer, go to Figma’s official downloads page and choose the version for your operating system. Figma offers desktop apps for macOS and Windows, and there is also a Windows Arm version for compatible devices.
For Windows
If you are using a standard Windows machine, download the Windows desktop app. If your computer runs Windows on Arm, choose the Arm build instead. Once the installer finishes downloading, open the file and complete the installation. After that, sign in with your Figma account and you are ready to work.
One practical note: Figma’s desktop app works on Windows 10 or later in a 64-bit environment. So if your machine is old enough to remember dial-up fondly, check your system details first.
For Mac
Mac users can download the macOS desktop app from the same official downloads page. Open the installer, then move the Figma app into your Applications folder. After that, launch the app and sign in.
Figma says the desktop app is optimized for both Intel Macs and Apple Silicon Macs, and you need macOS 12 or later. In other words, if your Mac is modern enough to survive a normal software update, you are probably in good shape.
Why use the desktop app instead of the browser?
The browser version is still excellent, so this is not a “web bad, app good” soap opera. But the desktop app feels more native, can handle links directly, and includes the font installer. That last part matters more than people expect. Fonts have a talent for turning beautiful mockups into accidental comedy when they fail to load correctly.
You can also tell Figma to open file links in the desktop app by default. That is a nice little quality-of-life improvement if you spend your day hopping between comments, specs, and shared design links like a caffeinated squirrel.
How to export a design, screen, or asset from Figma
If your real goal is to download something from a Figma file, this is the section you want. Figma lets you export layers, frames, components, groups, sections, slices, the full canvas of a page, and in some cases the original source image.
Export a single layer, frame, or component
Open the Figma file and select the object you want to download. On the right sidebar, scroll to the Export section. Click the plus icon, choose your format, set the scale or size if needed, and hit Export.
That is the basic workflow, and it works whether you are exporting one button, one app screen, or the logo your boss needs “in every file type just in case.”
Export the entire page or canvas
If you want the whole current page, deselect everything on the canvas first. Then add an export setting and export the page. This is useful when you need a full screen, a presentation slide, or a big visual snapshot of the design without selecting every object manually like a person doing digital archaeology.
Use the Slice tool for part of a canvas
Need just one region of a layout? Use the Slice tool. This is handy for screenshots, hero images, UI samples, or awkwardly shaped chunks of a design that do not line up with a single frame. Slices also give you more control over padding, which is great when you do not want the export cropped like it lost a fight with a paper cutter.
Bulk export multiple assets at once
If several objects already have export settings, Figma lets you bulk export them through File > Export. On Mac, the shortcut is Shift + Command + E. On Windows, it is Shift + Ctrl + E. This opens an export modal where you can review the assets, uncheck anything you do not want, and export the rest in one pass.
This is the feature that saves designers from the thrilling career milestone known as “manually exporting 47 icons one at a time.”
The best export format to choose
Picking the right format matters. A lot. Exporting a crisp icon as a JPG is the design equivalent of wearing dress shoes to the beach.
PNG
Use PNG when you need transparency, sharp graphics, or artwork that mixes text and visuals. It is a strong choice for interface mockups, logos, charts, and illustrations. PNG files are usually larger than JPG files, but they preserve detail better.
JPG
Use JPG for photos or visuals where smaller file size matters more than perfect sharpness. JPG is fine for many web images, but it does not support transparency, and compression can make text look softer than you want. If your export contains text, icons, or transparent backgrounds, PNG or SVG usually makes more sense.
SVG
Use SVG for icons, logos, and vector illustrations that need to scale cleanly. SVG is ideal for responsive design because it stays sharp at different sizes. Just remember that exported text may become glyphs, so text editability can be affected unless you adjust the export settings.
Use PDF when you want to share fixed layouts, slide decks, review files, or printable mockups. PDFs are also useful for handing off screens that need to preserve layout consistently across devices. They are less about editing and more about reliable presentation.
Browser versus desktop app: where your Figma download goes
This part trips people up all the time. If you export from Figma in the browser, the file goes to your browser’s default download location. That usually means your Downloads folder unless you changed the setting.
If you export from the Figma desktop app, Figma prompts you to rename the file and choose where to save it. So if your exported asset seems to have vanished into another dimension, the real issue may just be that you forgot which version of Figma you used five minutes ago.
How to save a local copy of an entire Figma file
Sometimes exporting a PNG or PDF is not enough. Maybe you want a backup. Maybe you want to move the work to another account. Maybe you are being responsibly paranoid, which, frankly, is underrated.
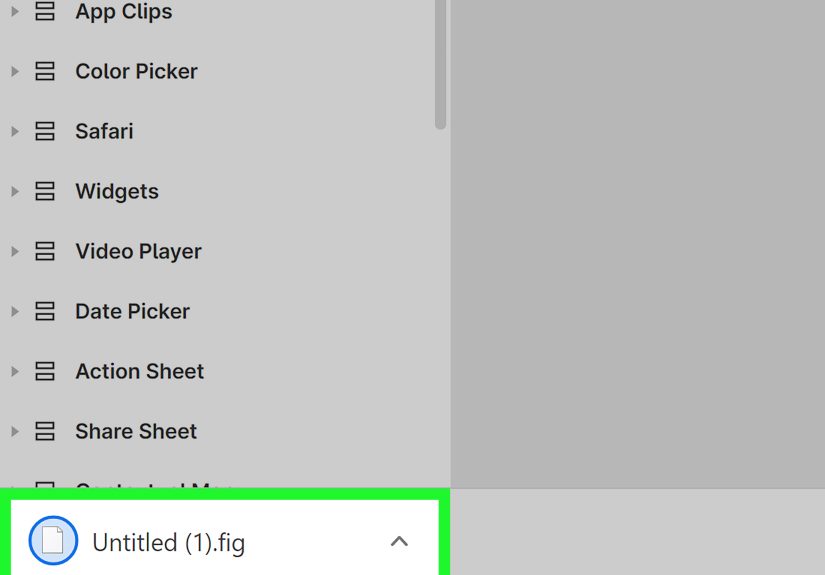
To save a local copy, open the file and go to Main menu > File > Save local copy. Figma downloads the file to your Downloads folder. For a design file, that usually means a .fig file.
This is the right method when you want the actual file, not just a flat export. You can later import that local copy back into Figma by dragging it into the file browser.
One important catch: if you do not see the option to save a local copy, the file owner may have restricted viewers from copying or exporting assets. That is not a bug. That is permissions doing their stern office-manager thing.
How developers can download assets in Figma Dev Mode
If you are a developer, Dev Mode can make life much less chaotic. Figma can automatically detect icons and present them as downloadable assets in the Inspect tab. Hover over the asset, pick a file type, and download it.
You can also create a custom export in Dev Mode by selecting the layer, adding an export configuration, and choosing the format you need. For images, Figma even gives you two useful choices: download the source image file at its original resolution, or download a layer export at the size used in the design.
That difference matters. If a product manager asks for “the original image,” they probably do not want the small cropped version sitting inside the mockup. They want the full-resolution source file. Dev Mode helps avoid that awkward back-and-forth.
Why you might not be able to download from Figma
If Figma is refusing to cooperate, here are the most common reasons:
You do not have the right permissions. People with view access can export assets only if the file owner has not restricted copying and sharing.
The export section is missing. Refresh the page first. In some cases, restrictions or access level are the reason the export controls are not visible.
You are trying to export the wrong thing. If nothing is selected, Figma may behave differently than you expect. Double-check whether you want a layer, a frame, a page, or a local copy of the full file.
You picked the wrong format. Exporting text-heavy graphics as JPG can make them look soft. Exporting a raster image as SVG will not magically transform it into clean vector art. Sadly, file formats are helpful, but not wizards.
You downloaded the asset but cannot find it. Check the browser’s default download folder or the save location you selected in the desktop app.
Smart tips for smoother Figma downloads on Windows and Mac
Name layers cleanly before exporting. Figma can organize exported assets into nested folders if you use slash-separated names. That makes asset handoff far less messy.
Use higher scale values when exporting for retina or high-density displays. If you are preparing image assets for sharper screens, larger scale settings can improve clarity.
Choose SVG for icons and logos whenever possible. Your future self, your developers, and your website performance will all send silent thank-you notes.
Use PNG when you need transparency. Use JPG when you need a lighter file. Use PDF when you need a polished review or print-style output. Use a local copy when you need the actual Figma file.
And maybe most importantly: know when not to export. If teammates only need to review the latest design, sharing a Figma link is often better than flooding Slack, email, and somebody’s desktop with seventeen near-identical image files.
Examples of common Figma download tasks
Example 1: Download a logo for a website
Select the logo component, add export settings, choose SVG, and export. This keeps the logo sharp across screen sizes.
Example 2: Download app screens for a presentation
Select each frame, apply PDF or PNG export settings, then use bulk export. PDF works well for decks and stakeholder review, while PNG is great for slides and docs.
Example 3: Download a full design file for backup
Open the file and use Save local copy. Store the downloaded file safely, then import it later if needed.
Example 4: Download a product image exactly as uploaded
Open Dev Mode, find the image in the Assets section, and choose Source image file instead of layer export. That gives you the original asset rather than the resized version used in the mockup.
Final thoughts
Learning how to download from Figma on Windows or Mac is not difficult once you separate the question into the right category. Are you installing the app? Exporting an asset? Saving a local copy? Downloading from Dev Mode? Each route has its own purpose, and once you know which one to use, the process becomes fast and surprisingly painless.
The biggest takeaway is simple: Figma is flexible, but it expects you to be specific. Pick the right format, confirm your permissions, know whether you are in the browser or desktop app, and your downloads will go from confusing to routine. Which is exactly what good software should do, even if it occasionally hides the important button like it is playing hard to get.
Experience Notes: What Real Users Learn After Downloading from Figma a Few Hundred Times
After enough time with Figma, most people stop asking, “How do I download this?” and start asking much better questions, like “What exactly should I download?” That shift matters. New users often export whatever is easiest, while experienced users export with a purpose. They know a developer probably wants SVG icons, a marketing teammate may need a PNG with transparency, and a stakeholder review often works best as a PDF. Experience turns downloading from a random action into part of a cleaner workflow.
Another lesson shows up quickly on both Windows and Mac: the desktop app feels smoother for repeated exports, especially when you want control over file names and save locations. In the browser, downloads can pile into the default folder so fast that everything starts looking like a crime scene made of unlabeled assets. In the desktop app, the extra save dialog feels slower at first, but it usually saves time later because you know where everything went.
People also learn that permissions are the hidden boss battle. When a file will not download, beginners often assume Figma is broken. In reality, the file owner may have restricted copying and sharing. That means the best fix is not a browser restart, a keyboard shortcut, or emotional bargaining. The fix is asking for the right access. It is not glamorous, but neither is spending twenty minutes troubleshooting a permission wall that was doing its job perfectly.
There is also a practical lesson about naming. Teams that name layers well tend to export faster, hand off assets more cleanly, and spend less time renaming files later. Teams that leave layers named things like “Rectangle 847” and “Copy of Group 12 Final Final” eventually discover that chaos is not a workflow. It is a lifestyle choice.
Developers usually learn to love Dev Mode once they realize it can surface downloadable assets without requiring a scavenger hunt through the design. Designers learn to appreciate that clean export settings make handoff smoother. Product managers learn that “Can you just send me the file?” is not always one request; it might mean a local copy, a PDF, a PNG, or an original source image. And everyone learns, sooner or later, that the wrong export format can create five extra rounds of messages that could have been avoided by one smart choice at the start.
The most useful experience-based takeaway is this: downloading from Figma is easy when the team agrees on what each export is for. A little consistency goes a long way. Decide which assets should be SVG, which screens should be PDF, which image exports should be 2x, and when a share link is better than a file. Once that becomes routine, Figma stops feeling confusing and starts feeling fast. And that is when the tool really earns its keep.


