
Table of Contents >> Show >> Hide
- Why Pointing Hands Are Tricky
- What You Need Before You Start
- How to Draw a Pointing Hand in 14 Steps
- Step 1: Decide the View and Gesture
- Step 2: Sketch the Wrist and Palm as Simple Shapes
- Step 3: Mark the Knuckle Line
- Step 4: Map the Pointing Index Finger
- Step 5: Add the Thumb as a Wedge
- Step 6: Block in the Folded Fingers
- Step 7: Connect the Finger Webbing and Palm Pads
- Step 8: Refine the Outer Contour
- Step 9: Draw the Joints and Creases
- Step 10: Add Fingernails the Smart Way
- Step 11: Check Proportions Before Shading
- Step 12: Shade the Large Planes First
- Step 13: Add Cast Shadows and Surface Details
- Step 14: Clean Up and Push the Character
- Common Mistakes When Drawing a Pointing Hand
- Tips to Make Your Pointing Hand Look Better Fast
- Experience and Practice: What Learning to Draw a Pointing Hand Really Feels Like
- Conclusion
- SEO Tags
Note: This article is written in body-only HTML for easy publishing and copying.
A pointing hand looks simple until you actually try to draw one. Then suddenly the fingers turn into breadsticks, the thumb wanders off like it missed rehearsal, and the whole hand starts looking like a stressed-out starfish. The good news is that learning how to draw a pointing hand is much easier once you stop thinking of it as “a hand” and start seeing it as a set of simple forms working together.
This step-by-step guide breaks the process down into manageable stages so you can draw a pointing hand that feels believable, clear, and full of gesture. We will cover structure, proportion, finger placement, shading, and the small details that make a drawing feel alive. Whether you are sketching for comics, character design, realistic drawing, or just trying to stop fearing hands forever, this tutorial will help.
The best part? You do not need magic powers. You just need observation, patience, and a willingness to redraw the same finger more than once. That last part is basically the secret handshake of every artist.
Why Pointing Hands Are Tricky
A pointing hand is not just a hand with one finger stuck out. It is a pose with a clear action. One finger extends, the other fingers bend, the thumb balances the gesture, and the palm shifts to support the pose. Because of that, a pointing hand combines anatomy, perspective, and expression all at once.
To draw it well, think in layers. First comes the gesture. Then the large structure of the palm. Then the fingers as simple three-dimensional forms. After that, you refine the joints, creases, nails, and shading. This approach keeps you from getting lost in tiny details too early.
What You Need Before You Start
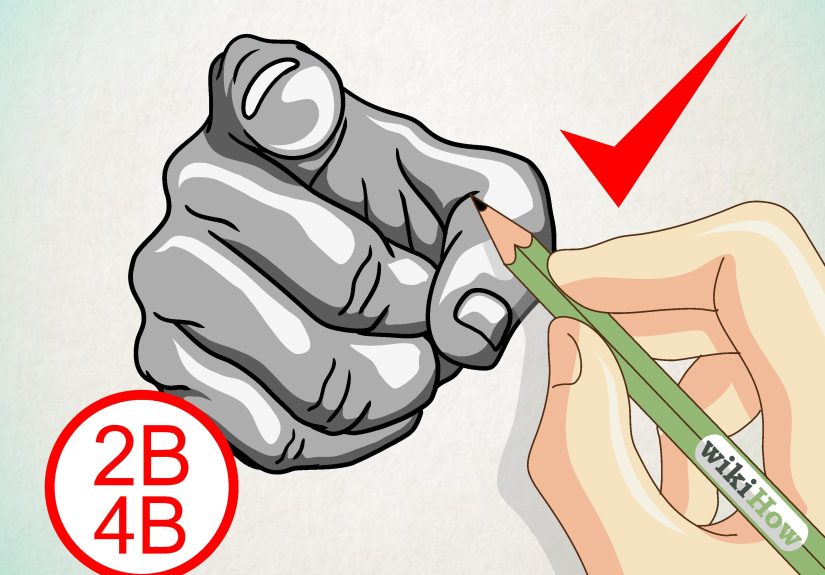
You can draw a great pointing hand with just a pencil and paper, but it helps to have an eraser and a reference photo or your own hand posed in a mirror. For practice, try sketching from life whenever possible. A real hand gives you better information about depth, folds, and the way light sits on the form.
Also, do not underestimate the power of using your own hand as a model. Artists have used that trick forever because it works. Conveniently, your reference is attached to your body and usually available without booking an appointment.
How to Draw a Pointing Hand in 14 Steps
-
Step 1: Decide the View and Gesture
Before drawing anything, decide exactly how the pointing hand is posed. Is the palm facing up, sideways, or down? Are you seeing the front of the hand, the back, or a three-quarter angle? Is the index finger pointing straight out, up, or slightly toward the viewer?
Start with a loose line of action. This is the overall directional flow of the pose. In a pointing gesture, that action line usually moves from the wrist through the palm and straight into the index finger. That line is the backbone of the drawing.
-
Step 2: Sketch the Wrist and Palm as Simple Shapes
Draw the wrist as a narrow block or cylinder. Then sketch the palm as a boxy shape, often close to a trapezoid or rounded rectangle depending on the angle. Keep it light. The goal is not beauty yet. The goal is structure.
This step is important because the palm controls where the fingers attach. If the palm shape is wrong, everything that follows becomes a rescue mission.
-
Step 3: Mark the Knuckle Line
Across the top of the palm, place the knuckles. Do not draw them in a perfectly straight row unless you want your hand to look suspiciously robotic. The knuckles usually form a gentle arc. The middle finger knuckle often sits highest, while the others step down slightly.
This curved rhythm gives the hand a more natural look and helps you place the fingers in believable positions.
-
Step 4: Map the Pointing Index Finger
Now block in the index finger first. Since it is the star of the show, it sets the pose. Draw it in three segments: proximal, middle, and tip section. Think of each section as a small box or cylinder rather than a flat stick.
Keep in mind that the index finger should feel extended, but not frozen. Even a straight finger has subtle taper, tiny curve changes, and visible joints.
-
Step 5: Add the Thumb as a Wedge
The thumb is what stops the pointing hand from looking like a fork. Start with a wedge or chunky triangular form at the base. Then add its two main sections. The thumb attaches lower on the palm than most beginners expect, and it swings out at a different angle from the fingers.
In a pointing pose, the thumb may rest outward, curl slightly inward, or support the gesture from below. Either way, it should feel connected to the base of the palm, not glued on as an afterthought.
-
Step 6: Block in the Folded Fingers
Next, draw the middle, ring, and pinky fingers in their bent positions. In many pointing poses, these fingers curl into the palm. Build them as short boxy forms with visible joints, overlapping slightly as they fold.
Do not draw three identical bent fingers. Real hands have variation. The middle finger may fold more deeply than the ring finger, and the pinky often angles outward a little. Small differences create realism.
-
Step 7: Connect the Finger Webbing and Palm Pads
Add the webbing between the fingers and suggest the fleshy pads of the palm. This is where the hand starts to look less like construction equipment and more like anatomy. The fleshy side of the hand tends to use softer curves, especially on the palm side.
The back of the hand is bony and angular. The palm side is softer and fuller. Remembering that contrast makes the drawing stronger immediately.
-
Step 8: Refine the Outer Contour
Go around the silhouette and refine the outline. Look for places where lines should stay straighter and places where they should bulge gently. The top of the fingers often shows flatter planes and sharper changes. The underside usually has softer curves because of fat pads and skin folds.
This is a great time to remove awkward bumps or random wiggles. A clean silhouette does a lot of work.
-
Step 9: Draw the Joints and Creases
Now mark the major joints: the knuckles at the hand, the middle finger joints, and the tip joints. The fingers have joints in the middle and near the tip, while the thumb has one main joint in the middle and a different range of motion from the fingers.
Add skin creases where the fingers bend, especially on the folded digits. Keep them subtle. A crease should support the form, not take over the drawing like it is trying to win an acting award.
-
Step 10: Add Fingernails the Smart Way
Fingernails are small forms that wrap over the finger, not stickers slapped onto the surface. Lightly place the nail on the pointing finger first, since it is the most visible. Then add nails to the folded fingers only where they would actually show.
Nails help describe perspective. A nail seen from the side will look narrower than one viewed from above. That tiny detail can make the whole hand feel more convincing.
-
Step 11: Check Proportions Before Shading
Pause and compare lengths. Is the palm too large? Is the index finger much too long? Did the thumb quietly become the size of a banana? Fix proportion issues now, while the drawing is still open and flexible.
A useful checkpoint is to compare the index finger length to the palm length and look at where each knuckle sits in relation to the others. Good proportions make even a simple sketch feel skilled.
-
Step 12: Shade the Large Planes First
When shading a pointing hand, begin with the major light and shadow shapes. Ignore tiny wrinkles at first. Think about which planes face the light and which turn away. The underside of the extended finger often carries shadow. Folded fingers may cast shadows onto the palm. The thumb base also tends to create strong shadow shapes.
Shade broadly before adding detail. This keeps the hand solid and three-dimensional.
-
Step 13: Add Cast Shadows and Surface Details
Once the main values are in place, add cast shadows from one finger onto another. These are especially important in a pointing pose because overlapping forms create depth. Then suggest tendons on the back of the hand, soft wrinkles near bent joints, and slight value changes around the knuckles.
Go easy. A little surface information goes a long way. Too much can make the hand look overworked and oddly dehydrated.
-
Step 14: Clean Up and Push the Character
Erase construction lines, sharpen important edges, and decide on the final style. For a realistic drawing, keep subtle value transitions and anatomical accuracy. For cartoon or comic work, exaggerate the silhouette and simplify internal details. In both cases, keep the gesture clear.
Ask one final question: does this hand actually look like it is pointing at something? If the answer is yes, you nailed it. If the answer is “it looks mildly confused,” adjust the angle of the index finger and thumb until the intent becomes obvious.
Common Mistakes When Drawing a Pointing Hand
One of the biggest mistakes is drawing the fingers as flat tubes with no structure. Another is forgetting that the bent fingers still have thickness and overlap. Many beginners also place the thumb too high or make the palm too small to support the fingers.
Another common problem is stiffness. A pointing hand should feel directional and alive. Even if the index finger is straight, the rest of the hand should support that action with believable angles, compression, and flow. Avoid perfect symmetry. Real hands are wonderfully uneven.
Tips to Make Your Pointing Hand Look Better Fast
Use your own hand as reference and rotate it under a lamp. Sketch the same pointing pose from several angles. Try one drawing that focuses only on structure, one that focuses only on contour, and one that focuses only on shading. This kind of repetition trains your eye faster than drawing one “perfect” hand for two hours while slowly losing emotional stability.
It also helps to practice blind contour and quick gesture sketches. A contour exercise teaches you to observe the edge honestly. A gesture sketch teaches you to catch the movement first. Together, they make your hand drawings less timid and more convincing.
Experience and Practice: What Learning to Draw a Pointing Hand Really Feels Like
Learning how to draw a pointing hand is one of those artistic experiences that starts humbly and usually with at least one dramatic sigh. At first, you think, “It is just a hand. I see hands every day.” Then you sit down, draw one finger, add a thumb, and realize you have somehow invented a creature that could apply for its own science-fiction franchise. That experience is normal. In fact, it is practically a rite of passage.
Most artists discover that the pointing hand teaches several lessons at once. The first lesson is observation. You cannot fake a convincing pointing gesture for long. The moment your shapes are vague, the pose falls apart. That is why drawing from life feels so valuable. You notice how the wrist tilts, how the index finger is straight but not rigid, how the folded fingers bunch together, and how the thumb acts like a quiet stage manager making the whole pose work behind the scenes.
The second lesson is patience. A good pointing hand rarely appears in one perfect pass. Usually it emerges through correction. You adjust the palm angle. Then the thumb. Then the knuckles. Then you erase the pinky because it drifted into another zip code. With time, those corrections stop feeling like failure and start feeling like the actual process of drawing. That mental shift matters. The artists who improve are often not the ones with supernatural talent. They are the ones willing to redraw the awkward finger and keep going.
There is also a practical confidence that comes from repeated hand studies. The first time you draw a pointing hand, you may rely heavily on a photo. After several rounds, you begin to predict the forms. You know the palm can be simplified into a block. You expect the fingers to taper. You understand that the back of the hand looks straighter and bonier while the palm side feels softer. Eventually, you stop panicking when a character needs a hand gesture in a sketch. That is a great moment. It feels like unlocking a door that used to be stuck.
Many artists also find that hand drawing improves the rest of their work. Once you get comfortable drawing a pointing hand, you become better at foreshortening, gesture, anatomy, and expressive posing in general. Hands are not isolated little puzzles. They connect to the arm, the action, and the emotion of the figure. A pointing hand can accuse, guide, warn, joke, command, teach, or celebrate. That is a lot of storytelling power packed into one bony little spotlight.
So yes, practicing this topic can be frustrating. It can also be strangely fun. Every attempt teaches you something. Every bad hand gets you closer to a good one. And one day, without fanfare, you will sketch a pointing hand in a few minutes and realize it actually works. That is the kind of quiet win artists live for.
Conclusion
If you want to learn how to draw a pointing hand well, focus on the big ideas first: gesture, simple shapes, finger structure, and clear direction. Build the palm, place the knuckles, construct the index finger, support it with the thumb and folded fingers, and only then move into details and shading. That order makes the process easier and the result better.
The more you practice, the less mysterious hands become. They are still complicated, sure, but they stop feeling impossible. And that is a big deal, because once you can draw a convincing pointing hand, you are no longer avoiding hand poses. You are using them on purpose.


