
Table of Contents >> Show >> Hide
- Why This DIY Planter Is So Popular
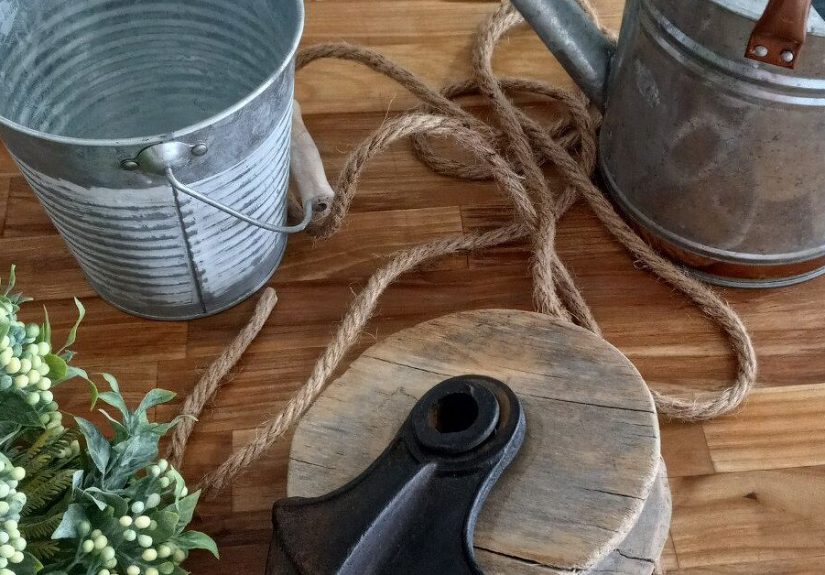
- What You Need
- How to Choose the Right Bucket
- Pick the Best Location Before You Build
- Step-by-Step: How to Build the Pulley & Hanging Bucket Planter
- Best Plants for a Hanging Bucket Planter
- Watering, Feeding, and Keeping It Alive
- Easy Styling Ideas for Extra Farmhouse Charm
- Common Mistakes to Avoid
- How Much Does This Project Cost?
- Final Thoughts
- Experience & Practical Lessons From Making a Farmhouse Pulley Bucket Planter
Note: Clean HTML body content only, with no extra source markup.
If farmhouse decor and garden projects had a charming little baby, it would probably look like a pulley planter with a hanging bucket. It has that vintage-country feel, a little practical magic, and just enough DIY flair to make visitors say, “Wait, you made that?” Best of all, this project is beginner-friendly. You do not need a full workshop, a dramatic soundtrack, or a beard made of sawdust. You just need a simple wall bracket, a pulley, a bucket, and a plant that is ready to live its best porch-life.
A cute farmhouse pulley and hanging bucket planter works because it blends style and function. The pulley gives the display height and movement, while the bucket adds rustic texture that looks right at home on a porch, patio, fence, garden shed, or entry wall. It is decorative, yes, but it is also useful: the pulley makes it easier to raise and lower the planter for watering, pruning, and seasonal swaps. In other words, it is pretty and practical, which is basically the dream.
In this guide, you will learn how to build one from scratch, how to choose the right materials, how to keep it sturdy, and how to style it so it looks like you bought it from a boutique garden shop that charges too much for distressed wood signs.
Why This DIY Planter Is So Popular
Farmhouse garden decor has staying power because it feels warm, handmade, and a little nostalgic. A pulley planter checks every box. It combines metal, rope, wood, and plants in one compact project. It also works in small spaces where a full planter stand or raised bed would feel bulky.
This design is especially useful if you want vertical interest. A bucket planter suspended from a pulley draws the eye upward, adds dimension to a blank wall, and creates a focal point without taking up much floor space. On a porch, it can soften hard surfaces. In a garden corner, it can make an ordinary fence feel intentional. Near an entryway, it adds instant curb appeal with very little drama, unless you count your neighbors becoming suspiciously inspired.
What You Need
Basic Materials
- 1 wall bracket or decorative wooden arm
- 1 pulley wheel with hook or eye bolt attachment
- Exterior-grade screws and washers
- Galvanized metal bucket or decorative hanging bucket
- Strong rope or outdoor-rated cord
- S-hook, quick link, or carabiner-style connector
- Potting mix
- Plants or herbs
- Optional liner, coco liner, or nursery pot insert
- Optional paint, stain, or distressing finish for a more vintage farmhouse look
Tools
- Drill and drill bits
- Stud finder or method for locating solid support
- Screwdriver or driver bit
- Measuring tape
- Level
- Marker or pencil
- Metal drill bit or awl for drainage holes
- Safety gloves and eye protection
How to Choose the Right Bucket
The bucket is the star of the show, so pick one with personality. A galvanized bucket is the classic choice because it brings that rustic farmhouse feel right away. Small to medium buckets usually work best. Oversized buckets can look great, but once you add wet potting mix and plants, they get heavy fast. Your pulley, bracket, rope, and mounting surface all need to handle that weight.
Look for a bucket with a sturdy handle, a solid bottom, and enough depth for roots. If you want flexibility, place your plant inside the bucket using a nursery pot or liner rather than planting directly into the metal. That makes seasonal changes easier and gives you better control over drainage and cleanup.
If you plan to plant directly in the bucket, drainage is non-negotiable. Drill several holes in the bottom so excess water can escape. No drainage means soggy roots, unhappy plants, and a very cute planter full of botanical disappointment.
Pick the Best Location Before You Build
Before you mount anything, decide where your pulley planter will live. This sounds obvious, but it is the part people skip right before saying, “Why is my petunia crispy?” Your location affects sunlight, watering needs, plant choice, and installation method.
Start with these questions:
- How many hours of sun does the spot get?
- Is the wall, post, or beam structurally sound?
- Will the planter swing into a door, railing, or person carrying groceries?
- Can you easily lower the bucket for watering and maintenance?
A covered porch is ideal because it gives you a little weather protection while still showing off the planter. Fence posts, pergola beams, shed walls, and porch columns can also work beautifully. Just make sure the support is solid and that your fasteners are appropriate for the material.
Step-by-Step: How to Build the Pulley & Hanging Bucket Planter
Step 1: Mark the Mounting Spot
Hold your bracket in place and test the height visually. You want the bucket high enough to look charming, but not so high that watering turns into a shoulder workout. Use a level and mark the screw holes. If you are mounting to a wall, aim for a stud or another sturdy structural point whenever possible.
Step 2: Install the Bracket Securely
Drill pilot holes first. Then attach the bracket using exterior-grade screws. If the bracket is going outdoors, exterior hardware matters. It holds up better to moisture and temperature swings and helps prevent rust and wobble. Once installed, tug the bracket gently to make sure it feels firm. If it wiggles now, it will definitely complain later.
Step 3: Attach the Pulley
Mount or hang the pulley from the bracket according to its design. Some pulleys attach with a hook, while others use an eye bolt or integrated hardware. Make sure the wheel turns smoothly and that the connection points are secure. The whole point of this project is that the planter can move up and down without a wrestling match.
Step 4: Prepare the Bucket
If the bucket does not already have drainage holes, drill them in the bottom. A handful of small holes is usually better than one large hole because it improves drainage while still supporting the potting mix. If you are using a liner or nursery pot, make sure that setup also allows water to escape instead of pooling in the bottom.
At this stage, you can also customize the bucket. Dry-brush on chalk paint, add a stenciled word like “Bloom” or “Herbs,” wrap the handle base with jute, or leave the metal plain for an authentic weathered look. Farmhouse style works best when it looks relaxed, not overly precious.
Step 5: Add Rope and Hardware
Thread your rope through the pulley and attach one end to the bucket handle or a secure connector. Tie strong knots and trim the ends neatly. On the other end, add a loop or handle so you can raise and lower the planter easily. Test the pulley motion before adding soil. If the rope rubs or slips, fix it now while the bucket is still light.
Step 6: Plant It Properly
Fill the bucket or insert pot with quality potting mix, not garden soil. Potting mix is lighter, drains better, and is designed for containers. Leave a little space at the top so water does not overflow like a tiny muddy waterfall every time you irrigate.
Then add your plants. For a classic farmhouse look, choose one of these combinations:
- Flowering charm: calibrachoa, trailing petunias, or geraniums
- Easy porch color: vinca or impatiens based on light conditions
- Edible cottage feel: thyme, basil, oregano, or parsley
- Texture-focused design: sweet potato vine, dichondra, ivy, or trailing greenery
A good rule is to include a “thriller, filler, and spiller.” That means one standout plant, one fuller plant, and one trailing plant. It gives the arrangement that lush, styled look without making it feel chaotic.
Step 7: Raise It and Adjust
Lift the planter using the pulley and stop when the height looks balanced. Step back. Squint slightly like a designer on a home show. Adjust if needed. Make sure the planter hangs straight and is not pulling awkwardly to one side. This is the moment where the project stops looking like “random hardware with a bucket” and starts looking intentional.
Best Plants for a Hanging Bucket Planter
Your plant choice depends mostly on sunlight and how committed you are to watering. Hanging containers dry out faster than ground beds, so pick plants that match your conditions and your schedule.
For Full Sun
- Calibrachoa
- Petunias
- Vinca
- Geraniums
- Lantana
- Rosemary or thyme
For Part Sun or Shade
- Impatiens
- Begonias
- Coleus
- Trailing ivy
- Mint in its own contained setup
If you are decorating a front porch and want color all season, flowering annuals are your easiest win. If you want a more useful planter near the kitchen door, herbs are adorable and practical. Nothing says “I have my life together” like snipping basil from a hanging bucket, even if the rest of the porch contains one lonely flip-flop and a package you forgot to bring inside.
Watering, Feeding, and Keeping It Alive
Here is the truth about hanging planters: they are beautiful, and they are thirstier than they look. Because the bucket is elevated and exposed to more air movement, the potting mix can dry out quickly. Check moisture often, especially in warm weather. Water thoroughly until excess runs out the bottom, then let the container drain.
Do not assume a splash is enough. Surface moisture can be misleading. The roots need a deep drink, not a polite misting and a motivational speech.
Because frequent watering can wash nutrients out of container soil, feed the planter regularly. A slow-release fertilizer at planting time can help, and a diluted liquid fertilizer during the growing season keeps flowering plants looking fresh. Just do not overdo it. Too much fertilizer can cause weak growth or fewer flowers, which is rude behavior from something you are literally feeding.
Easy Styling Ideas for Extra Farmhouse Charm
Once your pulley planter is built, styling is where the fun begins. You can keep it simple or lean all the way into storybook-country mode.
- Mount it near a vintage lantern or wall sconce
- Pair it with a small wooden crate or stool below
- Use a distressed white or black bracket for contrast
- Add a second planter nearby at a different height
- Swap plants seasonally: flowers in spring, herbs in summer, mums in fall, evergreen stems in winter
If you love layered porch decor, this planter plays well with doormats, rocking chairs, galvanized watering cans, and weathered wood signs. Just resist the urge to turn every square inch into a themed retail display. A little farmhouse charm goes a long way.
Common Mistakes to Avoid
Using the Wrong Soil
Garden soil is too dense for most hanging containers. It can compact, drain poorly, and make the planter heavier than necessary.
Skipping Drainage Holes
No drainage holes means trapped water, root problems, and mosquito-friendly puddling. Drill the holes. Future you will be grateful.
Choosing a Bucket That Is Too Heavy
Wet soil is heavy. Metal is heavy. Large plants become heavier. Add them together before installation and choose a manageable size.
Mounting Into Weak Material
A pretty bracket is not enough if the wall behind it is not solid. Secure mounting matters more than decorative flair.
Ignoring Light Conditions
A shade-loving plant in blazing sun will not become “resilient.” It will become crispy. Match the plant to the location.
How Much Does This Project Cost?
The price can vary depending on how vintage you want the hardware to look and whether you already own the tools. A simple version can be made on a budget using a basic bucket, rope, and standard pulley hardware. A fancier version with a decorative bracket, specialty finish, and premium plants will cost more, but it still tends to be cheaper than buying a boutique-ready decorative planter setup.
For many DIYers, the real value is the custom look. You get something that fits your space, your style, and your plant preferences instead of settling for whatever the garden center had sitting next to the ceramic frogs.
Final Thoughts
A cute farmhouse pulley and hanging bucket planter is one of those projects that delivers more than expected. It is affordable, creative, and surprisingly useful. It gives you a vertical garden accent, a movable planter, and a cozy handmade detail all at once. It also works whether your home style leans rustic, cottage, vintage, or somewhere between “country porch” and “I saw this idea online and now I own a glue gun.”
Take your time with the mounting, use the right potting mix, give your plants proper drainage, and choose a location that suits the light. Once it is up, you will have a charming decorative feature that feels personal, polished, and just a little bit brag-worthy.
And honestly, that is the best kind of DIY: useful enough to justify, cute enough to show off, and simple enough that you might immediately start planning a second one.
Experience & Practical Lessons From Making a Farmhouse Pulley Bucket Planter
The most interesting thing about this project is that it teaches you very quickly that “cute” and “practical” need to be friends. The first time I helped style a pulley bucket planter, the visual idea was perfect on paper: vintage metal bucket, thick rope, trailing flowers, rustic bracket, dreamy porch setting. In reality, the first version was too heavy, the bucket sat a little crooked, and watering it felt like trying to serve soup on a swing. It still looked adorable, but the experience made one thing clear: the prettiest planter is the one that is easy to maintain.
That is why the best DIY version is not the fanciest one. It is the one that feels balanced. A medium-size bucket usually performs better than a large one. A nursery pot insert often makes life easier than planting directly into metal. And a pulley that glides smoothly matters more than decorative details you only notice from three inches away. Once you use the planter for a week or two, convenience starts to matter a lot.
Another lesson is that plant choice changes the entire experience. If you choose a thirsty flowering mix for a hot sunny wall, you are signing up for regular care. That is not a bad thing, but it is a commitment. On the other hand, if you use herbs or tougher trailing plants in a spot with gentler light, the planter becomes much easier to live with. This is especially important if you love the look of hanging planters but know you sometimes forget to water until the leaves start acting dramatic.
There is also something satisfying about how customizable the project is. One person can make it look like a vintage farm stand piece with distressed paint and old-fashioned hardware. Another can make it look cleaner and more modern with black metal, simple rope, and a minimalist bracket. The basic structure stays the same, but the personality changes completely. That makes it a smart DIY for homeowners, renters with permitted mounting areas, and anyone who wants seasonal decor without reinventing the whole porch every few months.
The pulley feature is not just decorative, either. It genuinely makes the planter more usable. Lowering the bucket to prune spent blooms, add fertilizer, or swap out plants is easier than dragging a stool outside every time. It also makes seasonal refreshes fun. Spring flowers can become summer herbs, then fall mums, then winter greenery. One bracket, one pulley, many identities. The planter basically has better outfit changes than most of us.
In the end, the project feels rewarding because it combines simple building, light styling, and living design. You are not just making an object. You are creating a small garden moment that changes as the plants grow. It adds movement, texture, and a handmade story to a space. And that is probably the real charm of a farmhouse pulley bucket planter: it does not feel mass-produced. It feels lived-in, personal, and cheerful, which is exactly what good home decor should do.


