
Table of Contents >> Show >> Hide
- Why Make a Toy Car From Recycled Materials?
- Materials You Need
- Step-by-Step Guide: How to Make a Toy Car Out of Recycled Material
- How to Make a Balloon-Powered Recycled Toy Car
- How to Make a Rubber Band-Powered Toy Car
- Troubleshooting: Why Your Recycled Toy Car Will Not Roll
- STEM Lessons Kids Can Learn From This Project
- Creative Toy Car Ideas Using Recycled Materials
- Safety Tips for Kids and Adults
- Real Experience: What I Learned Making Toy Cars From Recycled Materials
- Conclusion
Learning how to make a toy car out of recycled material is one of those magical projects that proves a cardboard box is never just a cardboard box. It can become a race car, a science experiment, a rainy-day rescue mission, and possibly the reason your kitchen table is covered in bottle caps. The good news? You do not need fancy tools, expensive kits, or a garage full of engineering equipment. With a few household items, some creativity, and a little adult supervision, you can build a homemade toy car that actually rolls.
This project is perfect for kids, parents, teachers, homeschool groups, STEM clubs, and anyone who enjoys turning “trash” into treasure. It combines recycling, simple engineering, problem-solving, and hands-on creativity. Even better, every toy car can look different. One child may build a sleek cardboard sports car; another may create a juice-box monster truck with straw axles and bottle-cap wheels. Both are winners, especially if they make it across the floor without losing a wheel like a dramatic movie scene.
In this guide, you will learn how to make a recycled toy car step by step, which materials work best, how to make the wheels spin smoothly, and how to customize your car with safe, eco-friendly decorations. You will also find troubleshooting tips, STEM learning ideas, and real-world experience notes to help your project go from wobbly wagon to rolling champion.
Why Make a Toy Car From Recycled Materials?
Making a toy car out of recycled materials is more than a craft. It is a mini lesson in sustainability, design thinking, and physics. Children learn that everyday objects can have a second life before they end up in the trash. A cereal box can become a car body, plastic bottle caps can become wheels, and drinking straws can become axle holders.
This kind of recycled craft also helps develop fine motor skills. Cutting, taping, measuring, decorating, and assembling small parts all require focus and coordination. For younger children, the activity builds confidence and creativity. For older kids, it becomes a simple engineering challenge: How can I make the car travel farther? How can I reduce friction? What happens if I change the wheel size?
There is also a practical benefit for adults: it is budget-friendly. Instead of buying a new toy, you can reuse clean materials from home. That means fewer supplies to purchase and fewer items thrown away. It is a win for the wallet, the recycling bin, and the tiny car designer currently demanding racing stripes.
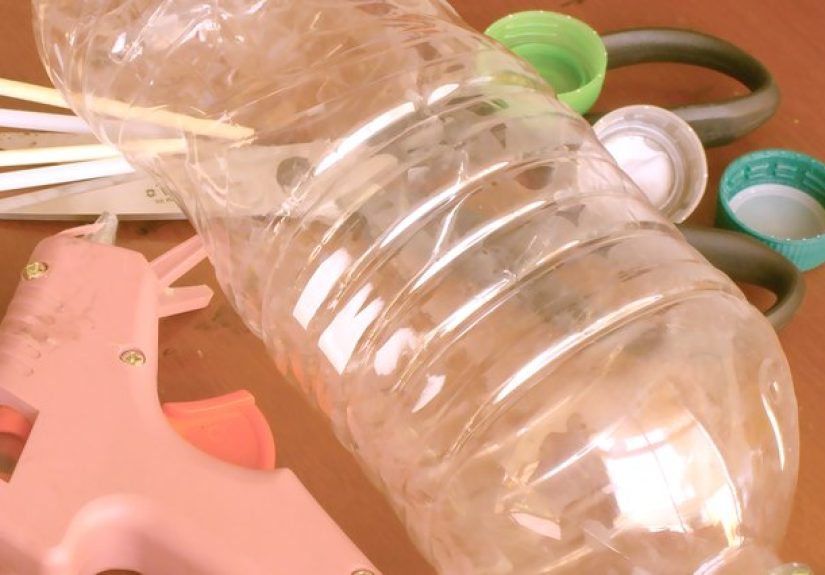
Materials You Need
Before you begin, gather clean recycled materials. Wash and dry any food containers, bottle caps, or cartons. Avoid sharp metal pieces, broken plastic, or anything that once held chemicals. Safety first; speed second.
Basic Supplies
- 1 small cardboard box, toilet paper roll, milk carton, juice box, or plastic bottle
- 4 plastic bottle caps, jar lids, cardboard circles, or old toy wheels
- 2 wooden skewers, pencils, chopsticks, or straight sticks for axles
- 2 drinking straws, paper tubes, or rolled paper strips for axle sleeves
- Tape, glue, or a low-temperature glue gun with adult supervision
- Scissors or a craft knife used only by an adult
- Markers, stickers, scrap paper, or paint for decoration
- A ruler
- A pencil for marking holes and lines
Optional Add-Ons
- A balloon and straw for a balloon-powered car
- A rubber band for a rubber band-powered car
- Cardboard fins, spoilers, or bumpers
- Buttons, beads, or washers to help wheels spin more smoothly
- Aluminum foil scraps for headlights
- Old magazine pages for colorful body panels
Step-by-Step Guide: How to Make a Toy Car Out of Recycled Material
Step 1: Choose the Car Body
Start by choosing the main body of your recycled toy car. A small cardboard box is the easiest option because it is lightweight, easy to decorate, and simple to poke holes through. A toilet paper roll creates a race-car shape, while a milk carton gives the car a taller, truck-like look. A plastic bottle can work too, but it may require more adult help to make clean holes.
If you are making this project with young children, choose cardboard. It is forgiving, easy to tape, and less likely to cause frustration. If the car ends up looking more like a potato on wheels, congratulations: you have made a concept vehicle.
Step 2: Plan the Wheel Placement
Turn the car body sideways and mark where the wheels should go. You need two wheels near the front and two near the back. Use a ruler to make sure the marks line up evenly on both sides. Uneven wheels can make the car wobble, turn in circles, or perform an unexpected dance routine across the floor.
The wheels should sit low enough to touch the ground but high enough that the body does not scrape. If the bottom of the car drags, it creates friction and slows everything down. For a cardboard box, place the axle lines about half an inch from the bottom edge.
Step 3: Create Axle Sleeves
Cut two drinking straws so each one is slightly wider than the car body. These straws will act as axle sleeves. Tape one straw across the bottom front of the car and the other across the bottom back. Make sure they are parallel. This matters because the axles need to spin straight. Crooked straws make crooked cars, and crooked cars tend to have strong opinions about going anywhere except forward.
If you do not have straws, you can roll scrap paper tightly around a pencil and tape it into a tube. Paper axle sleeves are not as durable as plastic straws, but they work well for a lightweight cardboard car.
Step 4: Add the Axles
Slide a wooden skewer, pencil, chopstick, or straight stick through each straw. These are the axles. They should spin freely inside the straw sleeves. If they feel stuck, check whether the straw is crushed by tape. Loosen the tape slightly or replace the sleeve.
Leave enough axle sticking out on both sides to attach the wheels. Try to keep the axle lengths even. If one side is much longer, the car may lean like it just heard bad news.
Step 5: Make the Wheels
Bottle caps make excellent recycled wheels because they are round, lightweight, and easy to collect. Ask an adult to poke a small hole in the center of each cap. The hole should be just wide enough for the axle to fit through. If the hole is too large, the wheel may wobble. If it is too tight, the wheel may not spin.
You can also cut wheels from thick cardboard. Trace four equal circles using a jar lid, cup, or compass. Cut them carefully and poke a hole in the center of each circle. Cardboard wheels are easier to decorate, but they may not roll as smoothly as plastic caps. For best results, use two layers of cardboard glued together for each wheel.
Step 6: Attach the Wheels
Push one wheel onto each end of the axles. Secure them with a small piece of tape, a dab of glue, or a tiny ball of modeling clay. Be careful not to glue the wheel to the straw sleeve. The axle and wheels should rotate together while the straw stays attached to the car body.
After attaching the wheels, place the car on a flat surface and give it a gentle push. If it rolls, celebrate. If it does not roll, do not panic. Most recycled toy cars require a little adjustment. This is not failure; this is engineering wearing a cardboard hat.
Step 7: Decorate the Car
Now comes the fun part. Use markers, stickers, paint, scrap paper, or magazine cutouts to decorate your recycled toy car. Add windows, headlights, doors, racing numbers, flames, stripes, or a tiny license plate. You can glue on cardboard bumpers, a roof, a spoiler, or even a paper driver.
Encourage kids to name their car. Names make the project more personal. “Lightning Banana,” “Captain Cardboard,” and “The Recycling Rocket” are all acceptable. Serious automotive branding can wait until after snack time.
How to Make a Balloon-Powered Recycled Toy Car
If you want to turn your recycled car into a moving STEM experiment, add balloon power. A balloon-powered car moves because air escapes from the balloon and pushes the car in the opposite direction. This introduces kids to motion, force, and cause-and-effect learning in a playful way.
Balloon Car Materials
- Your recycled toy car base
- 1 balloon
- 1 straw
- Tape
- Rubber band, optional
Balloon Car Instructions
- Insert one end of a straw into the balloon opening.
- Secure the balloon around the straw with tape or a rubber band.
- Tape the straw to the top of the car, with the open straw end pointing backward.
- Blow air into the balloon through the straw while pinching the straw closed.
- Place the car on a smooth floor and release it.
If the car barely moves, check the wheels first. A balloon car needs smooth-spinning wheels and a lightweight body. If the car is too heavy, the balloon may not provide enough force. Try removing extra decorations or using lighter materials.
How to Make a Rubber Band-Powered Toy Car
A rubber band-powered toy car is another exciting version of this recycled project. It uses stored energy. When you twist or stretch the rubber band, it stores energy. When released, that energy can turn the axle and move the car forward.
This version is best for older children because it takes more patience to set up. Attach one end of a rubber band to the car body and the other to the rear axle. Turn the rear wheels backward to wind the rubber band, then place the car on the floor and release it. If everything is aligned, the car should roll forward. If it zooms backward, congratulations: you have discovered reverse gear.
Troubleshooting: Why Your Recycled Toy Car Will Not Roll
The Wheels Are Crooked
If the wheels wobble, the holes may not be centered. Try making new wheels or adding small cardboard washers between the wheel and the car body. Centered wheels roll better and keep the car moving straight.
The Axles Are Too Tight
If the axle cannot spin freely inside the straw, the car will drag. Make sure the straw is not crushed by tape or glue. The axle should rotate smoothly with very little resistance.
The Car Body Is Too Heavy
Too much decoration can weigh down the car. Cardboard spoilers, paper flames, and foil headlights are fine, but avoid heavy objects unless you are building a display model instead of a racer.
The Wheels Do Not Touch the Ground Evenly
Place the car on a flat table and look at it from the front. If one wheel floats above the surface, adjust the axle position or gently bend the cardboard body until all four wheels touch the ground.
STEM Lessons Kids Can Learn From This Project
This recycled toy car activity naturally introduces several STEM concepts. Kids learn about wheels and axles, which are simple machines. They see how friction affects motion. They discover how weight changes speed and distance. They also learn that design improvements often happen after testing, not before.
For a classroom or homeschool extension, turn the activity into a challenge. Ask students to build cars using the same basic materials, then measure how far each car travels after one push. Have them change one variable at a time, such as wheel size, car weight, or axle type. This teaches fair testing and observation.
You can also discuss sustainability. Ask questions such as: What materials did we reuse? What would have gone into the trash? Which parts could be recycled again? This helps children connect hands-on play with environmental responsibility.
Creative Toy Car Ideas Using Recycled Materials
Juice Box Race Car
Use an empty juice box for the body, bottle caps for wheels, and straws for axles. Cover the box with scrap paper and draw racing stripes. This version is small, lightweight, and great for younger kids.
Cardboard Tube Rocket Car
A toilet paper roll makes a fun rocket-shaped car. Cut a small seat opening on top, add a paper driver, and attach wheels underneath. Add cardboard fins for a space-racer look.
Plastic Bottle Speedster
A clean plastic bottle can become a futuristic car body. Use bottle caps or cardboard circles for wheels. Because plastic can be slippery and harder to cut, adult help is important.
Cereal Box Truck
Cut and fold a cereal box into a truck shape. Add a cab, cargo bed, and large cardboard wheels. This is a great option if kids want a recycling truck made from recycled material. Very meta, very satisfying.
Safety Tips for Kids and Adults
Always supervise children when using scissors, skewers, hot glue, or sharp tools. Adults should make holes in bottle caps and plastic containers. Use low-temperature glue guns when possible, and avoid small parts for children under three because they can be choking hazards.
Clean all recycled materials before crafting. Food residue can attract bugs or create unpleasant smells. Nobody wants a race car that smells like last week’s yogurt. Also avoid materials with sharp edges, rust, or chemical residue.
Real Experience: What I Learned Making Toy Cars From Recycled Materials
The first thing you learn when making a toy car out of recycled material is that the wheels are the entire personality of the project. The body can be beautiful, the paint job can be worthy of a museum, and the racing number can look very official. But if the wheels are crooked, the car will wobble across the floor like it is trying to avoid responsibility.
One of the most successful recycled cars I have seen used a simple cracker box, four matching bottle caps, two straws, and two wooden skewers. Nothing fancy. No glitter engine. No superhero spoiler. The builder carefully lined up the straws underneath the box, kept the axles straight, and made sure the bottle-cap holes were centered. That car rolled farther than several heavier, more decorated models. The lesson was clear: lightweight design and smooth movement matter more than dramatic accessories.
Another memorable project used cardboard wheels instead of bottle caps. At first, the car barely moved because the cardboard circles were thin and uneven. The fix was simple: glue two circles together for each wheel and trim the edges until they matched. Suddenly, the car rolled much better. This is a great example of how recycled crafts teach iteration. Kids do not just follow instructions; they test, notice problems, and improve the design.
Balloon-powered cars are especially fun, but they can also be hilariously unpredictable. Sometimes they shoot forward. Sometimes they spin sideways. Sometimes the balloon flies off and leaves the car sitting there, emotionally abandoned. The most reliable balloon cars usually have very light bodies, straight axles, and a straw taped firmly along the centerline of the car. If the straw points slightly left or right, the escaping air pushes the car off course.
Rubber band cars require more patience, but they are excellent for older kids who enjoy solving mechanical puzzles. The most common mistake is attaching the rubber band in a way that stops the axle from spinning. The trick is to let the rubber band turn the axle without tangling around the body. It may take several tries, but that is exactly what makes the project valuable. Real engineering rarely works perfectly on the first attempt.
Decorating the car is where personalities shine. Some children want realistic headlights and windows. Others want flames, wings, googly eyes, or a cardboard dog in the driver’s seat. Let them experiment. A recycled toy car does not have to look like something from a dealership. It can look like a moon buggy, a food truck, a race car, or a vehicle designed by a raccoon with excellent ambition.
The best experience tip is to prepare extra wheels and axles before starting, especially with a group. Bottle-cap holes may split, cardboard wheels may tear, and skewers may break. Having backup parts keeps the mood cheerful and prevents the dreaded “my car is ruined” moment. Also, test on a smooth floor instead of carpet. Carpet adds too much friction, and even a well-built car may refuse to move.
This project works beautifully because it balances structure with freedom. The basic engineering idea is simple: body, axles, wheels. But within that structure, every builder can make different choices. That is why learning how to make a toy car out of recycled material is more than a craft tutorial. It is a small invitation to think creatively, reuse wisely, and discover that the recycling bin might be hiding the next great invention.
Conclusion
Making a toy car out of recycled material is an easy, affordable, and meaningful project for kids and adults. With a cardboard box, bottle caps, straws, skewers, and a little imagination, you can build a rolling toy that teaches creativity, sustainability, and basic engineering. The process also encourages problem-solving. If the car does not roll smoothly at first, every adjustment becomes part of the learning experience.
Whether you build a simple push car, a balloon-powered racer, or a rubber band-powered vehicle, the goal is not perfection. The goal is to explore, test, improve, and have fun. Recycled materials give children permission to experiment without worrying about wasting expensive supplies. A cereal box becomes a chassis. A bottle cap becomes a wheel. A straw becomes an axle sleeve. Suddenly, ordinary household waste becomes a hands-on lesson in motion, design, and environmental care.
So gather your clean recyclables, clear a small workspace, and start building. Your first car may wobble. Your second may roll farther. Your third may become a legendary living-room champion. And even if it looks a little silly, that is part of the charm. After all, every great inventor probably started with something that needed more tape.


