
Table of Contents >> Show >> Hide
- What Makes Cheddar Cheese Sharp?
- Ingredients for Homemade Sharp Cheddar Cheese
- Food Safety Before You Begin
- Step-by-Step Guide: How to Make Sharp Cheddar Cheese
- Step 1: Warm the Milk
- Step 2: Add the Starter Culture
- Step 3: Add Rennet and Let the Curd Set
- Step 4: Cut the Curds
- Step 5: Cook the Curds Slowly
- Step 6: Drain the Whey
- Step 7: Cheddar the Curds
- Step 8: Mill the Curds
- Step 9: Salt the Curds
- Step 10: Press the Cheese
- Step 11: Air-Dry the Cheese
- Step 12: Wax, Vacuum Seal, or Bandage
- How Long to Age Sharp Cheddar Cheese
- How to Know When Sharp Cheddar Is Ready
- Common Problems and How to Fix Them
- Best Ways to Use Homemade Sharp Cheddar
- Experience Notes: What Making Sharp Cheddar Teaches You
- Conclusion
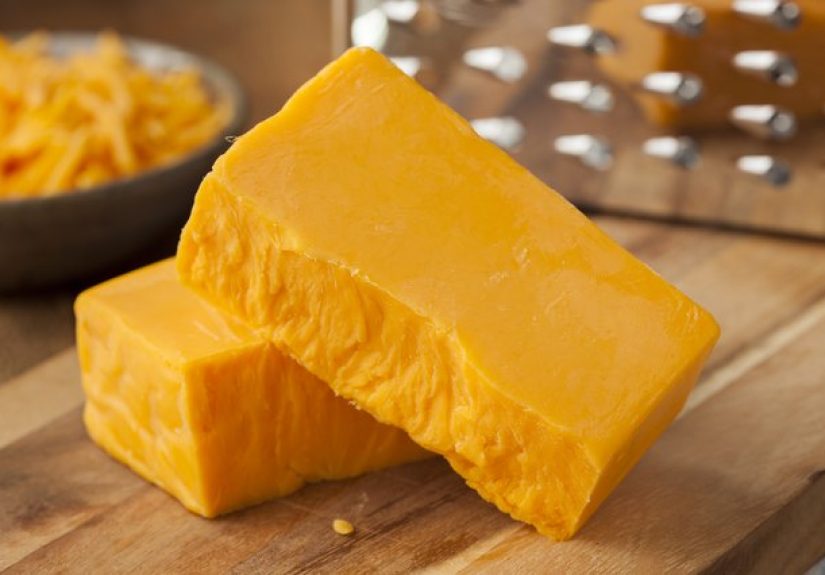
Making sharp cheddar cheese at home is a little like adopting a very quiet pet: it needs warmth, clean living conditions, regular checkups, and months of patience before it rewards you. The good news? Unlike a puppy, it will not chew your shoes. The better news? When done correctly, homemade sharp cheddar delivers that bold, tangy, crumbly, deeply savory flavor that makes grilled cheese sandwiches, burgers, baked potatoes, and snack boards suddenly feel like they went to culinary graduate school.
Sharp cheddar is not “sharp” because someone added hot peppers, vinegar, or a secret wizard powder. Its bite comes from time, acidity, salt, moisture control, and aging. A young cheddar may be smooth and mild after a few months. A sharp cheddar usually needs closer to nine to twelve months of aging, while extra-sharp cheddar can age eighteen months, two years, or longer. During that time, enzymes and friendly bacteria keep working inside the cheese, slowly transforming milk proteins and fats into nutty, tangy, complex flavors.
This guide walks through how to make sharp cheddar cheese at home, from choosing milk to pressing, waxing, aging, troubleshooting, and tasting. It is written for serious home cooks, curious food lovers, and anyone who has ever looked at a block of cheddar and thought, “I respect you, but I also want to know your secrets.”
What Makes Cheddar Cheese Sharp?
The sharpness in cheddar comes mainly from aging. As cheddar matures, moisture slowly decreases, texture firms up, and flavor compounds become more concentrated. Proteins break down into smaller peptides and amino acids, creating savory, nutty, sometimes slightly brothy notes. Fats also change, adding buttery and complex flavors. That is why aged cheddar often tastes stronger, drier, and more crumbly than mild cheddar.
Cheddar also has a special production step called cheddaring. After the curds are cooked and drained, they are cut into slabs, stacked, flipped, and allowed to knit together while acidity develops. This process helps remove whey, create cheddar’s dense body, and build the foundation for its classic flavor.
Ingredients for Homemade Sharp Cheddar Cheese
For a beginner-friendly home batch, start with two gallons of milk. This usually makes about two pounds of finished cheddar, depending on milk quality, curd handling, moisture loss, and aging.
Main Ingredients
- 2 gallons whole milk: Use fresh pasteurized milk, not ultra-pasteurized or UHT milk. Ultra-high heat treatment can damage proteins and prevent a good curd from forming.
- Mesophilic starter culture: This culture works at moderate temperatures and develops the acidity needed for cheddar.
- Calcium chloride: Helpful when using pasteurized store-bought milk because it improves curd firmness.
- Liquid rennet: Coagulates the milk into curd. Use animal or vegetable rennet according to preference.
- Cheese salt: Use non-iodized salt. Iodized table salt may interfere with cultures and can leave unwanted flavors.
- Optional annatto: A natural coloring used for orange cheddar. Skip it if you want white cheddar.
Essential Equipment
- Large stainless steel pot
- Accurate dairy thermometer
- Long knife or curd cutter
- Slotted spoon
- Colander
- Cheesecloth or butter muslin
- Cheese mold
- Cheese press
- pH strips or pH meter, strongly recommended
- Cheese wax, vacuum bags, or aging coating
- Aging fridge, wine cooler, or cheese cave setup
Food Safety Before You Begin
Cheesemaking is part cooking project, part science experiment, and part sanitation test. Before you begin, clean and sanitize everything that touches the milk, curd, or cheese. Wash your hands, sanitize utensils, and avoid using scratched plastic equipment that can hide bacteria.
For home cheesemaking, pasteurized milk is the safest and most practical choice. Raw milk cheeses are regulated differently and carry greater food safety risks. If you are new to cheesemaking, do not start with raw milk. Learn the process first, develop consistent sanitation habits, and follow local food safety rules if you ever plan to sell dairy products.
Cheddar is an aged cheese, but aging is not magic armor. A clean process matters from the first splash of milk to the final slice. Think of sanitation as the bouncer at the cheese nightclub: if the wrong microbes get in early, they may cause trouble later.
Step-by-Step Guide: How to Make Sharp Cheddar Cheese
Step 1: Warm the Milk
Pour two gallons of whole milk into a stainless steel pot. Warm it slowly to about 86°F, stirring gently to prevent scorching. Slow heating protects the milk and helps the starter culture work evenly.
If using calcium chloride, dilute it in cool non-chlorinated water and stir it into the milk before adding culture. This is especially useful for pasteurized milk because it can help produce a cleaner, firmer curd.
Step 2: Add the Starter Culture
Sprinkle the mesophilic starter culture over the surface of the milk. Let it rehydrate for a few minutes, then stir gently but thoroughly. Cover the pot and let the milk ripen for about 45 minutes. During this time, the culture begins converting lactose into lactic acid.
This acidity is essential. Too little acid and the cheese may be bland, rubbery, or slow to age. Too much acid and the cheddar can become sour, brittle, or harsh. This is where cheesemaking starts whispering, “Precision matters, my friend.”
Step 3: Add Rennet and Let the Curd Set
Dilute liquid rennet in cool non-chlorinated water, then stir it into the milk using gentle up-and-down motions. Stop the milk from moving, cover the pot, and let it sit undisturbed for about 30 to 45 minutes.
The curd is ready when it gives a clean break. To test, insert a clean knife at an angle and lift slightly. If the curd splits cleanly and the whey looks clearish yellow, you are ready to cut. If it looks weak or milky, give it a few more minutes.
Step 4: Cut the Curds
Cut the curd into roughly 1/4-inch cubes. Cut vertically in one direction, then across, then at an angle as best you can. The goal is even pieces so they release whey at a similar rate.
Let the cut curds rest for five minutes. This short pause helps the curds firm up before stirring. If you attack them immediately like you are scrambling eggs, you will lose fat and produce a weaker cheese. Cheddar likes confidence, not chaos.
Step 5: Cook the Curds Slowly
Raise the temperature gradually from 86°F to about 100°F to 102°F over 30 to 40 minutes, stirring gently. The curds will shrink as whey is expelled. This step controls moisture, which directly affects the final body of the cheese.
After reaching the target temperature, continue stirring for another 30 minutes or until the curds feel springy and hold their shape. A good curd should feel firm but not dry and rubbery. If it squeaks slightly between your teeth, you are moving in the right direction.
Step 6: Drain the Whey
Let the curds settle, then carefully remove the whey. Transfer the curd mass into a colander lined with cheesecloth. Keep the curds warm during draining because cheddar needs warmth for proper acid development.
Do not throw away all the whey immediately. Whey can be used in bread, pancakes, soups, smoothies, or as animal feed if appropriate. Congratulations: your cheese project just produced a bonus ingredient.
Step 7: Cheddar the Curds
Gather the warm curds into a slab. Cut the slab into two or more blocks. Place the blocks in a warm pot or draining pan, stack them, and flip them every 15 minutes for about two hours. This is the cheddaring stage.
During cheddaring, the slabs become denser, smoother, and more elastic. They also continue developing acidity. The texture may begin to resemble cooked chicken breast or firm tofu. That may not sound romantic, but in cheesemaking, it is a beautiful sign.
Step 8: Mill the Curds
Once the slabs have cheddared properly, cut or tear them into small pieces about the size of a walnut or large bean. This is called milling. Milling prepares the curd for salting and helps distribute salt evenly.
Do not rush this stage. Large, uneven chunks may salt unevenly, creating bland pockets and overly salty spots. Homemade sharp cheddar should taste bold and balanced, not like one corner joined a salt cult.
Step 9: Salt the Curds
Add cheese salt gradually, usually around 2 tablespoons for a two-gallon batch, depending on recipe and curd weight. Sprinkle in stages over 15 to 20 minutes, mixing gently between additions.
Salt does more than season the cheese. It slows acid development, helps control moisture, improves texture, and discourages unwanted microbes. Too little salt can cause overly acidic or unsafe cheese. Too much salt can slow aging and make the cheddar taste flat or briny.
Step 10: Press the Cheese
Line a cheese mold with damp cheesecloth. Pack the salted curds into the mold, fold the cloth neatly over the top, and place it in the press. Press lightly at first, then increase pressure gradually.
A common home schedule looks like this:
- Press at light pressure for 1 hour.
- Remove, unwrap, flip, rewrap, and press at medium pressure for 4 to 6 hours.
- Flip again and press firmly overnight.
The exact pressure depends on mold size and equipment. The goal is to knit the curds into a solid wheel while allowing whey to escape. If the cheese is pressed too hard too soon, whey can become trapped inside, leading to mechanical openings or off-flavors.
Step 11: Air-Dry the Cheese
After pressing, remove the cheese from the mold and peel away the cloth. Place the cheese on a clean mat at cool room temperature for two to four days, turning it twice daily. The surface should dry to the touch before waxing, vacuum sealing, or aging.
If the surface stays wet, wait. Trapping moisture under wax or plastic is asking for mold problems. If the cheese cracks badly, the air may be too dry. Cheesemaking is basically a long conversation with humidity.
Step 12: Wax, Vacuum Seal, or Bandage
Home cheesemakers often use cheese wax or vacuum sealing because both reduce moisture loss and protect the cheese during aging. Wax gives a traditional look, while vacuum sealing is simple and tidy. Clothbound cheddar is another option, but it requires more skill, careful humidity control, and regular brushing.
If waxing, apply multiple thin coats of cheese wax, making sure the surface is fully sealed. If vacuum sealing, use food-safe bags and check periodically for trapped whey or loose seals.
How Long to Age Sharp Cheddar Cheese
For sharp cheddar, plan on aging the cheese for 9 to 12 months. For extra-sharp cheddar, age it for 18 months or longer. Some commercial cheddars age for years, but home cheesemakers should master one-year cheddar before attempting the “forgotten treasure in the cheese cave” style.
Age cheddar at about 50°F to 55°F with relatively high humidity, often around 80% to 85%. A wine fridge can work well, especially when paired with a humidity box. Turn the cheese regularly so moisture distributes evenly and the shape remains consistent.
How to Know When Sharp Cheddar Is Ready
The hardest part of making sharp cheddar cheese is not cutting curds or pressing overnight. It is waiting. At three months, your cheddar may taste mild and pleasant. At six months, it may develop more character. Around nine to twelve months, sharpness becomes more obvious, with a tangy aroma, firmer texture, and deeper savory flavor.
When tasting, look for balance. Good sharp cheddar should be tangy but not painfully sour, salty but not aggressive, firm but not chalky, and flavorful enough to make crackers feel lucky.
Common Problems and How to Fix Them
My Cheddar Is Too Sour
Excess acidity can come from too much starter, over-ripening, slow draining, or delayed salting. Next time, monitor time and temperature carefully, and salt the curds when they reach the proper texture and acidity.
My Cheese Is Bitter
Bitterness may come from too much rennet, uneven aging, poor milk quality, or excessive protein breakdown. Measure rennet accurately and use fresh, high-quality milk.
My Cheddar Is Dry and Crumbly
Aged cheddar naturally becomes more crumbly, but extreme dryness may mean the curds were cooked too long, cut too small, pressed too hard, or aged in low humidity.
My Cheese Has Mold
Surface mold can happen during aging. If the cheese is waxed or vacuum sealed, mold under the seal means moisture or contamination was trapped. For natural-rind cheeses, small surface mold can often be brushed or trimmed, but strong odors, sliminess, unusual colors, or swelling are warning signs. When in doubt, throw it out.
Best Ways to Use Homemade Sharp Cheddar
Once your sharp cheddar is ready, use it where its flavor can shine. Slice it for burgers, grate it into macaroni and cheese, melt it into beer cheese soup, fold it into biscuits, or serve it on a board with apples, pickles, toasted nuts, and crusty bread.
Sharp cheddar also loves contrast. Pair it with sweet fruit preserves, honey, caramelized onions, smoked meats, mustard, or dark beer. The boldness of aged cheddar can stand up to big flavors without disappearing like a shy cheese at a fondue party.
Experience Notes: What Making Sharp Cheddar Teaches You
Making sharp cheddar cheese at home teaches patience in a very practical way. You cannot bully milk into becoming great cheddar. You can only guide it. The first time you make it, you may focus on the recipe like it is a legal contract. By the third batch, you start noticing the small signs: how the curd feels under the spoon, how the whey clears, how the slabs stretch during cheddaring, and how the cheese smells after a few months in the aging fridge.
One of the biggest lessons is that temperature control matters more than bravado. Heating milk too quickly can create uneven curds. Letting the curds cool during cheddaring can slow acid development. Aging too warm can create off-flavors, while aging too dry can crack the cheese. A simple thermometer and a steady hand can save months of disappointment.
Another lesson is that milk quality changes everything. Fresh, good-tasting milk makes better cheese. If the milk tastes flat, stale, or slightly off, those flaws do not politely leave during aging. They unpack their bags and move in. For the best homemade sharp cheddar, buy the freshest pasteurized whole milk you can find, preferably from a local dairy if available. Avoid ultra-pasteurized milk because it often forms weak curds.
Pressing is another skill that improves with experience. Beginners often want to press hard immediately, thinking more pressure equals better cheese. In reality, gradual pressure is better because it allows whey to escape before the rind closes. Too much pressure too early can trap moisture inside and create openings. A patient pressing schedule produces a smoother, denser wheel.
Aging also teaches restraint. It is tempting to cut into the cheese at three months, and honestly, you probably will. That is fine. Tasting a young wheel helps you understand how cheddar develops. But save at least part of the batch for nine months or longer. The transformation can be dramatic. The flavor becomes deeper, the texture more compact, and the aroma more rounded. That first bite of your own properly aged sharp cheddar is the kind of kitchen victory that makes you briefly consider introducing yourself as “an artisan.”
Keep a cheesemaking notebook. Record the milk brand, culture amount, rennet amount, temperatures, times, pressing schedule, aging conditions, and tasting notes. This may sound nerdy, because it is. It is also how you improve. If a batch turns out excellent, your notes let you repeat it. If a batch tastes like sadness wearing a cheese costume, your notes help you find the mistake.
The most satisfying part of making sharp cheddar is realizing that the process is both ancient and accessible. You are using milk, cultures, enzymes, salt, pressure, and time in the same basic spirit cheesemakers have used for generations. The equipment may be modern and the aging fridge may sit next to leftover pizza, but the transformation still feels special.
Conclusion
Learning how to make sharp cheddar cheese is not a quick kitchen trick. It is a slow, rewarding craft built on clean equipment, quality milk, careful temperature control, proper cheddaring, steady pressing, and patient aging. The sharp flavor comes from time and balance, not shortcuts. Start with pasteurized whole milk, use a reliable mesophilic culture, handle the curds gently, salt evenly, and age the cheese under cool, humid conditions for at least nine to twelve months.
Your first homemade sharp cheddar may not be perfect, and that is completely normal. Cheesemaking rewards repetition. Each batch teaches you something new about acidity, moisture, texture, and flavor. And when you finally slice into a wheel that has aged beautifully, all that waiting suddenly makes sense. It is tangy, rich, firm, savory, and proudly homemade. In other words, it is cheddar with a personality.
Note: This article is for educational home cheesemaking guidance. Follow food safety best practices, use pasteurized milk when making cheese at home, and check local regulations before selling or serving homemade dairy products commercially.


