
Table of Contents >> Show >> Hide
- Why Painting Plastic Is Tricky (And How Pros Beat It)
- Choose Your “Plastic Painting System”
- Tools and Materials (What You Actually Need)
- Step-by-Step: How to Paint Plastic Like a Pro
- Step 1: Wash Like You Mean It
- Step 2: The “Beading Test” (A Simple Pro Check)
- Step 3: Scuff for Adhesion (Not Destruction)
- Step 4: Mask Like a Detail Nerd
- Step 5: Prime or Promote (This Is Where “Pro” Happens)
- Step 6: Paint ApplicationSmooth, Light, and Boring (Boring Is Good)
- Step 7: Dry Time vs. Cure Time (The Part Everyone Rushes)
- Optional: Clear CoatShould You Use It?
- Troubleshooting: Fix the Usual Plastic Painting Problems
- Three Real-World Examples (So You Can Copy the Process)
- Quick Pro Checklist (Print This in Your Brain)
- Conclusion: Your Plastic Can Look New Again
- Field Notes: of Real-World Experience (What People Learn the Hard Way)
Plastic is everywherepatio chairs, storage bins, light switches, planters, toys, tool cases, appliance panels, car trim.
And at some point, it all looks… tired. Sun-faded. Scuffed. That weird “I used to be white but now I’m a vibe” beige.
The good news: you can paint plastic and get a finish that looks factory-clean.
The better news: doing it like a pro isn’t about fancy talentit’s about prep, patience, and resisting the urge to “just send it.”
This guide walks you through the exact steps that make paint stick to plastic, stay smooth, and survive real life.
You’ll learn which primers and adhesion promoters actually help, how to avoid peeling and tackiness, and how to get that
“wait… you painted that?” reaction.
Why Painting Plastic Is Tricky (And How Pros Beat It)
Plastic isn’t hard because it’s “too smooth.” It’s hard because many plastics have low surface energypaint doesn’t want to
bond to them. Add invisible grime (hand oils, silicone, sunscreen, car interior protectants), and paint can slide right off
like it’s late for an appointment.
Pros solve this with a three-part strategy:
- Clean until contaminants are gone (not “looks clean,” but “actually clean”).
- Scuff to create a uniform tooth for the coating to grab.
- Prime or promote with products designed to bond to plastic (or use paint formulated for plastic).
Nail those three steps, and your paint job stops being a temporary costume and starts being a durable finish.
Choose Your “Plastic Painting System”
There isn’t one single best way to paint plasticthere’s the best method for your plastic and how it will be used.
Pick the system that matches your project:
System A: “Simplest” (Plastic-Formulated Spray Paint)
Best for: lightly used items, décor, small parts, quick makeovers.
What you do: clean + scuff + spray paint made to bond to plastic.
System B: “Most Reliable” (Bonding Primer + Topcoat)
Best for: furniture, frequently touched items, outdoor pieces, anything you want to last.
What you do: clean + scuff + high-adhesion/bonding primer + paint (spray or brush/roll).
System C: “Hard Mode Plastics” (Adhesion Promoter + Paint)
Best for: slick plastics, automotive trim, polypropylene/olefin-type plastics, parts that flex.
What you do: clean + scuff + adhesion promoter (timing matters) + topcoat.
Not sure which plastic you have? Don’t panic. You can still get a pro result by following label directions and doing a small test
spot on the back or underside first.
Tools and Materials (What You Actually Need)
- Cleaner: mild soap + water to wash; isopropyl alcohol for final wipe (follow product labels).
- Scuffing tools: 400–600 grit sandpaper for smooth plastics; a red/gray scuff pad for curves and textures.
- Dust removal: lint-free cloths; tack cloth (optional, use lightly).
- Masking: painter’s tape + paper or plastic sheeting.
- Primer: bonding primer or plastic primer (if using System B).
- Adhesion promoter: if using System C (especially for flexible/olefin plastics).
- Paint: acrylic enamel spray, paint formulated for plastic, or an interior/exterior topcoat compatible with your primer.
- Optional clear coat: for extra durability or UV resistance (only if compatible with your paint).
- Safety gear: gloves, eye protection, and a respirator rated for paint fumes if spraying.
Step-by-Step: How to Paint Plastic Like a Pro
Step 1: Wash Like You Mean It
Start with warm water and dish soap. Scrub into texture and seams where grime hides. Rinse thoroughly and dry completely.
If the item has ever met sunscreen, cooking grease, car interior shine products, or kids’ sticky fingersassume contamination.
Pro habit: after drying, do a final wipe with a cleaner recommended for your coating system (often alcohol or a dedicated prep cleaner).
Use a lint-free cloth and keep turning to a clean side so you’re not redepositing grime.
Step 2: The “Beading Test” (A Simple Pro Check)
Here’s a surprisingly useful trick: mist a little water on the surface.
If water beads up dramatically, there may still be oils or residue. Clean again.
When water sheets more evenly, you’re closer to truly clean.
Step 3: Scuff for Adhesion (Not Destruction)
You’re not trying to sand plastic into a new lifeform. You’re creating a uniform dull finish so primer/paint can grip.
- Smooth plastic: lightly sand with 400–600 grit until the shine is gone.
- Textured plastic: use a red/gray scuff pad to hit the peaks and valleys.
- Edges and curves: slow downthese are where paint loves to fail first.
After scuffing, remove dust thoroughly. Dust is basically tiny sabotage.
Step 4: Mask Like a Detail Nerd
Clean paint lines are what make a DIY job look professional.
Press tape edges down firmly, especially in textured areas. Cover anything you don’t want painted.
Step 5: Prime or Promote (This Is Where “Pro” Happens)
Option 1: Use a Bonding/Plastic Primer (System B)
For many home projects, a bonding primer is the simplest route to durabilityespecially on hard, glossy surfaces.
Apply a thin, even coat and let it dry according to the label. If the primer feels rough after drying, a gentle scuff with
fine grit (around 400) can smooth it before paint.
Option 2: Use an Adhesion Promoter (System C)
Adhesion promoters are popular for automotive plastics and other “hard to stick” surfaces.
The catch: they’re often time-sensitive. Some want you to topcoat within minutes; others need to flash (become tack-free)
before paint goes on. Read the label and follow the recoat window.
If you’re using a “wet-on-wet” plastic conditioner style product, the topcoat may need to go on while it’s still wetlightly,
to avoid runs. If you’re using an olefin-focused promoter, it may require a short flash time (a few minutes) before topcoating.
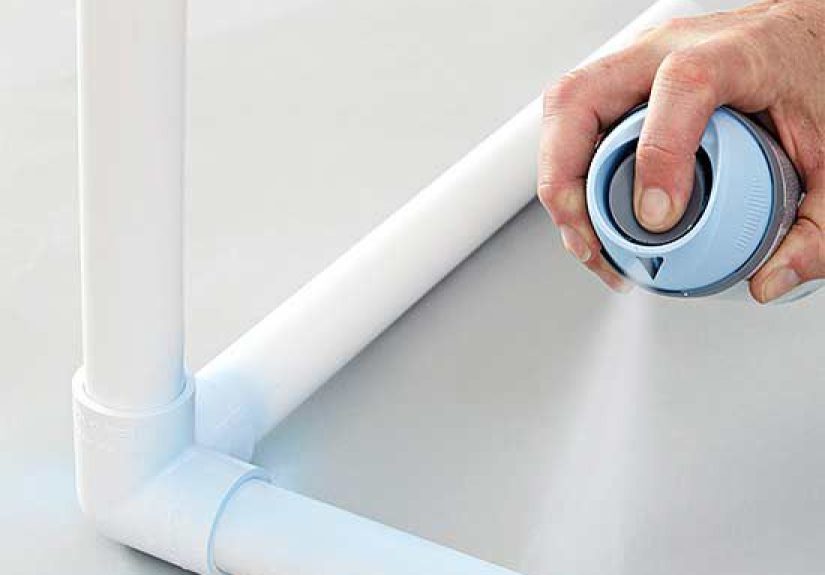
Step 6: Paint ApplicationSmooth, Light, and Boring (Boring Is Good)
Most plastic-paint disasters come from one heroic mistake: heavy coats.
Heavy coats run, wrinkle, stay soft, and collect dust like a lint magnet.
If You’re Spray Painting
- Shake well (yes, longer than you think).
- Distance: generally 8–12 inches away (adjust based on label and how the paint is laying down).
- Motion: start spraying off the object, sweep across, and release after you pass the edge.
- Overlap: about 30% overlap each pass for even coverage.
- Coats: 2–4 light coats beat 1 heavy coat every time.
If You’re Brushing/Rolling
Use a high-quality synthetic brush or a small foam roller for smooth surfaces.
Apply thin coats, avoid overworking, and expect two coats for good coverage.
Step 7: Dry Time vs. Cure Time (The Part Everyone Rushes)
Paint can feel dry and still be fragile. “Dry to the touch” is not the same as “ready for abuse.”
Many spray products can be handled in about an hour, but durability improves significantly after a full cure.
On plastic, maximum adhesion can take days, not hours.
If the piece will be used outdoors or handled a lot, give it time. Let it cure somewhere dust-free with good airflow.
Your future self will thank you (and stop side-eyeing that fingerprint you baked into coat #2).
Optional: Clear CoatShould You Use It?
A clear coat can add durability, UV protection, and a more “finished” lookif it’s compatible with your paint system.
Some paints are designed to be a final finish; others benefit from a clear topcoat.
- Use clear coat if the item will be outdoors, frequently handled, or you want extra scratch resistance.
- Skip clear coat if the paint label warns against it, or if you’re unsure about compatibility.
- Test first on a hidden spotsome clears can wrinkle or haze certain paints.
Troubleshooting: Fix the Usual Plastic Painting Problems
Problem: Paint Peels Off in Sheets
Cause: contamination, no scuffing, no bonding primer/promoter, or the wrong system for the plastic.
Fix: strip loose paint, clean thoroughly, scuff evenly, then use a bonding primer or adhesion promoter before repainting.
Problem: Fish-Eyes (Tiny Craters)
Cause: silicone/oil contamination (common on plastics that have been polished or “protected”).
Fix: stop, let it dry, sand smooth, clean with proper prep cleaner, and recoat lightly.
Problem: Runs and Drips
Cause: heavy coats or spraying too close.
Fix: let it dry, sand the run flat with fine grit, wipe clean, and recoat with lighter passes.
Problem: Orange Peel Texture
Cause: spraying too far away, paint drying mid-air, or painting in heat/wind.
Fix: adjust distance, paint in better conditions, and use lighter, wetter (but not heavy) coats.
Problem: Paint Stays Tacky
Cause: heavy coats, incompatible products, or not enough cure time.
Fix: move to a warmer, drier, ventilated area; allow more time. If it remains tacky after extended curing, stripping and repainting
with a compatible system may be necessary.
Three Real-World Examples (So You Can Copy the Process)
Example 1: Outdoor Plastic Chair Makeover
- Wash with soap and water; rinse and dry.
- Scuff with a red/gray pad (get into the texture).
- Final wipe with alcohol or a paint-prep cleaner.
- Apply a plastic/bonding primer (thin coat).
- Spray 3 light coats of exterior-rated paint.
- Optional: compatible clear coat for UV protection.
- Cure several days before stacking or heavy use.
Example 2: Plastic Storage Bin That Won’t Scratch Off Immediately
- Degrease thoroughly (bins collect invisible oils).
- Sand smooth plastic lightly with 400–600 grit.
- Bonding primer (thin coat, even coverage).
- Brush or spray paint in thin coats.
- Let cure fully before sliding it across shelves.
Example 3: Car Interior Trim Refresh (Flexible Plastic)
- Clean aggressively (interiors often have silicone dressings).
- Scuff evenly with a pad to avoid deep scratches.
- Use an adhesion promoter designed for automotive plastics (follow timing).
- Apply light coats of a flexible coating/topcoat.
- Let it curedon’t reinstall immediately if the system suggests adhesion improves with time.
Quick Pro Checklist (Print This in Your Brain)
- Clean until water doesn’t bead like a freshly waxed car.
- Scuff to a uniform dull finishshine is the enemy.
- Use a bonding primer or adhesion promoter when durability matters.
- Spray multiple light coats, not one thick “confidence coat.”
- Respect recoat windows and cure timeplastic rewards patience.
Conclusion: Your Plastic Can Look New Again
Painting plastic like a pro is mostly about preventing failure before it starts.
When you clean properly, scuff consistently, and choose the right primer/promoter for the type of plastic,
you get a finish that looks smooth, resists peeling, and holds up to real use.
So yesgo ahead and upgrade that faded patio set, that dull storage bin, or that scuffed plastic panel.
Just remember: the “pro” part isn’t the spray can. It’s the prep.
Field Notes: of Real-World Experience (What People Learn the Hard Way)
If you ask a bunch of DIYers what went wrong the first time they painted plastic, you’ll hear the same greatest hits:
“It looked amazing… for two days,” “I touched it and it left a fingerprint forever,” and the classic,
“Why is it peeling like a sunburn?” The funny part is that most of those heartbreaks come from skipping steps that feel
unnecessary in the momentbecause plastic is sneaky. It can look clean and still be coated in invisible oils.
One common lesson is that texture changes everything. A smooth plastic bin is easy to sand evenly, but a textured
patio chair has peaks, valleys, and little corners where grime hangs out like it pays rent. People often scrub the front,
scuff the front, paint the frontthen the first peel shows up along the underside edge where hands grab and stack.
The fix isn’t magic paint; it’s equal-opportunity prep. If you can touch it, scuff it. If you can scuff it, clean it again.
Another big “aha” moment is learning how much environment affects spray paint.
Spray in wind and you get grit. Spray in high humidity and the surface can dry weird. Spray in hot sun and the paint can
tack up before it levels. A lot of people discover that the easiest path to a smooth finish is not buying a more expensive can
it’s painting in calmer conditions with steady airflow and moderate temperatures, then walking away before they “just fix one spot.”
Then there’s the hard truth about heavy coats. Heavy coats feel productive. They’re also the fastest route to runs,
soft paint, and fingerprints that last longer than some friendships. Experienced painters learn to embrace the awkward stage:
the first coat looks too light. The second coat still looks a little patchy. The third coat is where the glow-up happens.
Light coats also dry more predictably, which matters a lot on plastic where solvents can linger and keep things soft.
People also learn that timing products is part of the craft. Adhesion promoters and certain plastic prep systems
don’t behave like typical primersome require a short window before topcoat, others want a flash time, and a few are designed
for wet-on-wet application. The folks who get the best results treat product labels like recipes, not suggestions.
They don’t freestyle the steps, and they don’t assume “more is better.”
Finally, the most satisfying experience comes when you let the piece cure properly.
Many DIYers say the project that finally “felt professional” wasn’t the one with the fanciest paintit was the one they didn’t rush.
They painted, set the item somewhere safe, and gave it real time to harden before dragging it into daily use.
Plastic painting rewards patience with a finish that looks intentional, feels smooth, and stays put.


