Table of Contents >> Show >> Hide
- What “Sanitize a Toothbrush” Really Means
- How to Sanitize a Toothbrush: 10 Steps
- Step 1: Rinse the Toothbrush Thoroughly After Every Use
- Step 2: Use Warm or Hot Water to Help Clear Debris
- Step 3: Shake Off Excess Water
- Step 4: Store the Toothbrush Upright
- Step 5: Let It Air-Dry in the Open
- Step 6: Keep Toothbrushes From Touching Each Other
- Step 7: Clean the Toothbrush Holder Regularly
- Step 8: Use an Optional Sanitizing Soak Only If You Want an Extra Step
- Step 9: Skip DIY “Sterilization” Tricks That Can Damage the Brush
- Step 10: Replace the Toothbrush on Schedule
- Common Toothbrush Sanitizing Mistakes
- Do You Need a UV Toothbrush Sanitizer?
- Extra Toothbrush Care Tips for Special Situations
- What Real-World Experience Teaches You About Toothbrush Hygiene
- Final Thoughts
- SEO Tags
If your toothbrush lives in a bathroom, it has seen things. Steam. Toothpaste foam. Sink splash. The mysterious humidity that turns mirrors into fog machines. So it makes sense to ask a very reasonable question: how do you sanitize a toothbrush without turning your bathroom into a tiny dental laboratory?
The good news is that keeping a toothbrush clean is much easier than people think. You do not need to boil it like pasta. You do not need to microwave it like a leftover burrito. And you definitely do not need to treat your brush like a biohazard every morning. In most cases, proper rinsing, smart storage, regular replacement, and a little common sense do the heavy lifting.
This guide breaks down how to sanitize a toothbrush in 10 practical steps, plus what to avoid, when to replace it, and what real-life experience teaches people once they stop tossing a damp toothbrush into a dark cup and hoping for the best.
What “Sanitize a Toothbrush” Really Means
Let’s clear up one thing first: sanitizing a toothbrush does not mean making it hospital-sterile. Your toothbrush is a personal care tool, not a surgical instrument. The goal is to reduce debris, moisture, and unnecessary microbial growth while keeping the brush safe, effective, and gentle on your teeth and gums.
That matters because a toothbrush can collect toothpaste residue, food particles, saliva, and bacteria over time. But a clean-looking toothbrush is not just about appearances. Bristles that stay wet, get mashed into a closed container, or sit shoulder-to-shoulder with other brushes can become less hygienic and less effective. And once the bristles start looking like they have survived a wind tunnel, they are no longer doing a great job cleaning teeth.
So if you have been wondering whether you need a fancy toothbrush sanitizer, the honest answer is usually no. Most people can keep their toothbrush in good shape with a few simple daily habits.
How to Sanitize a Toothbrush: 10 Steps
Step 1: Rinse the Toothbrush Thoroughly After Every Use
The first and most important step is also the least glamorous: rinse your toothbrush really well. After brushing, hold the bristles under running water and flush away leftover toothpaste, loosened plaque, and food particles. This is not the moment for a lazy two-second splash. Give it a proper rinse.
Think of this as the toothbrush equivalent of washing a coffee mug instead of just “emotionally rinsing” it. A good rinse helps remove the gunk that would otherwise sit between bristles until your next brushing session.
Step 2: Use Warm or Hot Water to Help Clear Debris
If you want a simple upgrade to your rinsing routine, use warm or hot water. You do not need scalding water, and you should not damage the brush, but a warmer rinse can help clear away residue more effectively than a quick cold splash.
This is one of the easiest ways to clean a toothbrush without overcomplicating the process. No gadgets. No dramatic bubbling solutions. Just better rinsing.
Step 3: Shake Off Excess Water
After rinsing, flick or shake off extra water. This tiny move helps because moisture is the whole villain in the toothbrush story. A brush that stays dripping wet for hours is basically sending out engraved invitations to whatever likes damp environments.
You do not need to towel-dry the bristles or rub them aggressively. Just remove excess water so the brush can dry faster on its own.
Step 4: Store the Toothbrush Upright
Always store your toothbrush upright after use. This lets water drain away from the bristles instead of collecting around them. Laying a wet toothbrush flat on the counter or sink edge might seem harmless, but it keeps moisture where you do not want it and exposes the brush to bathroom grime.
An upright holder is simple, cheap, and effective. Sometimes the old-school solution wins.
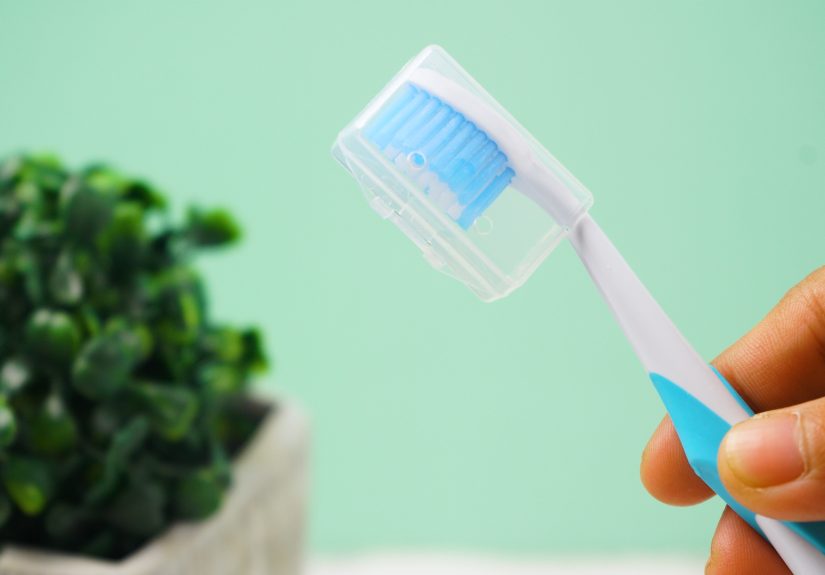
Step 5: Let It Air-Dry in the Open
This is where many people accidentally sabotage their own toothbrush care. A toothbrush should be allowed to air-dry in the open between brushing sessions. Daily storage in a closed cap, drawer, travel case, or sealed container can trap moisture and encourage more microbial growth than open-air storage.
In other words, your toothbrush is not a houseplant. It does not need a humid greenhouse. Let it breathe.
Step 6: Keep Toothbrushes From Touching Each Other
If several family toothbrushes share the same holder, make sure the heads are not touching. It is one of those tiny details people ignore until they picture the bristles having awkward social contact twice a day.
Separate storage matters because toothbrushes should not share bodily fluids, bacteria, or accidental cross-contamination. This is especially important in homes with kids, shared bathrooms, and roommates who treat hygiene advice as a suggestion instead of a lifestyle.
Step 7: Clean the Toothbrush Holder Regularly
Here is the plot twist: sometimes the dirtiest thing in the toothbrush setup is not the brush. It is the holder. Toothbrush cups and holders can collect water, toothpaste drips, dust, and mystery residue at the bottom. If the holder is gross, your “clean” toothbrush is basically parking in a dirty garage.
Wash the holder regularly with soap and water. Let it dry completely before putting brushes back in. This one habit makes a bigger difference than most people expect.
Step 8: Use an Optional Sanitizing Soak Only If You Want an Extra Step
For most healthy people, routine disinfecting is not necessary. Still, some people prefer an extra measure now and then, especially after a cold, during travel, or just because they sleep better knowing they did the most.
If you want an optional deep-clean step, a brief soak in antibacterial mouthwash or 3% hydrogen peroxide is commonly mentioned as a way to reduce bacterial load. Do not soak it forever, do not reuse the same liquid over and over, and rinse the toothbrush well afterward. This is an occasional add-on, not a daily requirement.
The key word here is optional. A short soak can be useful, but it is not a substitute for proper rinsing, air-drying, and regular replacement.
Step 9: Skip DIY “Sterilization” Tricks That Can Damage the Brush
Microwaving your toothbrush? Bad idea. Boiling it? Also no. Running it through the dishwasher? Your toothbrush did not sign up for that kind of stress.
High heat can damage bristles, warp the brush head, and reduce how well the toothbrush cleans your teeth. The same goes for harsh cleaning methods that sound clever online but are rough on the brush itself. If the bristles are bent, frayed, or weakened, your toothbrush may look “treated” but perform worse.
When in doubt, stick with gentle cleaning methods and replace the brush when it is worn. Your toothbrush should not need a survival story.
Step 10: Replace the Toothbrush on Schedule
This step is the grand finale because it solves a surprising number of problems. Replace your toothbrush every three to four months, or sooner if the bristles are matted, frayed, splayed, or visibly worn. If you use an electric toothbrush, replace the brush head on the same timeline.
It also makes sense to replace your toothbrush sooner after being sick, especially if you had an infection affecting the mouth or upper respiratory area. A fresh brush is often easier and more sensible than trying to rescue an old one that has already seen too much.
Common Toothbrush Sanitizing Mistakes
Even people with good oral hygiene habits can make a few classic mistakes. Here are the biggest ones:
- Using a closed travel cap every day: Great for a suitcase. Not great for everyday drying.
- Keeping brushes packed together: Toothbrush heads should not cuddle.
- Ignoring the holder: A dirty holder can undo your efforts.
- Waiting too long to replace the brush: If the bristles look exhausted, they are.
- Believing stronger always means better: Extreme cleaning methods can damage the toothbrush.
Do You Need a UV Toothbrush Sanitizer?
Some people love toothbrush sanitizer gadgets, especially UV devices. They may reduce bacteria, and some products are marketed for that purpose. But for the average person, these gadgets are not essential. A well-rinsed toothbrush stored upright and allowed to air-dry is usually enough.
If you choose a sanitizer device, look for one designed for toothbrushes and use it according to the manufacturer’s instructions. But do not let a gadget distract you from the fundamentals. A fancy sanitizer will not rescue a brush that stays wet in a closed case for days or should have been replaced two months ago.
Extra Toothbrush Care Tips for Special Situations
After Illness
If you have been sick, replacing your toothbrush is often the simplest move. It is low-cost, low-drama, and easier than wondering whether your brush is still carrying the memory of that miserable week.
During Travel
A travel case is fine when you are on the go, but open the case once you arrive so the brush can dry. Do not leave a wet toothbrush sealed inside a plastic coffin all weekend.
For Kids
Children’s toothbrushes need the same care: rinse well, store upright, let dry, and replace them regularly. Also, if siblings keep their brushes in one cup, make sure the heads do not touch. Kids share enough already.
For People With Health Concerns
If you are immunocompromised, undergoing certain medical treatments, or have specific oral health issues, ask your dentist or physician whether you need extra toothbrush hygiene precautions. Sometimes a standard routine needs a few adjustments based on your health status.
What Real-World Experience Teaches You About Toothbrush Hygiene
People usually do not rethink toothbrush hygiene until one of three things happens: they get sick, they move in with other humans, or they look closely at the bottom of the toothbrush cup and have a minor spiritual crisis.
One common experience is realizing that the toothbrush itself was never the only issue. The holder was. Plenty of people assume their brush is fine because they rinse it every day, then discover the cup holding it has a suspicious puddle at the bottom and a decorative ring of dried toothpaste around the sides. Suddenly the problem is not “How do I sanitize my toothbrush?” but “How long has this cup been auditioning to become a swamp?” Cleaning the holder regularly often changes the whole routine.
Another real-life lesson comes from family bathrooms. On paper, it sounds efficient to place four toothbrushes in one neat little container. In practice, the brush heads lean together like tired commuters on a train. Once people switch to a holder that keeps each toothbrush separate, the whole setup feels cleaner, less chaotic, and honestly less gross.
Travel is another big one. Many people do everything right at home, then undo it all on a weekend trip by zipping a wet toothbrush into a travel case and forgetting about it until Sunday night. Open the case, and there it is: damp, stale, and somehow emotionally disappointing. That moment teaches a memorable truth. A travel case is for transport, not long-term storage.
Then there is the post-cold toothbrush debate. Some people try to sanitize the brush with a heroic amount of mouthwash, peroxide, or determination. Others take one look at the brush that survived flu season and throw it out immediately. In everyday life, replacing it is often easier. It removes the guesswork, costs very little, and gives people that satisfying clean-slate feeling that no dramatic soaking ritual can quite match.
Electric toothbrush users learn a similar lesson with brush heads. Because the handle still looks shiny and expensive, it is easy to forget the head is the part doing the dirty work. People often keep using a worn brush head far past its prime simply because the device itself still looks brand new. But worn bristles are worn bristles, whether they are attached to a five-dollar manual brush or a high-tech gadget that hums like it has a business degree.
And maybe the most universal experience of all is this: once people start storing their toothbrush upright, in the open, with less clutter around it, the whole routine feels simpler. No elaborate sanitizing schedule. No weird internet hacks. Just a cleaner brush, a better setup, and one less tiny household thing quietly becoming a problem.
Final Thoughts
If you want to sanitize a toothbrush the smart way, focus on the basics that actually work. Rinse it well. Let it dry. Store it upright. Keep it separate. Clean the holder. Replace it on time. That is the real system.
You do not need a complicated ritual or a science-fair contraption humming beside your sink. Toothbrush care is less about dramatic disinfecting and more about consistency. Small habits beat heroic bathroom experiments every time.
So the next time you glance at your toothbrush and wonder whether it needs some kind of emergency intervention, start with the simple question: is it clean, dry, and not older than your last personality phase? If yes, you are probably doing just fine.


