
Table of Contents >> Show >> Hide
- The Five Enemies of Freshness
- Fridge Basics: The “Cold, Clean, and Organized” Triangle
- Freezer Strategy: Freshness on Pause (Not on Trial)
- Pantry Power: Cool, Dry, Dark, and Tidy
- Produce Storage: The Art of Not Ruining Your Fruits and Veggies
- Dairy, Eggs, and Deli: Cold and Consistent Wins
- Meat, Poultry, and Seafood: Keep It Contained
- Leftovers Without Regret: Safe Storage That Also Tastes Good
- Food Storage Tools That Make Life Easier
- A Simple “Grocery Day” System That Prevents Waste
- Quick Storage Cheat Sheet (Common Scenarios)
- Conclusion: Fresh Food Is a System, Not a Miracle
- Real-Life Experiences: What Actually Helped My Food Last Longer (and Saved My Sanity)
If your fridge were a tiny hotel, some foods would be living their best five-star life… and others would be stuck in the
drafty hallway next to the ice maker. (Looking at you, milk in the door.) Proper food storage isn’t just about avoiding
sad, limp lettuceit’s about keeping food safe, protecting flavor and texture, and saving money by wasting less.
The good news: you don’t need a PhD in Refrigerator Logistics. You just need a few rules that cover 90% of real-life
situationsplus a couple of “don’t do this at 11 p.m.” habits. Let’s get your kitchen running like a well-managed
(and slightly less mysterious) food system.
The Five Enemies of Freshness
Almost every storage tip is really about controlling one (or more) of these troublemakers:
- Temperature: Too warm speeds spoilage and can allow harmful bacteria to multiply.
- Time: Food doesn’t become unsafe because it’s offendedit becomes unsafe because time passed.
- Air: Oxygen dries foods out and accelerates staling and rancidity.
- Moisture: Too much moisture invites mold; too little turns food into crunchy disappointment.
- Light: Light can degrade quality (think oils and some produce) and increase off-flavors.
Your goal is simple: match each food to the best environmentpantry, fridge, freezer, or countertopbased on what it
needs to stay fresh and safe.
Fridge Basics: The “Cold, Clean, and Organized” Triangle
1) Set the right temperature (and prove it)
Don’t trust the dial that says “Colder” like it’s a motivational poster. Use an appliance thermometer and keep your
refrigerator at 40°F (4°C) or below. Your freezer should be 0°F (-18°C) or below.
Many fridges have warm and cold spots, so checking matters.
2) Understand fridge “zones” (yes, your fridge has neighborhoods)
- Door: Warmest, most temperature swings. Best for condiments, juices, soda, and shelf-stable sauces.
- Middle shelves: Reliable cold. Great for dairy, leftovers, and ready-to-eat foods.
- Bottom shelf: Coldest and safest place for raw meat/seafood (in a leak-proof container) so drips don’t contaminate other foods.
- Crisper drawers: Designed to manage humidity for produceuse them strategically (more on that below).
3) Follow the “2-hour rule” (and the “1-hour when it’s blazing” exception)
Perishable foods shouldn’t sit at room temperature for more than 2 hours. If it’s hotter than
90°F (think summer picnic, hot car, or “why is my kitchen a sauna?”), cut that to 1 hour.
This is about food safety, not vibes.
4) Cool leftovers fastshallow beats deep
Big, deep pots cool slowly. Transfer leftovers into shallow containers so they chill quickly and evenly.
Also: let steaming-hot foods cool a bit on the counter briefly if needed, but don’t leave them out for a long,
dramatic monologue.
5) Label like your future self is a stranger
Date leftovers and opened packages. Your future self will not remember if that container is chili, curry, or an
experimental “soup concept.” A piece of tape and a marker can prevent both food waste and culinary roulette.
Freezer Strategy: Freshness on Pause (Not on Trial)
The freezer is the closest thing we have to time travel. But it’s best at preserving quality when you freeze
foods correctly.
1) Portion first, freeze fast
Freeze foods in the portions you’ll actually use: single chicken breasts, 1-cup soup blocks, half loaves of bread.
Smaller portions freeze faster, which improves texture and reduces ice crystals.
2) Fight freezer burn with less air
Freezer burn is mostly dehydration plus oxidation. Use freezer-safe bags, press out air, and seal well. For fragile
items like berries, freeze on a sheet pan first, then transfer to a bag so they don’t become one giant frozen berry
meteor.
3) Wrap smart for different foods
- Soups/stews: Cool, portion, freeze flat in bags (stack like books).
- Bread: Slice before freezing so you can grab what you need.
- Meat: If storing longer than the store packaging seems designed for, overwrap or repackage to reduce air exposure.
- Cheese: Shredded or sliced often freezes better than big blocks, but expect texture changes in some cheeses.
4) Blanch many vegetables before freezing
For lots of veggies (like green beans, broccoli, and carrots), a quick blanch (boiling water or steam, then ice bath)
helps preserve color, texture, and flavor by slowing enzymes that cause quality loss. It’s a small step that pays off
months later when your vegetables don’t taste like they’ve given up on life.
5) Know the “best quality” window
Frozen food can remain safe when kept consistently cold, but quality can decline over time. As a practical rule,
many cooked leftovers are best used within a few months for top flavor and texture.
Pantry Power: Cool, Dry, Dark, and Tidy
Your pantry isn’t a junk drawer with ambitionit’s a storage environment. Aim for a cool, dry space away from the
oven, dishwasher steam, and direct sunlight.
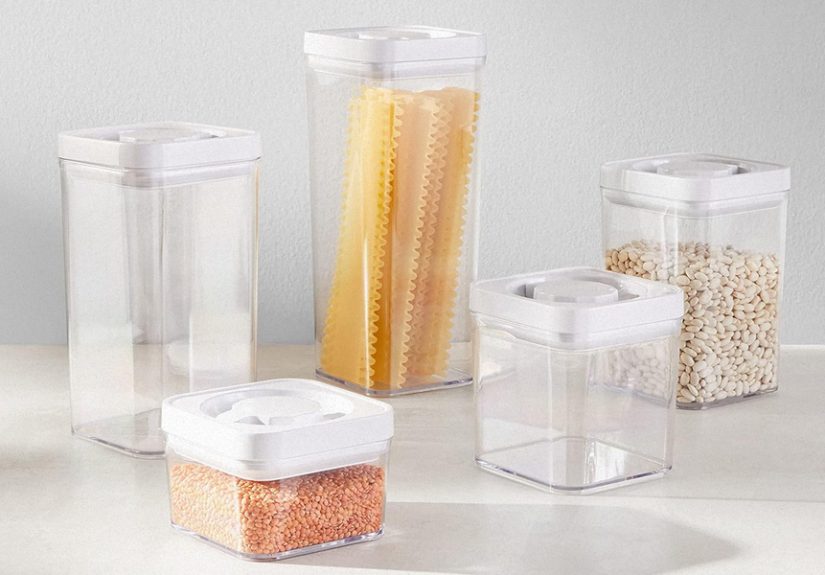
1) Use airtight containers where it matters
Flour, sugar, rice, cereal, and snacks go stale (or attract pests) when exposed to air and humidity. Airtight
containers help keep them fresh and make your pantry easier to manage.
2) Keep oils in the right spot
Heat and light can make oils go rancid faster. Store oils in a cool cabinet away from the stove. If you buy big
bottles you’ll use slowly, consider storing a smaller “daily use” bottle in the kitchen and the rest in a cooler place.
3) Practice FIFO (First In, First Out)
Put newer items behind older ones so you use what you already have. This one habit can reduce food waste more than
a thousand good intentions.
Produce Storage: The Art of Not Ruining Your Fruits and Veggies
Produce is tricky because different fruits and vegetables have different needs. Some want humidity, some hate it.
Some are sensitive to ethylene gas (a natural ripening hormone), while others produce a lot of it.
1) Separate ethylene producers from ethylene-sensitive items
Ethylene-producing fruits (like apples, bananas, avocados, and some stone fruits) can speed ripeningand spoilage
in ethylene-sensitive produce (like leafy greens). If you’ve ever watched spinach go bad overnight next to apples,
you’ve met ethylene in the wild.
- Tip: Use separate crisper drawers if you have themone for fruits, one for vegetables.
- Shortcut: Keep ethylene producers in a separate bin or on a different shelf to reduce cross-ripening chaos.
2) Match humidity to the food
- Higher humidity: Leafy greens, herbs, broccoliitems that wilt easily.
- Lower humidity: Many fruitsitems that can get moldy if trapped in too much moisture.
If your crisper has a humidity slider, use it. If it doesn’t, you can mimic the effect with storage:
wrap greens loosely in a paper towel and store in a breathable bag to absorb excess moisture while preventing drying.
3) Don’t refrigerate everything automatically
Some produce does better at room temperatureespecially if it needs to ripen. A simple approach:
- Ripen on the counter, then refrigerate: Avocados, pears, peaches (once ripe, chill to slow further ripening).
- Usually counter-friendly: Whole tomatoes (for better flavor), bananas, onions, garlic, and potatoes (cool, dark place).
- Usually fridge-friendly: Berries (dry, breathable container), leafy greens, grapes, and cut produce.
4) Herbs: treat them like flowers (or like toddlershigh maintenance, big payoff)
- Soft herbs (cilantro, parsley): Trim stems, store upright in a jar with a little water, loosely cover with a bag, refrigerate.
- Hard herbs (rosemary, thyme): Wrap loosely in a slightly damp paper towel and store in a container or bag.
Dairy, Eggs, and Deli: Cold and Consistent Wins
1) Keep dairy in the main fridge, not the door
Milk and many dairy products stay freshest in the coldest, most stable part of the fridge (usually a middle shelf),
not the door where temperatures swing.
2) Eggs: carton, middle shelf
Store eggs in their original carton on a shelf, which helps protect them from odor absorption and temperature swings.
The door is not their best life.
3) Deli meats and prepared foods: use promptly
These foods are convenient, but they’re also “ready-to-eat,” meaning you want to store them carefully and use them
within recommended time frames. Keep them sealed, cold, and dated once opened.
Meat, Poultry, and Seafood: Keep It Contained
Raw meat and seafood storage has one job: prevent leaks and cross-contamination. A second job is staying
cold enough to remain safe.
- Bottom shelf always: Store raw proteins low so nothing drips onto ready-to-eat foods.
- Use a tray or bin: Put packages in a rimmed container to catch leaks.
- Freeze if plans change: If you won’t cook it soon, freeze it earlier rather than later for better quality.
Leftovers Without Regret: Safe Storage That Also Tastes Good
Leftovers are either tomorrow’s easy lunch or next week’s “what is this?” mystery. The difference is how you store them.
1) Follow safe time limits
A practical guideline: many cooked leftovers are best used within 3–4 days in the refrigerator. For longer
storage, freeze them. This reduces food waste and keeps you out of the danger zone.
2) Reheat like you mean it
Reheat leftovers until they’re steaming hot throughout (many food-safety guidelines use 165°F as a target
for reheating). Stir soups and sauces to eliminate cold spots.
3) Don’t “taste test” for safety
Spoiled food may smell or look off, but unsafe food isn’t always obvious. If something has been left out too long,
or you can’t remember how old it is, the safest move is to toss it. Your stomach is not a laboratory.
Food Storage Tools That Make Life Easier
- Appliance thermometers: Cheap, powerful, and quietly heroic.
- Clear containers: Seeing food = remembering food exists.
- Painter’s tape + marker: Dates and labels without sticky residue drama.
- Sheet pans: Perfect for flash-freezing berries, dumplings, and pre-portioned cookie dough.
- Reusable produce bags and paper towels: Help manage moisture and extend produce life.
A Simple “Grocery Day” System That Prevents Waste
Here’s a realistic routine that keeps food fresh without turning your kitchen into a spreadsheet:
- Unpack cold items first: Refrigerate/freeze perishables immediately.
- Set a “use first” zone: Put the most perishable foods at eye levelberries, salad greens, fresh fish.
- Prep one or two items: Wash greens, slice bell peppers, or portion chicken for freezing.
- Label leftovers and opened items: Future-you says thank you (and stops ordering takeout out of confusion).
- Plan one “clean-out meal”: Soup, stir-fry, fried rice, or a big salad are excellent for odds and ends.
Quick Storage Cheat Sheet (Common Scenarios)
Storage times vary by food and conditions, but these common-sense guidelines help you make better decisions fast:
- Cooked leftovers: Refrigerate promptly; aim to use within a few days or freeze for longer keeping.
- Cut fruit/veg: Refrigerate in a sealed container; cut surfaces dry out and spoil faster.
- Berries: Keep dry, avoid washing until use, store in a breathable container in the fridge.
- Leafy greens: High-humidity drawer; add a paper towel to manage moisture.
- Bread: Room temp for short term; freeze for longer (slice first).
- Raw meat/seafood: Keep cold, contained, and low in the fridge; freeze if not using soon.
When in doubt, use a trusted storage guide (like FoodKeeper) for specific foods and time framesbut the principles
above will still be doing most of the heavy lifting.
Conclusion: Fresh Food Is a System, Not a Miracle
Storing food “right” is less about perfection and more about building a system that works on your busiest days.
Keep your fridge cold, keep raw foods contained, cool leftovers quickly, and give produce the right humidity and
breathing room. Do those things consistently and you’ll throw away less food, eat better, and spend less time
sniffing containers like a detective who regrets their career choices.
Real-Life Experiences: What Actually Helped My Food Last Longer (and Saved My Sanity)
The biggest change in my kitchen didn’t come from buying fancy containers or learning obscure storage trivia. It came
from realizing that food waste usually happens for boring reasons: I forgot what I had, I stored it in the wrong place,
or I created leftovers that cooled so slowly they basically had a spa day in the danger zone. Once I stopped treating
food storage like “common sense” and started treating it like a simple routine, everything improvedfreshness, safety,
and my weekly grocery bill.
The first breakthrough was the appliance thermometer. I used to assume my fridge was “cold enough” because, well, it
felt cold when I stood there with the door open thinking about cheese. But when I actually measured it, the temperature
wasn’t consistentespecially near the door. That explained why milk sometimes tasted off before the date, and why leftovers
were hit-or-miss. After adjusting the settings and reorganizing what lived where (milk and eggs moved off the door; condiments
took their rightful place), things stopped spoiling as quickly. It wasn’t dramatic, but it was steadyand steady wins the
“not throwing out groceries” race.
The second big improvement was a “use first” shelf. I used to tuck delicate produce wherever it fit, which meant leafy greens
got shoved behind taller items and quietly dissolved into a science experiment. Now I put the most perishable foods at eye
level: berries, greens, fresh herbs, and anything already opened. It’s basically a VIP section for foods that can’t handle
being ignored. If I see the strawberries every time I open the fridge, I’m far more likely to eat them with breakfast than
to discover them later in a fuzzy state of betrayal.
I also learned the hard way that moisture management is everything for produce. Washing berries and putting them back in the
fridge seemed tidyuntil they started molding early. Now I wait to wash berries until I’m ready to eat them and keep them in
a container that can breathe a bit. For leafy greens, I add a paper towel to absorb extra moisture. That tiny step routinely
buys me extra days of crispness. And yes, I used to roll my eyes at “store herbs like flowers,” but it works. A jar with a
little water and a loose bag turns sad cilantro into cilantro that actually shows up when you need it.
Freezer habits changed my cooking most. I stopped freezing “giant blobs” of food and started freezing portions. Soup gets
frozen flat in bags so I can stack it. Cooked rice gets cooled quickly and frozen in meal-sized packs. Bread gets sliced
before freezing, so I can grab two slices instead of thawing a whole loaf and pretending I’ll finish it in time. Even leftover
tomato pastemeasured into spoonfuls and frozenfeels like a tiny act of adult competence. My freezer became less of a
chaotic ice cavern and more of a backup plan that actually works on weeknights.
Finally, I got serious about labels. Not elaborate labelsjust tape and a date. It reduced waste immediately because I stopped
playing guessing games. The bonus was decision fatigue relief: when I can see “Chicken soup – Tue” on the container, I know
what to eat next. And when I can’t identify something, I don’t “risk it” out of optimism. I toss it and move on, because the
point of food storage is to make life easier, not to audition for a cooking-show challenge called Will This Make Me Sick?
If you’re trying to improve your own system, start with the least glamorous steps: fridge temperature, a use-first zone, and
a basic labeling habit. They’re not exciting, but they’re the reason food stays fresh long enough for you to actually enjoy it.
After that, everything elseproduce tricks, freezer strategies, pantry organizationbecomes a multiplier. And that’s when your
kitchen starts feeling less like a place where food goes to disappear and more like a place where meals reliably happen.


