
Table of Contents >> Show >> Hide
- What Does a Highlighter Stick Actually Do?
- Prep: Get Your Skin and Base Makeup Ready
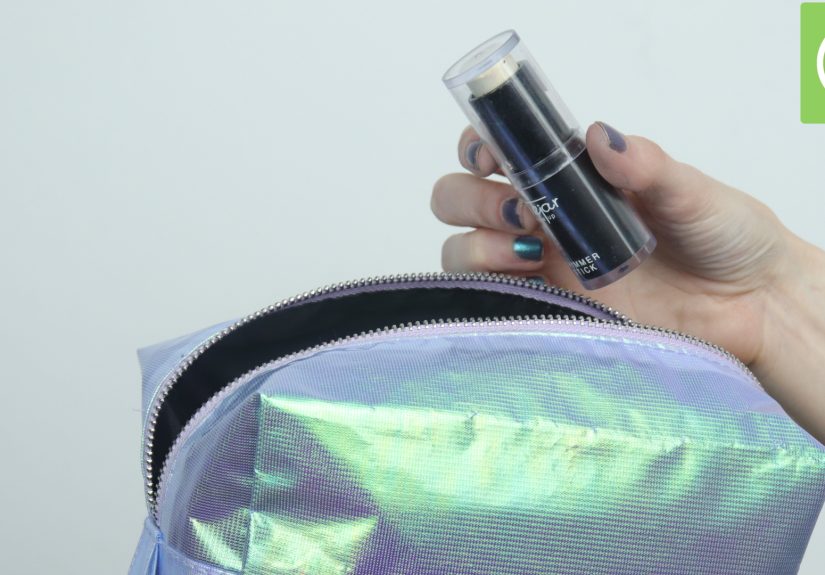
- Choosing the Right Highlighter Stick
- Step-by-Step: How to Use a Highlighter Stick (with “Picture” Ideas)
- Adjusting Your Technique for Skin Type and Face Shape
- Common Highlighter Stick Mistakes (and How to Fix Them)
- How to Remove Highlighter at the End of the Day
- Real-Life Experiences and Pro Tips with Highlighter Sticks
- Conclusion
If you’ve ever looked at a model’s glowing cheekbones and thought, “Maybe they’re born with it… or maybe they just know where to put that highlighter,” this guide is for you. A highlighter stick is one of the easiest makeup products to use, but it’s also one of the easiest to overdo. Swipe a little and you look fresh and luminous. Swipe a lot and you look like you lost a wrestling match with a disco ball.
Below, you’ll learn exactly how to use a highlighter stick step by step, where to apply it for your face shape, how to avoid common mistakes, and how to get that soft-focus glow that looks amazing in person and in pictures. We’ll even walk through some real-life experiences and tips at the end so you can skip the “trial and error” phase and go straight to “Wow, your skin looks incredible.”
Note: Since we’re in article-form, your “pictures” will be described, so you know what to look for when you apply your own makeup or take reference selfies.
What Does a Highlighter Stick Actually Do?
Think of a highlighter stick as a tiny flashlight for your face. It reflects light from specific areas so your features look lifted, defined, and a little bit magical. Unlike contour, which creates shadows and depth, highlighter brings areas forward and makes them look brighter.
Most highlighter sticks are a cream or balm formula packaged in a convenient twist-up stick. They’re designed to glide over the skin and blend easily with fingers, a sponge, or a brush. Some are subtle and balmy (great for everyday), while others are shimmery and dramatic (perfect for parties and photos).
What a highlighter stick can do for you:
- Make cheekbones look higher and more defined.
- Open up the eye area and make you look more awake.
- Emphasize your lips by brightening the Cupid’s bow.
- Give your skin that “lit from within” effect, even if you slept… not that much.
Prep: Get Your Skin and Base Makeup Ready
Highlighter looks best on skin that’s prepped, smooth, and not too powdery. A stick formula usually works over liquids and creams and sometimes over light powder, as long as you’re gentle.
Step 1: Skincare First
Before you even think about highlighter, start with a basic skincare routine:
- Cleanser: Remove oil, sweat, and leftover makeup so your stick glides smoothly.
- Moisturizer: Hydrated skin reflects light more evenly and helps cream products blend.
- SPF (daytime): Always protect your skin; glow is great, sun damage is not.
Picture 1 idea: A bare-faced person applying moisturizer, with a caption like “Start with clean, hydrated skin for a smoother glow.”
Step 2: Apply Your Base Makeup in the Right Order
The order matters if you’re wearing foundation, concealer, and powder. A simple routine might look like this:
- Primer (optional but helpful if you want long wear).
- Foundation and concealer.
- Cream products: blush, bronzer, and highlighter sticks.
- Powder (translucent or setting powder) on areas that get oily.
If you put a cream highlighter on top of a lot of powder, it can lift your base and look patchy. If you’ve already powdered, apply the highlighter stick with a very light tapping motion, or use your fingertip to pick up product from the stick and press it gently onto the skin.
Choosing the Right Highlighter Stick
Not all highlighter sticks are created equal. The right one for you depends on your skin tone, undertone, and how glowy you want to be.
Match the Shade to Your Undertone
- Fair to light skin with cool undertones: Look for pearl, icy champagne, or soft pink highlighters.
- Light to medium skin with warm undertones: Champagne, soft gold, and peachy tones look flattering.
- Tan to deep skin tones: Rich gold, bronze, rose gold, and copper shades give a believable glow without looking ashy.
As a general rule, choose a highlighter shade that’s one to two tones lighter than your skin, with a similar undertone (warm with warm, cool with cool) so it blends naturally instead of leaving a frosty stripe.
Pick the Finish You’re Comfortable Wearing
- Sheer balm or cream: Gives a natural, “glass skin” glow with minimal visible shimmer. Great for everyday and textured or mature skin.
- Soft shimmer: Adds noticeable light reflection but still looks skin-like if blended well.
- Metallic/high-shine: Best for photos, nights out, or when you fully subscribe to the “more is more” philosophyuse carefully during the day.
If you’re new to highlighter, start with a subtle, creamy stick. You can always layer a powder highlighter on top later for more intensity if you need extra drama.
Step-by-Step: How to Use a Highlighter Stick (with “Picture” Ideas)
Ready to glow? Here’s the basic technique you can use every day.
Step 1: Identify the High Points of Your Face
Highlighter goes on the places where light naturally hits firsttypically the highest points of your face. Common spots:
- Top of your cheekbones.
- Brow bone (just under the arch of the eyebrow).
- Bridge of the nose (not always the tip if you’re oily).
- Cupid’s bow (the dip at the center of your upper lip).
- Inner corners of the eyes and the center of the eyelids (optional but very brightening).
Picture 2 idea: A face diagram with little highlighted areas on the cheekbones, brow bones, bridge of nose, and Cupid’s bow.
Step 2: Apply the Highlighter Stick
Use a light handyou can always add more. Try this pattern:
- Cheekbones: Draw a short line from the outer corner of the eye toward the hairline, staying on top of the cheekbone. Don’t bring it too close to your nose; that can emphasize texture.
- Brow bone: Add a small swipe under the highest point of your brow, then soften so there’s no harsh line.
- Bridge of nose: Use the edge of the stick or your fingertip to place a thin line down the bridge of your nose. Stop before you reach the very tip if your nose tends to look shiny during the day.
- Cupid’s bow: Tap a tiny amount right on the center of the upper lip line.
- Inner corners/eyelids (optional): Use your ring finger to pick up a bit of product from the stick and tap gently onto the inner corners of your eyes or the center of the lid for a bright-eyed effect.
Picture 3 idea: Close-up of someone drawing a small line of highlighter from the cheekbone toward the temple with a stick, with arrows showing the direction of blending.
Step 3: Blend, Blend, Blend
The secret difference between “wow” and “what just happened” is blending. You have a few options:
- Fingers: Use the warmth of your fingertips to tap (not rub) along the edges of the highlighter until it melts into your skin.
- Makeup sponge: Use the rounded side of a damp sponge to gently bounce over the highlight area and blur any lines.
- Small brush: A dense, small brush can buff the edges for a soft-focus finish.
Always blend upward and outward, following the natural shape of your cheekbones and brows to keep your face looking lifted.
Step 4: Check in Natural Light
Lighting changes everything. Something that looks subtle in your bathroom can look intense in daylight or flash photos. If possible, step near a window and check your highlighter:
- If you see obvious lines or stripes, blend more.
- If it looks greasy instead of glowy, use a clean sponge or tissue to gently tap away excess.
- If you can barely see it and you want more glow, lightly layer another swipe.
Picture 4 idea: Side-by-side of “too much highlighter” vs. “softly blended highlighter” with captions explaining the difference.
Adjusting Your Technique for Skin Type and Face Shape
If You Have Oily or Combination Skin
Oily skin can already be shiny, especially around the T-zone. The goal is controlled glow, not total reflection.
- Blot or powder oily areas (like the sides of the nose and forehead) before applying highlighter.
- Concentrate highlighter on the tops of the cheekbones and brow bone instead of the center of the forehead or tip of the nose.
- Use a stick with a more satin or soft-shimmer finish rather than something very metallic.
If You Have Dry or Mature Skin
Good news: hydrating cream highlighter sticks can look gorgeous on dry or mature skin, as long as the formula is smooth.
- Layer over a nourishing moisturizer or hydrating foundation.
- Avoid sticks with heavy glitter that can emphasize fine lines or dry patches.
- Keep highlighter slightly away from areas with deeper wrinkles (like crow’s feet) and focus on the upper cheekbones, brow bone, and Cupid’s bow.
Adapting Placement to Your Face Shape
- Round face: Place highlighter higher and closer to the temples, in a slightly diagonal angle, to visually lift and elongate the face.
- Square face: Soften angles by focusing highlighter on the center of the facetop of cheeks, bridge of nose, center of foreheadwithout emphasizing sharp jawlines.
- Heart-shaped face: Highlight the tops of the cheekbones and lightly on the chin to balance a wider forehead and narrower chin.
- Oval face: You can follow the classic pattern: cheekbones, brow bone, bridge of nose, and Cupid’s bow.
Common Highlighter Stick Mistakes (and How to Fix Them)
Mistake 1: Using Way Too Much
We’ve all seen it: blinding stripes of shimmer that could signal airplanes. Over-application is the number one highlighter crime.
Fix: Start with one light swipe and build slowly. If you’ve already gone overboard, tap a bit of foundation or concealer over the area, then blend with a sponge to tone it down.
Mistake 2: Putting Highlighter in the Wrong Places
Highlighting areas that are already oily or textured can draw attention to pores, bumps, and lines.
Fix: Skip highlighter on:
- Very textured areas (like active breakouts or rough patches).
- The oiliest parts of your T-zone if you’re prone to shine.
Instead, keep it on the smoother high points of your face.
Mistake 3: Wrong Shade for Your Skin Tone
A shade that’s too light, frosty, or gray will sit on top of the skin instead of blending in, making the highlight obvious in a not-so-flattering way.
Fix: If your highlighter looks chalky, try a warmer or deeper tone closer to your natural skin color. You can also “dress it down” by lightly dusting a translucent powder over it to blur the effect.
Mistake 4: Not Blending the Edges
Even the best product looks harsh if you can see where it starts and ends.
Fix: After applying your highlighter stick, always take a moment to blend the edges with a finger, sponge, or brush. Think “soft haze of light,” not “solid bar of shimmer.”
How to Remove Highlighter at the End of the Day
Highlighter is fun until you go to bed still glowing. Removing it thoroughly helps prevent clogged pores and breakouts.
- Use a makeup remover or cleansing balm to break down foundation, highlighter, and any long-wear formulas.
- Follow with a gentle cleanser to remove residue and leave the skin clean.
- Moisturize to restore hydration. If you use actives (like retinol), always follow product directions and avoid over-exfoliating, especially after wearing a lot of makeup.
Waking up without leftover makeup means a smoother surface for highlighter the next day.
Real-Life Experiences and Pro Tips with Highlighter Sticks
Once you know the basics, the fun part is experimenting. Here are some experience-based tips and little “lessons learned” that make your highlighter stick truly earn its place in your makeup bag.
1. The “First Time” Highlighter Story
Many people’s first highlighter attempt goes something like this: they follow a quick video, swipe the product generously on their cheeks, nose, chin, and forehead, then step outside and realize they’re glowing so hard they could guide ships to shore.
If that sounds familiar, here’s the takeaway: what looks good on camerawith strong studio lights and filtersoften needs to be toned down for real life. When in doubt, apply less than you think you need, then take a quick selfie near a window. Your phone camera will instantly show if you need to blend more or add a little extra.
2. Highlighter for Real Life, Not Just Photos
In person, people see you from different angles, not just a head-on view. That’s why blending is more important than extreme brightness. A softly blended highlight that catches the light only when you move often looks more flattering than a constant metallic stripe.
Try this simple trick: after you’ve finished your makeup, tilt your head slowly from side to side in front of a mirror. If your highlighter creates a smooth glow that fades at the edges, you’re good. If you can spot obvious lines no matter which way you turn, go back in with a sponge or clean brush to blur the edges.
3. Day-to-Night Glow Upgrade
A lot of people like using one highlighter stick for both day and night looks. During the day, they’ll lightly tap the stick along the cheekbones and Cupid’s bow and leave it at that. For evening, they intensify the same product by layering or adding a supporting player.
Here’s a common routine that works well:
- Day: Sheer swipe on cheekbones and brow bone, blended out with fingers.
- Night: Add another light layer of the stick, then dust a matching powder highlighter on top for extra shine that shows up in low light and photos.
This way, you don’t need a separate “nighttime” highlighter; you’re just dialing up the intensity with layering.
4. Highlighter and Skin Texture Lessons
Real-world experience teaches one big truth: highlighter will show off whatever lives underneath. If you apply it over flaky patches, large pores, or acne bumps, it can make them more visible. Many people learn this on days when their skin is struggling and the highlighter seems to make things worse instead of better.
Here’s what experienced highlighter fans do:
- On days with more texture, they keep highlighter away from problem areas and instead emphasize smoother zonesmaybe just the brow bone and Cupid’s bow.
- They focus on prepping the skin with gentle exfoliation and hydration on a regular basis so that, over time, highlighter has a smoother surface to sit on.
- They choose cream or balm formulas rather than chunky glitter when skin is dry or textured.
5. The “Office Safe” Glow
If you work or study in bright overhead lighting, you might notice that some highlighters are more noticeable at your desk than in your bedroom mirror. A lot of people find that a sheer or satin-finish stick is perfect for office or classroom settings.
One easy trick: apply your highlighter as usual at home, then do a quick check in your work bathroom or school restroom mirror once you arrive. If it’s a bit too intense, tap a tiny amount of your regular face powder over the highlighted areas. This softens the shine without erasing it completely.
6. Using Highlighter as a Quick “Pick-Me-Up”
A common experience: you’re tired, running late, and don’t have time for a full face of makeup. This is where a highlighter stick earns hero status. Many people keep one in their bag and do this three-step “wake-up” routine:
- Tap a little highlighter on the inner corners of the eyes to look more awake.
- Swipe a small amount on the tops of the cheekbones.
- Add a bit to the Cupid’s bow and lightly blend with fingers.
Even if you skip eyeshadow and heavy foundation, those three spots create a fresher, more alive look in under a minute.
7. Finding Your Personal “Glow Level”
Over time, most people discover their preferred glow intensity. Some love a barely-there sheen that’s only noticeable up close. Others enjoy a dramatic highlight that really pops in photos. There’s no single “right” amountit’s about what makes you feel confident.
A useful habit is to experiment on low-stakes days. Try wearing a stronger highlight on a weekend at home or to a casual hangout. Take a few photos indoors and outdoors. Then compare them to a day when you wore something more subtle. You’ll quickly see which level of brightness makes you feel like the best version of yourself.
In the end, using a highlighter stick is part technique and part personal style. Once you understand the basicsplacement, blending, and the right formulayou can bend the “rules” a little to suit your taste. Maybe you like a bold nose highlight or you prefer skipping the nose entirely. Maybe you love highlighting your inner corners every day, or you save that for special occasions. The glow is yours to customize.
Conclusion
A highlighter stick is one of the most user-friendly ways to add dimension and radiance to your makeup. By choosing the right shade and finish, placing it on the high points of your face, and blending thoughtfully, you can create anything from a soft daytime sheen to a high-impact night-out glow. Remember to consider your skin type, face shape, and lighting, and don’t be afraid to adjust the intensity to your comfort level.
With a bit of practice, you’ll reach that sweet spot where people don’t say, “Nice highlighter,” they say, “Your skin looks amazing.” And that’s exactly what a good highlighter stick is supposed to do.


