
Table of Contents >> Show >> Hide
- Why Pineapple Leaves Work So Well for Papermaking
- The Three Pineapple-Leaf Paper “Styles” You Can Make
- Tools and Supplies
- Step-by-Step: From Pineapple Leaf to Paper Sheet
- Step 1: Harvest and prep the leaves
- Step 2 (Optional): Soak or “ret” to loosen non-fibrous material
- Step 3: Cook the fibers in an alkaline bath
- Step 4: Drain and rinse thoroughly (seriously, thoroughly)
- Step 5: Separate the usable fibers
- Step 6: Beat the fibers into pulp
- Step 7: Make your vat (the “fiber soup” stage)
- Step 8: Pull a sheet with a mould and deckle
- Step 9: Couch (transfer) the sheet
- Step 10: Press and dry
- Troubleshooting: Fix the Stuff That Usually Goes Wrong
- Finishing Touches That Make Pineapple-Leaf Paper Look Extra Polished
- Project Ideas: What to Do With Pineapple-Leaf Paper
- Experience-Based Notes: What Makers Learn After a Few Batches (About )
- Conclusion
Pineapples are generous. They give us fruit, they give us that “I ate too much pineapple” tongue tingle, and they give us
something else: a pile of spiky leaves that usually ends up as yard waste. But those leaves are basically nature’s packing
peanutsexcept instead of cushioning a delivery box, they can become beautiful handmade paper you can write on, fold, stitch,
gift, frame, or turn into tags that make your presents look like you own a small artisanal shop (in the best way).
This guide walks you through turning pineapple leaves into plant-fiber pulp and then into sturdy, textured sheetsplus
real-world, experience-based tips (the kind you only learn after you’ve accidentally made a vat of “green spaghetti soup”).
We’ll keep it practical, a little nerdy, and pleasantly low-drama.
Why Pineapple Leaves Work So Well for Papermaking
Paper is basically a carefully organized tangle of cellulose fibers. When those fibers are clean enough and frayed enough,
they lock together as water drains away, forming a sheet. Pineapple leaves are a strong candidate because they’re rich in
cellulose and relatively low in lignin compared with many other plant materials. Lignin is the “glue” that makes plants stiff;
it’s also one reason some papers yellow and get brittle faster if the fibers aren’t processed well.
In research on pineapple leaf fiber used for pulp, the composition reported includes a high proportion of holocellulose
(cellulose + hemicellulose) and a high fraction of alpha-cellulose, which is the more stable, long-chain form that papermakers
love for strength and longevity. Low lignin content can also mean you may need less aggressive processing than you would with
woodier materialsstill a process, just potentially a friendlier one.
The Three Pineapple-Leaf Paper “Styles” You Can Make
1) 100% pineapple leaf sheets
These have the most “plant character”: visible fibers, interesting texture, and that handmade look people pay extra for.
They can be strong, but the sheet can also be a little wild if your fibers aren’t well separated.
2) Pineapple leaf + recycled paper blends
If you’re new to plant-fiber papermaking, blending pineapple fibers with recycled office paper or shredded paper bags can make
sheet-forming easier. Think of it like adding breadcrumbs so your meatballs don’t fall apart.
3) Decorative sheets
Once you can pull a basic sheet, you can start adding inclusions: tiny petals, thread bits, chopped dried leaves, or even
ultra-thin pineapple fibers laid like “grain” for a linen-like look.
Tools and Supplies
Pineapple leaves: Fresh or dried. Mature leaves tend to have more developed fibers.
Cutting tools: Heavy scissors or garden shears (and patience).
A large non-food pot: Preferably stainless steel. (Once you cook plant fiber with alkali, don’t use the pot for soup.)
Alkali for cooking: Washing soda (sodium carbonate) is a common choice. Some makers use stronger chemicals, but beginners should start mild.
Gloves + eye protection: Not glamorous, but neither is a chemical burn.
Strainer and buckets: For draining and rinsing.
Blender or beater: A dedicated blender works, but hand beating helps fray fibers (which improves bonding).
Vat/tub: A dishpan or storage tote.
Mould and deckle: A screen in a frame (mould) and a frame that sits on top (deckle) to shape the sheet.
Felts or blotters: Wool felt, thick fabric, or sturdy blotting material for couching and pressing.
Sponge + rolling pin or press: For removing water.
Safety note (quick but important)
Preparing plant fibers often involves hot water and an alkaline solution. Even “milder” alkalis can irritate skin and eyes.
Work in a well-ventilated area, wear gloves and eye protection, and keep kids and pets away from the cooking pot. If you’re
a teen doing this as a craft project, have an adult supervise the heating and chemical handling.
Step-by-Step: From Pineapple Leaf to Paper Sheet
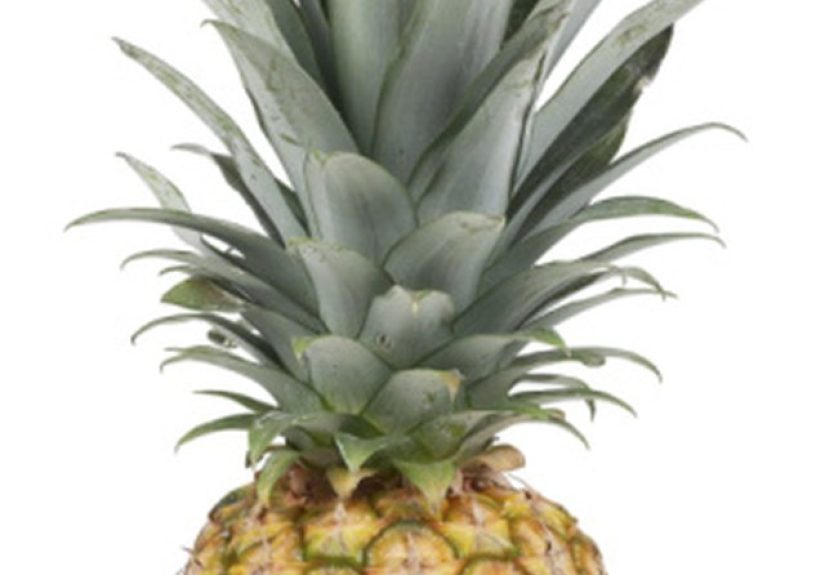
Step 1: Harvest and prep the leaves
Rinse the leaves to remove dirt and sap. Pineapple leaves can have sharp edges, so trim spines if needed.
Cut the leaves into shorter pieces (roughly 1–2 inches). Shorter pieces cook more evenly and are easier to beat into pulp.
Step 2 (Optional): Soak or “ret” to loosen non-fibrous material
If you want a more traditional fiber-prep approach, you can soak leaves in water for several days to help loosen pectins and
soft tissue. Some fiber research suggests that moderate retting times can improve fiber cleanliness, while very prolonged retting
can start damaging the cellulose itself. In craft terms: soaking can help, but don’t leave it so long that it turns into swamp confetti.
Step 3: Cook the fibers in an alkaline bath
Place leaf pieces in your dedicated pot and cover with water. Add washing soda (sodium carbonate). You’re aiming for a bath that
helps break down lignin, pectin, and “glues” that hold fibers together. Heat to a simmer (not a raging boil) and cook until the
leaf material is soft and fibers begin to separate easily when rinsed and tugged. Depending on leaf toughness, this can take
around 1–2 hours.
A practical way to judge doneness: rinse a small piece and gently pull along the length of the leaf. If it pulls apart easily and
feels “stringy” rather than stiff, you’re getting close. If it still feels like a plastic strap, keep simmering.
Step 4: Drain and rinse thoroughly (seriously, thoroughly)
Drain the cooked material through a strainer into a bucket. Then rinse the fibers in multiple changes of clean water until the rinse
water runs clear and the fibers no longer feel slippery or “soapy.” This matters for both safety and paper qualityleftover alkali
can weaken the sheet over time and make handling unpleasant.
Step 5: Separate the usable fibers
Pineapple leaves have a waxy outer layer and softer internal material. After cooking, you can often peel away or rub off softer
“flesh,” leaving longer, cleaner fibers. Think of it like combing out hair: you’re trying to isolate strands, not turn everything into mush.
Step 6: Beat the fibers into pulp
This is where paper gets its strength. Beating doesn’t just chop fibers; it frays them. Frayed fibers form more contact points and
bond better in the sheet. If you have a traditional beater, amazing. If you have a blender, use short pulses and plenty of water,
and check frequently. Over-blending can shorten fibers too much, producing weaker, linty paper.
Want an easier first win? Blend pineapple fibers with a small percentage of recycled paper pulp. The recycled fibers help sheet formation,
while pineapple fibers contribute character and reinforcement.
Step 7: Make your vat (the “fiber soup” stage)
Fill a tub about halfway with water. Add a handful of pulp and stir vigorously to disperse. Papermakers often keep the vat agitated so
fibers stay suspended; otherwise, they settle, and you pull “nothing sheets” that feel emotionally personal.
Step 8: Pull a sheet with a mould and deckle
Place the deckle on the mould. Dip them into the vat at a slight angle and lift smoothly, keeping the mould level as water drains.
A gentle side-to-side shimmy helps distribute fibers evenly. Lift, drain, and admire your damp rectangle of potential.
Step 9: Couch (transfer) the sheet
Set the mould down over a felt or blotter. Use a sponge on the back of the screen to remove excess water. Then flip the mould onto
the felt and lift carefully so the wet sheet releases onto the felt. That transfer step is called “couching,” and yes, it does feel like
you’re tucking your paper into bed.
Step 10: Press and dry
Stack sheets between felts/blotters. Press to remove waterusing a paper press if you have one, or a rolling pin plus body weight if
you don’t. Dry flat on a smooth surface, hang carefully, or use low heat (like ironing through blotters) for small sheets.
Troubleshooting: Fix the Stuff That Usually Goes Wrong
Your sheet looks patchy or has holes
Your vat may not be mixed well, or your pulp is clumping. Stir more, break up clumps, and consider beating a bit longer to separate fibers.
Your paper tears when you couch it
The sheet may be too thin or the fibers too short. Add more pulp to the vat (thicker furnish), reduce blender time, or blend in a little
longer-fiber pulp like cotton linters or recycled paper.
Your paper dries brittle
That can happen if fibers weren’t rinsed well or if the sheet is mostly short fibers. Rinse more thoroughly next time and consider blending
in longer fibers. Also press more: better bonding often comes from good wet-pressing.
Your paper feels slimy or “soapy” even after drying
That’s usually leftover alkali or plant residues. Rinse the cooked fiber in multiple water changes until it’s neutral-feeling, then beat again
with clean water.
Finishing Touches That Make Pineapple-Leaf Paper Look Extra Polished
Surface smoothing
A firm press and drying under restraint (between smooth boards or heavy books with blotters) can reduce curl. Light burnishing with a smooth
tool can also bring out a subtle sheen.
Writing friendliness
Very fibrous sheets can feather ink. For writing paper, aim for a more beaten pulp (better bonding), and consider blending in a smoother recycled
pulp. If you plan to use fountain pens, test first; handmade paper is charming, but it’s also honest.
Archival-ish habits
If you’re making keepsake paper, thorough rinsing matters. Longevity in paper is associated with fiber purity, higher alpha-cellulose, and a neutral
to slightly alkaline pH. You don’t need a labjust good craft discipline: rinse well, press well, dry well, store well.
Project Ideas: What to Do With Pineapple-Leaf Paper
- Gift tags and labels: deckle edges make everything look intentional.
- Stationery and note cards: blend with recycled pulp for smoother writing.
- Art prints: textured sheets can elevate simple line art or block prints.
- Journal inserts: sew sheets into signatures for a one-of-a-kind notebook.
- Seed paper: embed seeds near the surface (use cool water and skip harsh additives for this style).
Experience-Based Notes: What Makers Learn After a Few Batches (About )
People who stick with pineapple-leaf papermaking long enough to make more than one batch tend to discover a few truths that feel
oddly universallike gravity, taxes, and the fact that the first “perfect sheet” always happens when you weren’t trying that hard.
One common early surprise is just how tough pineapple leaves can be. Even after chopping, they may behave like stubborn plastic
ribbons until they’ve had enough time in the alkaline simmer. Makers often report that the “pull test” is more reliable than a timer:
when a rinsed piece separates into fibers with a gentle tug, you’re on the right track. If it fights back, you haven’t cooked long enough
(or your solution is too weak), and beating later becomes an exhausting cardio session disguised as art.
Another frequent lesson is that pineapple leaves come with a waxy outer layer that doesn’t automatically become paper-friendly.
When beginners skip the step of rubbing, scraping, or otherwise separating the softer leaf tissue from the stronger fibers, the pulp can end up
looking like greenish oatmeal. That pulp will still form a sheet sometimesbut the sheet may dry brittle, speckled, or oddly “boardy.”
Makers who take a few extra minutes to clean and separate the fibers usually get stronger, more elegant paper with visible strands that look
intentional rather than accidental.
Beating is where the magic happens, and it’s also where beginners accidentally sabotage themselves. A blender is convenient, but it’s a shortcut
with a personality: it chops. Chopped fibers can still make paper, but they don’t interlock as well as frayed fibers. Makers who want stronger sheets
often blend in stagesshort pulses, then checking the pulprather than letting the blender run like it’s making a smoothie for an elephant.
Another popular strategy is to blend pineapple fibers with a portion of recycled paper pulp. The recycled pulp improves sheet formation, while pineapple
fibers add texture and reinforcement. It’s the papermaking equivalent of adding a little flour so your cookies don’t spread into one giant cookie sheet
(unless that was the plan, which is valid).
Vat management is another “learned skill.” Pineapple fibers can settle faster than expected, especially if they’re long or not well dispersed.
Makers often develop a rhythm: stir, pull a sheet, stir again, pull again. If you forget the stirring step, the next sheet may come out thin and patchy,
like your pulp briefly unionized and decided to stop cooperating. A deeper vat with more water also gives fibers room to float and distribute, which can
improve uniformity.
Finally, pressing and drying are where good paper becomes great paper. Many makers notice that a heavier press (even a DIY one) improves bonding and
reduces fuzz. Drying under restraint reduces curling and makes the sheet feel more “finished.” The big takeaway people share is simple: pineapple-leaf paper
rewards patience. The process isn’t hard, but it’s layeredprep, cook, rinse, separate, beat, pull, press, dryand each layer quietly improves the sheet.
When you respect those layers, the final paper doesn’t just look handmade; it feels confidently made.
Conclusion
Turning pineapple leaves into handmade paper is part craft, part science, and part delightfully weird transformation: sharp yard waste becomes a soft,
writeable sheet you can share or keep. The keys are consistent fiber prep (including an alkaline cook and thorough rinsing), smart beating (fray more, chop less),
and solid pressing and drying. Start with a small batch, test a few pulp blends, and keep notesbecause the “best” pineapple paper is the one that fits what you
want to make, whether that’s rustic gift tags or smoother stationery.


