
Table of Contents >> Show >> Hide
- What Is Plumbers Tape?
- When to Use Plumbers Tape
- When Not to Use Plumbers Tape
- How to Choose the Right Plumbers Tape
- How to Use Plumbers Tape Step by Step
- Quick Example: Using Plumbers Tape on a Shower Head
- Common Mistakes to Avoid
- Do You Need Pipe Dope Too?
- Troubleshooting a Leak After Using Plumbers Tape
- Real-World Lessons and Experiences With Plumbers Tape
- Final Thoughts
Note: This article focuses on PTFE thread seal tape, the thin white, pink, yellow, or gray tape most homeowners mean when they say “plumbers tape,” not the metal hanging strap that sometimes gets called the same thing.
Plumbers tape looks harmless. It is small, cheap, lightweight, and about as intimidating as a roll of mint-flavored dental floss. Then it quietly decides whether your new shower head stays dry and civilized or drips all night like a tiny indoor cave. If you have ever tightened a threaded fitting, turned the water back on, and immediately heard the sad little plink… plink… plink of failure, good news: the problem is often not your strength, your wrench, or your destiny. It is usually technique.
Used correctly, plumbers tape helps seal threaded pipe joints, reduces friction while tightening, and makes future disassembly less dramatic. Used incorrectly, it bunches up, shreds, slips, or gives you false confidence while water sneaks out anyway. The difference comes down to knowing where to use it, where not to use it, and how to wrap it properly.
This guide breaks down the process in plain English, with practical examples, common mistakes, and real-world lessons that can save you from leaks, frustration, and repeated trips to the hardware store that somehow end with three fittings, two snacks, and still the wrong tape.
What Is Plumbers Tape?
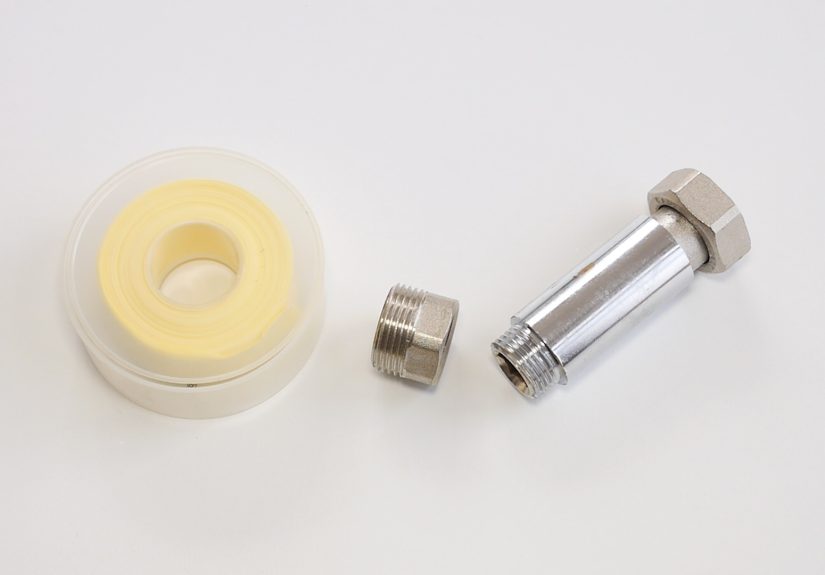
Plumbers tape is a thin, non-adhesive thread seal tape made from PTFE, short for polytetrafluoroethylene. Many people also call it thread seal tape, PTFE tape, or Teflon tape. No matter which name you use, the job is the same: it fills tiny gaps between threaded connections and helps create a tighter, leak-resistant seal.
It also acts as a lubricant. That matters because threaded fittings need to screw together smoothly enough to seat properly without binding. So plumbers tape does two useful things at once: it helps seal and it helps tighten. That is a pretty strong résumé for something that costs less than a coffee.
When to Use Plumbers Tape
Use plumbers tape on male threaded connections where the seal is made by the threads themselves. Common examples include:
- Shower heads and shower arms
- Threaded pipe nipples
- Threaded iron, brass, or galvanized fittings
- Some threaded PVC or CPVC adapters, if the manufacturer allows PTFE tape
- Pipe plugs and threaded caps
- Certain threaded valves and fittings for water or air systems
In simple terms, if you are screwing a male threaded fitting into a female threaded fitting and the threads are designed to create the seal, plumbers tape is often the right move.
When Not to Use Plumbers Tape
This is where many DIY jobs go sideways. Plumbers tape is not a universal fix for every fitting with threads on it. Some fittings have threads only to pull parts together; the actual seal is created somewhere else.
Do not use plumbers tape on:
- Compression fittings, where a ferrule or ring creates the seal
- Flare fittings, where the flared metal surfaces do the sealing
- Push-to-connect fittings, which seal internally
- Flexible supply lines with rubber washers
- Garden hose-style connections with gaskets
- Any connection where the manufacturer specifically says not to use thread tape
Adding tape where it does not belong can actually cause leaks by interfering with how the fitting is meant to seat. In other words, more sealant does not always mean more sealing. Sometimes it just means more confusion.
How to Choose the Right Plumbers Tape
Not all plumbers tape is exactly the same. In most homes, the color can help you choose the right type for the job.
White Tape
White PTFE tape is the general-purpose option for many standard water and air fittings. It is the roll most homeowners keep in a toolbox because it handles everyday plumbing tasks well.
Pink Tape
Pink tape is often a heavier-duty water line tape. It is commonly chosen for residential and commercial water applications where you want a denser, tougher wrap.
Yellow Tape
Yellow tape is commonly used for gas-rated threaded connections. Because gas work involves higher safety stakes, always follow local code, product labeling, and manufacturer instructions. If there is any doubt, call a licensed professional.
Gray Tape
Gray tape is often used on stainless steel fittings or where matching the finish matters.
The safest rule is simple: use a tape that clearly matches the application listed on the packaging. Do not treat color as decoration. In plumbing, color is often a clue, not a fashion statement.
How to Use Plumbers Tape Step by Step
1. Turn Off the Water and Prepare the Area
If you are working on a live plumbing connection, shut off the water first. Open a nearby faucet to relieve pressure and keep a towel or bucket nearby for any leftover drips. Plumbing has a funny way of holding onto one final surprise.
2. Clean the Male Threads
Before you touch the tape, inspect and clean the male threads. Remove old tape, pipe dope, rust, grime, or debris. A rag usually works. If the threads are really crusty, use a small brush. Tape sticks and seals better on clean threads than on old junk and optimism.
3. Start One Thread Back
Place the end of the tape just behind the first thread rather than hanging it over the edge. That helps prevent small bits of tape from being pushed into the pipe, where they do not belong.
4. Wrap in the Correct Direction
This is the big one. Hold the male threaded end facing you and wrap the tape clockwise, which is the same direction the fitting will turn as you tighten it. If you wrap the wrong way, the tape will bunch up or unravel when the fitting is assembled. That is not plumbing. That is sabotage.
5. Keep the Tape Taut
Pull the tape snug as you wrap. It should lie flat in the threads without sagging, wrinkling, or floating around loosely like it has no plans for the weekend. Tension helps the tape conform to the thread pattern.
6. Use the Right Number of Wraps
For many household plumbing jobs, 2 to 4 wraps is a good target. Thin tape may need a little more; thicker tape may need less. The goal is to cover the threads evenly without creating a bulky mess. Too little tape may not seal. Too much tape can make the fitting hard to seat properly.
7. Overlap as You Go
Each pass should overlap the previous layer slightly. This creates even coverage from the back of the threaded section toward the front. Make sure the tape sits down in the threads instead of floating across the peaks.
8. Tear or Snap the Tape and Press It Down
Once you have enough wraps, tear or snap the tape off cleanly and press the loose end into the threads with your fingers. The tape should look neat, thin, and intentional. If it looks like a tiny white scarf tangled around the fitting, start over.
9. Assemble and Tighten
Screw the fitting together by hand first to avoid cross-threading. Then tighten with the proper tool until snug. Do not over-tighten, especially on plastic fittings, because PTFE tape reduces friction and makes it easier to go too far. Tight is good. Heroic is expensive.
Quick Example: Using Plumbers Tape on a Shower Head
Replacing a shower head is one of the easiest ways to learn how thread seal tape works.
- Remove the old shower head.
- Clean the shower arm threads thoroughly.
- Wrap plumbers tape clockwise around the male threads 2 to 3 times.
- Press the tape into the threads.
- Thread on the new shower head by hand, then snug it according to the manufacturer’s directions.
- Turn the water on and check for drips.
If it leaks, do not panic and do not immediately assume the fitting is defective. Remove it, inspect the threads, rewrap neatly, and try again. Many minor leaks come from bad wrapping, not bad hardware.
Common Mistakes to Avoid
Wrapping Backward
This is the classic mistake. If you wrap counterclockwise on a standard fitting, the tape will unwind as the fitting tightens.
Using Too Much Tape
A mountain of tape does not make a better seal. It can keep the threads from mating correctly and may crack delicate fittings.
Using Too Little Tape
One sad, partial wrap usually will not do the job. Aim for even, full coverage.
Applying Tape to the Wrong Fitting Type
Compression, flare, and gasketed fittings generally do not want thread tape. Respect the design.
Wrapping Dirty or Damaged Threads
Tape is not a magic eraser for bad threads. If the fitting is bent, cracked, stripped, or badly corroded, replace it.
Backing Off the Fitting to Reposition It
Once a taped threaded fitting is tightened, loosening it to “line it up” can break the seal. If the orientation matters, remove it, rewrap, and reinstall.
Do You Need Pipe Dope Too?
For many basic household water connections, plumbers tape alone is enough. Some pros use both tape and pipe joint compound on certain threaded metal connections, usually with the tape first and compound over it. That can work well in the right application, but it is not a universal requirement.
If you are new to DIY plumbing, keep it simple: use the sealant method recommended by the fitting manufacturer. When in doubt, do not stack products just because it sounds tougher. Plumbing rewards precision more than enthusiasm.
Troubleshooting a Leak After Using Plumbers Tape
If a threaded joint still leaks after taping, check these possibilities:
- The tape was wrapped in the wrong direction
- The threads were dirty or damaged
- The fitting was cross-threaded
- You used too much or too little tape
- The connection is actually a compression or gasketed fitting that should not have tape
- The fitting needs a different sealant based on the manufacturer’s instructions
Take the joint apart, remove the old tape completely, inspect everything, and rewrap from scratch. Reusing mangled old tape is like reusing chewed gum as glue. Bold, yes. Effective, no.
Real-World Lessons and Experiences With Plumbers Tape
One of the most useful things about plumbers tape is that it teaches you quickly. Sometimes the lesson is gentle, like a tiny drip under a sink. Sometimes the lesson is louder, like a shower arm that sprays the wall because you got confident after watching exactly half of one tutorial. Either way, the experience tends to stick.
A very common beginner experience happens with a new shower head. The installation feels almost too easy, which is suspicious in home repair. You remove the old shower head, slap on a casual wrap of tape, tighten the new one, and turn on the water with the optimism of a person who has never been betrayed by threads. Then a bead of water appears at the connection. Not a flood. Just enough to annoy you every time you shower. What usually went wrong? The tape was wrapped backward, the threads were not cleaned first, or the wrap count was too random. Once you redo it carefully, the leak disappears, and suddenly you feel like you have unlocked a plumbing cheat code.
Another frequent lesson shows up under the sink. A homeowner notices threads on a supply connection and assumes tape must belong there because, well, threads exist and tape exists, so surely destiny wants them together. But many under-sink supply lines use compression fittings or rubber washers, and adding tape can make the connection worse rather than better. This is the moment plumbers tape teaches its most important life rule: it is not for every threaded thing. It is for the right threaded thing.
There is also the experience of using too much tape because “extra protection” sounds smart. The fitting becomes stubborn, feels unusually tight, and now you are one bad decision away from cracking a plastic female adapter. This is especially important with plastic connections. PTFE tape reduces friction, so it becomes easier to over-tighten without noticing. Many DIYers learn this the hard way once, then spend the rest of their lives preaching the gospel of “snug, not savage.”
People also remember the first time they clean old threads properly before rewrapping. It feels like a minor detail until you compare results. A dirty fitting wrapped with fresh tape may still leak. A clean fitting wrapped neatly often seals on the first try. That experience changes your habits fast. Suddenly the rag and brush are not optional side characters. They become part of the main cast.
Then there is the confidence boost that comes from getting a simple repair right. Replacing a shower head, installing a threaded pipe plug, or reconnecting a small water fitting with the correct amount of tape can make a homeowner far more comfortable with basic plumbing maintenance. You stop seeing every drip as a personal insult and start seeing it as a clue. That is a good shift.
The best long-term experience with plumbers tape is not just that it helps stop leaks. It teaches patience, fit, direction, and restraint. It reminds you to read the fitting, not just the package. It shows that tiny details matter. And it proves, once again, that home repair is often less about brute force and more about doing the boring little things correctly the first time. Annoying? Sometimes. Effective? Absolutely.
Final Thoughts
Learning how to use plumbers tape is one of those small DIY skills that pays off again and again. It is inexpensive, beginner-friendly, and surprisingly powerful when used the right way. Clean the threads, wrap the tape clockwise on male threads, keep it taut, use a sensible number of wraps, and do not put it on fittings that seal some other way.
That is really the whole game. Not glamorous, not complicated, and definitely not something that needs a 14-step motivational speech. Just neat wrapping, good judgment, and a little respect for the difference between threaded fittings and fittings that merely look like they want tape.
Master that, and you will spend less time chasing drips and more time enjoying the deeply satisfying silence of a plumbing connection that stays dry.


