
Table of Contents >> Show >> Hide
- Why Washing Brussels Sprouts Matters
- Before You Wash: A Few Smart Prep Rules
- Method 1: The Fast Running-Water Rinse
- Method 2: The Soak-and-Swish Clean
- Should You Wash Brussels Sprouts Before or After Trimming?
- What If the Package Says Pre-Washed or Ready-to-Eat?
- How to Dry Brussels Sprouts Properly
- How to Prep Brussels Sprouts After Washing
- Common Mistakes to Avoid
- How to Store Brussels Sprouts Before Washing
- Which Washing Method Is Best?
- Kitchen Experiences: What Actually Happens When You Wash Brussels Sprouts
- Conclusion
- SEO Tags
Brussels sprouts are tiny, adorable, and just dramatic enough to hide dirt, grit, and the occasional stubborn outer leaf in all those tight layers. They look neat and tidy in the bag, but before they hit your sheet pan, skillet, or salad bowl, they deserve a proper rinse. The good news is that washing Brussels sprouts is not complicated, and it definitely does not require fancy produce sprays, mystery potions, or a spiritual cleansing ceremony over the sink.
If you have ever wondered how to wash Brussels sprouts the right way, this guide keeps it simple. Below, you will find 2 quick and easy ways to clean them, plus smart prep tips for roasting, sautéing, shaving, and storing. Whether your sprouts came fresh on the stalk, loose in the produce bin, or in a bag from the store, the goal is the same: clean them well, keep them fresh, and avoid turning your kitchen into a wet vegetable crime scene.
Why Washing Brussels Sprouts Matters
Brussels sprouts may have a tight, layered structure, but they are still fresh produce. That means they can carry dirt, tiny bits of debris, and sometimes insects tucked between the leaves. Even if they look spotless, it is smart to wash them before eating or cooking. A proper rinse also helps remove loose outer leaves and surface residue so your finished dish tastes fresher and looks better.
There is also a quality factor. Clean sprouts roast more evenly, shred more neatly, and feel less like a gamble when you are tossing them into a slaw or sauté pan. Washing is one of those tiny prep steps that pays off in a big way. It is not glamorous, but neither is biting into grit.
Before You Wash: A Few Smart Prep Rules
Before we get into the two methods, there are a few helpful ground rules that make washing Brussels sprouts easier and safer.
1. Wash them right before using
Brussels sprouts keep best when they are stored unwashed and dry in the refrigerator. If you wash them too early, the extra moisture can speed up spoilage. In other words, save the bath for the last minute, not the moment you get home from the store.
2. Remove damaged outer leaves first
Peel away any yellow, wilted, bruised, or torn outer leaves before washing. This makes the sprouts easier to clean and improves the final texture when cooking.
3. Do not use soap or produce wash
Plain cool running water is the winner here. Soap, bleach, disinfectants, and commercial produce washes are unnecessary and can leave behind residues you do not want on your food.
4. Keep the sink and tools clean
If your cutting board still has evidence of raw chicken from dinner prep, stop right there. Clean your sink, colander, knife, and cutting board before handling produce to avoid cross-contamination.
5. Dry them well if you plan to roast
Wet sprouts steam. Dry sprouts brown. If crispy edges and caramelized flavor are your goal, pat them very dry with a clean towel or paper towels after washing.
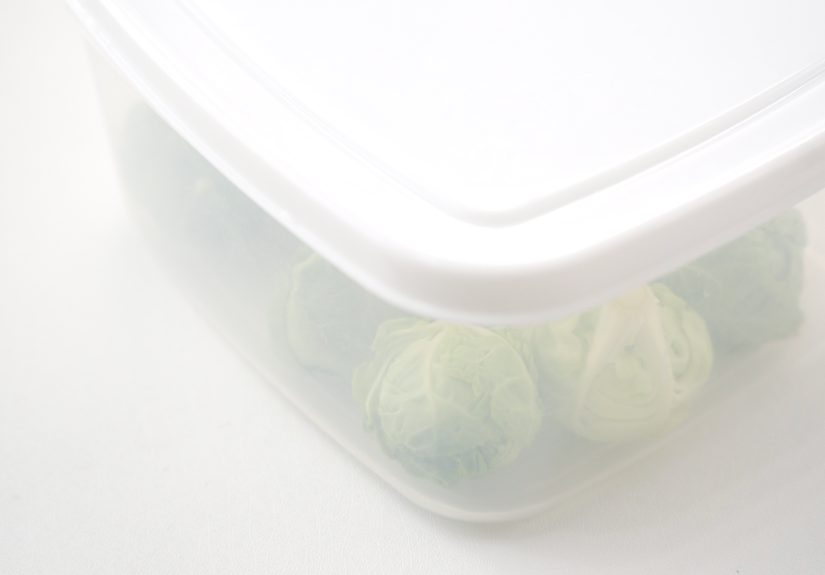
Method 1: The Fast Running-Water Rinse
This is the easiest and best everyday method for washing Brussels sprouts. It works especially well when the sprouts look fairly clean and you are prepping them for roasting, air frying, steaming, or sautéing.
How to do it
- Place the Brussels sprouts in a colander.
- Remove any loose, yellow, or damaged outer leaves.
- Hold the colander under cool running water.
- Use your hands to toss and turn the sprouts so water reaches all sides.
- Rub any visibly dirty spots gently with your fingers.
- Drain thoroughly.
- Pat dry with a clean kitchen towel or paper towels.
Why this method works
Running water helps carry away dirt and debris instead of letting it settle back onto the sprouts. It is quick, simple, and matches standard produce-washing guidance for most vegetables. If your sprouts are going straight to the oven, this method is usually all you need.
Best for
- Bagged or loose Brussels sprouts that look clean
- Weeknight cooking
- Roasting, air frying, steaming, or pan-searing
- Anyone who values speed and minimal sink drama
Method 2: The Soak-and-Swish Clean
If your Brussels sprouts are extra dirty, came from a farmers market, still have bits of garden debris, or seem suspiciously likely to hide tiny bugs between the leaves, use this method. It adds one extra step but can make a big difference.
How to do it
- Fill a large bowl with cold water.
- Remove the loose or damaged outer leaves from the sprouts.
- Add the Brussels sprouts to the bowl and let them soak for 2 to 5 minutes.
- Swish them around with your hands to loosen dirt or debris.
- Lift the sprouts out of the water rather than pouring the whole bowl through a colander right away. This helps leave grit behind in the bowl.
- Transfer them to a colander and give them a final rinse under cool running water.
- Dry thoroughly before trimming or cooking.
Why this method works
The soak helps loosen trapped dirt from the outer leaves, while the final rinse removes anything still clinging to the sprouts. Think of it as the deep-clean option for Brussels sprouts that have lived a more adventurous life.
Best for
- Farm-fresh Brussels sprouts
- Sprouts with visible dirt or sand
- Sprouts that may have bugs hidden in the leaves
- Raw preparations like shaved Brussels sprout salad or slaw
Should You Wash Brussels Sprouts Before or After Trimming?
For most situations, wash Brussels sprouts before trimming the stem and slicing them. Washing them whole helps keep the leaves intact and prevents the inner layers from getting overly waterlogged too soon.
That said, if you cut the sprouts in half and notice dirt or tiny insects tucked deeper inside, there is nothing wrong with giving the cut sprouts a quick second rinse. Just make sure to dry them very well afterward, especially if you plan to roast them. Nobody wants soggy sprouts when crispy was the dream.
What If the Package Says Pre-Washed or Ready-to-Eat?
If your Brussels sprouts are labeled pre-washed, triple-washed, or ready-to-eat, they generally do not need another rinse at home. In fact, rewashing can sometimes add unnecessary handling and increase the chance of cross-contamination if your sink or hands are not spotless.
Still, use common sense. If the package is damaged, the sprouts look slimy, or something seems off, skip them. Fresh produce should smell fresh, not like it is trying to file a complaint.
How to Dry Brussels Sprouts Properly
Drying matters more than many people realize. After washing, spread the Brussels sprouts on a clean kitchen towel or paper towels and gently pat them dry. If you have time, let them air-dry for a few minutes as well.
This step is especially important for:
- Roasting: Dry sprouts caramelize better and develop crisp edges.
- Air frying: Less surface moisture means more browning.
- Sautéing: Dry sprouts sear instead of steaming.
- Shaving for salads: Drier leaves hold dressing better without becoming limp too fast.
How to Prep Brussels Sprouts After Washing
Once the sprouts are clean and dry, the rest depends on how you plan to cook them.
For roasting
Trim just the very end of the stem, remove any tough outer leaves, and cut the sprouts in half. If they are especially large, quarter them so they cook evenly.
For sautéing
Halve them or slice them thinly for quicker cooking. Thin shreds are excellent when you want a faster side dish with lots of browned edges.
For salads and slaw
Trim the stem and shave the sprouts thinly with a sharp knife, mandoline, or food processor. If you are serving them raw, extra cleaning and careful drying are especially worthwhile.
For steaming or boiling
Leave smaller sprouts whole and halve larger ones. This keeps the cooking time more even across the batch.
Common Mistakes to Avoid
Washing them too early
This shortens shelf life and encourages spoilage. Store first, wash later.
Using soap
Brussels sprouts are vegetables, not dinner plates. Water is enough.
Skipping the outer leaves
Those wilted leaves are usually the first place dirt and damage show up. Remove them before washing.
Not drying them
If your roasted sprouts come out soft and pale, leftover moisture may be the culprit.
Letting them soak forever
A short soak is useful. A long soak turns into an unnecessary spa retreat. Keep it brief, then rinse and dry.
How to Store Brussels Sprouts Before Washing
Store Brussels sprouts whole, dry, and unwashed in the refrigerator. A perforated bag, produce bag, or loosely closed container works well. Try to keep them in the crisper drawer if possible. Avoid sealing them up while damp, which encourages spoilage faster than you can say “I thought these were still good.”
Fresh Brussels sprouts are best used within several days to about a week, depending on how fresh they were when you bought them. The firmer and greener they are, the better the eating experience will be.
Which Washing Method Is Best?
If you want the simplest answer, here it is:
- Use Method 1 for everyday cleaning.
- Use Method 2 when the sprouts are especially dirty or likely to hide debris.
For most home cooks, the fast running-water rinse is enough. The soak-and-swish method is your backup plan when your Brussels sprouts need extra attention. Either way, the real secret is not just washing them, but washing them well enough and then drying them properly.
Kitchen Experiences: What Actually Happens When You Wash Brussels Sprouts
In real kitchens, washing Brussels sprouts is rarely the part people get excited about. No one gathers around the sink and says, “This is the moment I have been waiting for.” But it is often the step that separates a great tray of roasted sprouts from a disappointing one. The difference shows up fast.
One common experience is buying a beautiful bag of Brussels sprouts, slicing them in half, tossing them with oil, and roasting them right away without washing or drying carefully. On paper, that seems efficient. In reality, a few gritty bites later, efficiency suddenly feels overrated. Even when the sprouts look clean, those compact leaves can hold onto dust or tiny bits of debris. That is why a quick rinse usually feels worth the extra minute.
Another very relatable moment happens when someone does wash the sprouts, but forgets to dry them. The oven is hot, the pan is ready, expectations are high, and then the sprouts come out softer than expected. Not bad, exactly, but more steamy than crispy. That is usually the moisture talking. Drying may sound like a fussy step, but it is the quiet hero behind those deeply browned edges that make Brussels sprouts taste nutty and sweet instead of merely respectable.
There is also the farmers market version of this story. Fresh local Brussels sprouts can be wonderful, but they sometimes arrive with more personality than grocery store sprouts. Maybe there is visible dirt near the stem. Maybe a few outer leaves look rough. Maybe one little bug decides to remind you that vegetables come from actual fields and not a magical produce showroom. In those cases, the soak-and-swish method feels less like extra work and more like common sense. A short soak loosens everything up, and a final rinse finishes the job without much drama.
People who shave Brussels sprouts for salad often have another useful lesson: clean them thoroughly before slicing, because once they are shredded, washing becomes much more awkward. Tiny ribbons of Brussels sprouts can turn into a soggy pile in a hurry if they are rinsed after cutting. Washing first and drying well usually produces a better texture, especially when the salad is dressed with lemon juice, mustard vinaigrette, or a creamy dressing.
Then there is the “I bought pre-washed sprouts and still rinsed them out of habit” experience. It is understandable. Many home cooks are wired to wash everything that looks remotely like produce. But for clearly labeled ready-to-eat vegetables, extra rinsing is not always helpful. Sometimes the best kitchen move is simply reading the package, trusting it when appropriate, and focusing your energy on the cooking part.
Over time, most people land on a routine that fits their kitchen style. Some always rinse in a colander and pat dry immediately. Some do a quick soak when the sprouts look rough. Some trim first, some trim later. The exact order can vary a bit, but the most successful routines usually have the same bones: remove rough leaves, wash with cool water, skip the soap, dry thoroughly, and cook with confidence. It is not fancy, but it works. And when Brussels sprouts finally come out crisp, clean, and delicious, that humble sink-side step suddenly feels like a very smart investment.
Conclusion
Learning how to wash Brussels sprouts is one of those small kitchen skills that makes everything easier afterward. The fast rinse under cool running water is perfect for everyday prep, while the soak-and-swish method is ideal for extra-dirty sprouts or batches with more debris tucked between the leaves. In both cases, remove damaged outer leaves, avoid soap, wash right before using, and dry thoroughly for the best texture.
That is really the whole story: clean sprouts cook better, taste better, and make you far less likely to discover a surprise crunch that has nothing to do with crispness. Tiny cabbage-like vegetables, yes. Tiny sink project, also yes. Totally worth it, absolutely.


