
Table of Contents >> Show >> Hide
- Why This IKEA Hack Works (and Why Some Versions Fail)
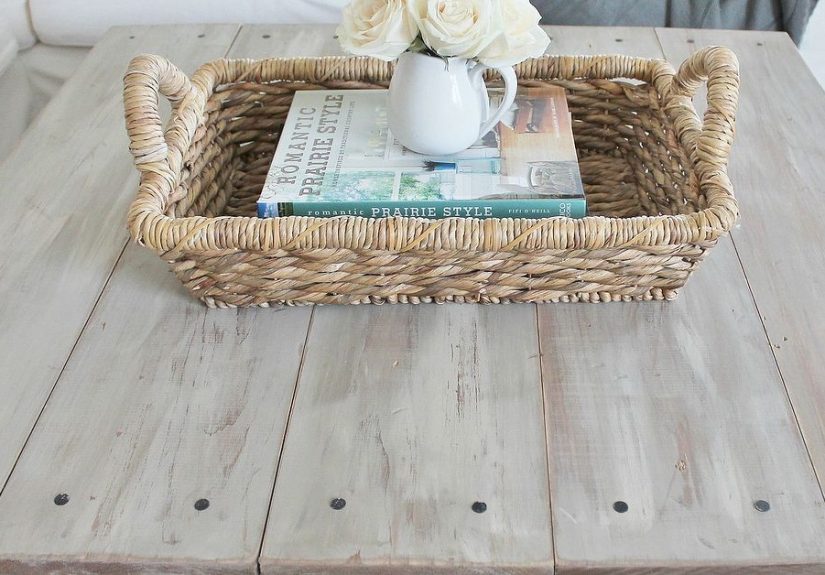
- Project Overview
- Materials and Tools
- Step-by-Step: IKEA Hacked Barnboard Coffee Table
- Step 1: Assemble the IKEA Base (But Don’t Stop There)
- Step 2: Choose Your Top Strategy (Panelized vs. Solid Wood)
- Step 3: Prep Your Barnboard Like You Want to Keep Your Fingers
- Step 4: Build a Reinforcement Frame (This Is Where the “Sturdy” Happens)
- Step 5A: Build the Panelized Barnboard Top (Recommended for Most IKEA Bases)
- Step 5B: Build a Solid Wood Top (If You’re Going Full Farmhouse)
- Step 6: Attach the Top Correctly (Wood Movement Matters)
- Step 7: Add Details That Make It Look “Custom”
- Step 8: Finishing for Real Life (Not Just “Pinterest Life”)
- Common Mistakes (and How to Avoid Them)
- Safety Notes for Reclaimed Barn Wood
- FAQ
- Real-World Experiences: What DIYers Usually Learn After Building This Table
- Conclusion
Let’s be honest: the internet has turned “IKEA hack” into a love language. And if you’ve ever looked at a perfectly fine
IKEA table and thought, “Nice… but what if it looked like it survived a wholesome barn fire in 1897?”welcome.
This tutorial shows you how to turn an affordable IKEA base into a rustic barnboard-style coffee table that looks custom,
feels sturdy, and can survive real life (a.k.a. feet-on-furniture season, coffee rings, and the occasional dramatic snack spill).
The goal here is a barnboard coffee table with that weathered, farmhouse vibewithout the farmhouse budget.
We’ll walk through smart material choices, structural upgrades (because “cute” isn’t a load rating), wood-movement-friendly attachment
methods, and finishing tips so your table doesn’t end up sticky, blotchy, or mysteriously cracking two months later.
Why This IKEA Hack Works (and Why Some Versions Fail)
Many IKEA coffee tables (especially popular hack bases) use lightweight engineered construction to keep costs down and assembly easy.
That’s great for moving apartments… but less great when you start adding heavy wood on top and expect it to behave like a workbench.
The secret to a successful IKEA hacked coffee table is simple: treat the IKEA piece as a base, then build real structure onto it.
The two most common failure points in barnboard hacks are:
- Weak screw-holding areas (you can’t “just drive longer screws” into a lightweight top and hope for the best).
- Ignoring wood movement (solid wood expands and contracts; it’s not being dramatic, it’s being wood).
We’ll solve both with reinforcement and proper top attachmentso your table stays flat, quiet, and not haunted by seasonal humidity.
Project Overview
- Skill level: Beginner-to-intermediate (confident beginner if you can measure twice and cut once… or measure once and buy more wood).
- Time: 1 weekend (plus drying time for stain/finish)
- Budget: Moderate (depends on whether your “barnboard” is true reclaimed wood or faux barnwood planks)
- Best bases: IKEA LACK coffee table, LACK side tables, or a similarly simple IKEA frame-style coffee table
Picking a Size
A common IKEA hack base is the IKEA LACK coffee table (often around 35″ x 21″ footprint in the U.S. market).
You can build your barnboard top to match that footprint for a clean look, or add a small overhang (about 1/2″ to 1″) for a more substantial profile.
Want a chunkier, square farmhouse vibe? Some popular barnboard hacks use a square top around 35″ x 35″ by building a larger top
and pairing it with a compatible base or reinforced frame. The method is the samejust adjust cut lengths.
Materials and Tools
Materials
- IKEA base (example: LACK coffee table or similar)
- Barnboard material: reclaimed barn wood planks OR barnwood-look boards (thin planks are easiest)
- Subtop: 1/2″ plywood or MDF (for a stable “panelized” top option)
- Frame lumber: 1×3 or 1×4 pine/poplar for an apron frame (reinforcement)
- Wood glue (quality PVA glue) and/or construction adhesive (sparingly, depending on method)
- Fasteners: brad nails or finish nails, pocket screws (optional), plus tabletop fasteners (figure-8s or Z-clips) if using a solid wood top
- Stain (optional) and topcoat (polyurethane recommended for coffee-table durability)
- Wood filler (optional, if you want fewer gaps) and sandpaper (80/120/180/220 grits)
- Felt pads (for floors) and optional casters (for industrial/farmhouse mobility)
Tools
- Measuring tape, pencil, square
- Miter saw or circular saw (with a guide)
- Drill/driver + bits
- Clamps (more than you think you need)
- Orbital sander (or sanding block + patience)
- Pry bar/pliers (if reclaimed wood has nails)
- Optional: pocket hole jig, brad nailer, metal detector for reclaimed wood
Step-by-Step: IKEA Hacked Barnboard Coffee Table
Step 1: Assemble the IKEA Base (But Don’t Stop There)
Build your IKEA table according to the instructions. Tighten everything fully and make sure it sits flat.
Then do a quick wobble test: push gently on corners. If it rocks, fix that now (often it’s uneven legs or a not-quite-seated joint).
Here’s the mindset shift: the IKEA base is your starter chassis. The barnboard top is heavier, and you’re going to add reinforcement
so the whole piece feels like furniturenot like a temporary prop for a catalog photo shoot.
Step 2: Choose Your Top Strategy (Panelized vs. Solid Wood)
There are two legit ways to build a barnboard-style top. Which one you choose depends on your materials and how “authentic” you want the build to be.
Option A: Panelized Top (Beginner-Friendly, Very Stable)
This method uses thin barnboard planks attached to a plywood/MDF subtop. It’s flatter, more resistant to warping,
and easier to attach to lightweight bases. This is also the best option if your barnboard pieces are uneven thickness or you want a “planked” look
without full edge-gluing.
- Pros: stable, easy, forgiving, works great with thin reclaimed boards
- Cons: less “traditional” joinery; subtop adds thickness
Option B: Solid Wood Top (More Traditional, Requires Wood-Movement Planning)
This method edge-glues boards into a true solid slab (or a planked panel with proper joinery). It’s beautiful and “real,” but it must be attached in a way
that allows seasonal movementotherwise cracks and splits are likely.
- Pros: authentic, timeless, repairable
- Cons: more tools/skill, must allow wood movement
Step 3: Prep Your Barnboard Like You Want to Keep Your Fingers
Reclaimed barn wood is gorgeous because it’s been through things. Unfortunately, one of those things may have been “hosting rusty nails” and
“wearing questionable paint from decades past.” So prep is not optional.
- Remove metal: Pull nails and staples. Sweep with a magnet or handheld metal detector.
- Clean: Dry brush + vacuum, then wipe with a lightly damp cloth. Avoid soaking old wood.
- Test old paint (if present): If you suspect old coatings, treat it seriously and consider a lead test kit.
- Sand strategically: Sand enough to remove splinters and loose grit, but don’t erase the character. Usually 80 → 120 grit is plenty for rustic texture.
Pro tip: If you want more “barn drama,” you can distress with chains, a hammer, or a metal tooljust remember you’re making it look old, not making it unsafe.
Step 4: Build a Reinforcement Frame (This Is Where the “Sturdy” Happens)
This is the step most quick hacks skipand then wonder why the table feels flimsy. Build a simple apron frame out of 1×3 or 1×4 boards that fits
just inside the perimeter of your IKEA tabletop footprint (or just inside your new top).
Basic approach:
- Measure the inside area where your frame will sit.
- Cut 2 long and 2 short apron pieces to form a rectangle.
- Join corners with pocket screws OR glue + screws (pre-drill to avoid splitting).
- Add one center brace if your top is wide or heavy.
Attach this frame to the IKEA base in a way that grabs real structure (legs or thick rails), not just thin skins. If you can’t, anchor the frame to itself
and let it become the “real” support the top fastens to.
Step 5A: Build the Panelized Barnboard Top (Recommended for Most IKEA Bases)
- Cut the subtop (plywood/MDF) to your final tabletop dimensions.
- Lay out planks in the prettiest order (flip boards around until the grain pattern feels balanced).
- Leave intentional gaps (1/16″–1/8″) if you like a rustic plank lookor butt them tight for a cleaner top.
- Glue planks down to the subtop. Use a thin, even glue layer (too much glue = squeeze-out city).
- Clamp or weight the surface flat while it dries.
- Trim edges flush with a circular saw + guide, or a router flush-trim bit if you have one.
- Add a perimeter “picture frame” (optional): mitered 1×2/1×3 trim around the edges gives a thicker, furniture-grade profile.
Step 5B: Build a Solid Wood Top (If You’re Going Full Farmhouse)
If your barnboard pieces are thick enough and reasonably straight, you can edge-glue them into a panel. Use clamps to keep boards aligned and consider biscuits/dominoes
if you have them (not required, but helpful).
After glue-up:
- Scrape glue squeeze-out while it’s rubbery.
- Flatten with a sander (or hand plane, if you’re fancy).
- Sand to your preferred smoothness (rustic can stop at 120–150 grit; smoother tops can go 180–220).
Step 6: Attach the Top Correctly (Wood Movement Matters)
If you used the panelized top, you can usually attach it more directly because the subtop is dimensionally stable.
Use screws up through the reinforcement frame into the subtop (pre-drill) and keep screw lengths appropriate.
If you built a solid wood top, do not glue or rigidly screw the entire top down across its width. Instead use:
- Figure-8 fasteners (they pivot as the top expands/contracts)
- Z-clips (they slide in a kerf/groove)
- Wooden buttons (traditional and effective)
This keeps your top from splitting when humidity changesbecause wood is basically a sponge with opinions.
Step 7: Add Details That Make It Look “Custom”
These optional upgrades take your barnwood coffee table DIY from “I glued boards to a table” to “Where did you buy that?”
- Chunky skirt/apron: wrap the sides with 1×4 boards for a thicker silhouette.
- Lower shelf upgrade: replace the shelf with barnboard slats or add trim to match the top.
- X-brace sides: farmhouse styling that also adds stiffness.
- Casters: industrial farmhouse vibe + easy cleaning underneath.
Step 8: Finishing for Real Life (Not Just “Pinterest Life”)
Coffee tables take abuse: hot mugs, cold drinks, cleaning sprays, and someone inevitably setting a pizza box down like it’s a trivet.
For durability, polyurethane is the usual winner.
Finish Paths That Work Well
- Stain + polyurethane: classic, durable, good for most looks.
- Light sanding + clear coat: preserves the weathered barnboard tone.
- Wax-only finishes: soft, matte, and cozybut higher maintenance and less resistant to spills/heat.
A practical process:
- Test stain on an offcut (barnboard absorbs unpredictablylike a toddler with a juice box).
- Apply stain, wipe off excess, let dry thoroughly.
- Apply 2–4 thin coats of protective topcoat, sanding lightly between coats (220 grit).
- Let cure fully before heavy use (dry-to-touch is not fully cured).
Common Mistakes (and How to Avoid Them)
1) “My screws won’t hold.”
You’re likely fastening into a thin or hollow area. Fix it by adding a real wood reinforcement frame and fastening into that, or by using a subtop that takes screws well.
2) “My top warped.”
Thin reclaimed planks can cup. Use the panelized method (subtop) and clamp/weight the top flat during glue-up. Seal all sides if possible.
3) “My finish looks blotchy.”
Barnboard has varied density and weathering. Use a conditioner (for certain woods), or embrace variation as “character” (the polite word for “wood doing wood things”).
4) “My top cracked later.”
That’s usually wood movement + rigid attachment. If you built a solid wood top, switch to figure-8s, Z-clips, or buttons.
Safety Notes for Reclaimed Barn Wood
If your barnboard is truly reclaimed, prioritize safety:
- Hidden metal: scan before cutting to protect blades and your face.
- Dust control: wear a respirator when sanding; reclaimed wood dust can be nasty.
- Old paint: treat unknown coatings carefully; avoid dry-sanding suspicious paint and consider testing.
- Kids/pets: keep them away from sanding dust and chips; clean up thoroughly.
FAQ
Can I do this hack without power tools?
Yes, but it’s slower. The key cuts (subtop and trim) are easiest with a saw. Many stores will cut plywood/MDF for you, and you can use pre-cut boards for trim.
Do I have to use real barn wood?
Nope. Faux barnwood planks or new wood distressed with stain can look fantastic, with fewer safety concerns and more predictable thickness.
What’s the most durable topcoat for a coffee table?
For everyday durability, a well-applied polyurethane finish is a common choice. The best one for you depends on your desired look, drying time, and odor tolerance.
Real-World Experiences: What DIYers Usually Learn After Building This Table
By far the most common “experience” people report after finishing an IKEA LACK hack with barnboard is a combination of pride and mild disbelief:
“Wait… I actually made something that looks expensive.” That feeling is realand it’s usually earned right around the moment you realize the rustic top
weighs more than the original IKEA table did in total. That’s also where the second, more practical lesson arrives: structure matters more than style.
DIYers who skip reinforcement often notice little clues in the first week: a faint creak when you set a mug down, a subtle wobble when someone leans on a corner,
or screws that seem to loosen as if the table is quietly attempting to return to the wild. The fix is almost always the same: add a real apron frame, a center brace,
or a subtop that distributes weight. Once that’s in place, the table suddenly feels “grown up,” like it’s ready for a long-term relationship and not just a summer fling.
Another frequent experience is the barnboard personality test. Reclaimed wood is charming because it’s inconsistentdifferent densities, old nail holes,
weathered soft spots, harder latewood ridges. The first time you stain it, you may think you did something wrong because one plank goes dark, another stays light,
and a third decides to look greenish in certain lighting. In reality, you’re seeing the wood’s history. Most builders end up liking the variation once the topcoat goes on,
because it reads as authentic and layered. The trick is to test your stain on scraps and decide whether you want “even and modern” or “rustic and honest.”
Finishing is where patience gets tested. Many people underestimate how long a table finish takes to cure (not just dry). The common scenario:
you apply the final coat, it feels dry, you put the table in the living room, and two days later you discover a mysterious imprintusually the bottom of a candle,
a coaster edge, or (iconic) a remote control that apparently melted into the finish. The takeaway: thin coats, light sanding between coats, and give it the full cure time
before heavy use. Your future self will thank youquietly, while setting down an iced coffee without fear.
People also learn quickly that “rustic” should still be comfortable. Barnboard can be splintery if you preserve too much texture.
A common compromise is sanding the touch surfaces a bit more (top edges and corners) while leaving deeper texture in the field. This keeps the weathered look
but makes it pleasant to live with. No one wants a coffee table that doubles as a low-grade exfoliation device.
Finally, the best experience is the one you don’t notice: a table that stays flat through seasonal humidity. Builders who use movement-friendly fasteners on solid tops
(or a stable subtop for plank overlays) often report that their table simply… behaves. No cracks, no dramatic gaps, no “why is it making that noise?”
It’s the least exciting outcomeand absolutely the best one.
Conclusion
A great IKEA hacked barnboard coffee table isn’t just a pretty topit’s the combination of smart structure, thoughtful material prep,
and a finish that matches how you actually live. Reinforce the base, choose the right top method, respect wood movement, and protect it with a durable finish.
Do that, and you’ll end up with a table that looks custom, feels solid, and tells a charming little story every time someone asks, “Where did you get this?”


