
Table of Contents >> Show >> Hide
- Why Plastic Bags Become Chaos So Fast
- The 15-Minute Reset: Declutter, Sort, and Set a “Bag Cap”
- The Best Inexpensive, Attractive, Easy Organizers
- Option A: The Tissue Box Dispenser (Free, Fast, Shockingly Cute)
- Option B: The Upcycled Canister (Oatmeal Tub, Coffee Can, or Wipes Container)
- Option C: The Wall or Cabinet-Mount Dispenser (Small Space Hero)
- Option D: The Hanging Mesh Tube (Budget-Friendly and Surprisingly Sleek)
- Option E: The Lidded Bin + Vertical “File” Method (Prettiest Under-Sink Solution)
- Make It Look Good: “Attractive” Doesn’t Have to Mean Expensive
- Realistic Ways People Reuse Plastic Bags (So Your System Earns Its Keep)
- The Recycling Reality Check (Because Not All Bags Belong in Your Bin Forever)
- The 60-Second Maintenance Routine (So This Stays Easy)
- Common Mistakes (and How to Avoid Them)
- Conclusion: The “One Container + One Rule” Strategy
- Extra: of Real-Life Experience With Plastic Bag Organization
Somewhere in America, right this minute, a cabinet door is being opened… and a flock of crinkly plastic bags
is making a break for it. If that’s your cabinet, welcome. You’re among friends.
The good news: you don’t need a custom pantry, a label maker with a PhD, or a storage system that costs more than groceries.
You need one simple rule, one container, and (optional but recommended) a sense of humor.
This guide walks you through an inexpensive, attractive, and genuinely easy way to organize plastic grocery bags
so you can actually reuse themwithout the under-sink bag monster staging a weekly rebellion.
You’ll get quick setup options, styling tricks, and a realistic plan for keeping the clutter from creeping back.
Why Plastic Bags Become Chaos So Fast
Plastic bags are the ultimate “I’ll deal with it later” item. They’re light, squishy, and oddly multiplying.
One bag becomes five. Five becomes “Why do I have a bag of bags that’s living here rent-free?”
The problem isn’t that you keep bagsit’s that you keep them without a system:
- No limit: If there’s no cap, the collection grows forever.
- No shape: Loose bags don’t stack nicely; they balloon into a tangled mess.
- No home: Under the sink becomes the default “plastic bag landfill.”
- No exit plan: Bags you don’t need stick around because you don’t know where to recycle them.
The 15-Minute Reset: Declutter, Sort, and Set a “Bag Cap”
Before you buy or DIY anything, do the reset. This is where organization stops being “Pinterest pretty”
and starts being “I can find a bag in five seconds.”
Step 1: Pull Every Bag Out (Yes, All of Them)
Lay them on the counter or floor. This is the moment you discover you’ve been quietly running a small plastic-bag museum.
Don’t panic. We’re curating.
Step 2: Toss the “Nope” Bags
Get rid of bags that are ripped, wet, sticky, or smell like last month’s takeout. If you wouldn’t want it near clean items,
it doesn’t deserve shelf space. Also: store bags out of reach of small kids and petsplastic can be a safety hazard when left loose.
Step 3: Sort by Size (Optional, but Life-Changing)
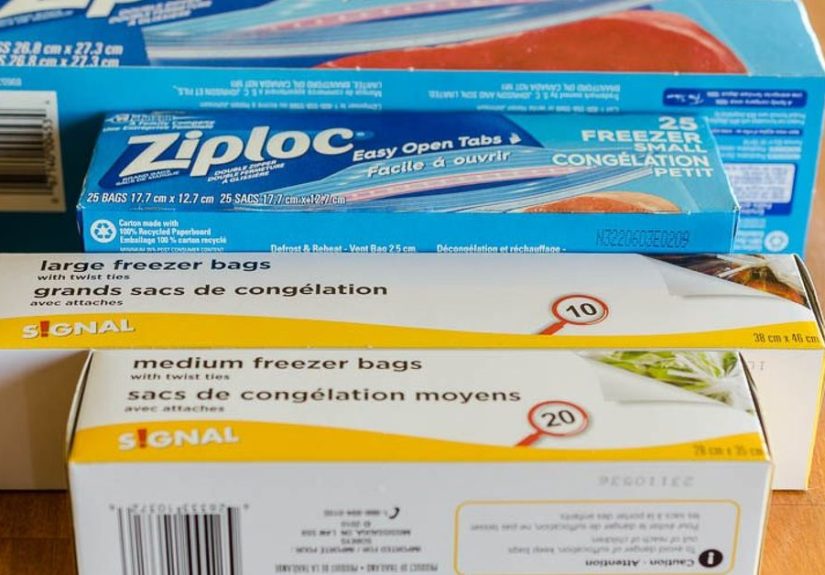
Make three quick piles: small (produce or small carryout), medium (typical grocery),
and large (big box store or sturdy takeout).
You’ll grab what you need faster, and your system won’t feel like a grab-bag lottery.
Step 4: Set a “Bag Cap”
This is the secret sauce. Pick a number you’ll keepthen stop. For most homes:
- Small household: 15–25 bags
- Average household: 25–40 bags
- Big household / frequent reuse: 40–60 bags
If you exceed your cap, it triggers an “exit plan” (reuse quickly or take extras to store drop-off recycling).
A cap turns bags from clutter into a controlled supply.
The Best Inexpensive, Attractive, Easy Organizers
You have two goals: (1) easy to load and (2) easy to grab one bag at a time.
Everything below nails thatchoose based on your space and style.
Option A: The Tissue Box Dispenser (Free, Fast, Shockingly Cute)
If you want the easiest win, this is it. An empty tissue box (or a wipe container) becomes a dispenser that keeps bags tidy
and lets you pull them out one-by-onelike tissues, but louder.
How to set it up (5–10 minutes)
- Flatten: Smooth each bag flat.
- Fold: Fold lengthwise once or twice until it’s roughly the width of the box opening.
- Chain-pack: Tuck the handles of Bag #2 into the bottom of Bag #1, then Bag #3 into Bag #2, and so on.
- Load: Feed the first bag’s handles through the slit (or opening), then slide the chain into the box.
Why it works: This method creates a neat “bag chain,” so when you pull one bag out, the next one politely shows up.
No rummaging. No avalanche. Minimal effort.
Make it prettier: Use a patterned tissue box cover, wrap the box in peel-and-stick wallpaper,
or place it inside a small basket to hide branding and add texture.
Option B: The Upcycled Canister (Oatmeal Tub, Coffee Can, or Wipes Container)
If you prefer a more durable container, a tall canister is perfect. It stands upright, takes up little space,
and looks intentionally “organized,” not “I’m hoarding bags for a future craft project.”
Best containers to repurpose
- Empty oatmeal canister (tall, sturdy, easy to label)
- Large wipes container (already designed to dispense)
- Coffee can or protein powder tub (opaque = visually calm)
How to load it
Use the same fold-and-chain method from the tissue box, then coil the chain inside the container.
Pull from the top opening. If the opening is tight, you’ll get a better “one-at-a-time” dispense.
Style tip: Wrap the canister in kraft paper, add a simple label (“Grocery Bags”), and you’ve got an organizer
that looks like it came from a home magazine instead of your recycling bin.
Option C: The Wall or Cabinet-Mount Dispenser (Small Space Hero)
Want bags off the floor and out of the sink cabinet chaos zone? Go vertical.
Wall-mounted dispensers (including simple white plastic styles) are inexpensive, clean-looking,
and great for tight kitchens because they use “dead space” on cabinet doors or pantry walls.
Where it looks best
- Inside the under-sink cabinet door
- On the side wall of a pantry
- In a laundry room (especially if bags are used for small trash bins)
- In a mudroom for wet shoes, gym clothes, or “please don’t drip on my floor” moments
How to keep it attractive: Choose a dispenser color that matches your cabinet interior (white, black, or clear),
and mount it straight (crooked is the enemy of “organized”).
Option D: The Hanging Mesh Tube (Budget-Friendly and Surprisingly Sleek)
Mesh bag holders are simple: stuff bags in the top, pull from the bottom. They’re inexpensive,
work great in utility spaces, and keep airflow moving (helpful if you occasionally store bags that might still be slightly dampthough
ideally, keep bags clean and dry).
Best for: garages, laundry rooms, pantry corners, or anywhere you want function-first with low visual clutter.
If you pick a neutral mesh and keep it tucked beside a shelf, it won’t scream, “I own 47 bags.”
Option E: The Lidded Bin + Vertical “File” Method (Prettiest Under-Sink Solution)
If you want the most polished look, use a lidded bin and store bags vertically like files.
This is the system that makes people say, “Wait… under your sink looks like that?”
How to do it
- Choose a lidded bin that fits your under-sink space (bonus points for handles).
- Fold bags into compact rectangles (or triangles if you like that method).
- Stand them upright in the bin so you can see the edges and grab one quickly.
- Label the bin (“Bags”) and close the lid for a clean look.
Why it’s great: You can cap the collection easily (when the bin is full, you’re done),
and the lid hides the visual noise of crinkly plastic.
Make It Look Good: “Attractive” Doesn’t Have to Mean Expensive
Organization feels easier when it looks intentional. Here are quick upgrades that cost little (or nothing):
- Match your materials: If your kitchen has warm wood, use bamboo or kraft labels. If it’s modern, use white or clear bins.
- Use one label style: A consistent label font or color makes everything feel calmer.
- Hide the chaos: Lidded bins, baskets, and opaque containers reduce visual clutter.
- Keep the “collection” small: The prettiest system is the one you don’t overfill.
Realistic Ways People Reuse Plastic Bags (So Your System Earns Its Keep)
You’re more likely to maintain an organizer if the bags are regularly used. Common, practical reuses include:
- Lining small trash cans (bathroom, bedroom, office)
- Picking up pet waste (with proper hygiene and disposal)
- Car trash bag (one bag in a small container makes a tidy “road trip” setup)
- Wet swimwear or muddy shoes (contain the mess)
- Protecting fragile items during storage or moving
- Donations: bagging clothes or household items (if accepted by your donation center)
The Recycling Reality Check (Because Not All Bags Belong in Your Bin Forever)
Here’s the part many people don’t realize: most curbside recycling programs do not accept plastic bags or soft plastic film.
Those bags can tangle sorting machinery and cause headaches at recycling facilities. The more common option is
store drop-off recycling (often at grocery stores and big retailers), where clean and dry bags and certain plastic films can be collected.
Quick rules of thumb
- Clean & dry matters: Food residue and moisture reduce recyclability and contaminate loads.
- Look for “Store Drop-off” guidance: Many packages and films include labels that tell you the right pathway.
- Don’t assume all soft plastics qualify: Some films do, some don’twhen in doubt, check local guidance.
Translation: your organizer should be a working supply, not a forever archive.
Your bag cap + a drop-off routine keeps things manageable and less guilt-inducing.
The 60-Second Maintenance Routine (So This Stays Easy)
The best system is the one you can maintain while half-asleep and looking for snacks. Try this:
- After unloading groceries: Immediately decide: keep for reuse or add to your “drop-off” pile.
- Once a week: Flatten and add bags to the organizer (takes one minute).
- Once a month: If you’re over the bag cap, take extras to store drop-off recycling.
Common Mistakes (and How to Avoid Them)
- Mistake: Keeping bags loose under the sink.
Fix: Use a dispenser or bin so bags have structure. - Mistake: No limit.
Fix: Set a bag cap based on your household’s actual reuse rate. - Mistake: Storing dirty bags.
Fix: Only keep clean, dry bags you’d happily touch again. - Mistake: Making the system complicated.
Fix: Pick one container and one folding method, then stop tinkering.
Conclusion: The “One Container + One Rule” Strategy
If you remember nothing else, remember this: one container and one rule.
The container gives bags a home (and makes your space look calmer). The ruleyour bag capkeeps the home from becoming a crowded dorm room.
Whether you pick a tissue box dispenser, a sleek wall mount, or a lidded bin that hides everything beautifully,
the win is the same: you’ll reuse bags on purpose, find them instantly, and stop wrestling a plastic avalanche every time you need one.
Extra: of Real-Life Experience With Plastic Bag Organization
In real homes, the “best” plastic bag organizer isn’t the fanciestit’s the one that fits how you actually live.
For example, people in small apartments often discover that under-sink space is less “storage” and more “choose-your-own-adventure”
because plumbing pipes steal most of the usable footprint. In that case, the wall-or-cabinet-mount dispenser becomes a quiet hero:
it turns a skinny cabinet door into storage, keeps bags off the floor, and makes it easy to see when you’re over your bag cap.
The biggest “aha” for small spaces is realizing that vertical storage isn’t just a style choiceit’s how you avoid crowding out cleaning supplies.
Families with kids (or just lots of daily chaos) tend to love the tissue-box method because it’s fast and forgiving.
Bags can be loaded in a couple of minutes, and anyone can pull one out without tearing the whole stash apart.
The shared experience here is that the system has to be “easy enough for the busiest person in the house.”
If only one person knows how to fold and file bags perfectly, the organizer will slowly revert to a sad pile of plastic spaghetti.
A tissue box dispenser sidesteps that problem: it’s basically self-explanatory, even on a hectic weekday.
People who reuse bags primarily for small trash cans (bathrooms, bedrooms, office bins) often prefer a lidded bin near the utility area or laundry room.
The experience is less about “pretty” and more about “I need this to be convenient when I’m cleaning.”
A lidded bin works because it holds a controlled supply without looking messy, and it prevents the common “bag drift” problem
where bags migrate from the kitchen to random closets and cars. Some households even keep two mini-supplies:
one under the sink for kitchen needs, and a small canister in the laundry room for bathroom and bedroom trash liners.
Then there’s the group that’s trying to cut down on plastic bags altogetherwhether because their town added a bag fee,
a favorite store switched to paper, or they’re leaning into reusable totes. Their experience is often a transition phase:
they still have bags to use up, but they don’t want to store a lifetime supply. For them, the “bag cap” feels especially empowering.
Once the container is full, that’s the limiteverything else goes into a dedicated drop-off pile for store recycling (clean and dry).
This approach reduces guilt because the system isn’t about hoarding; it’s about using what you have responsibly while moving toward fewer bags.
Finally, a very common experience: people stop organizing bags not because they don’t care, but because the system becomes annoying.
If the dispenser is hard to reload, it gets ignored. If bags snag every time you pull one out, you’ll abandon it.
That’s why the sweet spot is a simple dispenser plus a simple folding routinedone once a week, not every single time you come home.
In practice, the “best” organizer is the one that stays easy even when you’re tired, distracted, or juggling groceries and keys.
When the system works on your worst day, it will definitely work on your best day.


