
Table of Contents >> Show >> Hide
- Know Your Miter Saw: The Quick Overview
- 13 Tips to Master the Miter Saw in Days
- 1. Start with Safety Gear and a Clean Setup
- 2. Read the Manual and Check Calibration on Day One
- 3. Choose the Right Blade and Keep It Sharp
- 4. Master Your Stance and Never Cross Your Arms
- 5. Mark Clearly and Use Test Cuts on Scrap
- 6. Clamp the Workpiece and Keep Hands 6 Inches from the Blade
- 7. Let the Saw Reach Full Speed—and Wait for It to Stop
- 8. Use Stop Blocks for Fast, Repeatable Cuts
- 9. Support Long Boards So They Don’t Teeter
- 10. Practice Bevel and Compound Cuts Slowly
- 11. Avoid Common Beginner Mistakes
- 12. Manage Dust and Keep the Saw Clean
- 13. Build a Maintenance Routine
- Real-World Miter Saw Experiences: Learning from the “Oops” Moments
A miter saw can feel a little intimidating at first. There’s a screaming blade, a sliding arm, and more angle markings than your high school geometry exam. But here’s the good news: with a little practice and the right habits, you can go from “I’ll just use the handsaw” to confidently cutting crisp trim and picture-perfect angles in just a few days.
Think of this guide as your crash course in miter saw mastery. We’ll walk through 13 practical miter saw tips that focus on safety, accuracy, and repeatable results—the stuff pros rely on every day. Along the way you’ll learn how to set up your saw, dial in the right angles, avoid classic beginner mistakes, and keep the tool running smoothly for years.
Know Your Miter Saw: The Quick Overview
Before we dive into the tips, it helps to know what your miter saw is designed to do. A basic miter saw pivots left and right to cut angles across the width of a board. A compound miter saw also tilts (bevels) to cut angles across the thickness of the board, while a sliding version adds a front-to-back slide so you can cut wider boards, like 2x10s or 2x12s, with ease.
Most DIYers use their miter saw for interior trim, decking, framing, and DIY furniture. The big advantages are speed and repeatable accuracy—as long as you set things up correctly and follow safe technique.
13 Tips to Master the Miter Saw in Days
1. Start with Safety Gear and a Clean Setup
If you only remember one thing from this guide, make it this: personal protective equipment isn’t optional. Wear safety glasses or goggles every time you pull the trigger, and add hearing protection if you’ll be making more than a quick cut or two. Wood chips and fine sawdust travel farther than you think, and miter saws are loud enough to wear down your hearing over time.
Clear the area around the saw. No cords underfoot, no offcuts on the table, no coffee cup sitting where your board should go. A cluttered workspace is how boards bind, pieces fall, and accidents start. A minute of cleanup before a cutting session pays off in smoother, calmer work.
2. Read the Manual and Check Calibration on Day One
Factory setup is often “close,” not “perfect.” Before you trust that 0° mark, grab a good combination square and spend a few minutes checking:
- Blade to table: Lower the blade (with the saw unplugged) and place the square against the blade and the table. Adjust the bevel until it’s truly 90°.
- Blade to fence: Place the square against the fence and blade. If you see a gap, tweak the miter angle until the blade is perfectly perpendicular.
- Angle indicators: Once everything is truly square, adjust the detents or indicators so the 0° and 45° marks match reality.
It sounds obsessive, but this is how you get tight-fitting baseboards and picture frames instead of “good from far, but far from good” joints.
3. Choose the Right Blade and Keep It Sharp
The blade that came on your saw is usually a general-purpose or construction-grade blade. It’s fine for rough framing, but if you’re cutting trim, furniture parts, or plywood, upgrade to a higher-tooth-count blade designed for crosscuts and fine finish work.
A higher-quality, sharp blade:
- Reduces tear-out on the face of the board
- Requires less force to cut
- Makes the saw feel more controlled and predictable
If the saw starts burning wood, grabbing, or leaving ragged edges, it’s time for a new blade or a professional sharpening—not “one more project.”
4. Master Your Stance and Never Cross Your Arms
A stable stance keeps you in control. Stand with your feet shoulder-width apart, slightly to the side of the blade, not directly in line with it. This gives you better leverage on the handle and keeps you out of the direct line of any potential kickback.
One non-negotiable rule: never cross your arms while making a cut. Your hand that holds the workpiece should stay on the side of the fence closest to your body, while the other hand operates the saw handle. Crossing over feels awkward, reduces control, and brings your hand closer to the danger zone.
5. Mark Clearly and Use Test Cuts on Scrap
Accurate cuts start before the saw ever touches wood. Use a sharp pencil or marking knife and clearly mark your cut line, including an “X” on the waste side so you know which half of the line to keep. For critical cuts, especially miters on trim, make a quick test cut on scrap with the same thickness as your workpiece.
If your saw has a laser or shadow line, treat it as a guide, not gospel. Align the blade itself to your mark with the saw unplugged, then note where the line lands. From then on, you’ll know exactly how that laser or shadow relates to your cut.
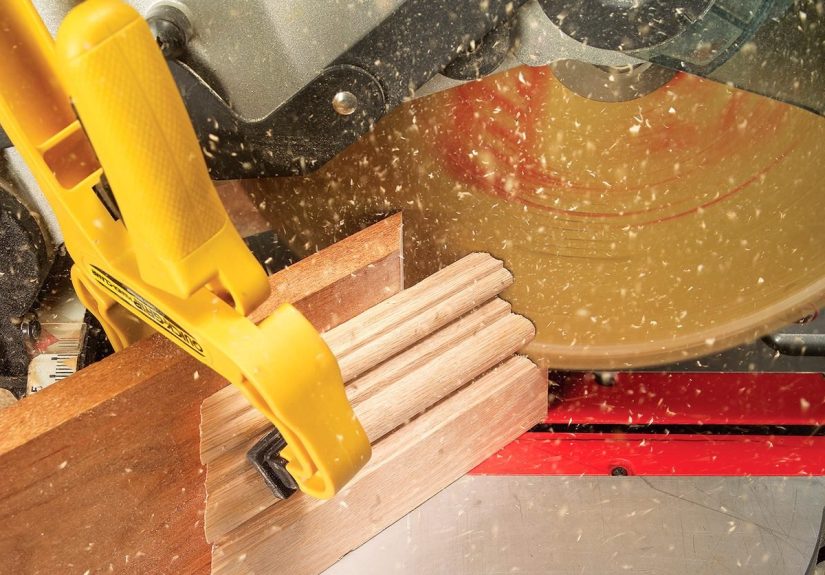
6. Clamp the Workpiece and Keep Hands 6 Inches from the Blade
Your hands are not clamps. Most miter saws include at least one hold-down clamp; use it. For wider boards or slippery materials, add a quick clamp or two to keep things steady. You want the board firmly against the fence and the table, so it can’t twist or ride up as you cut.
A simple rule many pros use: keep your hands at least 6 inches away from the blade path at all times. If a cut requires your fingers to creep closer, rethink the setup. Use a stop block, cut a longer piece and trim later, or switch tools. Tiny offcuts and short pieces are where “that was close” stories usually begin.
7. Let the Saw Reach Full Speed—and Wait for It to Stop
Resist the urge to “bump cut” or plunge before the blade is up to speed. Instead:
- Bring the blade down just above the board.
- Pull the trigger and let the blade reach full speed.
- Lower the blade in a smooth, controlled motion straight through the cut.
Once you’re through the wood, keep the blade down and let it come to a complete stop before lifting it back up. Raising a spinning blade through the kerf can catch the offcut and send it flying or pull the board into the blade.
8. Use Stop Blocks for Fast, Repeatable Cuts
One of the biggest advantages of a miter saw is repeatability. If you need ten pieces all at 24-3/8 inches, you don’t want to measure and mark each one. Instead, clamp or screw a stop block to your saw stand or fence at the exact length you need.
Slide each board against the stop, make your cut, and move on. This saves time, reduces measuring mistakes, and ensures every board is exactly the same length—perfect for stair treads, deck balusters, or trim runs.
9. Support Long Boards So They Don’t Teeter
Long lumber hanging off the saw table acts like a lever. If one end dips, the cut can pinch the blade or wander off your line. Use extension wings, roller stands, or even a couple of sturdy sawhorses with scrap boards to create a level “runway” on both sides of the saw.
Your goal: the board should sit flat and stable without you needing to constantly lift or hold the far end. When the work is supported, you can focus on accuracy and safety instead of wrestling gravity.
10. Practice Bevel and Compound Cuts Slowly
Bevel and compound cuts are where your miter saw really shines—and where beginners often get nervous. Start simple:
- Practice basic 45° miters with the blade square (0° bevel).
- Then practice bevel cuts with the miter at 0° and the blade tilted left or right.
- Finally, combine both for compound cuts used in crown molding and complex trim.
Always return the saw to “home base” (0° miter, 0° bevel) after experimenting. This makes it less likely you’ll forget the saw is tilted and accidentally ruin the next “normal” cut—or a nice piece of lumber.
11. Avoid Common Beginner Mistakes
A few habits separate clean, accurate cuts from “what just happened?” moments:
- Don’t rush. Rushing leads to misaligned boards, crooked cuts, and dangerous binding.
- Don’t cut freehand. The board should always be flat on the table and tight to the fence.
- Don’t cut pieces that are too short to control. When in doubt, cut a longer piece and trim to size using another method.
- Don’t ignore the kerf. The blade removes material. Decide if your line is on the “keep” or “waste” side, and position the blade accordingly.
Most “miter saw disasters” come from rushing and improvising. Slow down, think through the cut, and make adjustments before you pull the trigger.
12. Manage Dust and Keep the Saw Clean
Miter saws are notorious sawdust generators. If your saw has a dust bag, use it, but know that it only catches a portion of the dust. For a cleaner shop and healthier lungs, connect the saw to a shop vacuum or dust collection system whenever possible.
After a cutting session, brush or vacuum sawdust from:
- The miter scale and detents
- The fence, table, and slide rails
- Any moving joints or pivot points
Dust buildup can interfere with smooth sliding and accurate angle settings. A clean saw is a happier, more accurate saw.
13. Build a Maintenance Routine
Treat your miter saw like the power tool MVP it is, and it will treat you well in return. A simple maintenance routine can be done in under 15 minutes:
- Inspect the cord for nicks or damage.
- Check the blade for missing or chipped teeth.
- Lightly lubricate slide rails and moving parts according to the manufacturer’s instructions.
- Confirm calibration (blade square to table and fence) every few projects.
- Store the saw in a dry, covered space to prevent rust and corrosion.
These small habits keep your cuts accurate and your saw feeling smooth and predictable every time you fire it up.
Real-World Miter Saw Experiences: Learning from the “Oops” Moments
You can read every miter saw guide on the internet and still learn the most from that first “why doesn’t this trim line up?” moment. Here are a few real-world scenarios that help you shortcut some of those growing pains.
The Case of the Gappy Baseboards
Picture this: you’ve cut and nailed your baseboards, step back, and notice little V-shaped gaps in the inside corners. Classic beginner headache. Nine times out of ten, the issue isn’t your measuring—it’s that the saw wasn’t perfectly square or the corner of the room isn’t actually 90°.
The fix? First, re-check your calibration with a square. Then, test-cut a couple of short scraps at slightly different angles (say 44° and 46°) and hold them against the wall corner. When the pieces meet perfectly, you’ve discovered the “real” angle of that corner. Use that setting for all your cuts in that room.
The Floating Crown Molding
Crown molding introduces compound angles, which can turn anyone’s brain into sawdust. Many DIYers start by trying to calculate every angle; most end up frustrated. A more forgiving approach is to cut crown molding “nested” (held upside down against the fence, like it will sit on the wall) and to use a dedicated jig or stop that matches your crown’s spring angle.
The experience most people have is this: the first few pieces don’t fit quite right, you tweak one degree here or there, and suddenly everything clicks. The lesson is simple: take the first couple of cuts as learning experiments, not failures. Once you have a working combination of miter and bevel angles, write them down or mark them on blue tape stuck to the saw base.
The “Why Is My Cut Wandering?” Mystery
Another common story: you line up your cut perfectly, but the blade drifts off the line as you cut. The culprit is often a mix of three things:
- A dull or inappropriate blade for the material
- Too much sideways pressure on the board
- Not allowing the blade to do the work at full speed
The practical fix is surprisingly simple: upgrade or sharpen the blade, clamp the workpiece, and let the saw reach full speed before you cut. Then, drop the blade straight down and avoid “steering” the saw mid-cut. After a few properly set-up cuts, you’ll feel the difference immediately.
The Confidence Jump
For many DIYers, there’s a specific project where everything suddenly feels easier. It might be a new deck, a room full of trim, or a simple bench where every board fits tight. That jump in confidence usually happens after a few consistent habits stick:
- Always checking the blade and angles before a project
- Using stop blocks instead of measuring every piece
- Clamping instead of “just holding it”
- Taking the extra 10 seconds to do a test cut
The miter saw hasn’t changed. You have. And once those habits become muscle memory, using the saw feels less like wrestling a loud machine and more like pointing a laser at a line and making it disappear.
If you’re just starting out, give yourself a simple challenge: pick a small project—a shelf, a picture frame, or a basic bench—and commit to using the good habits from this guide on every single cut. By the time you’re done, you won’t just “own” a miter saw. You’ll actually know how to use it like a pro.
SEO JSON (for reference / extraction)


