
Table of Contents >> Show >> Hide
- First, What “Self-Tapper” Actually Means (and What It Doesn’t)
- Why People Use Inserts in the First Place
- When You Can Skip Inserts and Use Self-Tappers Instead
- When Inserts Still Beat Self-Tappers (Yes, Sometimes You Need the “Extra Part”)
- The “Prepared” Part: A Practical Checklist That Makes Self-Tappers Work
- Specific Examples: What This Looks Like in Real Builds
- Troubleshooting: Common Failures and Fast Fixes
- Conclusion
- Field Notes: of Real-World Self-Tapper Experience
Threaded inserts are great. They’re also one more part to buy, one more operation to perform, and one more chance for a production line (or your weekend project) to turn into a small soap opera.
The good news: in a lot of real-world builds, you can skip inserts entirelyif you’re willing to do the unglamorous prep work that makes self-tapping screws behave like civilized fasteners.
This article is your practical guide to knowing when self-tappers can replace inserts, when they absolutely shouldn’t,
and how to set up your parts so you get strong threads without cracking, stripping, or that “why is everything wobbly now?” feeling.
We’ll keep it technical, specific, and just funny enough to keep you awake.
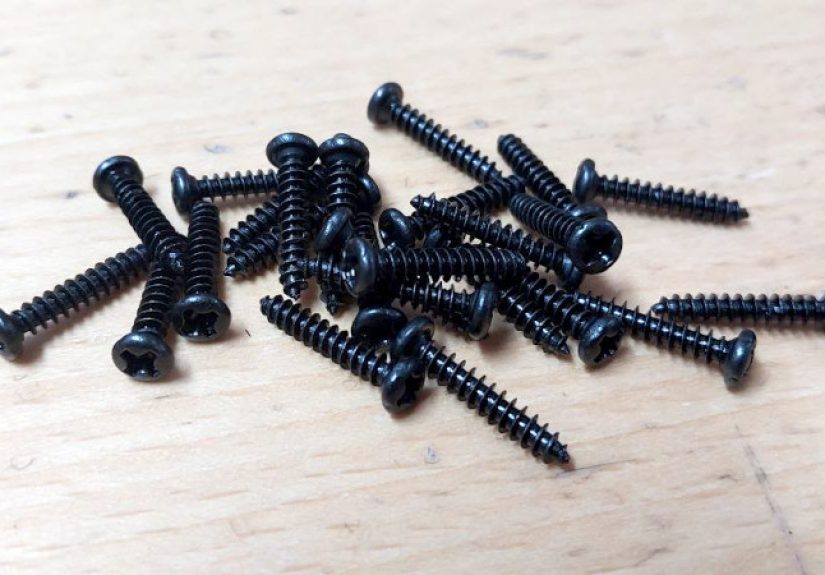
First, What “Self-Tapper” Actually Means (and What It Doesn’t)
“Self-tapping screw” is a broad label people slap on anything that looks confident. In practice, it usually means a screw that creates (or forms) internal threads in the base material during installation,
instead of requiring a pre-tapped hole.
Thread-forming vs. thread-cutting: the personality test
Self-tappers generally fall into two families:
- Thread-forming screws displace material to form threads. They don’t remove much material; they reshape it. This is often ideal for more ductile materials and can improve resistance to loosening because the formed threads “hug” the screw.
- Thread-cutting screws remove material to create threads. They’re doing a tiny machining operation as you drive them in, which can reduce radial stress in some casesbut also produces chips and can be less forgiving if the geometry is wrong.
Self-tapping vs. self-drilling: similar vibes, different job
Self-drilling screws (think TEK-style) have a drill-point tip that can create the pilot hole and the threads in one gooften used in sheet metal and structural attachments.
Self-tapping screws typically still assume you’ve provided a pilot hole (unless you’re using a point style designed to pierce thinner materials). Translation: “self-drilling” is about making the hole; “self-tapping” is about making the threads.
Why People Use Inserts in the First Place
Inserts exist because some base materialsespecially plastics, particleboard, soft metals, and thin sectionsdon’t love being threaded directly.
Inserts give you durable machine threads, better wear resistance, and more predictable performance when you need repeated assembly/disassembly.
If you’re building something that will be opened a hundred times, sees high clamp loads, or lives under vibration and heat, inserts can be the grown-up choice.
But if your assembly is low-cycle, cost-sensitive, or needs speed (prototyping, field repair, short runs), self-tappers can be a smarter, simpler system.
When You Can Skip Inserts and Use Self-Tappers Instead
The sweet spot is: moderate loads, limited rework, and a base material thick enough to develop meaningful thread engagement.
Here are scenarios where self-tappers often win.
1) Sheet metal assemblies and enclosures
HVAC ducting, electrical cabinets, brackets, appliance panelsself-tapping and self-drilling screws are classics here.
You’re often joining thin stock where a traditional tapped hole is either impractical or too expensive.
With the right screw and the right pilot (or drill tip), you get fast assembly with minimal tooling.
2) Plasticsespecially prototypes and “closed-for-life” products
For one-time assembly (or a couple service cycles), self-tapping screws designed for plastic can be an efficient alternative to heat-set or press-in inserts.
This is especially common in prototypes and early production, where you want to avoid secondary operations and keep iteration fast.
3) Wood and composites where you’d rather not add hardware
In many woodworking builds, the insert is less about strength and more about reusability. If you don’t need repeated removal,
a properly sized pilot hole and a suitable screw often beat installing insertsparticularly in softwoods and plywood where inserts can split layers if installed aggressively.
4) Soft metals (in the right thickness)
Thread-forming screws are commonly used in softer metals like aluminum, brass, and copper alloys when the part geometry supports it.
Instead of cutting threads (and producing chips), the screw forms the thread profile, which can improve speed and reduce operations in production.
When Inserts Still Beat Self-Tappers (Yes, Sometimes You Need the “Extra Part”)
Self-tappers are not magic. They’re more like a very capable intern: excellent with direction, chaotic without it.
Consider inserts (or other strategies like captured nuts) when:
- High service cycles: frequent removal/reinstallation can degrade threads in softer substrates over time.
- High clamp loads: you need strong, stable preload without crushing or creeping the base material.
- Plastics under sustained load: creep/stress relaxation can reduce clamp force, encouraging loosening.
- Thin walls/bosses: not enough material for reliable thread engagement or crack resistance.
- Critical alignment: you can’t tolerate the variability that comes with threads formed in-place.
The takeaway: self-tappers are amazing when the joint is designed for them. Inserts are amazing when the joint can’t be redesignedand must survive harsh realities.
The “Prepared” Part: A Practical Checklist That Makes Self-Tappers Work
Here’s the prep that separates “clean, strong joint” from “why is my boss split in half?”.
1) Pick the right screw for the material
- Plastic: prefer screws engineered for plastics (often thread-forming profiles that reduce cracking and improve strip-out resistance).
- Sheet metal: choose the correct style (self-tapping with pilot hole, or self-drilling if appropriate for the thickness/material).
- Wood: use wood screws or sheet-metal style screws depending on the substrate and application; don’t assume “any screw is fine” unless you like surprises.
2) Get the pilot hole right (this is 80% of the battle)
Pilot holes aren’t just about “making it easier.” They control:
- Driving torque (too high and you strip or split)
- Thread engagement (too large and you lose holding power)
- Stress in the boss (too small and you invite cracking)
As a general rule, the pilot hole is typically sized between the screw’s minor and major diametersthen adjusted based on material stiffness and desired thread engagement.
Manufacturer charts (and a small amount of testing) are your best friends here.
3) Design a boss that won’t crack (plastics)
A plastic boss is basically a tiny pressure vessel once you drive a screw into it.
You want enough wall thickness to resist hoop stress, and enough depth to develop thread engagementwithout bottoming out and “jacking” the boss apart.
Practical boss tips:
- Use generous fillets at the boss base to reduce stress concentration.
- Provide adequate boss OD (outer diameter) relative to the screw size.
- Keep the hole deep enough so the screw doesn’t bottom out; bottoming out can turn clamp load into destructive wedging.
- Use ribs/gussets if the boss is tall and slender (tall skinny bosses love to snap when you least need drama).
4) Control torque like you mean it
If you take one “pro” habit into every self-tapper job, make it this: use torque control.
Over-tightening is the fastest way to strip formed threads, especially in plastic and thin metal.
Tips that work:
- Use a clutch driver (or a torque-limiting screwdriver) when possible.
- Drive straightcam-out and wobble destroy thread quality.
- Use consistent speed; too fast can overheat plastic, too slow can chew it up depending on the screw profile.
5) Plan for service: re-entry without regret
If your product will be opened occasionally, you can often still use self-tappersjust be intentional:
- During reassembly, rotate the screw backward until it “drops” into the existing thread path, then tighten. This helps avoid cutting new threads and weakening the joint.
- Limit the number of service cycles you expect; if it’s high, move to inserts or captured hardware.
- Consider using a larger boss or a screw designed specifically for repeated use in plastics if serviceability matters.
Specific Examples: What This Looks Like in Real Builds
Example A: 3D-printed enclosure (prototype phase)
You’ve got a PLA or ABS enclosure for a prototype. You want to open it maybe 2–5 times during testing.
Heat-set inserts are great, but they add tooling, time, and risk (overheating, poor alignment).
A plastic-friendly self-tapper plus cleanly printed pilot holes can be faster and cheaperespecially if you’re iterating on geometry weekly.
The “prepared” part is making sure the boss is thick enough, the pilot hole isn’t undersized, and you’re driving with controlled torque.
Example B: Sheet metal bracket to thin-gauge steel
If you’re attaching a bracket into thin sheet, you might choose a self-drilling screw to eliminate a separate drilling step.
If a pilot hole is already present (punched or drilled), a self-tapping screw matched to the hole size can be a clean solution.
Your success hinges on matching screw type to thickness and using a driver that won’t over-torque and strip the threads in thin material.
Example C: Cabinet hardware into plywood
Threaded inserts can be useful for knock-down furniture that’s assembled repeatedly.
But for fixed cabinetry, a properly sized pilot hole and an appropriate screw often outperforms inserts on cost and speedwithout introducing another failure mode (insert spin-out, splitting, or misalignment).
Troubleshooting: Common Failures and Fast Fixes
“The screw spins but won’t tighten.”
- Cause: stripped threads from over-torque or oversized pilot.
- Fix: step up screw diameter (if geometry allows), switch to an insert, or redesign boss/hole. In wood, a dowel-and-redrill repair often works.
“The plastic boss cracked.”
- Cause: pilot too small, boss too thin, or wrong screw profile creating excessive radial stress.
- Fix: increase pilot size slightly, increase boss OD, add fillets/ribs, or change to a plastic-optimized thread-forming screw.
“It worked… until it loosened.”
- Cause: stress relaxation/creep in plastic, inadequate clamp load retention, vibration.
- Fix: consider a different joint strategy (insert + compression limiter in plastics, threadlocker where appropriate, or geometry that maintains preload).
Conclusion
Inserts are not mandatory. They’re a toolsometimes the right one, sometimes overkill.
If you’re prepared to use self-tappers the right way, you can often skip inserts and still get a strong, repeatable joint:
choose the correct screw type, size the pilot hole intentionally, design the boss like it matters (because it does),
and control torque like you’re paid per un-stripped thread.
Do those things and self-tappers stop being “the cheap option” and start being what they really are:
a fast, reliable fastening system that can simplify manufacturing, prototyping, and repairwithout a bag of extra hardware.
Field Notes: of Real-World Self-Tapper Experience
The first time you decide to “skip the inserts,” it usually feels like you’re cheating. Like you’re building something that will immediately fall apart in the presence of mild disappointment.
Then you drive the first screw, it bites cleanly, the parts snug together, and you think: “Wait… that’s it?” That’s also the moment you’re most at riskbecause confidence is how over-torque happens.
In plastic housings, the biggest lesson is that the boss is the joint. People obsess over screw length and forget the boss geometry is doing all the heavy lifting.
A boss that’s too thin is basically a timed puzzle: it will survive assembly, pass a quick shake test, and crack the moment you ship it across the country in winter.
When I’ve seen “mystery cracks,” the root cause is usually a pilot hole that’s just a hair too small paired with a fast driver and a user who thinks “tight” is a feeling, not a torque value.
On prototypes, especially 3D prints, self-tappers are the ultimate speed hackif you treat them like prototypes, too.
Print a small test coupon with a few pilot hole sizes, drive the same screw into each, and note the torque feel and the thread quality.
It’s fifteen minutes that saves hours of redesign later. For early runs, I’ve watched teams waste time installing heat-set inserts into parts that were redesigned twice a week.
Self-tappers let you move fast, learn fast, and only “graduate” to inserts when the design stabilizes.
In sheet metal, the experience is almost the opposite: you can get away with a lotuntil you can’t.
Self-drilling screws feel magical right up to the point where the material is thicker than you thought, the drill tip overheats, and suddenly you’re polishing a shiny divot instead of making a hole.
That’s where prep matters: confirm thickness, choose the right point style, and don’t pretend one screw fits every gauge. Also: keep the driver aligned.
A slight angle can turn a clean thread into a stripped mess faster than you can say “I swear it was straight.”
The most satisfying self-tapper moments happen in repair work. When a tapped hole is damaged or you don’t have the right tap on hand,
a properly chosen self-tapper can get equipment back online quickly. But the best repairs still respect the fundamentals:
correct pilot size, controlled torque, and enough engagement depth to hold under real loads.
The meta-lesson from all of this is simple: self-tappers aren’t “shortcut screws.” They’re “design-for-assembly” screws.
When you design and prep for them, they perform like a systemnot a gamble.


