
Table of Contents >> Show >> Hide
- What “Industrial Farmhouse” Actually Means (So You Don’t Accidentally Build a Conference Table)
- Choose Your IKEA “Core” (The Part That Makes This a Hack)
- Pick a Base That Screams “Custom” (Not “Temporary”)
- Size & Layout: Build a Table That Fits Humans, Not Just Your Pinterest Board
- Step-by-Step Build: The IKEA Industrial Farmhouse Table Hack
- Tools & supplies (basic, not scary)
- Step 1: Plan the base placement (and save your knees)
- Step 2: Reinforce the underside (optional but often worth it)
- Step 3: Pre-drill pilot holes (your future self will thank you)
- Step 4: Attach the base the smart way (allow for wood movement)
- Step 5: Level it like you mean it
- Finishing: How to Get the “Heirloom” Look Without the “Sticky Table” Experience
- Styling Your Table So It Reads “Industrial Farmhouse” Instantly
- Common Problems (and the Non-Dramatic Fixes)
- Budget Reality Check (Because Math Is Part of DIY)
- of Real-World Experience (The Stuff People Learn After the Photos)
- 1) The base matters more than you think
- 2) You’ll care about overhang the first time someone bumps the table
- 3) “Dry” isn’t “cured,” and your patience will be tested
- 4) The prettiest stain color is the one you tested first
- 5) A slightly softer sheen looks more expensive
- 6) Leveling is not optional (unless you enjoy chasing rolling pencils)
- 7) The table becomes a “life surface,” so protect it accordingly
- 8) The best compliment is “Where did you buy that?”
You know that feeling when you see a rugged, wood-and-metal “industrial farmhouse” dining table online and think,
“Wow. That’s gorgeous. Also, that’s definitely more than my car payment.”
Good news: you can get the same vibe (warm wood + black metal + “I could host Thanksgiving on this thing” sturdiness)
by combining a few smart IKEA components with a little DIY finesse.
This guide walks you through building an industrial farmhouse table using an IKEA “core” (usually a countertop or tabletop)
and a base that looks customwithout requiring a workshop, a lumberyard friendship, or a dramatic montage set to rock music.
You’ll get practical sizing tips, base options, finishing advice, and real-world lessons so your table ends up looking intentional,
not “I assembled this at 2 a.m. and now it wobbles when someone looks at it.”
What “Industrial Farmhouse” Actually Means (So You Don’t Accidentally Build a Conference Table)
Industrial farmhouse style is a mash-up: farmhouse brings warmth, natural wood grain, and “come sit awhile” comfort;
industrial brings black metal, clean lines, and a slightly utilitarian edge. A great industrial farmhouse table typically has:
- A substantial top (thicker-looking wood, butcher-block vibes, or a convincing wood tone)
- Simple, sturdy legs (matte black metal, steel pipe, or a trestle base with dark hardware)
- Honest materials (wood grain that looks like wood, not “printed wood cosplay”)
- Durability (because tables aren’t just for dinnerthey’re for homework, crafts, and the occasional life crisis)
Choose Your IKEA “Core” (The Part That Makes This a Hack)
The fastest way to a high-end look is starting with a quality, heavy top. IKEA’s countertop-style pieces are popular because
they’re wide, sturdy-looking, and budget-friendly compared to custom slabs.
Option A: Countertop-as-Tabletop (Most “Industrial Farmhouse” for the Effort)
If you want that modern farmhouse “butcher block” look, an IKEA countertop is your best friend. Countertops often have a thicker profile,
which reads more “custom dining table” than “I borrowed this top from a desk.”
- Wood-look veneer countertops (great for clean, modern grain and consistent color)
- Solid-wood or thick-veneer styles (more sandable and durable long-term)
- Dark walnut tones (instant industrial edge when paired with matte black legs)
Pro tip: Pick your top first, then choose a base that matches its weight and width. A table is basically a trust exercise:
the top trusts the base not to betray it in front of guests.
Option B: Solid-Wood Tabletop (If You Find One or Already Own One)
Solid wood is wonderful for farmhouse style because it can be stained, sanded, and refinished. If you already have an IKEA wood tabletop,
you can absolutely upgrade it into something that looks handcrafted.
Solid wood does expand and contract with humidity (because wood is a living drama queen), so your attachment method matters.
More on that in the build steps.
Option C: Two Tops, One Longer Table (For Big Rooms or Big Plans)
Want seating for eight without paying “wedding venue” prices? You can join two tops end-to-end.
The key is reinforcement underneath (cleats, mending plates, or a support frame) so the seam doesn’t become the table’s personality.
Pick a Base That Screams “Custom” (Not “Temporary”)
The base is where industrial farmhouse style really shows up. You’re aiming for sturdy, simple geometry and dark hardware.
Here are the most popular approachesranked from easiest to “still totally doable.”
Base Idea 1: Matte Black Metal Legs (Fast, Clean, Modern)
This is the shortcut that looks like you ordered a designer table on purpose. Choose a leg style that fits your vibe:
- Square tube legs for a minimalist industrial look
- Hairpin legs for a lighter, mid-century-leaning farmhouse blend
- X-frame or U-frame legs for a more “statement” industrial feel
If your top is heavy (like a countertop), choose legs rated for the load and wide enough to prevent wobble.
Skinny legs under a heavy top is how you create suspense in your dining room.
Base Idea 2: “Pipe” Base (Peak Industrial, Surprisingly Affordable)
Steel pipe bases are the signature move for industrial farmhouse builds. They look rugged, feel solid, and have that workshop vibe.
You can assemble a pipe frame using pre-cut lengths and fittings, then attach it to the underside with flanges.
Design note: Keep the pipe lines simplerectangles and straight runs. Overcomplicated pipe geometry can start to look like
a science fair project (which is fun, but not always the goal).
Base Idea 3: Trestle Base (Farmhouse Energy, Industrial Hardware)
A trestle base leans farmhouse immediately. To make it feel industrial farmhouse, pair a chunky wood trestle shape with:
black corner brackets, visible bolts, or matte black stretcher hardware. You get warmth plus edgelike a cozy cabin that listens to metal.
Base Idea 4: Storage Base (Functional Farmhouse, Slightly Sneaky)
If you want storage, you can use drawer units or cabinet-like bases under a countertop top, then finish the look with
a centered stretcher or apron so it reads as a “table,” not “desk cosplay.”
Bonus: Storage-base tables are amazing for small spaces where the table needs to do double duty (dining + homework + craft zone).
Size & Layout: Build a Table That Fits Humans, Not Just Your Pinterest Board
Before you buy anything, measure your room. Industrial farmhouse tables tend to look best when they’re substantial
but “substantial” should not mean “I now have to shimmy sideways into my own kitchen.”
Quick sizing guidelines
- Table height: Typical dining tables land around 29–30 inches high. Match your chairs.
- Seat spacing: Plan roughly 24 inches of table edge per person for comfortable elbow room.
- Clearance: Aim for about 36 inches from table edge to wall/furniture so chairs can slide out.
- Top width: Around 30–36 inches is comfortable for place settings while still allowing conversation.
Step-by-Step Build: The IKEA Industrial Farmhouse Table Hack
This is the general build flow, whether you’re using a countertop top with metal legs, a pipe base, or a trestle setup.
Adjust to your exact partsbut keep the logic.
Tools & supplies (basic, not scary)
- Measuring tape, pencil, and painter’s tape
- Drill/driver with bits (including a small bit for pilot holes)
- Clamps (helpful for joining or reinforcing tops)
- Sandpaper (or a sanding block) in a few grits
- Screws appropriate to your top thickness (do not “guess and hope”)
- Mounting hardware: brackets, flanges, figure-eight fasteners, or tabletop fasteners
- Finish: stain (optional), plus a protective topcoat (recommended)
- Felt pads (because floors deserve rights, too)
Step 1: Plan the base placement (and save your knees)
Flip your top upside down on a soft surface. Mark where the legs/base will go.
Keep legs far enough in from the corners that people won’t kick them constantly, but far enough out to prevent wobble.
If you’re using a countertop with an overhang, add support where needed. A long unsupported overhang can sag over time,
especially with heavy use (or if someone sits on itno judgment, just physics).
Step 2: Reinforce the underside (optional but often worth it)
If your top is long or you’re joining two pieces, reinforce underneath using:
a simple wood cleat, a metal mending plate, or a slim support frame.
Reinforcement keeps seams aligned and reduces “table flex,” which is not the vibe.
Step 3: Pre-drill pilot holes (your future self will thank you)
Pilot holes reduce splitting and make screw placement more accurate.
Use a bit slightly smaller than your screw diameter, and keep depth under control.
If you’re using a veneer top, you especially want clean, controlled drilling.
Step 4: Attach the base the smart way (allow for wood movement)
Wood expands and contracts across the grain. If you rigidly lock a solid-wood top to a base,
you can invite warping or cracking. The safer approach is using hardware that allows a little movement, such as:
- Figure-eight fasteners (great for wood tops and wood frames)
- Tabletop fasteners (designed specifically for this job)
- Slotted brackets (allow slight shift while staying secure)
If you’re using metal legs with mounting plates, follow the plate’s hole pattern and use screws sized for your top.
Too long = screw poking through. Too short = wobbly regret.
Step 5: Level it like you mean it
Set the table upright and check for wobble. Adjustable feet are a hero featureespecially on older floors.
If you don’t have adjustable feet, add furniture levelers or discreet shims.
Industrial farmhouse style says “effortless,” not “earthquake chic.”
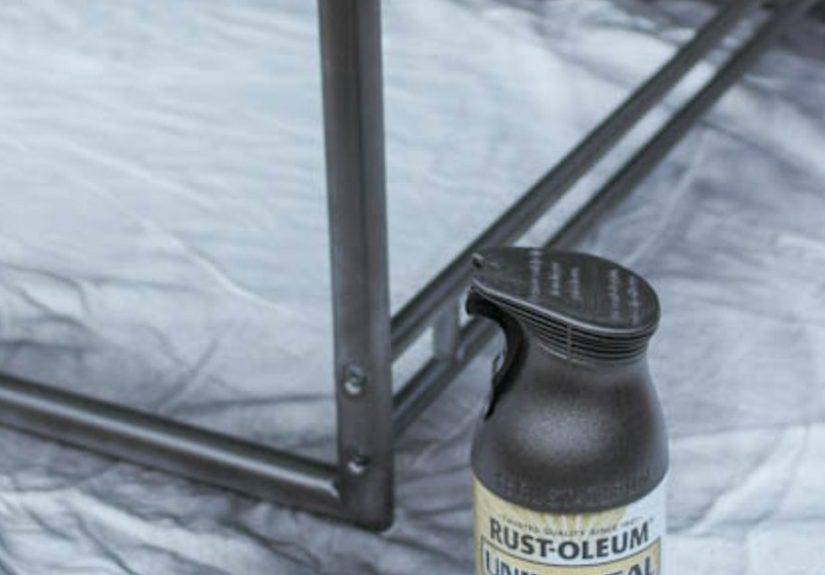
Finishing: How to Get the “Heirloom” Look Without the “Sticky Table” Experience
A great finish is what makes your IKEA industrial farmhouse table hack feel truly custom.
It also protects the surface from water rings, hot mugs, and the mysterious sauce splatter that appears even when nobody cooked.
Choose your finish strategy
- Clear coat only: Keeps the current tone, adds protection. Great if your top already has a beautiful color.
- Stain + clear coat: Best for matching existing furniture or warming/cooling the wood tone.
- Oil-and-wax style finish: Very natural look, easy to refresh, but needs periodic maintenance.
Food-safe, kid-safe, life-safe: a practical note
Many finishes are considered safe once fully cured, but “dry to the touch” is not the same as “cured.”
If this table will be used for food, give your finish the full curing time recommended by the manufacturer
before putting it into heavy service.
A smoother finish with fewer tears
- Sand in stages: Don’t jump from rough sanding to fine finishing in one leap. Gradual grit changes look better.
- Remove dust: Wipe or vacuum between coats so you’re not sealing in crumbs of your own effort.
- Thin, even coats: Thick coats can drip, gum up, or cure unevenly.
- Light sand between coats: Helps the next layer bond and reduces brush marks.
Styling Your Table So It Reads “Industrial Farmhouse” Instantly
Once the build is done, styling seals the deal. The easiest way to hit the industrial farmhouse note is contrast:
warm wood + black metal + simple, textured décor.
Fast styling wins
- Chairs: Mix black metal chairs with one or two upholstered end chairs for comfort.
- Lighting: Industrial pendants or a black chandelier anchors the look above the table.
- Centerpiece: A simple tray, a low vase, or a rustic bowl keeps it casual and functional.
- Textiles: A linen runner softens the metal and makes the table feel welcoming.
Common Problems (and the Non-Dramatic Fixes)
Problem: The table wobbles
- Check that all screws are snug (not stripped).
- Add adjustable feet or levelers.
- Move legs slightly wider if the base is too narrow for the top.
Problem: The top looks “flat” or cheap
- Add a thicker-looking edge trim (carefully) or choose a thicker top next time.
- Use a satin or matte finish for a more natural, high-end look.
- Style with contrast: black hardware, darker chairs, textured runner.
Problem: The finish shows water rings
- Upgrade to a more protective topcoat, or add an extra coat after a light scuff-sand.
- Use coasters (the most boring advice that works the best).
Problem: The seam between two tops is obvious
- Reinforce underneath and re-clamp to align.
- Use a wood filler matched to the stain (sparingly).
- Place a runner or centerpiece strategically (interior design is also problem-solving).
Budget Reality Check (Because Math Is Part of DIY)
One reason this hack is so popular: it scales to your budget. You can go basic and sturdy, or upgrade the base and finish
for a “boutique furniture store” look.
| Item | Budget Range | Notes |
|---|---|---|
| Tabletop (IKEA countertop/tabletop) | $100–$400+ | Heavier tops look more high-end and feel sturdier. |
| Base (metal legs / pipe / trestle) | $60–$250+ | Metal legs are easiest; pipe bases are industrial; trestles lean farmhouse. |
| Hardware | $10–$40 | Brackets, fasteners, screws, levelers. |
| Finish | $20–$80 | Stain + protective topcoat makes the table last longer and look better. |
of Real-World Experience (The Stuff People Learn After the Photos)
Here’s what DIYers commonly discover after building an IKEA industrial farmhouse table hackaka the “wisdom section”
that doesn’t always make it into a glamorous reveal.
1) The base matters more than you think
A gorgeous top on a flimsy base is like a blockbuster movie with a shaky camera: technically impressive, emotionally stressful.
If your top is heavy (countertops usually are), pick legs or a frame that is genuinely rated for the weight and has a footprint
wide enough to feel planted. If you’re unsure, go sturdier. Nobody has ever said, “Ugh, my table is too stable.”
2) You’ll care about overhang the first time someone bumps the table
Big overhangs look sleek, but too much unsupported overhang can invite saggingespecially if the table becomes a homework-and-leaning zone.
If you love the overhang look, build in support: a center stretcher, a discreet brace, or a base that reaches closer to the edges.
Your table should feel confident, not delicate.
3) “Dry” isn’t “cured,” and your patience will be tested
Finishes can feel dry quickly, but curing takes longer. If you rush and start using the table too soon, you might end up with
impressions from plates, tacky spots, or a finish that marks easily. The best move is giving your finish a proper cure window,
then letting the table live its best life. Think of curing time as a tiny investment that prevents months of annoyance.
4) The prettiest stain color is the one you tested first
Stain can look wildly different depending on the wood tone, grain, and previous treatment of your surface.
The “perfect walnut” you saw online can become “mysterious swamp brown” if you skip testing.
Always test on an inconspicuous underside area or a scrap piece. This is the DIY version of checking your outfit in natural light.
5) A slightly softer sheen looks more expensive
High-gloss finishes can make a table look a little “plastic,” especially under bright overhead lights.
Satin or matte often reads as more natural and upscale. It also hides everyday micro-scratches better,
which is useful if your table will actually be used like a table.
6) Leveling is not optional (unless you enjoy chasing rolling pencils)
Even a well-built table can wobble if your floor is unevenwhich is common in real homes.
Adjustable feet or levelers are small upgrades with huge quality-of-life payoff.
If you’re building a table for a rental or an older home, plan for leveling from the start.
7) The table becomes a “life surface,” so protect it accordingly
People think “dining table,” but reality is “everything table.” It becomes the mail station, craft station, snack station,
laptop station, and occasionally the “I need to spread out my entire existence” station.
A durable protective topcoat and easy-clean surface will matter more than the trendiest shade of stain.
8) The best compliment is “Where did you buy that?”
And the best response is a casual shrug followed by, “Oh, it’s a little IKEA industrial farmhouse table hack.”
You don’t need to mention that you measured twice, pre-drilled carefully, and spent an unreasonable amount of time
staring at the table from different angles like an art critic. Your secret is safe here.


