
Table of Contents >> Show >> Hide
- What “Other” Means (and Why It’s Often Called System Data Now)
- Why Other/System Data Gets So Big (Common Culprits)
- First: Identify What’s Actually Taking Space (No Guessing Required)
- Safe Cleanup Checklist (Big Wins, Low Drama)
- 1) Empty Trash and clean Downloads (easy wins)
- 2) Use macOS Storage recommendations
- 3) Delete old iPhone/iPad backups (often the biggest “Other” jackpot)
- 4) Manage Time Machine local snapshots (when they’re the mystery bulk)
- 5) Clear caches (smartly, not recklessly)
- 6) Hunt down DMGs, ZIPs, and old installers
- 7) Clean up Mail downloads and Messages attachments
- 8) Uninstall apps the complete way (because leftovers count)
- What Not to Delete (Unless You Enjoy Panic)
- Why “Other” Shrinks… Then Grows Back Again
- Quick Troubleshooting When Storage Numbers Look Wrong
- Common Cleanup Experiences ( of “Yep, That Happens”)
- Conclusion
Your Mac’s storage chart is supposed to be helpful: Apps, Photos, Documents, Music… lovely, tidy little boxes.
And then there’s Other (or in newer macOS versions, System Data)the junk drawer of your drive.
It’s where bits and pieces land when macOS can’t neatly label them, which is basically macOS saying,
“I swear this all made sense at the time.”
The good news: Other usually isn’t mysterious malware or some cursed file gremlin. It’s often backups, caches,
logs, disk images, old installers, app support files, and system “just-in-case” storage.
The better news: you can often shrink it safelywithout deleting anything important or turning your Mac into a decorative paperweight.
What “Other” Means (and Why It’s Often Called System Data Now)
In older macOS versions, the storage view used Other as a catch-all category for files that didn’t fit
into obvious groups like Photos or Apps. In newer versions (especially Ventura and later), Apple tends to show
System Data (and sometimes a separate macOS category). Same idea, different label:
files that support the system and your apps, plus anything that’s “uncategorized.”
“Other/System Data” can include things like:
- Caches (app caches, browser caches, media caches)
- Logs and diagnostic files
- Temporary files created during updates, installs, exports, or syncing
- iPhone/iPad backups stored locally
- Time Machine local snapshots (space used for on-the-go restore points)
- Disk images and archives (.dmg, .zip) and installers you forgot about
- Mail and Messages attachments that quietly moved in and never moved out
- App “support” files (plugins, extensions, libraries, leftover data)
Translation: Other isn’t one thing. It’s a neighborhood. A weird neighborhood. With a lot of storage-hungry residents.
Why Other/System Data Gets So Big (Common Culprits)
1) Time Machine local snapshots
If you use Time Machine, macOS may keep local snapshots when your backup drive isn’t connected. These are usefulbut they can grow.
Usually macOS manages them automatically, but sometimes they balloon until you notice your “Other/System Data” looks like it’s training for a sumo match.
2) Old iPhone/iPad backups
Local device backups can be huge. A single iPhone backup can be tens or even hundreds of gigabytes, and you might have more than one.
If you switched to iCloud backups, the old local ones often stick around unless you remove them.
3) Caches from big apps (creative, developer, streaming)
Video editors, audio tools, design apps, IDEs, and even browsers can build caches that grow fast.
Think: render caches, preview files, “optimized media,” simulator data, downloads, offline content… all the stuff that makes your Mac feel faster
until it makes your storage feel smaller.
4) Disk images and “Downloads archaeology”
DMGs, ZIPs, old macOS installers, duplicated files, and random “final_FINAL_v7_reallyfinal” folders often end up counted as Other.
Your Downloads folder is basically a museumexcept the exhibits eat SSD space.
5) Attachments in Mail and Messages
Over time, attachments can quietly build up. If you’re in a lot of group chats, your Mac may be storing every meme,
video, and “look at this cat” clip like it’s preserving human history.
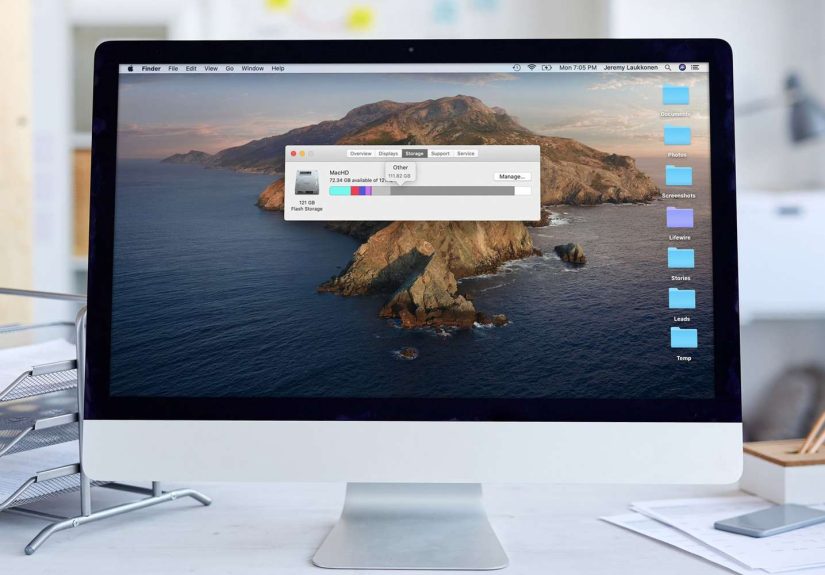
First: Identify What’s Actually Taking Space (No Guessing Required)
Check Storage the Apple way
- Open System Settings (or System Preferences on older macOS).
- Go to General → Storage (Ventura and later) or About This Mac → Storage (older versions).
- Look for categories like System Data, Documents, iOS Files, and Mail.
This view won’t always tell you every file name, but it points you toward the likely “big rocks.”
Use Finder search like a storage detective
Finder can help you locate large files and common “Other” formats:
- Open Finder and press Command + F.
- Select This Mac.
- Click the filter dropdown and choose filters like File Size and File Extension.
- Search for common culprits: dmg, zip, mov, pkg, iso, mp4.
- Sort by size and remove what you don’t need.
Get folder sizes (so you can spot the “big folder energy”)
In Finder, switch to List View and enable size calculation (in View options). Then you can sort folders by size.
This is a simple way to find which folder is the real storage villainwithout blaming “Other” for everything.
Safe Cleanup Checklist (Big Wins, Low Drama)
1) Empty Trash and clean Downloads (easy wins)
Yes, it’s basic. Yes, it works. Empty the Trash. Then open Downloads and delete old installers, DMGs, ZIPs, and duplicate files.
If you’re nervous, move them to an external drive first. Your Mac doesn’t care where your 2017 printer driver livesonly that it’s still living rent-free.
2) Use macOS Storage recommendations
In the Storage screen, macOS often offers recommendations such as:
- Store in iCloud (keep local space free while files remain available)
- Optimize Storage (help manage watched media and older items)
- Empty Trash Automatically (future-you will thank present-you)
- Reduce Clutter (review large files and downloads)
You don’t need to enable every optionjust pick what fits your workflow.
3) Delete old iPhone/iPad backups (often the biggest “Other” jackpot)
If iOS Files shows up in Storage, check it. Old device backups are one of the most common reasons “Other/System Data” looks enormous.
- Connect your iPhone or iPad to your Mac.
- Open Finder (or the Apple Devices app if that’s what your setup uses).
- Select your device and look for Manage Backups.
- Delete backups you no longer need (or archive one if you want a “just in case” copy).
Tip: If you’re already backing up to iCloud and you don’t rely on local backups, removing old ones can free a shocking amount of space.
4) Manage Time Machine local snapshots (when they’re the mystery bulk)
Time Machine local snapshots are designed to help you restore files even if your backup drive isn’t connected.
macOS usually removes them automatically when it needs space. But if they’re not thinning out, you can check them.
Option A: The gentle approach
- Connect your Time Machine drive and run a backup.
- Restart your Mac afterward.
- Give macOS some time to recalculate storage.
Option B: Terminal (for confident users)
If you’re comfortable using Terminal, you can list and remove snapshots. The exact commands can vary by macOS version,
but the typical flow is:
- List snapshots
- Delete specific ones (or thin them)
If that sentence made your palms sweat, stick with Option A. There’s no shame in choosing the “I like my Mac functional” route.
5) Clear caches (smartly, not recklessly)
Caches help apps load faster, but they can grow large. Clearing them can reduce “Other/System Data,” especially for heavy-use apps.
The safest approach:
- Quit the app completely (don’t just close the window).
- Clear cache from inside the app if it offers that option (many browsers and creative tools do).
- If you go manual, focus on user caches (typically under your user Library) rather than system folders.
Bonus trick: Starting your Mac in Safe Mode can clear certain caches automatically, then you restart normally.
It won’t erase everything, but it can help when storage numbers feel stuck.
6) Hunt down DMGs, ZIPs, and old installers
Disk images and archives are classic “Other” squatters. Use Finder search for .dmg, .zip,
and .pkg, sort by size, then delete what you no longer need. Also check:
- Applications for old macOS installers you already used
- Desktop for “temporary” files that became permanent roommates
- Documents for duplicates and abandoned exports
7) Clean up Mail downloads and Messages attachments
If Mail or Messages is a big part of your life, attachments can pile up. Practical cleanup ideas:
- In Messages, review large attachments and remove what you don’t need.
- In Mail, delete large messages with attachments and then empty Mail’s trash.
- Check your Downloads folder for attachment duplicates (yes, they happen).
8) Uninstall apps the complete way (because leftovers count)
Dragging an app to Trash removes the app, but not always its support files. If you uninstall something big
(a game, an editor, a developer tool), look for leftover project files, libraries, plugins, and support folders it created.
If you still use the app, don’t delete its support files just to “see what happens.”
That’s not cleaningthat’s chaos cosplay.
What Not to Delete (Unless You Enjoy Panic)
- /System and most of /Library (system-level files are not your DIY project)
- Anything you don’t recognize that looks like a core macOS component
- Random folders inside the Library just because they’re large
- Files you “might need later” but have no backup for
A good rule: if you can’t explain what it is in one sentence, pause and identify it before deleting.
Storage is cheaper than regret.
Why “Other” Shrinks… Then Grows Back Again
Some System Data is meant to be temporary. Caches get rebuilt. Logs accumulate. Snapshots may return.
That doesn’t mean your cleanup “failed”it means your Mac is doing normal Mac things.
The goal isn’t to make Other/System Data hit zero (that’s not realistic). The goal is to remove the unnecessary bulk:
old backups, forgotten disk images, giant caches you don’t benefit from, and clutter that never needed to exist in the first place.
Quick Troubleshooting When Storage Numbers Look Wrong
- Restart and wait a few minutes (storage recalculation isn’t always instant).
- Update macOS (some storage bugs get fixed in updates).
- Try Safe Mode, then restart normally (can help clear certain caches).
- Check for local device backups and remove old ones.
- Run a Time Machine backup if snapshots might be stacking.
Common Cleanup Experiences ( of “Yep, That Happens”)
Below are a few real-world patterns people commonly run into when “Other/System Data” gets out of hand. Think of them as
storage cautionary taleswith happy endings and fewer spreadsheets.
Experience #1: The “I Have One iPhone Backup” Plot Twist
Someone checks Storage and sees System Data at 180GB. They assume it’s caches, start deleting random things,
and nothing changes. Then they open the Storage breakdown and notice iOS Files.
Turns out they have three backups: an old iPhone, their current iPhone, and one from an iPad they sold two years ago.
They delete the two older backups and instantly recover a massive chunk of space.
The lesson: before you do anything fancy, always check for device backupsbecause they’re silent, huge, and oddly sentimental.
Experience #2: Time Machine Snapshots on a Laptop That Never Sees Its Backup Drive
Another common scenario: a MacBook that uses Time Machine… in theory. In practice, the backup drive lives at home,
the laptop lives everywhere else, and local snapshots quietly build up. The user notices “Other” swelling and free space shrinking.
The fix is often boringbut effective: connect the Time Machine drive, run a backup, restart, and let macOS tidy up.
Sometimes that’s all it takes. The lesson: Time Machine isn’t just a featureyou have to actually feed it a backup drive occasionally.
Experience #3: The Creative Pro Cache Monster
Video and design workflows are cache factories. People exporting large projects, generating previews, or working with optimized media
can accumulate gigantic cache folders. The best part? It can feel like the space disappeared overnight.
In these cases, cleanup usually works best inside the app: many creative tools have settings to delete render files,
clear media caches, or remove old preview files. That approach avoids breaking projects while still recovering space.
The lesson: if your Mac is a studio, your caches are basically sawdustclean them regularly.
Experience #4: DMG Collection, Curated by Your Past Self
Lots of people discover they’ve been hoarding installers: DMGs in Downloads, ZIPs on the Desktop, and duplicates in random folders
because they kept re-downloading the same apps. A quick Finder search for .dmg and .zip reveals a surprising truth:
your Mac is running a small “Software Installer Museum,” and admission costs 40GB.
The lesson: if you installed the app months ago, you probably don’t need the installer anymore.
The big takeaway across all these experiences is simple: “Other/System Data” usually becomes huge for a reason you can identify.
Once you find the cause, cleanup is often straightforwardand you don’t need to nuke your Library folder to get your space back.
Conclusion
“Other” (or “System Data”) is macOS’s way of saying, “This stuff matters, but it’s complicated.” It’s not automatically bad
but it can get bloated. Start with the biggest, safest wins: delete old iPhone/iPad backups, clear out DMGs and ZIPs,
use Storage recommendations, and tidy caches in a careful, app-first way.
If your Mac’s storage chart still looks suspicious after that, don’t panicrecheck Storage, restart, and give macOS time to recalculate.
Your goal isn’t perfection. Your goal is enough breathing room that your Mac can update, work, and exist without constantly yelling, “Disk Full!”


