
Table of Contents >> Show >> Hide
- What “Shampooing” Means with a Rug Doctor (Spoiler: It’s Extraction)
- Before You Start: A Quick Checklist for Better Results
- Mixing the Cleaning Solution the Right Way
- Step-by-Step Rug Doctor Shampooing Instructions
- Step 1: Fill the clean/solution tank correctly
- Step 2: Start in the far corner and work your way out
- Step 3: Do wet passes, then dry passes (this is the secret sauce)
- Step 4: Control your pace (fast is for race cars, not carpets)
- Step 5: Release the spray before you finish each pass
- Step 6: Empty dirty water and refill before performance drops
- Step 7: Know when “clean enough” is actually clean enough
- Drying the Carpet Faster (So It Doesn’t Smell Like a Swamp)
- Common Mistakes That Make Carpets Look Worse (Yes, It Happens)
- Special Situations: Pets, Rugs, and High-Traffic “Dirt Highways”
- After-Cleaning Machine Care (Because Future You Deserves Better)
- Troubleshooting: Quick Fixes for Common Rug Doctor Problems
- Bonus: Real-World Experiences People Have with Rug Doctor Shampooing (and What They’d Do Differently)
- Conclusion
- SEO Tags
If your carpet could talk, it would probably ask for two things: a snack (mysterious crumbs) and a spa day (deep
cleaning). The Rug Doctor is basically a portable carpet spaminus the cucumber water. But if you’ve ever rented
one, you already know: using it correctly is the difference between “wow, this looks brand new” and “why is my
living room still damp enough to grow rice?”
Below are practical, step-by-step Rug Doctor shampooing instructions you can follow whether you’re using a rental
machine or a home unit. You’ll also get drying tips, troubleshooting, and the real reason “one more squirt of soap”
is usually a trap.
What “Shampooing” Means with a Rug Doctor (Spoiler: It’s Extraction)
A lot of people say “carpet shampooing,” but Rug Doctor-style cleaning is closer to hot water extraction.
The machine sprays cleaning solution into the carpet fibers and then vacuums most of that liquid back uppulling soil
with it. That “vacuum-back-up” part is the make-or-break moment. Done right, your carpet ends up clean and only mildly
damp. Done wrong, your carpet becomes a sponge with feelings.
The goal isn’t to flood your carpet. The goal is to flush + extract. Think: rinse your hair and then actually
rinse the conditioner outdon’t just leave it there and hope for the best.
Before You Start: A Quick Checklist for Better Results
1) Confirm your carpet (or rug) can handle wet cleaning
- Check the label on area rugs. Natural fibers (wool, silk, jute, sisal) and some dyed rugs can bleed or shrink.
- Do a colorfastness test: in a hidden spot, apply a little diluted solution or plain water, blot with a white towel, and look for dye transfer.
- If your carpet is already loose, wrinkled, or the backing is damaged, go gently and prioritize drying.
2) Gather supplies (so you’re not sprinting mid-clean)
- Rug Doctor machine + appropriate Rug Doctor cleaning formula
- Stain pre-treatment (especially for traffic lanes and pet spots)
- Vacuum (non-negotiable)
- Fans (at least one, more if you cleaned a big area)
- Old towels or a microfiber cloth for quick blotting and wiping
- Optional but smart: aluminum foil or plastic under furniture legs while drying
3) Prep the room like a pro
Vacuum thoroughly first. Not a quick “two swipes and confidence.” A real vacuum. Dry soil turns into mud when you add water,
and mud is famously hard to “extract.”
Move small furniture out of the room. For heavier items, shift them to one side, clean the exposed carpet, then move them
back onto foil or plastic after the carpet is only slightly damp.
Mixing the Cleaning Solution the Right Way
Here’s the simplest rule: use the formula recommended for your Rug Doctor model and follow the label. Different
formulas are designed to be low-foam (important for suction) and compatible with the machine.
Typical dilution range (common for many Rug Doctor setups)
Many instructions use a range like ¼ to ½ cup of Rug Doctor carpet cleaner per gallon of hot tap water, depending
on how soiled the carpet is. Use the lower amount for lightly soiled rooms and the higher amount for heavy traffic or visible grime.
Water temperature matters (but don’t get dramatic)
Use hot tap waternot boiling water. If you wouldn’t willingly dip your hand in it, it’s too hot. Extremely hot water
can be unsafe and may not be recommended for all fibers.
Pro tip: More detergent does not equal more clean. It often equals more residue. Residue attracts soil, which is how you
end up with a carpet that looks dirty again faster than your phone battery drains at 10%.
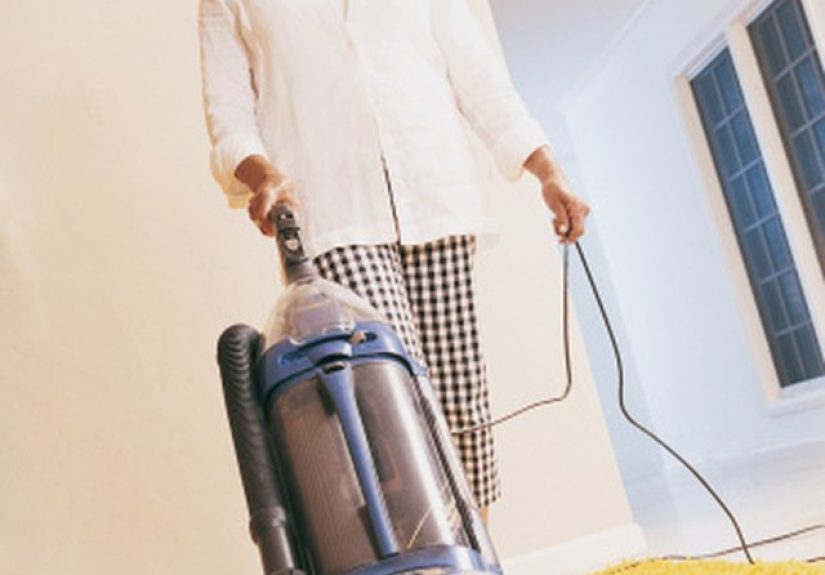
Step-by-Step Rug Doctor Shampooing Instructions
Step 1: Fill the clean/solution tank correctly
The exact tank setup depends on your machine (rental machines and home units can differ), but the logic is the same:
hot tap water + measured cleaning solution.
- Fill to the indicated fill line (don’t freestyle your own “line”).
- Add the recommended amount of Rug Doctor solution.
- Secure caps and tanks firmlyloose tanks can cause poor spray, leaks, or weak suction.
Step 2: Start in the far corner and work your way out
Begin where you’ll least want to step latertypically the far cornerthen clean in sections as you back toward the exit.
Overlap your passes slightly so you don’t leave “clean stripes” like a freshly mowed lawn.
Step 3: Do wet passes, then dry passes (this is the secret sauce)
A widely recommended method is:
- Two slow wet passes (spraying solution while moving), then
- Two slow dry passes over the same area (no sprayjust suction).
Those dry passes aren’t optional fluff. They’re how you avoid over-wetting and speed up drying. Move slowly and steadily.
If your machine’s instructions emphasize pulling backward for cleaning passes, follow that guidance for your model.
Step 4: Control your pace (fast is for race cars, not carpets)
For lightly soiled carpet, you can move at about a foot per second. For moderate to heavily soiled areas, slow down
closer to a foot every two seconds. Slower movement gives the machine time to scrub and extract effectively.
Step 5: Release the spray before you finish each pass
Stop spraying a few inches before the end of each pass, then continue moving so the machine can extract without adding more water.
This helps reduce puddling at the end of lanes (and prevents that “why is this section still squishy?” moment).
Step 6: Empty dirty water and refill before performance drops
Most machines will tell you they’re done in subtle ways: the recovery tank fills, suction changes, or the machine gets louder when the clean
solution runs out. When you notice reduced pickup or the dirty water tank is full, pause:
- Turn the machine off and unplug it.
- Empty the dirty water tank where appropriate.
- Rinse the tank quickly if it’s extra gunky.
- Refill clean water + solution as needed and continue.
Step 7: Know when “clean enough” is actually clean enough
You’re not trying to turn your dirty water into Evian. If the recovered water looks noticeably cleaner than the first tank and the carpet looks
brighter with no obvious soil lanes, you’re winning. Over-cleaning can mean over-wetting, and over-wetting can mean slow drying and odor.
Drying the Carpet Faster (So It Doesn’t Smell Like a Swamp)
How dry is “dry enough”?
Even with strong extraction, you’ll usually recover mostbut not allof the water used. Expect damp, not dripping. Drying time varies based on
humidity, airflow, carpet thickness, and how many wet passes you did.
Drying tactics that actually help
- Run fans pointed across the carpet surface (not straight down like you’re trying to press it flat).
- Improve ventilation: open windows/doors when weather allows.
- Use AC or a dehumidifier in humid climates; use heat in cool/damp weather.
- Do extra dry passes during cleaning in slow-drying zones.
- Limit foot traffic until fully dry. If you must walk on it, wear clean socksshoes reintroduce soil.
Health note: In general home moisture guidance, it’s important to dry wet materials promptlyoften within
24–48 hoursto reduce the risk of mold growth and musty odor.
Common Mistakes That Make Carpets Look Worse (Yes, It Happens)
Using too much detergent
Extra soap can leave residue that attracts soil (hello, rapid re-soiling). It can also cause excessive foam that reduces suction. If your carpet feels
sticky after drying, do a rinse pass: fill with clean hot tap water only and do wet + dry passes to pull remaining residue out.
Skipping pre-vacuuming
If you don’t vacuum first, you’re basically turning loose dirt into soup. Extraction is great at removing suspended soil, but it’s not a miracle
worker for clumps of grit you could’ve removed dry.
Moving too fast (or holding the spray in one spot)
Speed reduces cleaning and extraction. Also, keeping the spray/brush action in one spot can over-wet and over-agitate fibers. Keep the machine moving.
Not doing enough dry passes
Dry passes are what separate “fresh carpet” from “damp basement vibes.” If drying is slow, your answer is usually more extraction, not more solution.
Special Situations: Pets, Rugs, and High-Traffic “Dirt Highways”
Pet accidents
Pet urine and odor are tricky because they can reach the pad. Industry cleaning guidance often warns against using high heat like steam on urine spots
because heat can set odor and staining. For DIY cleaning:
- Blot/extract as much as possible first (a wet/dry vacuum helps).
- Use a pet-specific pretreatment if appropriate for your carpet.
- Prioritize extraction and dryingodor problems get worse when moisture lingers.
If odor keeps returning, it may need professional treatment below the surface.
Berber and loop carpets
Loop piles can hold moisture differently. If your machine guidance suggests fewer wet passes on Berber, follow itthen extract thoroughly with additional
dry passes and strong airflow.
Area rugs and natural fibers
If your rug is wool, silk, jute, sisal, or a specialty dyed piece, proceed cautiously. Always test first. Some rugs are best cleaned by professionals
who specialize in that fiber type and dye method.
After-Cleaning Machine Care (Because Future You Deserves Better)
Cleaning the carpet is only half the job. The other half is preventing your machine from smelling like yesterday’s dirty water. After each use:
- Turn off and unplug.
- Empty both tanks. Dump dirty water responsibly.
- Rinse tanks with warm water and let them dry thoroughly before storage.
- Clean filters/screens (dome filter, solution tank filter screen, etc.) so suction and spray stay strong next time.
- Remove hair and debris from brushes and the vacuum slot. (Hair is the glitter of carpet cleaning: it gets everywhere.)
Store the machine in a dry place and avoid setting it on flooring that could be damaged by moisture.
Troubleshooting: Quick Fixes for Common Rug Doctor Problems
No spray or weak spray
- Check that the clean tank is properly seated and latched.
- Confirm you’re pressing the spray trigger/button correctly.
- Inspect for clogged filters/valves if your manual indicates where they are.
Not picking up water well
- Slow down and add more dry passes.
- Make sure the suction slot is snug against the carpet.
- Empty the dirty water tank if it’s full.
Foam in the recovery tank
- Use the correct low-foam formula (especially for upholstery).
- Consider a defoamer if recommended for your situation.
- Rinse with clean water afterward to reduce residue.
Spots “come back” after drying
This can be wickingsoil below the surface moves upward as the carpet dries. The fix is usually better extraction, controlled moisture, and sometimes
targeted spot treatment rather than re-soaking the entire area.
Bonus: Real-World Experiences People Have with Rug Doctor Shampooing (and What They’d Do Differently)
The instruction manual gives you the rules. Real life gives you the plot twists. Here are common, experience-based lessons homeowners and frequent
renters mention again and againshared here so you can skip the “learning it the hard way” phase.
First: the machine is usually heavier than you expect. Rental units in particular are built like tanks because they live a hard life.
The trick isn’t hero-lifting itit’s planning your route. Park it near the area you’ll start, keep cords out of your path, and clear floor clutter
(toys, throw pillows, that one sock that’s been under the couch since 2019). People who “wing it” end up wrestling the machine and cleaning around it,
which is like trying to shampoo your hair while wearing a winter hat.
Second: the “wow” moment happens after you slow down. Many first-timers move too fast because it feels like vacuuming. But extraction
cleaning works best when you give the brushes time to agitate and the suction time to pull water back out. Frequent users often say their best results
came once they treated it like mowing the lawn: steady lanes, slight overlap, and no sudden zigzags. When they added more dry passes (especially on
thick carpet), drying time improved dramaticallyand the musty smell risk dropped.
Third: people underestimate how often they’ll empty tanks. If you’re cleaning a high-traffic living room or a whole apartment, you will
make multiple trips to the sink/toilet. That’s normal. It doesn’t mean you’re doing it wrongit means your carpet had “opinions” and the machine is
actually removing soil. Experienced users keep a small towel nearby for drips and make peace with the refill rhythm: clean water in, dirty water out,
repeat. It’s basically cardio with a cleanliness reward.
Fourth: detergent drama is real. A lot of “my carpet felt crunchy/sticky after” stories trace back to using too much solution. In the
moment, extra detergent feels like extra cleaning power. After it dries, it can feel like a residue that grabs dirt faster. People who got the best
long-term results typically measured carefully, used the proper formula, andwhen in doubtdid a final rinse pass with plain hot tap water. That rinse
pass is the unsung hero of DIY carpet cleaning.
Fifth: drying is a full-time job for a few hours. The folks who had carpets dry within a reasonable window almost always did the same
things: fans, airflow, and “no shoes.” They opened windows when weather allowed, ran AC or a dehumidifier when humidity was high, and avoided turning
the freshly cleaned room into a family parade route. Some even cleaned in the morning so the carpet had all day to dry, rather than starting at night
and letting damp carpet sit in stagnant air.
Finally: machine cleanup determines whether next time is pleasant or… memorable. People who skipped rinsing tanks often reported a stale
smell in the machine later. The fix is simple: rinse, wipe, let parts dry, and remove hair from brushes. It’s not glamorous, but neither is opening a
“cleaning machine” that smells like a swampy science experiment.
Conclusion
Rug Doctor shampooing works best when you follow three big principles: prep the carpet, measure the solution, and extract like you mean it.
Vacuum first, pre-treat thoughtfully, do wet passes followed by dry passes, and then speed up drying with airflow. If you keep moisture under control and
clean the machine afterward, you’ll get the satisfying kind of cleanwhere your carpet looks brighter, smells fresher, and doesn’t stay damp long enough to
develop a personality.


