
Table of Contents >> Show >> Hide
- Before You Start: The 60-Second Tile Reality Check
- Cheap Ways to Cover Tile: Options at a Glance
- Step 1: Decide Your Goal (And Your Level of Commitment)
- Step 2: Measure, Budget, and Plan the “Annoying Stuff”
- Step 3: Clean Like You’re Trying to Impress a Very Judgmental Adhesive
- Step 4: Flatten the Tile (So Grout Lines Don’t Snitch on You)
- Step 5: Choose Your Cheap Tile Cover (Floors vs. Walls)
- Step 6: Install With a Simple Layout Strategy (So It Looks Expensive)
- Step 7: Finish Edges and Transitions (Where DIY Projects Go to Get Judged)
- Step 8: Protect Your New Surface (So “Cheap” Still Looks Good in a Year)
- Common Mistakes That Make “Cheap” Turn Expensive
- FAQ: Covering Tile Without Removing It
- Experiences From the Real World: What People Learn After Covering Tile Cheaply
- Conclusion: Cheap Tile Covers Work When You Respect the Prep
Tile is one of those home “features” that’s either timeless or “why does my kitchen look like a 1998 pizza shop?” If you’re in the second camp,
you’re not aloneand you’re not doomed to a full demolition, either.
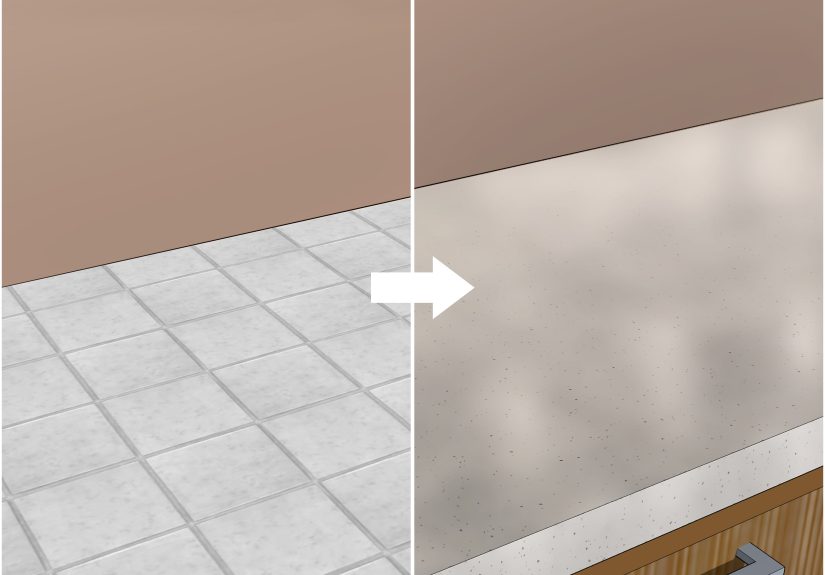
The good news: in many cases, you can cover tile cheaply (floors or walls) and get a clean, updated look with weekend-level effort.
The slightly-less-fun news: tile is a truth-teller. Skip prep and it will rat you out by showing grout lines, bumps, and every shortcut you hoped would stay secret.
This guide gives you 8 practical steps to cover tiles without removing themplus specific low-cost options, pros/cons, and real-world “wish I knew that” advice.
Before You Start: The 60-Second Tile Reality Check
Cheap doesn’t mean careless. These checks help you avoid spending $200 to create a problem that costs $2,000 to un-problem later.
- Is the tile solid? If tiles are loose, cracked, or hollow-sounding, fix that first. Covering movement just turns small issues into dramatic ones.
- How deep are the grout lines? Deep grooves can “telegraph” through thin coverings unless you fill them.
- Is moisture a factor? Bathrooms, laundry rooms, and backsplashes need moisture-smart materials and sealed edges.
- Heat exposure? Behind a range or near a fireplace requires products rated for that environmentsome peel-and-stick materials aren’t.
- Height & transitions: Covering tile adds thickness. Doors, appliances, baseboards, and thresholds may need small adjustments.
Cheap Ways to Cover Tile: Options at a Glance
Think of this as your menu. You’ll pick the “meal” in Step 5, but it helps to know what’s even on the table.
| Where | Budget-Friendly Cover | Best For | Big Watch-Out |
|---|---|---|---|
| Tile floors | Peel-and-stick vinyl tile | Quick cosmetic upgrade, light-to-medium traffic | Grout lines must be filled or they may show and seams can lift |
| Tile floors | Sheet vinyl | Moisture-prone rooms, easy cleaning | Needs a very smooth surface or imperfections show |
| Tile floors | Click-lock LVP / rigid core | Durability + water resistance without tile demo | Must be flat; manufacturer rules on underlayment matter |
| Tile floors | Laminate (with attached pad) | Fast install; good for drier spaces | Not ideal for heavy water exposure unless rated and sealed correctly |
| Tile floors | Carpet tiles or large rugs | Warmth, softness, rental-friendly | Moisture + carpet is… a complicated relationship |
| Tile floors | Tile paint / floor coating system | Lowest material cost for a “new look” | Prep is everything; durability varies by product and area |
| Tile walls/backsplash | Peel-and-stick backsplash sheets | Quick makeover, minimal tools | Heat/steam ratings vary; surface prep still matters |
| Tile walls/backsplash | Beadboard or paneling (painted) | Classic look, budget materials | Must seal/caulk edges to protect from splashes |
Step 1: Decide Your Goal (And Your Level of Commitment)
“Cover tile cheaply” can mean three very different missions:
- Cosmetic cover: You just want it to look better fast (peel-and-stick, paint, rugs).
- Functional upgrade: You want easier cleaning, fewer grout lines, and better durability (sheet vinyl, LVP).
- Long-ish term fix: You need it to survive kids, pets, and daily chaos without failing dramatically (rigid core LVP, quality sheet vinyl, properly prepped coatings).
Also decide whether you need something removable (renters often do) or semi-permanent (most homeowners prefer that once they’ve spent a weekend measuring and muttering).
Step 2: Measure, Budget, and Plan the “Annoying Stuff”
Before you buy anything, measure the area and plan for the parts that trip people up:
- Buy extra: Aim for about 10% extra material for cuts and mistakes (more if your room has lots of corners).
- Height changes: Covering tile raises the floor. Think: dishwasher clearance, doors swinging, and transitions to adjacent rooms.
- Baseboards: Decide if you’ll remove and reinstall them (cleanest) or keep them and add shoe molding/quarter-round (fastest).
- Outlets & switch plates (walls): Paneling or thicker coverings may require box extenders so everything sits flush and safe.
A tiny planning session now prevents the classic DIY ending: “Everything looks great except the door won’t open, the fridge is stuck,
and I have one weird strip of flooring left because I measured like a raccoon holding a tape measure.”
Step 3: Clean Like You’re Trying to Impress a Very Judgmental Adhesive
Whether you’re using peel-and-stick, glue-down vinyl, or paint, grease and soap film are the enemy. Kitchens and bathrooms are especially sneaky here.
Cleaning checklist
- Sweep/vacuum thoroughly (grit under coverings can cause bumps and wear).
- Wash with a degreaser appropriate for the surface; rinse well.
- Let it dry completelyespecially grout lines.
- Do a quick “tape test”: press painter’s tape down and pull it up. If you get dust/film, keep cleaning.
Pro tip: if you can still feel a slightly oily film with your fingertips, your adhesive definitely can.
Step 4: Flatten the Tile (So Grout Lines Don’t Snitch on You)
The most common reason cheap tile covers fail is simple: tile isn’t flat. It has grout lines, texture, and sometimes lippage
(where one tile edge sits slightly higher than the next).
What to fix before covering
- Deep grout lines: Fill with a patching/leveling compound compatible with your planned cover.
- Chips and cracks: Patch them so they don’t create weak points.
- High spots: Carefully sand/grind (if appropriate for the surface and product instructions) or spot-level around them.
- Loose tiles: Re-adhere or replace. Covering movement is like putting a Band-Aid on a trampoline.
If you’re installing click-lock LVP/rigid core, “flat enough” matters because the locking joints can stress and separate over bumps.
For peel-and-stick vinyl, the goal is also “flat enough,” but mainly so the grout pattern doesn’t telegraph and the adhesive bonds evenly.
Wall tile note
For backsplash tile you’re covering with panels or peel-and-stick sheets, you may still need to skim-coat or fill grout lines if they’re deep.
The smoother the base, the more “real” your new surface looks.
Step 5: Choose Your Cheap Tile Cover (Floors vs. Walls)
Now you pick your method. Below are reliable, budget-friendly options that work in real homesnot just in “before and after” reels.
For Tile Floors
Option A: Peel-and-Stick Vinyl Tile (Fastest Budget Makeover)
This is the “I want it done by Sunday afternoon” choice. Peel-and-stick tiles can look surprisingly sharp if your floor is clean and smooth.
- Best for: Powder rooms, laundry rooms, low-to-medium traffic areas, quick refreshes.
- Pros: Low tools, low cost, easy to replace a single tile.
- Cons: Seams can lift if prep is poor; grout lines can show if you skip leveling.
Option B: Sheet Vinyl (The “One Piece, No Grout” Upgrade)
Sheet vinyl is often the most economical resilient flooring and it’s easy to clean because you’re not dealing with tile joints or grout.
It can work beautifully over tileif the surface is smooth.
- Best for: Kitchens, baths, laundry rooms where easy cleaning matters.
- Pros: Water-friendly; fewer seams (sometimes none); comfy underfoot.
- Cons: Any bumps underneath can show, so surface prep has to be thorough.
Option C: Click-Lock LVP / Rigid Core (Best Durability for the Money)
Luxury vinyl plank (LVP) is popular for a reason: it’s durable, moisture-resistant, and often DIY-friendly.
Many products can “float” over tile as long as the base is flat and the grout lines are addressed.
- Best for: Kitchens, hallways, living spacesareas where you want a longer-term solution.
- Pros: Durable wear layers; good for busy households; easy ongoing maintenance.
- Cons: You must follow manufacturer rules on flatness, moisture barriers, and underlayment.
Option D: Laminate Flooring (Dry Spaces, Big Visual Payoff)
Laminate can be a cost-friendly floating floor option, often with an attached pad that helps minor imperfections.
It’s generally better in drier areas unless the product is specifically rated and installed for wet spaces.
- Best for: Dining rooms, bedrooms, offices, living areas over sound tile.
- Pros: Quick install; lots of styles; comfortable underfoot.
- Cons: Water exposure is the main riskread product specs carefully.
Option E: Carpet Tiles (Soft, Warm, and Surprisingly Practical)
Carpet tiles (a.k.a. carpet squares) are a budget-friendly way to cover tile when you want warmth and sound absorption.
They’re also great for “replace one square, not the whole floor” convenience.
- Best for: Basements (dry ones), offices, playrooms, rental-friendly upgrades.
- Pros: Comfortable; modular repairs; DIY-friendly layout.
- Cons: Avoid moisture-prone rooms unless you’re using products specifically designed for that environment.
Option F: Paint or Floor Coating Systems (Cheapest Materials, Highest Prep Demand)
Painting tile can be dramatically cheaper than replacing it. It can also be dramatically annoying if prep is rushed.
Use products designed for floors/tile, and remember: durability depends heavily on moisture and traffic level.
- Best for: Low-to-moderate moisture zones, quick design changes, creative patterns with stencils.
- Pros: Lowest cost entry; unlimited colors/patterns; no added height.
- Cons: Not ideal for constantly wet areas; requires careful cleaning, scuffing/etching (as directed), and a protective top coat.
For Tile Walls & Backsplashes
Option G: Peel-and-Stick Backsplash Sheets (Instant Gratification, Minimal Tools)
Peel-and-stick backsplash materials can cover dated tile fast. Look for products rated for kitchens (heat) and bathrooms (humidity).
- Best for: Quick kitchen refreshes, rentals (depending on adhesive), low-mess projects.
- Pros: Fast installation; many styles; minimal demolition.
- Cons: Uneven tile textures may show; heat/steam ratings vary.
Option H: Beadboard or Paneling Over Tile (Budget Classic)
Beadboard paneling can cover a tile backsplash on a budget and gives a clean, cottage-style look.
The key is sealing and caulking so splashes don’t get behind it.
- Best for: Kitchens where you want charm on a budget, powder rooms, laundry room walls.
- Pros: Inexpensive materials; paintable; quick visual transformation.
- Cons: Needs careful sealing near sinks and countertops.
Step 6: Install With a Simple Layout Strategy (So It Looks Expensive)
Even budget materials look premium when the layout is clean.
For floor coverings (vinyl tile, LVP, laminate)
- Mark reference lines: Snap chalk lines (or use a laser) so your first rows are straight.
- Dry fit first: Lay a row without adhesive to avoid ending with tiny slivers at the walls.
- Start from the best “sight line”: Usually the doorway or the longest visible run.
- Press/lock consistently: Peel-and-stick needs firm pressure; click-lock needs fully engaged seams.
- Cut neatly: Sharp blades are cheaper than regret. Change utility knife blades often.
For peel-and-stick floors
- Keep a trash can nearby for backing paper (your future self thanks you).
- Use a hand roller or rolling pin to set adhesive, especially on seams.
- Work in small sections so you can align edges tight and avoid creeping rows.
For backsplash panels/sheets
- Clean and dry the tile thoroughly; wipe dust right before sticking.
- Plan around outlets first so cuts land where trim plates will hide tiny imperfections.
- Use a levelcounters aren’t always level, even if they look innocent.
Step 7: Finish Edges and Transitions (Where DIY Projects Go to Get Judged)
Finishing details are what separate “wow” from “hmm.”
- Floors: Add thresholds at doorways, and use shoe molding if you didn’t remove baseboards.
- Wet areas: Seal perimeter edges near tubs, showers, and exterior doors with the appropriate flexible sealant.
- Backsplashes: Caulk the seam where the new surface meets the countertop to prevent water from sneaking behind it.
Also: check doors. If the new floor is thicker, you may need to adjust hinges or trim the door bottom slightly.
It’s not glamorous, but neither is a door that scrapes like it’s auditioning for a horror movie.
Step 8: Protect Your New Surface (So “Cheap” Still Looks Good in a Year)
Cheap coverings last longer when you treat them like the flooring/wall finish they arenot like a disposable prop.
Do this
- Use felt pads on furniture legs.
- Clean with mild products recommended for the material (avoid harsh abrasives).
- Wipe up standing water quickly, especially at edges and seams.
- Keep spare tiles/planks for future repairs (the dye lot fairy does not do repeat performances).
Avoid this
- Dragging heavy appliances without protection.
- Soaking seams with excessive water or aggressive steam cleaning before adhesives/cures fully settle.
- Assuming “water-resistant” means “I can ignore puddles forever.” (It does not.)
Common Mistakes That Make “Cheap” Turn Expensive
- Skipping grout-line prep: Telegraphed lines make new floors look cheapand can stress floating-floor joints.
- Installing over unstable tile: Loose tile means your new surface is only as stable as the wobble underneath.
- Ignoring moisture: Trapped moisture can create odor, mold risk, or adhesive failure depending on conditions and materials.
- Random underlayment layering: Some click-lock floors don’t allow extra cushion beyond what the manufacturer specifies.
- Not planning transitions: A perfect floor with an awkward doorway lip still feels unfinished.
FAQ: Covering Tile Without Removing It
Can I really cover tile without ripping it out?
Often, yesif the tile is sound, clean, and reasonably flat. The most successful projects treat prep as part of the “covering,” not an optional side quest.
Will grout lines show through?
They can, especially under thin materials like peel-and-stick vinyl or sheet vinyl, if you don’t fill/skim them. If you want a smoother “new floor” illusion,
plan to level grout lines first.
Is painting tile actually worth it?
It can be, particularly for low-to-moderate moisture zones and decorative upgrades. It’s also the option most likely to fail if you rush prep or skip a durable top coat.
If you want maximum durability with minimal fuss, vinyl options tend to be more forgiving long-term.
What about radiant heat under tile?
Some floating floors can work over radiant systems, but you need to follow product-specific requirements (temperature limits, acclimation rules, and flatness).
Always check the manufacturer instructions before committing.
Experiences From the Real World: What People Learn After Covering Tile Cheaply
Here’s the pattern you see over and over when homeowners (and DIYers with big optimism energy) try to cover tiles cheaply: the material matters, but the
prep and expectations matter more.
In small bathrooms and powder rooms, peel-and-stick vinyl tile is the popular “starter project.” People love it because it feels approachablemeasure, peel, press,
admire. The biggest surprise usually hits about two weeks later: grout lines that seemed “not that deep” start to faintly show, especially when sunlight hits the floor at an angle.
The folks happiest with the result are the ones who filled grout lines first and treated cleaning like a sport. The folks least happy? The ones who installed over
slightly glossy, slightly soapy tile and wondered why corners started lifting. Adhesive doesn’t bond to “mystery film,” even if that film is invisible to the human eye.
Sheet vinyl stories tend to be split into two categories: “Wow, this looks like a whole new room” and “Why do I see every tiny dip?” Because sheet vinyl is a continuous surface,
it’s fantastic for easy cleaning and moisture-prone spaces. But it’s also honestmaybe too honest. When people install it over tile without smoothing the grout lines, the floor can develop a subtle
quilted look. Not always terrible, but not what they imagined. The best outcomes happen when the installer spends extra time skim-coating low spots, feathering patches smoothly, and sanding carefully.
It’s not glamorous work, but it’s the difference between “budget win” and “budget whoops.”
Click-lock LVP is where many people land after wanting something that feels more permanent. The common lesson here is that “floating floor” doesn’t mean “float over chaos.”
If the tile has uneven edges or the grout lines are deep, joints can feel bouncy or sound hollow. The fix isn’t usually “more underlayment” (that can violate manufacturer rules);
it’s making the surface flatter before installation. Another frequent discovery: transitions. People forget that adding LVP over tile changes floor height, so thresholds and door clearances suddenly matter.
The happiest DIYers plan those details early, then the install feels smooth instead of like a surprise obstacle course.
On backsplashes, peel-and-stick sheets often deliver the fastest transformation, but the “experience lesson” is heat and edges. Around stoves and near kettles,
steam and warmth can challenge adhesives if the product isn’t rated for it. People who succeed typically degrease thoroughly, avoid stretching sheets during placement,
and finish with neat caulk lines at the countertop seam. Beadboard/paneling experiences are charming when sealed properlyand tragic when not.
The difference is whether water can sneak behind the panel at the sink area. A careful bead of caulk and a moisture-resistant paint finish can turn beadboard into a budget hero.
The overall takeaway: cheap tile covering works best when you treat it like a real installation. Choose the right method for the room, prep the surface like it’s getting inspected,
and don’t skip the finishing details. That’s how “cheap” becomes “smart,” instead of “temporary with a side of regret.”
Conclusion: Cheap Tile Covers Work When You Respect the Prep
If you remember one thing, make it this: tile can be covered cheaply, but it can’t be fooled cheaply. When you clean well, flatten grout lines, and pick the right material for the room,
you can get an updated look without the mess (and cost) of demolition.
Choose your approach, follow the 8 steps, and you’ll end up with a finish that looks intentionalnot like you lost a bet with your own home.


