
Table of Contents >> Show >> Hide
- What Is the Lego and Raspberry Pi Film Scanner?
- Why Film Scanning Still Matters
- How the RoboScan Workflow Works
- What Makes This DIY Film Scanner So Appealing?
- DIY Film Scanning Quality: What to Watch For
- Who Should Build a Lego and Raspberry Pi Film Scanner?
- Can It Replace a Professional Film Scanner?
- Practical Tips Before You Start Building
- Experience Notes: What It Feels Like to Use a DIY Film Scanner
- Final Thoughts
Somewhere in a closet, shoebox, attic, or suspiciously dusty drawer, there is probably a roll of film waiting for its big digital comeback. Maybe it is a strip of 35mm negatives from a family vacation. Maybe it is a forgotten roll from an old point-and-shoot. Or maybe it is a mysterious envelope labeled “Do Not Open Unless Ready for Embarrassing Haircuts.” Whatever the case, film scanning remains one of those chores that sounds romantic for about seven minutes and then becomes a battle against dust, alignment, software, and patience.
That is why the idea behind a Lego and Raspberry Pi film scanner is so charming. It combines the playful engineering of Lego Technic, the affordable computing power of a Raspberry Pi, a camera, a backlight, and a little machine-learning magic to automate one of analog photography’s most repetitive tasks. The project, known as RoboScan, proves that film photography does not have to stay trapped between expensive lab scans and slow manual workflows.
This is not just a cute gadget built for internet applause. It is a serious example of how makers are solving real photography problems with modular hardware, open-source software, and a healthy willingness to make plastic bricks do grown-up work.
What Is the Lego and Raspberry Pi Film Scanner?
The Lego and Raspberry Pi scanner is an automated analog film scanning machine designed to move a roll of film frame by frame, position each image accurately, light it from behind, and trigger a digital camera to capture the negative. Instead of manually sliding each frame into place like a tiny photographic assembly line worker, the system uses a Raspberry Pi to control the movement, detect frame boundaries, manage the camera, and transfer image files.
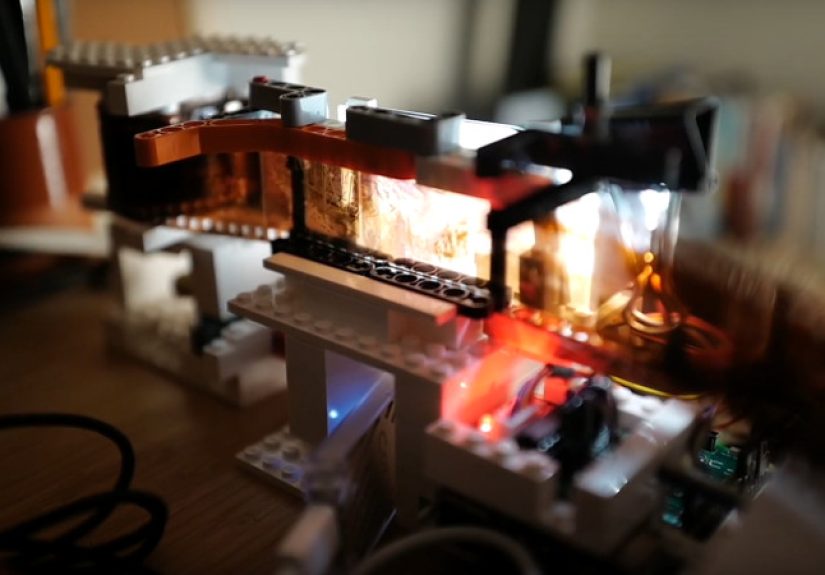
The original RoboScan build uses a Lego mechanism as the film transport system. Lego Technic parts form the frame and sprocket-style feeder, while a stepper motor advances the film. The Raspberry Pi runs the control software, and the camera captures the actual image. A white LED backlight provides illumination through the film. In some versions of the workflow, a Google Coral USB Accelerator can help with machine-learning inference, allowing the system to recognize frame positioning more efficiently.
In plain English: the machine pulls your negatives through, watches for the next frame, stops when the frame is aligned, takes a photo, saves it, and moves on. It is like hiring a tiny robot intern, except this one does not drink your coffee or ask whether “film” means TikTok.
Why Film Scanning Still Matters
Film never truly disappeared. It went quiet for a while, hid in camera bags, and then came back with the confidence of a vinyl record store owner. Today, many photographers shoot film because they like the colors, grain, slower process, and unpredictability. Families also have decades of negatives and slides that may contain better detail than faded prints in old albums.
Scanning those negatives matters for three big reasons: preservation, access, and editing. Film is physical. It can scratch, fade, curl, collect fingerprints, or get lost during a heroic but doomed “garage organization weekend.” Once digitized, images can be backed up, shared, restored, printed, and edited without repeatedly handling the original material.
Professional labs can produce beautiful scans, but costs add up quickly if you have hundreds or thousands of frames. Flatbed scanners are useful, especially for medium format and prints, but they can be slow. Dedicated film scanners can be excellent, but many older models rely on outdated software or limited connectivity. Camera scanning, where a digital camera photographs the negative over a backlight, has become popular because it is fast, sharp, and flexible. RoboScan takes that camera-scanning idea and adds automation.
How the RoboScan Workflow Works
1. The Lego Transport Moves the Film
The heart of the build is the film transport. Lego Technic gears and structural pieces hold the film path and provide the mechanical movement. A stepper motor turns the mechanism in small, controlled increments. This is important because film frames must land in nearly the same position every time. Even a tiny alignment error can make cropping annoying or create inconsistent results.
Lego is surprisingly useful here. It is modular, adjustable, easy to rebuild, and strong enough for a lightweight film path. If a gear ratio is wrong, you can change it. If the film angle is awkward, you can rebuild the guide. If the whole thing looks like something a 12-year-old genius made during a snow day, that is part of the charm.
2. The Backlight Illuminates the Negative
Film scanning depends heavily on consistent lighting. A clean, even backlight helps the camera capture the full frame without bright spots, weird color casts, or vignetting. The RoboScan parts list includes a white LED backlight module and high-quality lighting components. For color work, consistent color temperature and high color rendering are helpful because negative inversion already has enough drama without adding questionable green shadows.
Diffusion is also important. A bare LED can create uneven illumination, while a diffused panel spreads the light more smoothly. In DIY film scanning, the light source is often the difference between “wow, that looks like a real scan” and “why does Uncle Bob look like he is standing inside a haunted aquarium?”
3. The Raspberry Pi Runs the Brains
The Raspberry Pi handles the automation. It controls the stepper motor, manages lighting, communicates with the camera, and runs the software interface. In the RoboScan project, the software is built around Docker, making deployment more organized for users who are comfortable with maker-style setup. The Pi also hosts a web interface so the scanning process can be monitored and controlled from a browser.
Depending on the camera and connection, a Raspberry Pi 4 can be useful for faster USB transfer. The project documentation notes that older Pi models may still work when high-speed USB is not required. That flexibility is one reason Raspberry Pi remains a favorite platform for camera automation projects: it is small, affordable, widely documented, and just powerful enough to make you believe every household appliance should have Linux.
4. Machine Learning Finds the Frame
One of the clever parts of the project is frame detection. Film frames are not always perfectly spaced, especially with different cameras, film stocks, or hand-advanced analog bodies. Instead of assuming every frame lands at an identical interval, the system can use machine learning to detect when a photo is properly framed. The Raspberry Pi article about the project notes that the model was trained with a surprisingly small set of images.
A Google Coral USB Accelerator can be added to speed up machine-learning inference. That does not mean the scanner suddenly becomes self-aware and begins judging your exposure choices. It simply means the visual recognition task can run more efficiently, helping the machine decide when the next frame is ready to capture.
5. The Camera Captures the Image
RoboScan is designed to use a digital camera with a macro lens, controlled through software such as libgphoto2. A mirrorless or DSLR camera with a sharp macro lens can produce excellent results because it captures the negative as a high-resolution raw file. The Raspberry Pi does the coordination, while the camera does what cameras do best: stare at rectangles and turn light into files.
Modern Raspberry Pi camera options also make DIY scanning more interesting. The Raspberry Pi High Quality Camera, for example, uses a 12.3-megapixel Sony sensor and supports interchangeable C- and CS-mount lenses. While a dedicated mirrorless camera may outperform it in some workflows, the HQ Camera shows why maker-built scanners keep evolving: the imaging hardware keeps getting better, smaller, and easier to integrate.
What Makes This DIY Film Scanner So Appealing?
It Automates the Boring Part
Manual film scanning is not hard in theory. Place frame. Focus. Capture. Move film. Repeat. The problem is that a 36-exposure roll requires doing that again and again, and the 29th frame never feels as exciting as the first. RoboScan reduces that repetitive labor by turning film advancement and capture into an automated workflow.
It Is Open Source
The RoboScan project is available as open-source software, which matters because users can inspect it, modify it, improve it, and adapt it to their own equipment. Open-source film scanning projects are especially valuable because photographers rarely have identical setups. One person has a Sony mirrorless camera. Another has an old Canon DSLR. Someone else has a Raspberry Pi HQ Camera, a drawer full of Lego, and the dangerous confidence that comes from watching three maker videos in a row.
It Uses Accessible Parts
The parts list includes familiar maker components: a Raspberry Pi, a stepper motor, a motor driver, LED lighting, a digital camera, and Lego elements. Some parts require wiring, printing adapters, or configuring software, so this is not a “plug it in and scan grandma’s wedding negatives before lunch” product. Still, compared with building a precision film transport from machined metal, Lego makes the project more approachable.
It Is Genuinely Useful
A novelty build is fun. A novelty build that solves an annoying workflow problem is better. RoboScan sits in that sweet spot. It is playful, but it is not pointless. Automated film advancement, consistent lighting, camera control, and file transfer are exactly the tasks that make home scanning slower than people expect.
DIY Film Scanning Quality: What to Watch For
Dust Is the Final Boss
Every film scanning setup eventually becomes a dust management system with a camera attached. Before scanning, negatives should be handled carefully by the edges, ideally with clean gloves. A blower can remove loose dust, and an anti-static brush may help. Avoid rubbing the emulsion side, because scratches are forever, and Photoshop healing tools should not be forced into unpaid overtime.
Alignment Matters
The camera sensor and film plane should be parallel. If the camera is tilted, one side of the frame may be sharp while the other is soft. This is one reason a rigid frame is important. Lego is adjustable, but the final scanning position still needs to be stable. A good build should minimize wobble, keep the negative flat, and prevent the film from scraping against rough edges.
Use Raw Capture When Possible
Raw files preserve more editing flexibility than JPEGs. Color negatives require inversion, white balance adjustment, contrast control, and dust cleanup. A raw workflow gives you more room to correct exposure and color without damaging the file. For black-and-white film, raw capture also helps maintain smooth tonal transitions and shadow detail.
Light Quality Affects Color
The backlight should be bright, even, and consistent. High-CRI lighting is useful because it helps preserve color accuracy. Uneven light can be corrected with flat-field calibration, but it is better to start with clean illumination than to fix problems later. In film scanning, prevention is always easier than digital surgery.
Who Should Build a Lego and Raspberry Pi Film Scanner?
This project is ideal for photographers, tinkerers, archivists, students, and family historians who enjoy building as much as using. If you want a polished consumer product, a commercial scanner or scanning service may make more sense. If you like learning how machines work, adapting designs, and occasionally muttering at GPIO pins, this kind of scanner is deeply satisfying.
It is especially useful for people with many rolls to digitize. The more frames you scan, the more automation matters. For one roll, a manual setup is fine. For fifty rolls, your wrist, eyes, and general optimism will appreciate a machine that advances the film for you.
Can It Replace a Professional Film Scanner?
In some cases, yes. In other cases, not quite. A well-built camera scanning rig can produce excellent results, especially with a high-resolution camera, sharp macro lens, and even light source. For web publishing, family archives, social media, and many print uses, the results can be more than good enough.
However, professional scanners may still offer advantages in dynamic range, infrared dust removal, film flatness, color consistency, and batch reliability. High-end lab scanners are designed for repeatable production work. RoboScan is more like a brilliant garage-built assistant: clever, useful, customizable, and occasionally in need of a screwdriver.
The best way to think about it is not “DIY versus professional.” It is “which workflow fits the job?” Precious, rare, damaged, or historically important negatives may deserve professional handling. Everyday rolls, family archives, and experimental film projects are perfect candidates for a DIY scanning system.
Practical Tips Before You Start Building
Test With Unimportant Film First
Do not begin with your only negatives from a once-in-a-lifetime event. Use a test roll or a strip you can afford to sacrifice. Check for scratches, tension issues, uneven lighting, focus drift, and frame detection errors.
Keep the Film Path Gentle
Film should glide, not fight. Any sharp edge, tight bend, or uneven pressure point can create scratches. Lego pieces are smooth enough for many mechanical tasks, but film is delicate. Consider adding soft guides or carefully testing contact points before running valuable negatives.
Calibrate Focus and Exposure
Focus should be checked at the grain level if possible. For exposure, avoid clipping highlights or shadows. Color negatives can be tricky because the orange mask changes how the histogram looks. Take test captures, invert them, and inspect the result before committing to a full roll.
Create a File-Naming System
Automation can create lots of files quickly. Use clear folder names, roll numbers, dates, and frame sequences. Future you will be grateful. Future you may even forgive present you for keeping unlabeled negatives in a cookie tin.
Experience Notes: What It Feels Like to Use a DIY Film Scanner
The first experience with a Lego and Raspberry Pi film scanner is usually a mix of wonder, suspicion, and mild fear. You load the film, start the system, hear the stepper motor click, and suddenly the machine advances a negative like it has been doing this professionally since 1978. The first captured frame appears, and you immediately zoom in too far because that is what photographers do. You check grain, corners, dust, color, and whether the image is straight. Then you realize the machine is already moving to the next frame, completely unbothered by your emotional journey.
The biggest practical surprise is how much time disappears in preparation rather than capture. Cleaning the film, setting focus, leveling the camera, checking the light, and confirming the software connection can take longer than expected. But once the workflow is dialed in, automation changes the mood completely. Instead of babysitting every frame, you supervise the process. You can review files, prepare the next roll, or simply enjoy the mechanical ballet of Lego gears doing something far more useful than launching plastic missiles across a bedroom.
Another real-world lesson is that scanning teaches you about your old cameras. Uneven spacing, light leaks, exposure mistakes, and frame overlap become very obvious when a machine tries to scan the roll consistently. The scanner does not judge, but it does reveal. That half-frame at the end of the roll? There it is. That underexposed indoor shot from 2003? Also there, lurking in muddy orange. A good digital workflow can rescue many frames, but scanning reminds you that analog photography is a partnership between chemistry, mechanics, and luck.
Color correction is its own adventure. Black-and-white negatives are usually friendly: invert, adjust levels, clean dust, enjoy. Color negatives can be more demanding because the orange mask, film stock, exposure, and light source all influence the final look. Some users prefer dedicated negative conversion software, while others build presets in Lightroom, Capture One, or Photoshop. Either way, the scanner gets you to the starting line faster. The art still happens in editing.
The best part is emotional. Old negatives often contain images nobody has seen clearly in years. A faded print may look dull, but the negative can still hold surprising detail. Scanning a strip and discovering sharper faces, richer shadows, or a forgotten moment feels like opening a tiny time capsule. The Lego and Raspberry Pi scanner makes that process less intimidating. It says: yes, your archive is messy, but it is not hopeless. Give the robot some film, give yourself a decent cup of coffee, and let the past roll through one frame at a time.
Final Thoughts
The Lego and Raspberry Pi film scanner is exactly the kind of invention that makes DIY technology exciting. It is practical, weird, affordable, educational, and just a little ridiculous in the best possible way. It brings together analog photography, robotics, computer vision, open-source software, and toy bricks to solve a real problem: getting film into digital form without losing your weekend to manual scanning.
For photographers with boxes of negatives, RoboScan is more than a clever build. It is a reminder that old media does not have to stay old-fashioned. With a Raspberry Pi, a camera, a good light source, and a pile of Lego parts, yesterday’s film can become today’s editable, shareable, backed-up digital archive. And honestly, if that is not a perfect use of modern maker culture, what is?
Note: This article is original editorial content based on verified project details, Raspberry Pi film-scanning concepts, camera-scanning practices, and archival handling recommendations.


