
Table of Contents >> Show >> Hide
- Why Dollar Tree House Frames Are a Holiday DIY Favorite
- Supplies You’ll Need for This Holiday Upgrade
- Step-by-Step Guide: Turning Frames Into a Christmas Village
- Design Ideas Inspired by Popular Holiday Décor Trends
- Where to Display Your DIY Christmas Village
- Why This DIY Project Is Perfect for Families
- Budget Breakdown: How Much Does This Craft Really Cost?
- Extra Tips From Seasoned DIYers
- Final Thoughts: Create Holiday Magic on a Budget
- : Real-World Experience & Insights From Building These Villages
If you love the idea of building a charming Christmas village without dropping the equivalent of Santa’s toy-production budget, welcome to your new favorite holiday DIY. Dollar Tree’s simple wooden house framesthose lightweight little structures you’ve probably walked past a hundred timescan be transformed into a magical, glowing Christmas village that looks straight out of a holiday movie set. Even better? It’s inexpensive, customizable, and surprisingly relaxing, especially with a mug of cocoa nearby.
Across DIY communities, from Hometalk to small creative blogs to major lifestyle sites, crafters are embracing budget-friendly holiday décor that feels personal, nostalgic, and warm. And nothing captures that spirit better than turning basic Dollar Tree house frames into a winter wonderland fit for mantels, shelves, and tabletops. With a touch of paint, some creative layering, and a sprinkle of Christmas magic, you can craft a miniature village that rivals store-bought setupsat a fraction of the cost.
Why Dollar Tree House Frames Are a Holiday DIY Favorite
Crafting experts across the U.S. have noticed a trend: people want décor that feels homemade but still looks chic. Dollar Tree frames check all the boxesthey’re lightweight, inexpensive, easy to modify, and neutral enough to transform into almost anything. Sites like Good Housekeeping, Better Homes & Gardens, The Pioneer Woman, and Apartment Therapy frequently highlight low-budget holiday crafts, and wooden frames consistently make the list.
But what makes the house-shaped ones so special? It’s the instant holiday vibe. They already resemble tiny buildings, so with a few upgradesfrom faux snow to LED tea lightsthey become the foundation for a whimsical Christmas village. Plus, the frames come in several styles, allowing you to mix shapes and heights for a more dynamic display. Think “tiny North Pole subdivision,” but stylish.
Supplies You’ll Need for This Holiday Upgrade
Before diving into the creative process, line up the essentials. Most of these items can be found at Dollar Tree, Walmart, Target, or any craft store.
- Dollar Tree wooden house frames (4–8 depending on your village size)
- White acrylic paint or spray paint
- Mini bottlebrush trees
- LED tea lights or fairy lights
- Hot glue gun and glue sticks
- Faux snow or Epsom salt
- Scrapbook paper, craft foam, or cardstock
- Ribbon, mini wreaths, and other tiny holiday embellishments
- Optional: wood filler for smoothing, Mod Podge for sealing, glitter if you want shimmer
Remember: this craft is meant to be fun and flexible. You can customize the materials based on your preferred lookmodern and minimalist, traditional and cozy, or full-on glitter explosion.
Step-by-Step Guide: Turning Frames Into a Christmas Village
Step 1: Prep and Paint Your House Frames
Start by removing any labels and sanding any rough edges. A smooth surface makes painting easier. Apply white paint for a snowy winter aesthetic or choose soft pastels for a Scandinavian feel. Let everything dry completely before moving on.
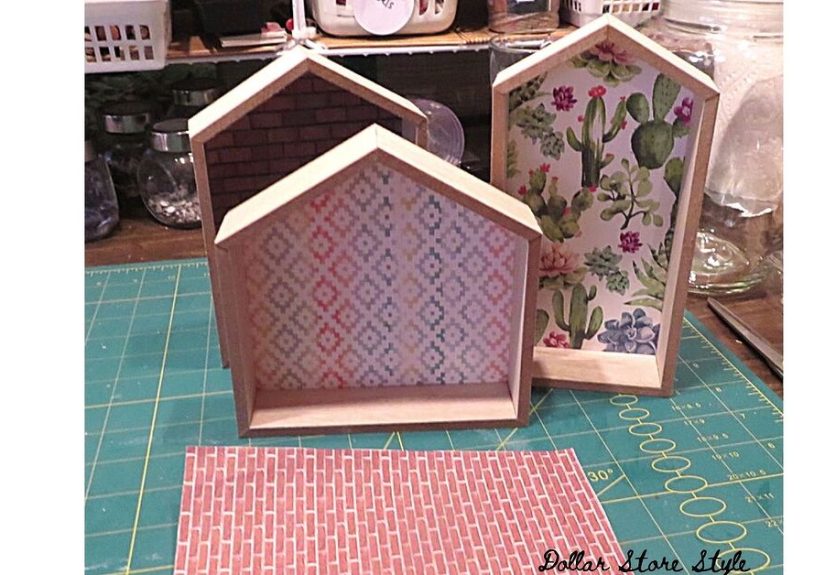
Step 2: Create Backgrounds That Bring the Houses to Life
This is where scrapbook paper or cardstock comes in handy. Cut pieces to fit the interior backing of each frame. Popular choices include:
- Deep navy paper with white speckles for a starry night
- Red plaid for a rustic lodge vibe
- Gold foil for a glamorous holiday style
Attach the backing using Mod Podge or a thin layer of craft glue. This small detail instantly adds depth and personality.
Step 3: Build Mini Scenes Inside Each House
Now for the most joyful partdecorating! Arrange mini bottlebrush trees, tiny deer, miniature wreaths, or small houses inside each frame. Glue pieces in place to make the scene stable. Mixing textureslike felt trees next to wood piecesadds visual interest.
If you want your Christmas village to light up (and why wouldn’t you?), place LED tea lights behind or underneath the elements. Battery-operated options keep things safe and low-stress.
Step 4: Add Winter Magic With Faux Snow
Faux snow, Epsom salt, or even baking soda can mimic fresh powder. Sprinkle the “snow” along the bottom of each frame or secure it with Mod Podge for a more permanent look.
Step 5: Arrange Your Village
Create tiers using books, cake stands, or boxes wrapped in neutral paper. Group the frames by height to build a small town feel. Add fairy lights in the background to create a soft glow that ties the whole village together.
The final effect? A cozy holiday display that feels whimsical, warm, and curated without costing more than a movie night snack run.
Design Ideas Inspired by Popular Holiday Décor Trends
Holiday design experts from HGTV, Martha Stewart Living, Real Simple, and Country Living often highlight how mini Christmas villages can completely transform a room’s seasonal atmosphere. Here are some creative design variations that elevate your Dollar Tree village:
- Rustic Farmhouse Village: Use kraft paper backdrops, buffalo plaid accents, and tiny wooden elements.
- Modern Minimalist Village: Stick to black, white, and gold with sleek lines and simple bottlebrush trees.
- Candy-Coated Pastel Village: Soft pink, mint, lavender, and baby blue paired with iridescent glitter.
- Nordic Woodland Village: Neutral tones, wooden animals, and natural fibers like twine or burlap.
- Vintage Retro Village: Bright reds, classic greens, tiny Santas, and old-school tinsel flair.
Mixing and matching styles is half the fun. Because the frames are inexpensive, you can experiment without fearconsider creating a new theme each year.
Where to Display Your DIY Christmas Village
This lightweight décor is incredibly versatile. Popular display spots include:
- Your mantel: Create a focal point that warmly anchors your living room.
- Bookshelves: Tuck houses between books or on open shelves for a magical surprise.
- Kitchen counters: Because even kitchens deserve a little holiday charm.
- Entryway tables: Greet guests with a cheerful winter welcome.
- Office desks: Add a festive touch to your workspace without taking up too much room.
Some creators even set up their miniature towns on window sills where the lights reflect beautifully at night.
Why This DIY Project Is Perfect for Families
According to family-oriented home lifestyle sites, holiday crafts like this one create lasting memories because everyone contributes. Kids can help paint frames, sprinkle faux snow, and choose interior décor. Adults, meanwhile, can manage glue guns and structural decisions.
Plus, the project is short enough to finish in an afternoon but customizable enough to stretch across several days if you want to savor the experience. It’s also great for holiday gatheringsset up a craft station and let guests make their own house to take home.
Budget Breakdown: How Much Does This Craft Really Cost?
One of the biggest benefits of this DIY Christmas village is the low price tag. Here’s a simple breakdown:
- House frames: $1.25 each
- Bottlebrush trees: $1.25 per pack
- LED tea lights: $1.25 per 2-pack
- Scrapbook paper: $0.50–$1 per sheet
- Faux snow: $1.25 per bag
For under $15–$25, you can create a full display that looks like something from a high-end home décor catalog. Even major retailers like Target, Michaels, and Joann Fabrics showcase similar pre-built displaysoften for triple the cost.
Extra Tips From Seasoned DIYers
- Seal painted frames with Mod Podge to prevent chipping.
- Add mini wreaths to the “doors” of the houses using green pipe cleaners.
- Use warm white fairy lights for a cozy glow.
- Layer heights using wooden risers for a professional display.
- Keep all village pieces lightweight for easy storing after the holidays.
Final Thoughts: Create Holiday Magic on a Budget
Turning Dollar Tree house frames into a Christmas village is one of the most rewardingand wallet-friendlyholiday projects you can take on. It blends creativity, nostalgia, and personalization into décor that feels meaningful, not mass-produced. Whether you’re decorating your home, crafting with the family, or gifting handmade pieces, this DIY village is proof that festive magic doesn’t require a big spend.
: Real-World Experience & Insights From Building These Villages
After making several of these Dollar Tree Christmas villages myselfand helping friends craft theirsI’ve learned a lot about what works, what doesn’t, and what takes the display from cute to absolutely enchanting.
The first thing I noticed is that the frames paint beautifully, but only if you lightly sand them first. Skipping the sanding step gives the wood a slightly fuzzy texture once painted, which isn’t the end of the world but does make the finish less crisp. Using spray paint speeds things up, but brushing on acrylic paint gives you better control, especially when adding trim details.
Lighting is where the project comes alive. I’ve tried everything from micro fairy lights to tea lights to LED strips. Tea lights work best inside frames with deeper backing, while fairy lights woven behind the village create a magical nighttime glow. If you’re aiming for a storefront look, tiny battery-powered LED puck lights can sit under risers to illuminate the houses from below.
One trick I learned from HomeTalk community posts is layering textures for a more realistic village. Instead of just placing bottlebrush trees along the bottom, try mixing large and small trees, adding tiny wrapped “presents,” and even creating a snowy walkway using white craft foam. These little touches add storytellingsuddenly your village isn’t just cute, it feels lived in.
Another big improvement came from adding depth to the backgrounds. At first, I used plain scrapbook paper, but switching to double-layered backdrops made a huge difference. For example, pairing navy cardstock with metallic gold star stickers instantly created a magical night sky. Using wood-grain vinyl in another frame made it look like a rustic cabin interior.
One of my favorite setups was a gingerbread-style village painted in pastel pink, mint, and buttery yellow. With glitter Mod Podge sealing the trim and faux “icing” piped along the rooflines using puffy paint, the finished display looked like sugary cookies come to life. It ended up being a conversation starter at holiday gatherings, and several guests asked if the houses were bought from a specialty store.
Storage is surprisingly easy. I wrap each frame in tissue paper, place them flat in a shoebox-size container, and add a note with the theme so I remember what goes where next year. The lightweight nature of the Dollar Tree frames means nothing chips or cracks easily, so the village stays pristine season after season.
What I love most about this project is that it evolves. Every year, I add a few new “buildings”a post office, a toy shop, a snowy cottage. The collection grows organically, and each piece carries a memory of the year it was made. It’s festive, sentimental, and endlessly customizable. Truly the perfect holiday craft.


