
Table of Contents >> Show >> Hide
- What “Braising” Actually Means
- Why Braising Makes Meat So Tender
- The Best Cuts of Meat for Braising
- The Braising Formula: A Foolproof Step-by-Step
- Step 1: Season like you mean it
- Step 2: Sear for flavor (don’t rush this)
- Step 3: Build a flavor base with aromatics
- Step 4: Deglaze (aka: rescue the good stuff)
- Step 5: Add braising liquidenough, but not a swimming pool
- Step 6: Cover and cook low and slow
- Step 7: Cook until tender, not until the clock says so
- Step 8: Rest the meat (yes, even in a braise)
- Step 9: Finish the sauce
- Temperature, Time, and “Don’t Let It Boil”
- Choosing the Right Braising Liquid
- How Much Liquid Should You Use?
- Troubleshooting: Why Your Braise Isn’t Tender (Yet)
- Three Braising Examples You Can Copy Tonight
- Food Safety Notes (Tender Is GreatSafe Is Better)
- Experience Section: Real-Kitchen Braising Moments ()
- Conclusion: The Tender-Meat Takeaway
Braising is the culinary equivalent of turning a “hard no” into a “wow.” You start with a tough, no-nonsense cut of meat
(the kind that looks like it bench-presses refrigerators), thenthrough a little browning, a little bubbling, and a lot of patience
you end up with something spoon-tender and deeply flavorful.
If you’ve ever wondered how pot roast becomes fork-friendly, why short ribs can taste like a restaurant splurge, or how
a simple Dutch oven can make you feel like a weekend hero… you’re in the right kitchen.
What “Braising” Actually Means
Braising is a two-stage cooking method that uses both dry heat and moist heat. In plain English: you sear the meat first
to build flavor and color, then you cook it slowly in a covered pot with a small amount of liquid until it turns tender.
It’s often confused with stewing, but there’s a key difference:
braising typically uses larger pieces of meat with the liquid coming partway up the sides (not fully submerging it),
while stewing tends to use smaller pieces that are more fully covered in liquid.
You’ll also hear braising called “pot roasting” when the star is a large roast (like chuck), cooked low and slow with aromatics and
enough liquid to keep things gentle and saucy.
Why Braising Makes Meat So Tender
Tender braised meat isn’t magicit’s muscle science with a side of gravy. Tough cuts are tough because they contain more
connective tissue (collagen). With time and gentle heat, collagen breaks down into gelatin, which gives braises their
silky mouthfeel and “melts in your mouth” texture.
The covered pot also creates a cozy environment: heat circulates, moisture stays trapped, and the meat cooks evenly without
the harsh drying effect of high heat. The result is meat that stays juicy, tastes richer, and comes with its own built-in sauce.
The Best Cuts of Meat for Braising
Braising shines with cuts that have plenty of connective tissue and (often) a bit of fat. These are the cuts that can be chewy
when cooked quickly, but turn luxurious when cooked slowly.
Great beef cuts to braise
- Chuck roast (classic pot roast energy)
- Brisket (deep flavor, slices beautifully when rested)
- Short ribs (rich, dramatic, “special occasion” tender)
- Shank (osso buco style; collagen for days)
Great pork cuts to braise
- Pork shoulder / Boston butt (pull-apart, crowd-pleaser)
- Country-style ribs (meaty, forgiving, great for beginners)
- Pork belly (if you want maximal richness)
Other excellent braising options
- Lamb shanks (classic braising superstar)
- Chicken thighs (quick braise with big payoff)
- Turkey legs (dark meat + braise = comfort)
Lean cuts (like chicken breast, pork tenderloin, or a very lean beef round) can dry out more easily. You can still braise them,
but you’ll need more precision with time, temperature, and restingand honestly, those cuts often prefer different methods.
The Braising Formula: A Foolproof Step-by-Step
Here’s the reliable rhythm of a great braise. Once you learn this, you can braise “without a recipe” and still look like you planned everything.
Step 1: Season like you mean it
Salt is not just flavorit’s foundation. Season the meat generously with salt and pepper. If you have time, salt it a few hours
ahead (or overnight) and refrigerate it uncovered for better flavor and browning.
Step 2: Sear for flavor (don’t rush this)
Heat a heavy pot (Dutch oven is ideal) and add a little oil. Sear the meat on multiple sides until it’s deeply browned.
This isn’t about “cooking it through.” It’s about creating a flavorful crust and those browned bits on the bottom of the pot
(called fond), which will become sauce later.
Pro tip: Don’t overcrowd the pot. If the meat is packed in too tightly, it steams instead of browns. Brown in batches if needed.
Your patience here gets paid back in flavor interest.
Step 3: Build a flavor base with aromatics
Remove the meat. In the same pot, sauté aromatics like onion, garlic, carrots, and celery (the classic “mirepoix” trio plus friends).
Add a spoonful of tomato paste if you like deeper, roasted flavor. Cook until everything smells sweet and toasty.
Step 4: Deglaze (aka: rescue the good stuff)
Pour in a splash of wine, beer, stock, or even water and scrape up those browned bits. This is where your sauce begins.
Deglazing also reduces the risk of a burnt-tasting braise because you’re dissolving the fond into the liquid instead of letting it sit
and scorch.
Step 5: Add braising liquidenough, but not a swimming pool
Return the meat to the pot and add liquid until it comes about one-third to halfway up the sides (a common guideline is “halfway up”).
You want moist heat and gentle simmering, not boiling the meat like it owes you money.
Step 6: Cover and cook low and slow
Put on a tight-fitting lid and cook at a gentle simmer on the stovetop or in a low oven. The oven is often more even and forgiving,
because heat surrounds the pot rather than blasting from underneath.
Step 7: Cook until tender, not until the clock says so
Braises don’t care about your schedule. Start checking when you’re “close,” not when you’re “done.”
You’re aiming for a fork to slide in with little resistance. For shred-style dishes, the meat should pull apart easily.
Step 8: Rest the meat (yes, even in a braise)
Let the meat rest in its juices off heat for 10–20 minutes before slicing or shredding. This helps the texture settle and keeps slices
from drying out.
Step 9: Finish the sauce
Remove the meat, then simmer the liquid uncovered to reduce and concentrate flavor. Skim excess fat, strain if desired, and adjust seasoning.
If you want a thicker sauce, you can whisk in a small slurry (cornstarch + water) or a classic butter-and-flour paste.
Temperature, Time, and “Don’t Let It Boil”
For most braises, you’re looking for a gentle environment: a low oven (often around 300–325°F) or a stovetop simmer so calm
it barely bubbles. A rolling boil can tighten muscle fibers, emulsify fat into the sauce in a greasy way, and generally make the whole
thing feel a little stressed out.
Time depends on the cut, size, and whether it’s bone-in. Typical ranges:
- Chuck roast (3–4 lb): about 3–4 hours in the oven
- Short ribs: about 2.5–3.5 hours
- Pork shoulder chunks: about 2.5–4 hours (or longer for shreddable)
- Chicken thighs: about 35–60 minutes
Pressure cookers and Instant Pot–style appliances can shorten braise time dramatically, but you still want the same flavor steps:
brown first if possible, build the base, and reduce the sauce afterward for the best texture and taste.
Choosing the Right Braising Liquid
Liquid is more than moisture; it’s the flavor delivery system. Think of it as the difference between “cooked meat” and “I should invite people over.”
Common braising liquids
- Stock or broth: the classic, flexible option
- Wine: adds acidity and depth (red for beef, white for chicken/pork)
- Beer or stout: malty richness, great with onions and beef
- Cider or apple juice: lovely with pork and root vegetables
- Tomatoes: crushed tomatoes or sauce for Italian-style braises
Flavor boosters that make braises pop
- Aromatics: onion, garlic, shallots, scallions
- Herbs: thyme, rosemary, bay leaf, parsley stems
- Umami: soy sauce, miso, fish sauce (a little goes a long way)
- Sweet balance: a touch of honey, brown sugar, or caramelized onions
- Acid for brightness: wine, vinegar, lemon added near the end
How Much Liquid Should You Use?
The short version: enough for gentle cooking and sauce, but not so much that you dilute flavor. Many cooks aim for liquid to come
about one-third to halfway up the meat. In a covered pot, the trapped steam does a lot of the “moist heat” work, while the partially exposed
top can still develop flavor and color.
Using too much liquid can give you a thin, washed-out sauce. Using too little can risk scorching, especially on the stovetop.
If you’re unsure, start with lessyou can always add a splash later.
Troubleshooting: Why Your Braise Isn’t Tender (Yet)
Problem: The meat is tough and chewy
This usually means it needs more time. Collagen doesn’t transform on a deadline. Keep cooking gently until it becomes tender.
(The frustrating truth: a braise can be tough at 2 hours and incredible at 3 hours, with no warning in between.)
Problem: The meat is dry
Dry can happen if the heat was too high, the pot wasn’t sealed well, or the meat cooked past its best texture window.
Keep the simmer gentle, ensure a tight lid, and rest the meat before slicing. Also, choose a cut with enough fat and connective tissue.
Problem: The sauce tastes flat
Add salt gradually, then bring brightness: a splash of vinegar, a squeeze of lemon, or a spoon of mustard can wake it up.
Reducing the sauce uncovered concentrates flavor fast.
Problem: The bottom burned
Heat was likely too high or there wasn’t enough liquid. Deglaze thoroughly before the long cook and consider the oven method for steadier heat.
Problem: Vegetables turned to mush
Add quick-cooking vegetables later (or roast them separately). Root vegetables can handle longer cooking, but even they can go too soft if left for hours.
Three Braising Examples You Can Copy Tonight
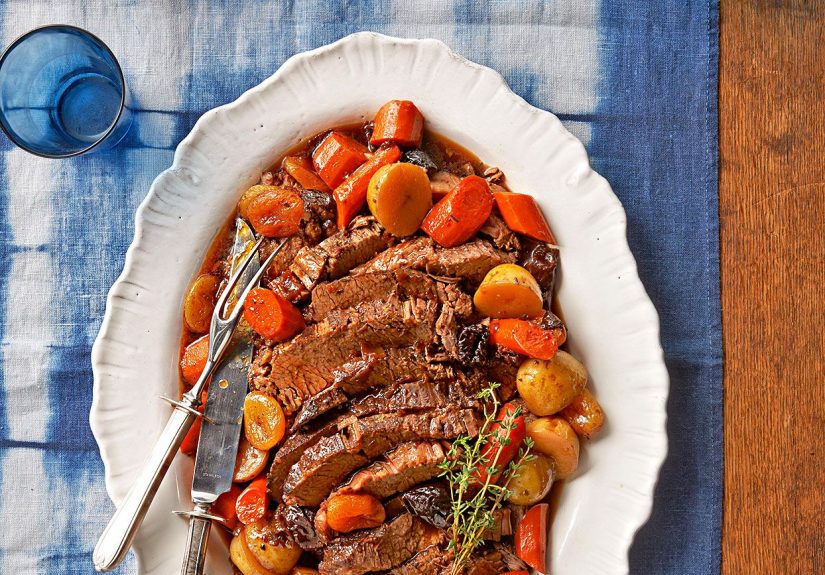
1) Classic Beef Pot Roast (weekend comfort)
Sear a chuck roast. Sauté onion, carrot, and celery. Deglaze with red wine, add beef broth to halfway up the roast, toss in thyme and a bay leaf,
then cover and braise at 300–325°F until fork-tender. Reduce the sauce and serve with mashed potatoes.
2) Red Wine Short Ribs (date-night energy)
Brown bone-in short ribs deeply. Build a base with onions and garlic, add tomato paste, deglaze with wine, then add broth and herbs.
Cook covered until the meat yields easily. Chill overnight if you canfat is easier to remove cold, and flavor improves.
3) Cider-Braised Pork Shoulder (sweet-savory, low effort)
Cut pork shoulder into large chunks, sear, then braise with onions, garlic, apple cider, a spoon of mustard, and a bay leaf.
Cook until shreddable. Reduce the liquid into a glossy sauce and pile the pork onto buns or serve over roasted sweet potatoes.
Food Safety Notes (Tender Is GreatSafe Is Better)
Braising is slow, but it should still be safe. Use a food thermometer if you’re unsure, especially for poultry.
In general, whole cuts of beef and pork are often considered safe at 145°F with a rest time, while poultry should reach 165°F.
Also cool leftovers promptly: divide into shallow containers so they chill quickly, then refrigerate.
Experience Section: Real-Kitchen Braising Moments ()
If you’re new to braising, your first experience might feel suspiciously easylike you’re getting away with something.
You brown a roast, pour in a little liquid, put the lid on, and walk away. Two hours later your kitchen smells like you hired a private chef.
That’s the braise doing what it does best: working quietly while you live your life.
One of the most common “aha” moments people have is realizing that browning isn’t optional. It’s tempting to skip searing because you’re hungry
and the meat is going to cook for hours anyway. But the day you do a side-by-side comparisonone batch browned deeply, one batch “meh”you’ll
taste the difference immediately. The browned version tastes rounder, richer, and more “complete,” like the sauce already knows what it wants to be.
Another memorable moment is the first time you deglaze and watch the pot transform. Those stuck-on bits look like a mess until a splash of wine or broth
hits the heat and a wooden spoon starts scraping. Suddenly the bottom of the pot becomes liquid gold. It’s weirdly satisfying, like cleaning a window
and discovering there was a beautiful view behind it the whole time.
Then there’s the patience lesson. Braises teach you that “tough” doesn’t always mean “ruined”sometimes it just means “not yet.”
Many home cooks have had the same experience: you check the meat, it’s chewy, and you panic. The fix is almost always the same:
lower the heat if needed, put the lid back on, and give it more time. Sometime later, you check again and the fork slides in like the meat finally
remembered it’s supposed to be delicious.
Braising also has a way of making you feel organized, even if you aren’t. It’s a natural make-ahead method. The sauce gets better overnight,
fat is easier to remove the next day, and reheating is gentle and forgiving. People who “don’t meal prep” often discover that braises are basically
meal prep in disguise: cook once, eat twice, and feel like you cracked a secret code.
And finally, there’s the moment you lift the lid. It’s a small drama: steam rushes out, the sauce bubbles softly, and the meat looks darker and glossier
than when it went in. It’s the kind of reveal that makes you want to call someone into the kitchen like, “Hey. Look at this. This is happening.”
If your braise is tender and the sauce tastes deep and savory, you’ve earned the right to do a little victory lappreferably with a piece of bread
to mop up the pot.
Conclusion: The Tender-Meat Takeaway
Braising is one of the most reliable ways to turn tougher cuts into tender, satisfying mealswithout fancy tools or stressful timing.
Remember the core principles: sear for flavor, use just enough liquid, keep the heat low and gentle,
and cook until the meat is tender (not until the timer says so). Once you’ve nailed the method, you can braise with confidence all year long.


