
Table of Contents >> Show >> Hide
- Why Distressed Black Works (Even If You’re Not “A Black Furniture Person”)
- What “Distressed” Should Look Like (Hint: Not Random Scratches)
- Pick Your Black: Paint, Stain, or “Ebonized” Wood?
- The 10 Easy Pieces (That Look Like You Paid Way More Than You Did)
- 1) A Slim Console Table
- 2) A Vintage-Style Dresser
- 3) A Nightstand (Or Two That Don’t Match Perfectly)
- 4) A Coffee Table with a Worn Edge
- 5) A Sideboard or Buffet
- 6) A Bookcase (Especially with a Lighter Back Panel)
- 7) A TV Stand or Media Console
- 8) A Small Accent Cabinet
- 9) A Dining Table Base (With a Wood Top)
- 10) A Mirror Frame or Wall Shelf
- How to Get a Believable Distressed Black Finish (Without Overthinking It)
- Styling Distressed Black Furniture So It Looks Intentional
- Maintenance: Keep the Charm, Lose the Grime
- Common Mistakes (So You Don’t Have to Learn the Hard Way)
- Conclusion: A Little Black (and a Little Wear) Goes a Long Way
- Real-World Experiences: What People Learn After Going Distressed Black (500+ Words)
Black furniture has a reputation. It’s the leather-jacket friend of home decor: cool, confident, and slightly intimidating until you realize it’s also
ridiculously versatile. Add a distressed finish (a.k.a. “I’ve lived a little”), and suddenly black furniture feels warm, collected, and inviting instead
of “did a showroom mannequin pick this room?”
This guide rounds up 10 easy, high-impact furniture pieces that look especially good in distressed blackplus the practical
tips that keep the finish from looking fake, flaky, or like it lost a fight with sandpaper. Whether you’re shopping vintage, flipping a thrift find,
or updating what you already own, you’ll leave with a plan that looks intentional (even if you “accidentally” end up distressed).
Why Distressed Black Works (Even If You’re Not “A Black Furniture Person”)
A solid, perfect black finish can read modern and sharpwhich is great if your vibe is “sleek gallery” or “I alphabetize my spices.” But distressing
softens black’s edges (literally and visually). It adds contrast, reveals undertones, and gives the piece depth so it doesn’t feel like a visual black hole
absorbing all joy and sunlight.
The secret is that most “black” finishes aren’t truly ink-black. Many are soft blacks with charcoal, brown, blue, or green undertones. That’s why one
black dresser can feel cozy and another can feel stormy and dramatic. Distressing helps those undertones show up, which makes the finish feel layered and real.
What “Distressed” Should Look Like (Hint: Not Random Scratches)
The most believable distressing mimics natural reminders of daily life: worn edges, softened corners, faded high-touch areas, and just a bit of age
in creases and details. It’s not about attacking the piece everywhere. It’s about choosing the places that would realistically wear firstlike around drawer pulls,
on table edges, and along feet and baseboards.
Think of distressing like seasoning food. A little makes everything better. Too much and the whole dish tastes like salt and regret.
Pick Your Black: Paint, Stain, or “Ebonized” Wood?
Before we get to the 10 pieces, decide how you want “black” to behave. The method changes the lookand the durability.
Option 1: Painted Black (Best for Dramatic Makeovers)
Paint gives full coverage and works on most existing finishes with proper prep. For a furniture-grade finish, many DIYers use cabinet-and-trim style paints,
enamel-like products, or specialty furniture paints. Chalk-style paints are popular because they’re forgiving and distress easily, but they typically need a protective
finish (wax or topcoat) if the piece will be used often.
Option 2: Black Stain or Gel Stain (Best for Seeing Wood Grain)
Stain lets the wood grain show through, which can look rich and expensive. Gel stain is thicker and can be easier to control on vertical surfaces. This approach
is great when you want “black wood,” not “painted black.”
Option 3: A Layered Look (Best for Believable Distressing)
Many of the most convincing distressed black pieces use layers: a warm wood tone underneath, a deep black top coat, and then selective sanding that
reveals hints of what’s below. That layered reveal is what gives the finish depth and a genuinely timeworn feel.
The 10 Easy Pieces (That Look Like You Paid Way More Than You Did)
1) A Slim Console Table
A distressed black console is the fastest way to make an entryway look “styled” instead of “I threw my keys somewhere near the door.” Look for a narrow depth
(so it doesn’t block traffic), a lower shelf for baskets, and legs with a little detail. Distress the edges and the feetthose areas naturally get scuffed.
- Where it shines: entryway, behind a sofa, hallway
- Style tip: pair with a light runner and a brass or ceramic lamp for contrast
2) A Vintage-Style Dresser
If you only do one piece, make it a dresser. Big surface area = big impact. A distressed black dresser can feel farmhouse, French country, modern vintage,
or slightly gothic-chic depending on hardware and styling. Keep distressing concentrated around drawer edges and pullsbecause that’s where hands live.
- Best hardware: aged brass, antique nickel, or matte black for a stealth look
- Pro move: line drawers and add cedar blocksbeauty and function can be friends
3) A Nightstand (Or Two That Don’t Match Perfectly)
Distressed black nightstands are small enough to DIY in a weekend but noticeable enough to transform a bedroom. Bonus: pairs beautifully with white bedding and
warm wood tones. If you’re mixing styles, choose nightstands with similar height but different shapesintentional mismatch looks collected, not confused.
4) A Coffee Table with a Worn Edge
Coffee tables live hard lives. They hold mugs, feet (no judgment), board games, and the occasional “temporary” stack of mail that becomes a permanent installation.
A distressed black finish is forgivinglittle scuffs blend into the story instead of screaming “damage!”
- Finish suggestion: consider a tougher topcoat for this one
- Distress map: corners, lower shelf edges, and around any decorative trim
5) A Sideboard or Buffet
A distressed black buffet makes dining rooms feel grounded and grown-up. It also gives you storage for the stuff you swear you use “all the time” (like that
fancy serving platter that only appears on holidays and birthdays). Choose one with doors and drawers so you can hide the chaos.
6) A Bookcase (Especially with a Lighter Back Panel)
A black distressed bookcase can look heavy if everything is dark. The trick: add contrast. A lighter wall behind it, a pale backing, or styling with cream ceramics,
woven baskets, and warm wood frames keeps it airy. Distress the outer edges and the front lip of shelveswhere objects slide.
7) A TV Stand or Media Console
TVs are basically giant black rectangles, so a distressed black media console can make the whole setup feel cohesive instead of “screen floating in space.”
Pick a console wider than the TV for balance, and use the distressing to break up the black-on-black effect.
- Look for: cable management holes, adjustable shelves, doors to hide devices
- Styling tip: add a light-toned tray or stacked books to create contrast
8) A Small Accent Cabinet
Accent cabinets are the sneakers of furniture: they go with everything and get worn constantly. A distressed black accent cabinet works in bathrooms (for towels),
living rooms (for games), and kitchens (for the “miscellaneous” category). Use a slightly softer black if the room is small so it doesn’t feel heavy.
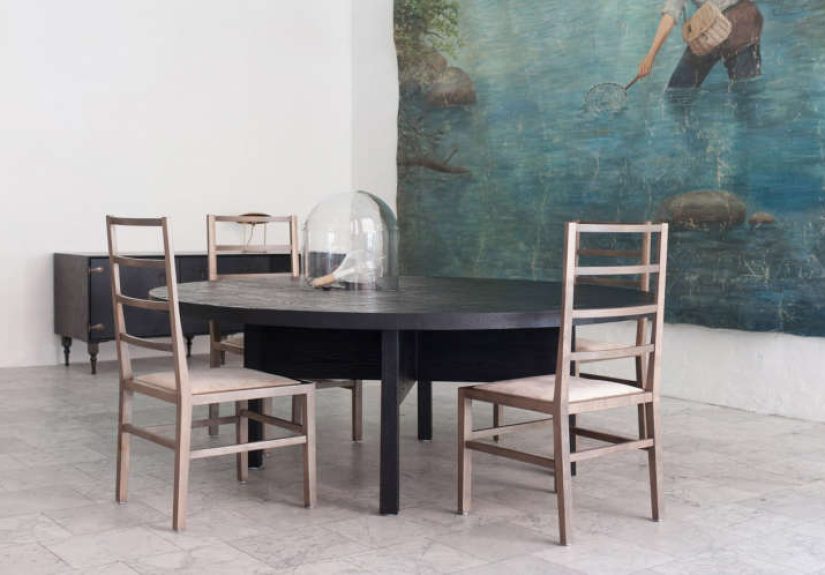
9) A Dining Table Base (With a Wood Top)
If you love the contrast of black and wood, a table with a black distressed base and a natural wood top is a classic. The wood top warms things up,
while the black base anchors the room. Distress the baselegs, stretcher, edgeswhile keeping the top smoother for easy cleaning.
10) A Mirror Frame or Wall Shelf
Want the look without committing to a giant project? Start with a mirror frame or wall shelf. Distressed black frames add definition to walls, especially in bright rooms.
This is also a smart “test drive” for your chosen black color and distressing style before tackling bigger pieces.
How to Get a Believable Distressed Black Finish (Without Overthinking It)
Different products have different steps, but the most reliable approach follows the same rhythm: prep → paint/stain → distress → protect → cure.
Here’s a straightforward workflow that keeps results consistent.
Step 1: Clean Like You Mean It
Furniture collects invisible grimeespecially around handles and edges. Clean thoroughly so your finish sticks. (Paint is many things, but it is not a miracle worker.)
Step 2: Scuff Sand for Adhesion
You’re not trying to sand the piece into a new identity. You’re just giving the surface a little texture so primer/paint grips. A quick scuff is often enough unless the
existing finish is peeling or super glossy.
Step 3: Prime When Needed
Primer is especially useful when you’re dealing with slick finishes, dramatic color changes, or stain bleed-through. It’s also your best friend if you want the black to look
crisp and even, rather than needing eight coats and a pep talk.
Step 4: Apply Black in Thin Coats
Two or three thinner coats typically look better than one thick coat. Thick paint can dry unevenly, show ridges, and make distressing unpredictable. If you want a smoother finish,
consider a small foam roller for flat areas and a brush for details.
Step 5: Distress Where Life Would Actually Happen
The most natural distressing is selective. Focus on:
- corners and edges
- drawer fronts near pulls
- feet and base molding
- raised details and trim
Start subtle and step back often. You can always add more. You cannot easily “un-distress” without repaintingask any DIYer who has stared at a piece and whispered, “I went too far.”
Step 6: Add “Age” with Wax, Glaze, or a Matte Topcoat
If you’re using a chalk-style paint, sealing matters for durability. Wax can add a soft, velvety feel and deepen the look in creases. A matte topcoat keeps the finish protected while
maintaining that low-sheen vibe that makes black look sophisticated instead of plasticky.
Step 7: Respect Cure Time (Your Future Self Will Thank You)
Dry to the touch is not the same as cured. Let finishes harden before heavy useespecially for tabletops and drawers. If you rush, you’ll get sticky spots, scuffs, or fingerprints
fossilized into history.
Styling Distressed Black Furniture So It Looks Intentional
Black can anchor a room, but it needs balance. Use these styling rules to keep your space feeling warm instead of cave-like.
Use Contrast on Purpose
- Light walls + black furniture = crisp, classic contrast
- Warm wood + black = cozy and elevated
- White/cream textiles = softens and brightens
Mix Finishes for Depth
Distressed black looks great with aged brass, brushed nickel, leather pulls, and natural woven textures. Mixing a few finishes prevents the room from feeling flat.
Repeat Black in Small Doses
If you add one big black piece, echo it elsewherepicture frames, a lamp base, cabinet hardwareso it feels connected. Like a good chorus in a song, black should show up more than once.
Maintenance: Keep the Charm, Lose the Grime
Distressed doesn’t mean dirty. Dust regularly, wipe spills quickly, and avoid harsh cleaners that can dull wax or topcoats. For high-use surfaces (coffee tables, dining tables),
a tougher protective finish is worth it.
- Waxed finishes: gentle cleaning; avoid soaking and harsh chemicals
- Topcoated finishes: generally easier for everyday use
- Touch-ups: keep a small jar of your black paint for quick fixes
Common Mistakes (So You Don’t Have to Learn the Hard Way)
Mistake 1: Distressing Everywhere
If every inch is distressed, it stops looking natural and starts looking like a costume. Choose realistic wear zones and keep the rest calmer.
Mistake 2: Skipping Prep on Super Glossy Finishes
If paint won’t grip, it will chipsometimes in a “cute distressed” way, but often in a “my finish is falling off” way. Prep prevents heartbreak.
Mistake 3: Picking the Wrong Sheen
High-gloss black shows every fingerprint and brush mark. For distressed black furniture, matte and satin are usually more forgiving and more believable.
Conclusion: A Little Black (and a Little Wear) Goes a Long Way
Distressed black furniture is one of those rare design moves that works across stylesfarmhouse, traditional, modern vintage, industrial, even coastal (yes, really).
The key is choosing the right piece, using a black with a flattering undertone, and distressing with restraint so the wear looks earned, not manufactured.
Start with one of the “easy pieces” above, keep your distressing realistic, protect the finish, and your room will instantly feel more layeredlike you curated it
over time instead of panic-ordering everything in one weekend.
Real-World Experiences: What People Learn After Going Distressed Black (500+ Words)
Here’s the part no one tells you when you fall in love with a photo of a perfectly distressed black sideboard: the process is equal parts art, patience, and learning
what “too much” looks like before it’s too late. And while every project is different, people tend to report the same handful of lessons once they’ve painted their
first piece black and tried to make it look like it has a charming backstory.
First, black is honest. It will highlight what your furniture is doing underneathbumps, brush strokes, old dents, and all. That doesn’t mean black is unforgiving; it just
means prep and technique matter more than you think. A lot of DIYers find that spending an extra 10 minutes smoothing obvious drips or sanding a rough patch saves them from staring
at that one weird ridge forever. (Because yes, your eyes will find it every time you walk by. It’s like a tiny decor gremlin.)
Second, “distressing” feels scary until you do itand then it becomes weirdly addictive. Many people start timid: one corner, a gentle swipe, step back, squint, repeat.
Then they get confident and suddenly they’re sanding like they’re trying to uncover treasure. The most common mid-project realization is: believable wear is usually subtle.
It’s not about creating damage; it’s about revealing layers. That’s why so many experienced furniture painters recommend focusing on raised edges, corners, drawer fronts near pulls,
and feet. Those spots tell a story people recognizehands, movement, time.
Third, the “right” black depends on the room’s light. People often expect black to be one simple color, but once it’s on a big piece, undertones start showing up.
In bright daylight a black can look charcoal. Under warm lamps it can lean brown. In cooler LED light it can look slightly blue. That’s why testers and sample swatches are so helpful.
A black you love online might look harsher in your spaceor it might look softer and more sophisticated than you hoped. Either way, the lighting is part of the final design.
Fourth, sealing and cure time are where success lives. A finish can feel dry and still be tender underneath. People who skip cure time often notice “mystery marks”:
a basket imprint on a shelf, a sticky ring where something sat too soon, or faint fingerprints that become permanent roommates. Waxed finishes, in particular, can take time to harden.
Topcoats can also need patience between coats to look smooth and even. The shared lesson here is simple: letting the piece rest isn’t wasted timeit’s how you get a finish that lasts.
Finally, once a distressed black piece lands in the room, people often realize it’s less about the furniture and more about the contrast it creates. Black makes whites look crisper,
wood tones look warmer, and metals look shinier. A distressed finish keeps it from feeling too formal, which is why it fits so many styles. The most satisfying “after” moment tends
to be when the piece stops looking like a project and starts looking like it belongslike it’s been there forever, in the best way.
If you’re new to distressed black, start smallera mirror frame, a nightstand, a little cabinetand practice the restraint part (the hardest part). Once you’ve found your ideal black,
your favorite distressing method, and your preferred protective finish, you’ll be surprised how quickly “one piece” turns into “okay, but what if the console table matched the dresser?”
That’s not a problem. That’s a design era.


