
Table of Contents >> Show >> Hide
- Why Framing Mistakes Matter So Much
- 13 Framing Mistakes to Avoid at All Costs
- 1. Skipping Accurate Layout and Measurements
- 2. Not Crowning and Orienting Studs
- 3. Forgetting to Stagger Top Plate Joints
- 4. Incorrect Stud and Joist Spacing
- 5. Ignoring Load Paths and Bearing Walls
- 6. Using the Wrong Fasteners or Too Few of Them
- 7. Over-Notching and Over-Drilling Studs and Joists
- 8. Skipping Bracing, Blocking, and Fire Blocking
- 9. Forgetting Drywall Backing and Future Support
- 10. Framing Out of Plumb, Level, or Square
- 11. Undersized Headers or Improperly Supported Openings
- 12. Forgetting Hardware and Structural Connectors
- 13. Ignoring Plans, Code, and Inspections
- Simple Habits That Help You Avoid Framing Mistakes
- Real-World Framing Lessons: Experiences from the Jobsite
- Conclusion
If you’ve ever hung a door that swings itself open, fought with a wavy wall, or listened to a floor squeak like a haunted house, you already know this truth: framing mistakes never stay hidden for long. They show up later as cracked drywall, sticky windows, and callbacks that eat up your weekends.
The good news? Most common framing errors are easy to avoid once you know what to look for. Whether you’re a DIYer tackling a basement wall or a pro with a busy schedule, steering clear of these 13 framing mistakes will save you time, money, and a lot of creative vocabulary.
Why Framing Mistakes Matter So Much
Framing is the skeleton of the house. If that skeleton’s crooked or weak, no amount of fancy finishes will make the job truly right. Poor wall framing can lead to:
- Wavy, out-of-plumb walls that make trim and cabinets a nightmare.
- Squeaky floors and bouncy rooms.
- Doors and windows that don’t close smoothly.
- Structural issues and building code violations.
Let’s walk through the most common framing mistakes to avoid, plus practical tips to keep your walls straight, sturdy, and inspector-approved.
13 Framing Mistakes to Avoid at All Costs
1. Skipping Accurate Layout and Measurements
“Measure twice, cut once” might be the oldest carpentry cliché, but it’s also the one that prevents the most headaches. Inaccurate layout and rushed measurements are a fast track to crooked walls, misaligned studs, and rough openings that don’t match your doors or windows.
The problem: A stud 1/4 inch out of place may not look like much, but stack those errors across a long wall and your sheet goods won’t land on studs, your drywall joints will be floating, and your wall may end up out of square.
How to avoid it:
- Snap chalk lines for plates and double-check dimensions against the plans.
- Use a story pole or a marked tape for consistent stud spacing (16″ or 24″ on center).
- Mark door and window rough openings clearly before you start nailing anything together.
- Verify your diagonals on framed walls to confirm they’re square.
2. Not Crowning and Orienting Studs
Lumber is rarely perfect. Most studs have a slight “crown” or curve. If you install them randomly, those crowns will create a roller coaster wall that makes drywall, tile, and cabinets tough to install cleanly.
The problem: Mixed crown directions lead to wavy walls and uneven surfaces. You’ll notice it the moment you try to run baseboard or install a countertop against that wall.
How to avoid it: Sight every stud. Turn the crown so it faces the same way (typically toward the room) and use your straightest studs near doors, windows, and corners where accuracy matters most.
3. Forgetting to Stagger Top Plate Joints
Double top plates are there to tie walls together and distribute loads. When the joints in the top plate and cap plate line up, you create a weak spot right where you want strength.
The problem: Lined-up joints reduce continuity in the load path and may violate building code requirements that call for overlapping top plates.
How to avoid it:
- Stagger joints in the top plate and second plate by at least 4 feet wherever possible.
- Use metal plate connectors where you can’t stagger due to layout constraints.
- Make sure top plates overlap corners to interlock adjoining walls.
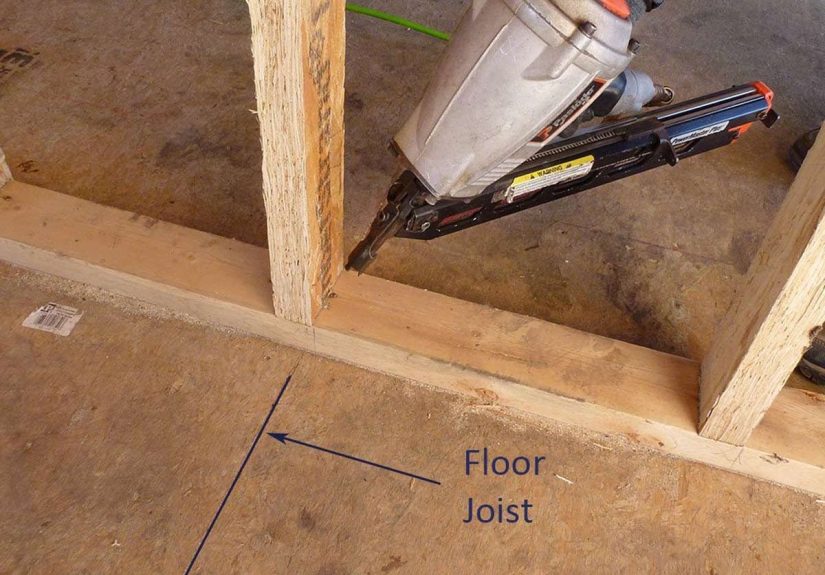
4. Incorrect Stud and Joist Spacing
Guessing on stud spacing is never a good strategy. Too far apart, and you risk sagging surfaces. Too close together, and you waste material and fight to fit insulation and services.
The problem: Improper spacing can lead to structural weakness, drywall cracks, and failed inspections.
How to avoid it:
- Follow the plans or building code: typically 16″ or 24″ on center for walls, floors, and ceilings.
- Lay out studs from the same reference end, marking “X” where each stud goes so everything lines up.
- Confirm that your sheet goods (OSB, plywood, drywall) break on studs and joists, not between them.
5. Ignoring Load Paths and Bearing Walls
Every load needs a path down to the foundation. When bearing walls, beams, or posts don’t align with supports below, you’re asking a random joist to do way more work than it was ever meant to do.
The problem: Misaligned bearing points can cause excessive deflection, sagging floors, cracked finishes, and serious structural issues.
How to avoid it:
- Study the plans to understand what walls are load-bearing and where loads land.
- Line up bearing walls with beams, posts, or foundation walls below whenever possible.
- When in doubt, consult the designer, engineer, or building department before moving a structural wall.
6. Using the Wrong Fasteners or Too Few of Them
That box of miscellaneous nails and screws in the back of the truck is not a structural solution. Framing connectors, hangers, and plates are engineered for specific nails and screws and inspectors know it.
The problem: Undersized nails, missing nails in hangers, or using drywall screws for framing weaken the connections and can lead to failures under load.
How to avoid it:
- Use the fastener type and length specified by the hanger or connector manufacturer.
- Fill all the required nail holes in joist hangers and structural connectors.
- Never use drywall screws for structural connections stick with framing nails or structural screws.
7. Over-Notching and Over-Drilling Studs and Joists
Running plumbing and electrical is important, but turning a stud into Swiss cheese to do it is a bad trade-off.
The problem: Excessive notches or oversized holes reduce load capacity and can violate code. Over time, that’s a recipe for sagging, cracking, or even failure.
How to avoid it:
- Know your local code limits on notching and boring (often expressed as a percentage of depth or width).
- Keep holes centered in the member as much as possible.
- Use metal nail plates to protect wires and pipes when they’re close to the surface.
8. Skipping Bracing, Blocking, and Fire Blocking
Bracing and blocking may feel like “extra” work, but they’re essential for straight, stiff walls and safer structures.
The problem: Missing bracing can lead to racking during wind or seismic events, while missing fire blocking can allow flames to race through wall cavities.
How to avoid it:
- Install required diagonal bracing or use properly nailed structural sheathing.
- Add blocking where needed for sheathing edges, stair stringers, and tall walls.
- Include fire blocking at code-required locations: between floors, at ceiling transitions, and in tall wall cavities.
9. Forgetting Drywall Backing and Future Support
Drywall backing is one of those things nobody thinks about until the drywall crew starts asking, “What am I supposed to screw this to?”
The problem: Missing backing creates floating edges, weak corners, and loose finishes. It also makes it harder to anchor cabinets, grab bars, and shelving later.
How to avoid it:
- Add blocking at inside corners, around tubs and showers, and behind heavy fixtures.
- Think ahead: add solid backing where cabinets, vanities, or wall-mounted TVs will go.
- Walk the framed space before drywall and look for any unsupported edges or corners.
10. Framing Out of Plumb, Level, or Square
Laser levels and good old-fashioned spirit levels exist for a reason. A wall that leans a little today turns into a lot of “make it work” later.
The problem: Out-of-plumb walls and out-of-square corners cause problems for almost everything that comes after: trim, tile, flooring, doors, windows you name it.
How to avoid it:
- Check plumb at the ends of each wall and at key points along its length as you stand it up.
- Use diagonal measurements to square up framed walls and floor systems.
- Secure temporary bracing once the wall is plumb so it stays that way while you tie everything together.
11. Undersized Headers or Improperly Supported Openings
Doors, windows, and large openings need properly sized headers and full bearing support. Guessing with “it looks strong enough” is not a design method.
The problem: Undersized or unsupported headers can sag over time, causing cracked finishes, stuck doors, and structural concerns.
How to avoid it:
- Follow the header sizing tables in your building code or engineered plans.
- Use jack (trimmer) studs to carry the header’s load down to the floor or foundation.
- Don’t cut into or notch headers to “make something fit” reroute instead.
12. Forgetting Hardware and Structural Connectors
Modern homes rely heavily on metal connectors hurricane ties, hold-downs, straps, and hangers to handle high winds and seismic forces.
The problem: Leaving out a connector or installing it wrong is like leaving out a link in a chain. Everything might look okay, but the structural performance isn’t there.
How to avoid it:
- Review the plans and structural details for all specified anchors and connectors.
- Install connectors exactly as directed, including the right fasteners in every hole that matters.
- Do a dedicated “hardware walk-through” before inspections to catch anything missing.
13. Ignoring Plans, Code, and Inspections
“We’ve always done it this way” is not a building code. Codes evolve, local requirements differ, and inspectors expect work that matches the approved plans.
The problem: Skipping details, freelancing critical dimensions, or ignoring code updates can lead to failed inspections, costly rework, and even safety issues.
How to avoid it:
- Keep the approved plans on site and refer to them early and often.
- Know the key local code requirements for wall framing, bracing, and fire blocking.
- Don’t be afraid to call the building department with questions before you frame something you might have to tear apart later.
Simple Habits That Help You Avoid Framing Mistakes
Avoiding framing mistakes isn’t about being perfect it’s about having good habits:
- Plan first, cut later: Review the layout before you pick up the saw.
- Use the right tools: A solid level, square, tape, chalk line, and laser make a big difference.
- Check as you go: Plumb, level, straight, and square keep asking those four questions.
- Think like the next trade: Make life easier for the drywall, mechanical, and trim crews (and for future you).
Real-World Framing Lessons: Experiences from the Jobsite
Ask any seasoned framer about their early days and you’ll see the same reaction: a smile, a wince, and probably a story about the wall that almost fell over. Experience is a tough teacher, but it leaves unforgettable lessons. Here are some jobsite moments that quietly shape the way pros work today.
The Basement Wall That Wouldn’t Line Up
One DIYer framed a basement wall, proud of his tight joints and solid nailing. Then the drywall delivery showed up and nothing landed on a stud. The layout was “roughly 16 inches on center,” which turned out to mean “eyeballed and optimistic.” Every sheet needed extra screws, extra backing, and extra time.
The lesson? Layout is not a suggestion. Pros snap lines, mark exact on-center locations, and double-check against the length of their sheet goods. Taking an extra 10 minutes on the front end can save hours (and a lot of frustration) later.
When Crowns Collide
On another job, a helper was tasked with building a short partition wall. He grabbed studs from the pile and nailed them in without crowning them. The wall looked fine on the floor. But when it went up and the light hit it just right, it looked like a topographical map bumps, bows, and dips everywhere.
The fix involved pulling several studs, flipping them, and replacing the worst offenders. Since then, that crew has a strict rule: every stud gets sighted and oriented before it ever touches a nail. It adds a minute per stud, but it saves hours in smoothing out problems later.
Hardware Amnesia
A crew once framed a beautiful two-story addition. The walls were plumb, the sheathing was tight, and the inspector even complimented the straight lines. Then he asked, “Where are your hold-downs and hurricane ties?” The hardware had been ordered but never installed. Everything looked great, but it wasn’t properly tied down.
The crew had to go back, cut into walls, and retrofit hold-downs and straps. The workday turned into a workweek. Now, they keep a hardware checklist on every project and don’t call for inspection until they’ve walked the job with that list in hand.
The Case of the Sagging Header
In one remodel, a wide opening between kitchen and dining room was framed with a “good enough” built-up header chosen on the fly. It held at first. Over time, the drywall cracked at the corners and the opening developed a visible sag. Furniture brushed the ceiling, and cabinet doors never quite stayed closed.
A structural engineer later confirmed the obvious: the header was undersized for the span and loads above. The fix involved temporary shoring, opening the wall, and installing a proper engineered header. It was noisy, dusty, and expensive but the lesson stuck. Today, that contractor doesn’t guess on headers; he follows tables or gets them engineered.
Why Pros Walk the Job Twice
Many experienced framers have a quiet ritual: at the end of the day, they walk the job with a pencil and a notepad. They look for missing blocking, unsupported corners, risky notches, or studs that should be swapped for straighter ones. They imagine where tile, cabinets, and trim will go. They think about where a future homeowner might mount a handrail or grab bar.
That second look is where good framing becomes great framing. It’s also where you catch the “little” framing mistakes before they turn into a callback. For DIYers, doing a slow walkthrough with a critical eye at the end of each framing session acts like an on-site quality control check.
The Big Takeaway
What do all these experiences have in common? None of them were caused by exotic, complicated engineering problems. They all came from simple things layout, crowns, hardware, headers done in a hurry or on autopilot. The more time you spend on layout, checking, and following the plan, the less time you’ll spend repairing, re-framing, or explaining.
So whether you’re framing a small partition wall or an entire addition, treat each stud, plate, and connector like it matters because it does. When the walls are straight, the floors quiet, and the doors swing perfectly, everyone assumes it “just worked out.” You’ll know better. It wasn’t luck. It was good framing.
Conclusion
Framing doesn’t have to be mysterious or intimidating. If you focus on accurate layout, proper spacing, crowned studs, solid connections, and following the plans and code, you’ll avoid the most common framing mistakes that cause wavy walls, squeaky floors, and frustrating callbacks. Build it straight, build it strong, and your future self and your future projects will thank you.
meta_title: 13 Framing Mistakes to Avoid at All Costs
meta_description: Learn 13 common framing mistakes to avoid so your walls stay straight, strong, and code-compliant from day one.
sapo: Framing is the backbone of any house, and even small mistakes can lead to wavy walls, squeaky floors, and expensive fixes down the road. This in-depth guide walks you through 13 framing mistakes to avoid at all costs from bad layout and crooked studs to missing connectors and undersized headers with practical tips, real-world examples, and jobsite lessons you can use on your very next project.
keywords: framing mistakes, wall framing errors, house framing tips, common framing problems, how to frame walls, structural connectors, load-bearing wall mistakes


