
Table of Contents >> Show >> Hide
- Why Under-Cabinet Lighting Is Such a Big Deal (Besides Looking Awesome)
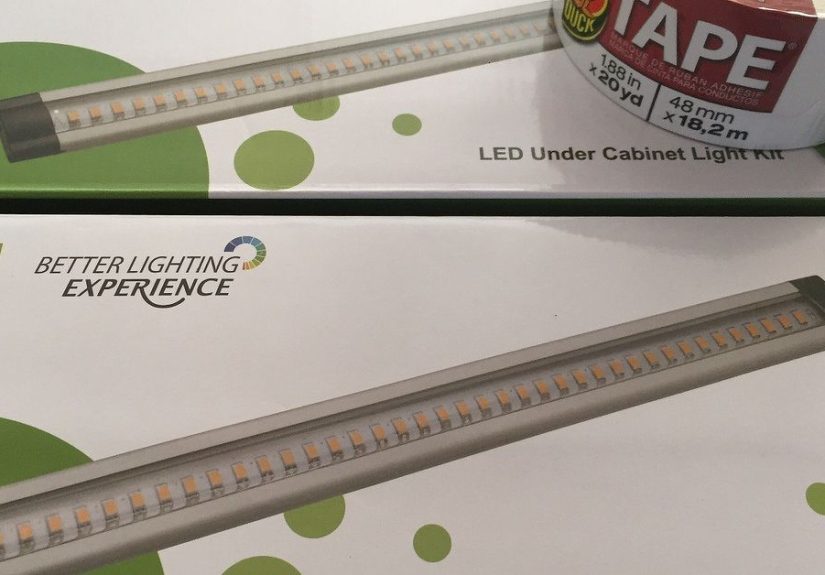
- Pick Your Light Type: Tape, Bars, or Pucks
- Power Options: The Cord Question Starts Here
- Plan Like a Pro: Placement, Color, and Brightness
- 6 Easy Ways to Hide Cords (Without Turning Your Kitchen Into a Construction Zone)
- 1) Route Wires Through the Cabinets (The “Invisible Highway” Method)
- 2) Use Cord Clips and Tuck Lines Into the Cabinet Gaps
- 3) Install a Paintable Raceway (The “Cord Disappears Into the Wall” Illusion)
- 4) Hide Everything Behind a Light Rail or Valance
- 5) Use a Low-Voltage System With a Hidden Driver
- 6) Go Cordless for Problem Areas (Rechargeable Bars/Pucks)
- Controls: From Simple Switches to Smart Scenes
- A Simple Step-by-Step: “Easy” Plug-In Under-Cabinet Lighting With Hidden Cords
- Hardwired Installs: The Cleanest Look (And Where Safety Matters Most)
- Safety Checklist (Because “Hidden Cord” Shouldn’t Mean “Hidden Hazard”)
- Troubleshooting: Fix the Annoying Stuff Fast
- Cost Expectations and “Is It Worth It?”
- Wrap-Up: Bright Counters, Calm Cords
- Real-World Experiences: What Homeowners Commonly Run Into (and How They Solve It)
- The “I Bought a Kit and Now My Kitchen Has Tentacles” Moment
- The “My Outlet Is in the Worst Possible Place” Experience
- The “I’m a Renter, So No Drilling… But Also I Want It to Look Nice” Scenario
- The “I Chose Daylight Color and Now My Kitchen Feels Like a Dentist Office” Lesson
- The “Why Is It Flickering?!” Experience
- The “I Want Zero Visible Wires” Endgame
Under-cabinet lighting is one of those upgrades that feels like cheating: it makes your kitchen look fancier, your counters more usable, and your midnight snack missions way saferwithout requiring a full-blown remodel. The only catch? Cords. The minute you stick lights under cabinets, wires try to audition for a role in a spaghetti western.
The good news: you can get bright, even, professional-looking under-cabinet lighting and keep cords practically invisible. This guide walks you through the simplest lighting options, the cleanest cord-hiding tricks, and a few “learn-from-other-people’s-mistakes” safety rules so your kitchen glows for the right reasons.
Why Under-Cabinet Lighting Is Such a Big Deal (Besides Looking Awesome)
Kitchens suffer from a classic lighting problem: overhead lights create shadows exactly where you need light moston the counter in front of you. Under-cabinet lighting fixes that by placing illumination at task level, making chopping, measuring, and coffee-making less “mystery movie” and more “high-definition cooking show.” It also highlights backsplash tile, adds evening ambiance, and can act as a low-glare night light if you dim it down.
Pick Your Light Type: Tape, Bars, or Pucks
Before you hide cords, you’ve got to decide what you’re hiding cords for. Here are the most common under-cabinet fixtures, with real-world pros and cons.
LED Tape/Strip Lights (Best for Seamless, Even Light)
- Pros: Very low profile, continuous “no hot spots” glow, easy to customize length, great for long counters.
- Cons: Needs a driver/transformer (usually), connectors matter (cheap ones cause flicker), adhesive prep matters.
Tape lights are the “architectural” look: you see light, not the fixture. If you want the most polished result with minimal visual clutter, tape is usually your best friend.
Light Bars/Linear Fixtures (Best for Quick, Straightforward Installs)
- Pros: Even lighting, simple mounting, often linkable, great balance of brightness and ease.
- Cons: Slightly bulkier than tape, may require more planning around cabinet seams and corners.
Puck Lights (Best for Spotlighting Specific Zones)
- Pros: Great for focused pools of light (coffee station, prep corner), can be battery or wired.
- Cons: Can create scallops/shadows if spaced poorly; not as smooth for full-counter task lighting.
Power Options: The Cord Question Starts Here
The cleanest cord management begins with choosing the right power style for your kitchen and your tolerance for tools.
Plug-In (Easiest DIY, Best for Renters and Fast Upgrades)
Plug-in kits connect to a standard outlet, usually with a small power supply or hub. You’ll still hide cordsbut you won’t open walls. With smart routing, you can make plug-in systems look nearly as clean as hardwired.
Hardwired (Cleanest Look, Best for Remodels or “Do It Once” Homes)
Hardwired fixtures tie into household wiring and can be controlled by a wall switch/dimmer. It’s the most seamless look because there’s no visible plug. It can also be the most code-sensitive, so many homeowners bring in a licensed electrician for this part.
Battery/Rechargeable (No Wires… But Also Not Unlimited Power)
Rechargeable light bars and puck lights are fantastic for pantries, rentals, or “I need light tonight” situations. For heavy daily cooking, you may get tired of chargingunless you’re using them as accent/night lighting.
Plan Like a Pro: Placement, Color, and Brightness
Placement That Avoids Glare and Shadows
A simple rule produces a noticeably better result: mount your light source closer to the front edge of the cabinet, not pushed all the way against the wall. That aims light onto the work surface (where you need it) instead of blasting the backsplash and leaving your cutting board in a dim mood.
If your cabinets have a bottom lip, light rail, or trim, you can often tuck strips or bars just behind it so the fixtures disappear from standing eye level.
Color Temperature: Your Kitchen’s Personality in Kelvin
- 2700K–3000K: Warm and cozy (great with wood cabinets and warm counters).
- 3500K–4000K: Neutral “true white” (a favorite for modern kitchens and task clarity).
- 5000K+: Crisp daylight (excellent visibility, sometimes feels a bit “clinical” at night).
CRI: The “Does My Food Look Appetizing?” Factor
If you care about colors looking natural (and most people do, once they see the difference), choose LEDs with high CRIcommonly 90+ for premium task lighting. It helps ingredients look like themselves, not like they’re auditioning for a sci-fi filter.
6 Easy Ways to Hide Cords (Without Turning Your Kitchen Into a Construction Zone)
1) Route Wires Through the Cabinets (The “Invisible Highway” Method)
This is the go-to approach for plug-in systems that still look built-in:
- Pick a “home base” cabinet near an outlet (often over the fridge or near a corner).
- Mount the power supply/hub inside the cabinet (high and back, so it’s out of sight).
- Drill small pass-through holes at the back corners or cabinet sides to route low-voltage leads to each run of lights.
- Add grommets (optional but nicer) so holes look finished and cords don’t chafe.
- Keep slack controlled with clips or small cable ties.
The trick is to run cables where your eyes never go: cabinet corners, the back upper edge, and along seams. Done well, you’ll open the cabinet and see a tidy “control center,” not a nest.
2) Use Cord Clips and Tuck Lines Into the Cabinet Gaps
If you’re spanning multiple cabinet sections, small clips under the cabinet keep the wires snug. Extra length can be tucked into the small gaps between upper cabinets (or hidden behind a light rail/valance). It’s basic, but it’s the difference between “custom kitchen” and “my lights came with a free cord parade.”
3) Install a Paintable Raceway (The “Cord Disappears Into the Wall” Illusion)
A surface-mounted raceway (cord cover) is a clean solution when cords must travel a visible path. Many are paintable, so you can match the cabinet or backsplash area. Use this when you can’t route cords inside cabinetry, or when the outlet is awkwardly placed.
- Best for: short visible runs, corners, and transitions to an outlet.
- Pro move: paint the raceway before installing for a factory-clean look.
4) Hide Everything Behind a Light Rail or Valance
Many kitchens already have (or can add) a small trim piece beneath upper cabinets called a light rail/valance. It hides the fixture and gives you a shadow line to conceal wire runs. If you want the “I can’t even see where the light is coming from” vibe, this is a powerful (and surprisingly affordable) option.
5) Use a Low-Voltage System With a Hidden Driver
Tape lighting often uses a driver/transformer to convert household voltage to low voltage. You can hide that driver in an upper cabinet (or above the fridge) and run only low-voltage leads to the light strips. Low-voltage wire is thinner and easier to route discretely.
Keep the driver accessible (so you can service it later) and avoid stuffing it in a sealed, unventilated nook. Think “tidy and reachable,” not “buried treasure.”
6) Go Cordless for Problem Areas (Rechargeable Bars/Pucks)
For pantries, glass cabinets, or one-off dark corners, rechargeable fixtures with motion sensors are hard to beat. Mount them with screws or strong magnets, charge as needed, and enjoy the blissful absence of wires. If you want under-cabinet lighting purely for ambiance, cordless can be enough.
Controls: From Simple Switches to Smart Scenes
Wall Switch + Dimmer (The “Feels Built-In” Upgrade)
If you can tie your system into a wall switch, dimming turns under-cabinet lighting into an all-day feature: bright for prep, soft for evening, low for late-night navigation. Just make sure your dimmer and LED driver/fixture are compatible.
Plug-In Dimmers, Remotes, and Touch Controls
Many plug-in kits include inline dimmers or remotes. They’re great if you want easy control without electrical work. The cleanest installs hide the inline dimmer in a cabinet and rely on a remote or a discreet wall-mounted remote holder.
Smart Lighting (Scenes, Schedules, Voice Control)
Smart strips and smart under-cabinet fixtures can schedule on/off times, sync with routines, and shift brightness for day vs. night. If you already have a smart home setup, this is one of the quickest “wow” upgrades you can add to a kitchen.
A Simple Step-by-Step: “Easy” Plug-In Under-Cabinet Lighting With Hidden Cords
This is the sweet spot for most homeowners: a plug-in system with cords routed through cabinets so it looks hardwired. Here’s a practical workflow that minimizes mistakes.
Step 1: Map Your Counter Runs
- Measure each cabinet section length.
- Note obstacles: microwave, hood, window trim, cabinet seams.
- Decide where the power supply will live (usually the cabinet nearest an outlet).
Step 2: Choose Fixture Style Per Zone
- Long continuous prep area: LED tape or light bars.
- Coffee/appliance nook: a short bar or a puck.
- Accent-only area: warm tape light on a dimmer.
Step 3: Dry-Fit Before You Stick Anything
Tape light adhesive is not a fan of “oops.” Hold everything in place with painter’s tape first. Confirm the light hits the counter evenly and the fixtures aren’t visible from normal standing positions.
Step 4: Drill Pass-Through Holes (Small and Strategic)
Drill near the back corner where the cabinet side meets the bottomsmall holes, neat routing. If you’re routing wires through multiple cabinets, drill matching holes so wires travel in a straight, hidden path.
Step 5: Mount the Driver/Hub Inside the Cabinet
Keep it accessible. Use screws if possible; if using adhesive, clean the surface first and give it time to bond.
Step 6: Install Lights and Secure Cords
Mount the lights, connect the leads, and secure slack with clips. Your goal is “no dangling anything” when you look up from the counter.
Step 7: Test, Then Tidy
Turn it on, check for dark spots, and adjust placement if needed. Once you’re happy, tidy the cabinet “control center” with small ties or adhesive mounts.
Hardwired Installs: The Cleanest Look (And Where Safety Matters Most)
Hardwired under-cabinet lighting can be extremely cleanespecially when controlled from a wall switch. Many how-to resources show running cable inside upper cabinets and dropping it down to fixtures. If you’re remodeling or comfortable with electrical work, this is achievablebut it’s also where local codes and safe wiring practices matter.
If you’re unsure about circuit selection, junction boxes, or code constraints in kitchens, consider hiring a licensed electrician. Kitchens have specific rules around required receptacle circuits and safe wiring methods, and the “just tap into whatever’s nearby” approach is how DIY projects become expensive stories.
Safety Checklist (Because “Hidden Cord” Shouldn’t Mean “Hidden Hazard”)
- Use listed products: Choose fixtures, drivers, and connectors that are safety-tested by recognized labs (commonly UL/ETL listed).
- Don’t treat extension cords as permanent wiring: If you need power where there isn’t an outlet, the safest fix is installing the right outletnot living forever with a workaround.
- Don’t run cords through walls or ceilings: If a cord disappears into a wall like a magic trick, it’s usually the bad kind of magic.
- Avoid pinched cords: Don’t trap wires under cabinet edges or through tight, sharp holes without protection.
- Keep things dry: Near sinks, use appropriate protection and keep drivers/power supplies away from splash zones.
- Mind heat and ventilation: Drivers need breathing room. Don’t bury them in insulation or cram them behind packed shelves.
- Match dimmers and LEDs: Incompatible dimmers can cause flicker, buzzing, or early failure.
Troubleshooting: Fix the Annoying Stuff Fast
Flicker or Random Shutoffs
- Check connector quality and seating (loose connections are common culprits).
- Confirm the driver wattage is sufficient for total strip length.
- If dimmed, confirm the dimmer/driver/LED combo is compatible.
Hot Spots or “Polka-Dot Countertops”
- Move puck lights closer together or switch to bars/tape for continuous light.
- Use a diffused lens channel for tape lights if dots from individual LEDs are visible.
Too Bright (Yes, That Can Happen)
- Add a dimmer (inline for plug-in, wall dimmer for hardwired).
- Choose warmer color temperature for a softer feel at night.
Cost Expectations and “Is It Worth It?”
Under-cabinet lighting ranges from budget-friendly stick-on solutions to premium hardwired systems with smart controls. Many homeowners land somewhere in the middle: linkable LED bars or tape lighting with a hidden driver and a dimmer. Beyond looks, the practical payoff is realbetter visibility, safer prep, and a kitchen that feels intentionally designed.
Wrap-Up: Bright Counters, Calm Cords
The best under-cabinet lighting is the kind you don’t noticeuntil you turn it off and wonder how you ever cooked in the shadows. Whether you choose tape, bars, or pucks, you can absolutely keep cords out of sight by routing wires through cabinets, using clips and raceways strategically, and hiding drivers where they stay accessible.
Start simple: pick a plug-in kit, plan your “home base” cabinet, and route cables through discreet pass-through holes. With a little planning, you’ll get a clean, professional lookand your kitchen will finally stop eating your overhead light for breakfast.
Real-World Experiences: What Homeowners Commonly Run Into (and How They Solve It)
If you’ve ever looked at those picture-perfect kitchen photos and thought, “Sure, but where do the cords go?”you’re not alone. In real homes, under-cabinet lighting projects tend to fall into a few familiar storylines. Here are the most common experiences people report, plus the practical fixes that keep the project easy instead of spiraling into a weekend-long soap opera.
The “I Bought a Kit and Now My Kitchen Has Tentacles” Moment
A very normal first attempt goes like this: someone installs linkable light bars under three cabinet sections, plugs everything in, and then steps back to admire… a collection of dangling cords that looks like the lights are trying to escape. The fastest rescue is usually cord clips plus a quick decision about where the extra slack should live. People often tuck excess wire into the gap between cabinet boxes (or up behind a light rail) and clip the rest snugly along the underside edge. The “clean” look happens when the cord follows a straight line and never droops below the cabinet plane.
The “My Outlet Is in the Worst Possible Place” Experience
Many kitchens have outlets that are perfect for blenders and terrible for lighting. When the nearest outlet is around a corner, homeowners often try to stretch cords across the backsplash and hate it immediately. The usual fix is choosing a single “home base” cabinet near the outlet (even if it’s not centered), putting the power supply inside that cabinet, and then routing low-voltage leads through cabinet walls to reach the rest of the run. Suddenly the only visible cord is the short one from the driver to the outlet and that last visible section is where a paintable raceway earns its keep.
The “I’m a Renter, So No Drilling… But Also I Want It to Look Nice” Scenario
Renters often want lighting that comes down cleanly later. The experience here is usually a happy one with rechargeable light bars or smart plug-in strips mounted with removable adhesive. The trick renters learn quickly: clean the cabinet underside thoroughly before mounting. Grease and kitchen dust weaken adhesives, and nobody wants their lights to fall into the fruit bowl at 2 a.m. Many renters also mount the driver and excess cable inside a cabinet using removable adhesive hooks, so the “cord mess” lives behind a door instead of on display.
The “I Chose Daylight Color and Now My Kitchen Feels Like a Dentist Office” Lesson
Color temperature surprises people. A lot of homeowners pick 5000K because it sounds bright and “clean,” and then realize the evening vibe feels a bit intense. The common fix is either switching to 3000K–4000K or adding a dimmer so the same lights can do both jobs: crisp task lighting when cooking, softer light when winding down. The most satisfied setups usually have dimming plus a neutral or warm-white setting that flatters counters, cabinets, and yesyour dinner.
The “Why Is It Flickering?!” Experience
Flicker tends to show up when connectors are cheap, the driver is undersized, or the dimmer/driver/LED combo doesn’t play nicely together. Homeowners who solve this quickly usually do three things: confirm total wattage, upgrade connectors (or use a better system), and verify dimmer compatibility before blaming the universe. Once the right pieces match, the system is typically rock-solid.
The “I Want Zero Visible Wires” Endgame
The cleanest-looking kitchens almost always do some version of “hidden routing”: a driver mounted inside a cabinet, small pass-through holes, and low-voltage wire traveling where eyes don’t go (back corners and seams). People often say the biggest surprise is how little drilling is needed. Most of the “professional” look comes from planning the cable path before mounting the lights. When the routing is planned, the install feels easy. When it’s improvised, the cords win. (Cords always believe they can win.)
The overall takeaway from real homes is simple: under-cabinet lighting becomes “easy” when you treat cord hiding as part of the design, not an afterthought. Pick your power strategy, choose a home base for the driver or hub, and route wires like you’re trying to hide a surprise partyquietly, neatly, and with no stray evidence left on the counter.


