
Table of Contents >> Show >> Hide
- Why Sharpen Crayon Points in the First Place?
- 1. Use a Dedicated Crayon Sharpener
- 2. Try a Two-Hole Pencil-and-Crayon Sharpener
- 3. Chill Soft Crayons Before Sharpening
- 4. Refine the Tip with Fine Sandpaper or an Emery Board
- 5. Re-Shape the Point While You Color
- Common Mistakes That Ruin Crayon Points
- Do All Crayons Need Sharpening?
- Which Method Is Best?
- Experience: What Sharpening Crayon Points Actually Feels Like in Real Life
- Final Thoughts
Crayons are supposed to be simple. You open the box, admire the colors, lose the wrapper on one of them almost immediately, and get to work. Then five minutes later your once-proud blue crayon has the tip profile of a marshmallow. Tragic. Preventable. Slightly dramatic, yes, but still tragic.
If you love coloring, drawing, classroom crafts, or just want your child’s art supplies to survive longer than a goldfish cracker in a preschool room, learning how to sharpen crayon points is surprisingly useful. A sharper crayon tip gives you cleaner outlines, tighter details, neater lettering, and a lot less waxy smudging. It also makes coloring more fun, which is really the whole point unless you are running a highly competitive household coloring league.
Below are five practical ways to sharpen crayon points, plus the mistakes to avoid, when not to bother sharpening at all, and a real-world look at what actually works at craft tables, in classrooms, and during ordinary family coloring sessions. The goal is simple: better crayon control, less frustration, and fewer tiny wax casualties.
Why Sharpen Crayon Points in the First Place?
Before we jump into the methods, let’s answer the obvious question: why bother? After all, crayons are not mechanical pencils. They are not auditioning for architecture school.
Still, a fine crayon point can make a big difference. Sharper crayon tips are helpful for:
Detailed coloring pages, tracing, writing names and labels, outlining shapes, filling small spaces, and adding texture or layered effects. In other words, whenever you want more control and less waxy chaos, a better point matters.
And no, this does not mean every crayon needs to become a tiny spear. You just want a point that is clean, even, and suited to the kind of coloring or drawing you’re doing.
1. Use a Dedicated Crayon Sharpener
The easiest method for most people
If you want the most straightforward answer to how to sharpen crayon points, this is it: use a sharpener made for crayons. Dedicated crayon sharpeners are designed with wider openings and blades that can handle soft wax better than an average pencil sharpener. That means less snapping, less crumbling, and less emotional damage to your favorite color.
A crayon sharpener is ideal for kids’ art tables, classrooms, and anyone who wants repeatable results without turning sharpening into a side quest. You insert the crayon gently, rotate slowly, and stop as soon as the point looks clean. That is the whole trick. No heroics. No force. No wrestling match with the wax.
Why it works well
A dedicated crayon sharpener usually gives the most even point because the opening matches the size of the crayon more closely. A loose fit can cause wobbling, and wobbling is the enemy of a clean point. If you’ve ever sharpened a crayon and ended up with something that looked chewed by a nervous squirrel, fit was probably the problem.
Best use case
Choose this method if you sharpen crayons often, have children who color regularly, or want a neat solution that keeps shavings contained. It is also the best option when you need several crayons sharpened at once for school, crafts, or group projects.
2. Try a Two-Hole Pencil-and-Crayon Sharpener
The practical backup plan
Not everyone owns a dedicated crayon sharpener, and that is fine. A good two-hole pencil-and-crayon sharpener can do the job beautifully. These sharpeners usually have one standard opening for pencils and one larger opening for crayons or jumbo tools. That larger hole is what you want.
This method is especially useful because it is easy to find. Many school-supply sharpeners, classroom sharpeners, and art-room sharpeners are built this way. If you already have one tucked in a drawer, congratulations: your crayon may be closer to greatness than you thought.
How to get better results
Insert the crayon straight, not at an angle. Turn gently and keep pressure light. The biggest mistake people make is treating a wax crayon like a tough wooden pencil. Crayons are softer, so they need a slower hand. Think “careful twist,” not “start a lawn mower.”
If the blade seems dull or the crayon starts shredding, stop. A dull sharpener can tear wax instead of shaping it. Clean blades matter more than people think. A decent sharpener can produce a tidy point, while a bad one can turn your crayon into confetti with self-esteem issues.
Best use case
This is the best choice for homes, classrooms, and backpacks because it is versatile. One tool can sharpen pencils and crayons, which is handy when a coloring project suddenly turns into a writing project and then, for no clear reason, into a handmade birthday card.
3. Chill Soft Crayons Before Sharpening
The smart trick for mushy crayons
If your crayons feel soft, sticky, or oddly bendy, the problem may not be your sharpener. Wax softens with warmth, and a soft crayon is harder to shape cleanly. That is why a short chill can help before sharpening.
Place the crayons somewhere cool for a little while before sharpening. A brief rest in the refrigerator can firm them up enough to make the blade glide more cleanly. You do not need to turn this into a cryogenic research experiment. You just want the wax a bit firmer, not frozen into an arctic wand.
Why this helps
When wax is softer, it can drag, smear, or flatten under pressure. A firmer crayon tends to hold its shape better during sharpening. That means a cleaner point, fewer chunks breaking off, and much less of that sad “why is the red one now shaped like a potato?” moment.
Important note
Do not use heat to “shape” the tip. Warm crayons can become messy fast, and once wax softens too much, precision goes right out the window. Cooling is the friendlier path if you are after a neat point.
Best use case
Use this method when crayons have been sitting in a warm room, a hot car, near sunlight, or in a crowded pencil pouch that feels like a tiny sauna. It is a small step that can noticeably improve sharpening results.
4. Refine the Tip with Fine Sandpaper or an Emery Board
The detail-lover’s method
If you want a finer finish after sharpening, a small piece of fine sandpaper or an emery board can help refine the point. This method is popular in art settings because it gives you more control over the final shape. Instead of relying only on a blade, you gently smooth and shape the crayon tip until it is more precise.
Think of it as the difference between a haircut and styling. The sharpener gives you the basic shape. Fine sandpaper helps you finesse it.
How to use it well
Use light pressure and rotate the crayon as you smooth the tip. You are refining, not grinding for revenge. A few careful passes are often enough. This works especially well when you need to outline tiny spaces, add texture, or write with crayons more neatly.
It also helps rescue a point that is almost good but slightly uneven. Instead of putting the crayon back through a sharpener and risking over-sharpening, you can simply smooth the rough edge and move on.
Best use case
This is a great choice for artists, adult coloring fans, teachers prepping supplies for a project, and anyone who enjoys fine details. It is also helpful when a crayon is already fairly pointed and only needs a little touch-up.
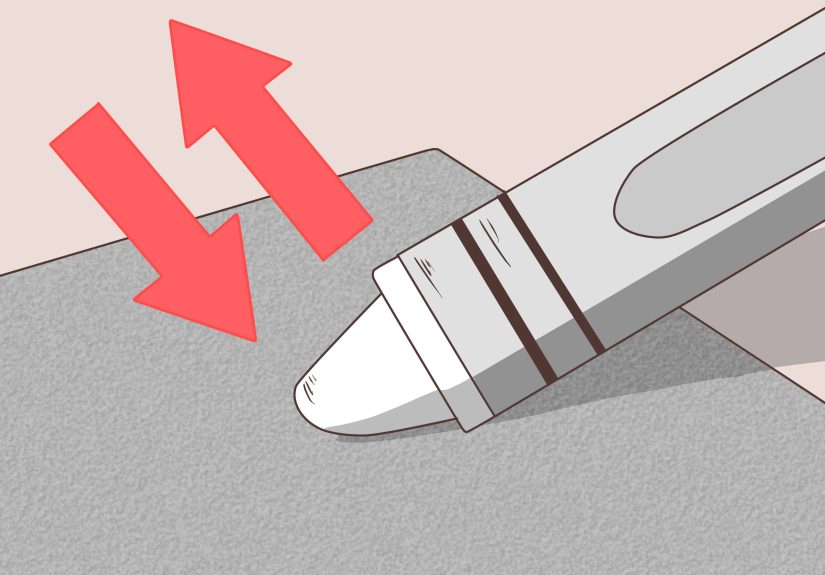
5. Re-Shape the Point While You Color
The no-tool method
Sometimes the easiest way to sharpen a crayon point is not to stop coloring at all. By using light pressure, holding the crayon at a slight angle, and rotating it as you draw, you can wear the tip more evenly and maintain a usable point longer. In plain English: let the paper help you do the work.
This method is not a replacement for real sharpening when a crayon is badly rounded. But it is excellent for maintaining a decent point between sharpenings. If you color with a bit of intention instead of going full bulldozer, the crayon stays neater for longer.
Why it works
Crayon tips wear down unevenly when you press too hard or always use the same side. Rotating the crayon distributes wear around the tip. Light strokes also preserve the shape better than heavy strokes. So yes, gentler coloring really can make your crayons last longer and behave better. Your crayons were never the drama. The pressure was.
Best use case
Use this method when you are in the middle of a drawing session, away from sharpeners, or just trying to keep a nice point for as long as possible. It is simple, portable, and surprisingly effective.
Common Mistakes That Ruin Crayon Points
Even the best crayon sharpening tips can go sideways if you make one of these common mistakes:
- Using a sharpener opening that is too small.
- Twisting too fast or pressing too hard.
- Trying to sharpen warm, soft crayons.
- Using a dull or dirty blade.
- Over-sharpening when the point is already good enough.
That last one deserves special attention. A crayon does not need to look like a needle to work well. If it has a clean point and the line looks controlled, stop there. Continuing to sharpen just wastes the crayon and increases the odds of breakage.
Do All Crayons Need Sharpening?
Nope. Some crayons are designed specifically so you do not have to sharpen them at all. Twist-style crayons are a great example. You simply advance more color when needed. If your household includes young children, frequent crafters, or anyone who loses sharpeners the way socks disappear in the laundry, that style can be a game changer.
Also, not every broken crayon is a problem. In early childhood settings, smaller crayons can actually be useful because they encourage a more refined grip. That means a short crayon is not always a failed crayon. Sometimes it is just a tiny overachiever.
So if your goal is better handwriting prep, early fine-motor practice, or simple coloring for little kids, you may not need a super-sharp point at all. Sometimes a clean, manageable stub is exactly right.
Which Method Is Best?
If you want the fastest answer, here it is:
- Best overall: a dedicated crayon sharpener.
- Best budget option: a two-hole pencil-and-crayon sharpener.
- Best for soft crayons: chill first, then sharpen gently.
- Best for fine details: refine with fine sandpaper or an emery board.
- Best maintenance method: rotate the crayon while coloring.
The right choice depends on what you need. For quick everyday use, a crayon sharpener is hard to beat. For detail work, sandpaper gives you extra control. For casual coloring, smart technique may save you from stopping at all.
Experience: What Sharpening Crayon Points Actually Feels Like in Real Life
Here is the honest truth about sharpening crayons: the experience is never as glamorous as a brand-new box of perfectly lined-up colors. It is more like a tiny test of patience mixed with a little problem-solving and, occasionally, a mild identity crisis caused by one stubborn green crayon.
In real life, the first thing you notice is that crayons all behave a little differently. Some sharpen beautifully and come out looking like they just got promoted. Others act as if the very idea of becoming pointy is an insult. The softer ones smear. The older ones crumble. The crayons that spent time in a hot room often behave like they are made of candle wax and bad decisions.
That is why people who use crayons often, whether parents, teachers, hobby colorists, or kids who take coloring very seriously, tend to become surprisingly loyal to a specific method. Once someone finds a sharpener that works, they guard it like treasure. It becomes the sharpener. Not a sharpener. The sharpener. The chosen one. The wax whisperer.
There is also a funny shift that happens once you start paying attention to crayon points. You begin to notice how much easier small details become. Letters look cleaner. Borders stay inside the lines more often. Tiny petals, stars, windows, and superhero emblems suddenly feel less impossible. It is not that the crayon becomes magical. It is just easier to control a tip that has some shape to it.
At the same time, real-world experience teaches you not to become overly precious. A crayon is still a crayon. It is a tool for color, creativity, and sometimes glorious mess. If a child snaps one in half while coloring a dragon purple and orange, that is not a tragedy. That is Tuesday. In fact, smaller crayons often end up being easier for little hands to manage. What looks ruined to an adult can feel totally normal to a child who just wants to finish the volcano before snack time.
Another practical lesson is that maintenance matters more than perfection. People often assume sharpening is the whole game, but really it is the combination of sharpening gently, storing crayons reasonably well, and coloring with lighter pressure. The best crayon point in the world will not survive long if someone grips the crayon like they are signing a major legal document in a windstorm.
And finally, sharpening crayons teaches a strangely useful life lesson: small improvements make creative work easier. A cleaner tip, a cooler crayon, a better angle, a gentler hand. None of these changes are dramatic, but together they make the experience smoother and more enjoyable. Which is probably the most crayon-like wisdom imaginable: better results, brighter colors, less chaos, and still plenty of room for fun.
Final Thoughts
If you have ever wondered how to sharpen crayon points without destroying the crayon, the answer is refreshingly simple. Start with the right tool, use a gentle hand, keep soft crayons cool, refine the tip when needed, and maintain the point as you color. That is it. No complicated system. No wax engineering degree required.
The best method depends on your situation, but the bigger idea is this: crayons work better when you treat them like soft drawing tools instead of tiny tanks. With the right approach, you can get cleaner lines, better detail, and longer-lasting crayons without much effort.
So go ahead and rescue that tired old crayon box. Your colors deserve better than blunt little stumps pretending to be precise. And honestly, so do your coloring pages.


