
Table of Contents >> Show >> Hide
- Why Build a DIY Camera Slider?
- What This Easy Build Looks Like
- Materials You Will Need
- Step-by-Step: How to Build the Slider
- How to Get Smooth Shots with a Homemade Camera Slider
- Best Shots to Try First
- Common DIY Camera Slider Mistakes
- Is a Motor Necessary?
- Conclusion
- Experience and Lessons from Building an Easy Camera Slider
- SEO Tags
A camera slider is one of those magical filmmaking tools that makes footage look instantly more expensive, even if your budget currently lives somewhere between “college ramen” and “mystery couch coins.” Smooth tracking shots, subtle product reveals, gentle push-ins, and low-angle movement all become easier when your camera can glide instead of wobble like it just drank three iced coffees. The good news is that building a simple DIY camera slider does not require an engineering degree, a machine shop, or a spiritual connection to titanium.
This guide walks through an easy camera slider build that is practical, affordable, and realistic for creators who want better motion without buying a high-end commercial rig. It is based on real slider design ideas commonly seen in filmmaking gear, DIY tutorials, and camera support advice: straight rails, a stable carriage, secure mounting, and careful attention to balance. In other words, the glamorous stuff.
If your goal is to shoot smoother B-roll, cinematic reveal shots, tabletop product videos, or short documentary sequences, a homemade camera slider can absolutely get the job done. You just need to build it with common sense, keep your camera setup light, and test everything before trusting your favorite lens to a rolling contraption held together by optimism.
Why Build a DIY Camera Slider?
A camera slider gives you controlled movement along a fixed path. That sounds simple, because it is simple, and that is exactly why it works so well. Even a short slide can add depth, parallax, and energy to a shot that would otherwise look flat. Instead of panning from a tripod, you can move past foreground objects, reveal a subject, or create a smooth side-to-side product shot that feels polished.
Commercial sliders come in different lengths, materials, and load ratings. Many are made from aluminum or carbon fiber for portability, while heavier-duty models prioritize rigidity and payload. DIY builds borrow the same basic logic: keep the rails straight, keep the carriage stable, and mount the camera securely. You do not need every premium feature to get useful results. You need a dependable platform that moves smoothly and does not flex like a diving board.
The biggest advantage of an easy camera slider build is customization. You can choose the length, the weight, the mounting style, and the budget. If you mostly shoot with a phone, action camera, or small mirrorless body, you can build a light slider. If you want room to grow, you can reinforce the base and add better bearings or a small fluid head later. That makes this kind of project ideal for creators who like tools they can improve over time.
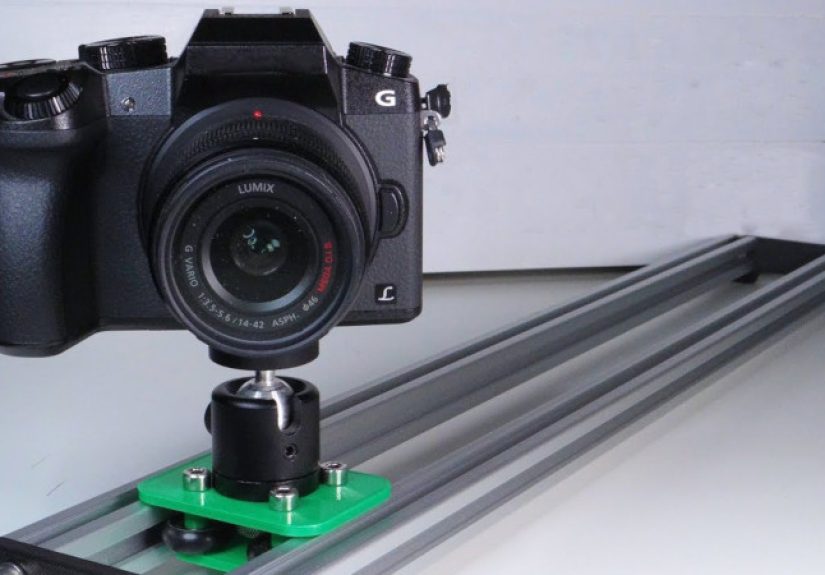
What This Easy Build Looks Like
This version uses a flat base, two straight rails, and a small carriage with roller bearings. Think of it as the sensible middle ground between “piece of wood with wild ambition” and “NASA-grade cinema transport system.” It is easy enough for beginners, but sturdy enough to be genuinely useful.
Recommended Size
A slider length of 24 to 36 inches is the sweet spot for most DIY users. It is long enough for meaningful movement, short enough to carry, and much easier to keep straight than a giant six-foot rail monster. Longer sliders can be excellent, but they usually need better support and more careful alignment.
Best Use Case
This build is best for lightweight camera setups: smartphones in a cage, compact cameras, action cameras, or light mirrorless bodies with a small lens. Could it hold something bigger? Maybe. Should you test with the heaviest setup in your house on day one? Absolutely not. Start light, confirm the slider is smooth and stable, and only then work upward.
Materials You Will Need
Here is a realistic material list for a homemade camera slider that is straightforward to assemble:
- One straight base board or aluminum plate, about 24 to 36 inches long
- Two straight rails, such as aluminum square tube, round tube, or steel rod
- One carriage plate made from plywood, hardwood, or aluminum
- Eight small roller bearings or skate bearings
- Bolts, washers, lock nuts, and spacers
- One tripod head or quick-release plate
- One camera mounting screw or compatible plate system
- Rubber feet for ground use
- One center tripod mount or two support points near the ends
- Optional: bubble level, adjustable feet, drag control material, carry handle
If you want this build to stay “easy,” keep the material choices simple and easy to source. Aluminum rails are popular because they are light and reasonably rigid. A wood base is beginner-friendly because it is easy to drill and mark accurately. A quick-release plate is worth adding because nobody enjoys threading a camera on and off a slider twenty times like they are tightening a pickle jar.
Step-by-Step: How to Build the Slider
1. Cut and Prep the Base
Start with a flat base that is straight and rigid. Mark the centerline and then mark where the two rails will sit, keeping them perfectly parallel. This matters more than people want to admit. A slider can survive ugly paint, mismatched bolts, and questionable workshop music, but it will not forgive crooked rails.
Sand rough edges, check for warping, and add your rubber feet underneath if you plan to use the slider on a table or the ground. If you want tripod mounting, drill the center mounting hole now. For longer builds, two support points near the ends can improve stability.
2. Mount the Rails
Attach both rails to the base carefully. Measure the spacing at multiple points, not just once like an overly confident game show contestant. The rails must stay parallel from end to end. If they pinch inward or drift outward, the carriage will bind, wobble, or slide with the grace of a shopping cart with one evil wheel.
Use pilot holes for screws if mounting to wood, and tighten everything gradually. Do not crank one side all the way down before checking alignment. Build slowly here, because this is the part that decides whether your slider feels silky or suspicious.
3. Build the Carriage
Your carriage is the moving platform that rides on the rails. A simple rectangular plate works well. Mount roller bearings underneath so they hug the rails from multiple sides. The idea is to create stable contact without too much pressure. Too loose, and the carriage wiggles. Too tight, and it drags like it is carrying emotional baggage.
Use washers or spacers to fine-tune the bearing position. Test-fit the carriage on the rails before final tightening. It should move smoothly with a gentle push and without side-to-side slop. This is the moment when the project starts feeling real, and also the moment when you realize you have been whispering “please be smooth” to a piece of hardware.
4. Add the Camera Mount
Mount a small tripod head or quick-release plate to the top of the carriage. A dedicated head is helpful because it lets you level the camera and adjust framing without shimming the entire slider like a wobbly restaurant table. If you only have a direct screw mount, it can still work for lightweight setups, but a compact head makes the rig far more useful.
Make sure the mounting point is centered and secure. Many camera systems use common mounting threads, and quick-release plates are especially handy if you move between tripod, slider, and handheld shooting. Convenience is not laziness. It is workflow wearing sensible shoes.
5. Add Stops and Safety Features
Install end stops so the carriage cannot roll right off the rails and introduce your camera to the floor in a dramatic but unnecessary way. Even simple rubber bumpers or bolted stops are better than trust. If your build allows it, add a basic carriage lock for transport.
This is also a good time to add a bubble level, especially if you shoot outdoors or use the slider on uneven surfaces. Small details like that make the rig easier to use and reduce setup frustration later.
How to Get Smooth Shots with a Homemade Camera Slider
Building the slider is only half the job. The other half is using it well. A cheap or DIY slider can still produce excellent footage if your technique is calm and consistent.
Use Light Pressure
Do not shove the carriage. Guide it. The best slider movement usually comes from steady, gentle pressure rather than a dramatic arm thrust worthy of competitive curling.
Balance the Camera
Keep the camera centered over the carriage. A front-heavy setup puts more strain on the mount and increases vibration. Lightweight rigs are easier to control and more forgiving on DIY hardware.
Mind the Surface
If the slider is on the ground or a table, make sure the support surface is solid. If it is mounted on a tripod, use a sturdy tripod and check that the entire rig does not sag in the middle. Some commercial sliders support more weight on the ground than when mounted, so a DIY build deserves the same caution.
Practice the Move Before Rolling
Always rehearse the shot. Check your start point, end point, framing, and focus. Even a short slider move looks more professional when the motion begins and ends cleanly instead of starting with a nervous twitch and ending in existential regret.
Best Shots to Try First
If this is your first DIY camera slider, keep your test shots simple. You do not need a car chase. You need repeatable motion.
- Product reveal: Slide past a foreground object to reveal a camera, watch, keyboard, or coffee mug
- Tabletop B-roll: Move across ingredients, tools, or small objects for YouTube and social content
- Interview detail shot: Use a subtle side move on hands, notes, or work surfaces
- Low-angle texture shot: Glide across wood grain, fabric, plants, or pavement for visual variety
- Mini push-in: Angle the slider slightly toward the subject to create a gentle inward move
The beauty of a slider is that the move does not need to be huge. A few inches of smooth travel can create parallax and depth that make a shot feel much more intentional.
Common DIY Camera Slider Mistakes
Building Too Long Too Soon
A six-foot slider sounds exciting until you have to keep it rigid, level, portable, and safe. Shorter builds are easier to align and more likely to get used regularly.
Ignoring Load Limits
If your carriage, rails, or mount flex under load, the footage will show it. Start with the lightest camera setup you own. Test slowly. Add weight only when the system proves it can handle it.
Skipping End Stops
This is the DIY equivalent of building a swimming pool and forgetting the water. End stops are not optional.
Poor Rail Alignment
Most “my slider feels rough” problems come from rails that are not parallel or bearings that are too tight. Alignment is everything.
Mounting on a Weak Tripod
A decent slider on a flimsy tripod becomes a fancy wobble generator. Support matters.
Is a Motor Necessary?
No. A manual slider is easier to build, cheaper, quieter, and perfect for learning shot control. Motorized sliders are great for repeatable moves and time-lapse work, but they add complexity, wiring, and setup time. If your goal is an easy camera slider build, manual is the smart place to start.
Later, if you catch the DIY bug and begin whispering sweet nothings to stepper motors, you can always upgrade. Many makers do. But first, build a slider that works manually. Fancy features are wonderful; reliable basics are better.
Conclusion
An easy camera slider build is one of the most rewarding DIY filmmaking projects because the payoff is immediate. You build a straightforward tool, you put a camera on it, and suddenly your footage starts moving with purpose. That is a satisfying return on a weekend project.
The key is not making the biggest slider or the most complicated one. The key is making a smooth, stable, usable slider that fits your camera, your shooting style, and your budget. Keep the rails straight, the carriage secure, the setup light, and your expectations realistic. That is the formula.
And once your first smooth reveal shot appears on screen, you will understand why creators love this tool so much. A humble homemade camera slider can make a modest shoot feel cinematic. Not bad for a device whose job is basically “move slowly and do not embarrass me.”
Experience and Lessons from Building an Easy Camera Slider
The first thing most people discover when building a DIY camera slider is that smooth motion looks simple from the outside and hilariously picky from the inside. In theory, it is just a camera moving from point A to point B. In practice, point A and point B become deeply invested in rail spacing, bearing pressure, balance, tripod rigidity, surface level, hand pressure, and whether you tightened one bolt a little too enthusiastically after lunch.
One of the most useful lessons is that shorter sliders are friendlier than ambitious long builds. A compact slider is easier to carry, easier to level, easier to mount, and far less likely to flex in the middle. A builder may dream of dramatic studio moves across a six-foot span, but a tidy two- or three-foot slider often gets used more often in real life. It fits on a table, it works for product shots, and it does not require the kind of setup that makes your creative energy leave the building before filming starts.
Another common experience is learning that “sturdy enough” and “actually smooth” are not the same thing. A slider can feel solid in your hands and still produce jerky footage if the carriage has too much play or the bearings press unevenly against the rails. That is why testing matters so much. Builders often do best when they assemble the carriage loosely, check the glide, then make tiny adjustments instead of tightening everything fully and hoping the universe rewards confidence.
There is also a practical lesson in camera choice. A DIY slider becomes much more enjoyable when paired with a lightweight camera setup. Small mirrorless bodies, smartphones, and compact lenses make the whole system easier to balance and safer to mount. The moment a heavy lens enters the chat, every weakness in the build suddenly becomes very honest. Wobble increases, drag becomes obvious, and the tripod starts writing its resignation letter.
Many creators also discover that using the slider well is a separate skill from building it. The first footage often moves too fast. Then too slow. Then one take begins with a little bump, another ends with a panicked finger correction, and a third reveals that autofocus had its own artistic vision. But once you rehearse the move, guide the carriage with gentle pressure, and think about foreground and background relationships, the footage starts to feel intentionally cinematic rather than accidentally mobile.
Perhaps the best experience of all is psychological. A homemade camera slider teaches problem-solving in a way that buying gear does not. You start paying attention to mechanics, shot design, weight distribution, and how movement changes storytelling. The build becomes more than a budget hack. It becomes a filmmaking lesson disguised as a workshop project. And that is a pretty good deal for a tool made of rails, bearings, patience, and the occasional muttered phrase not suitable for family programming.
SEO Tags
Note: This HTML includes only the body content for publishing. Before placing any heavier camera on a DIY slider, test the rig with your lightest setup first and confirm the rails, carriage, and mounting points are stable.


