
Table of Contents >> Show >> Hide
- Before You Touch Anything: A Quick Safety Reality Check
- Choose Your “Ceiling Rescue Plan”
- 1) Paint It the Right Way (Not the “Snowfall” Way)
- 2) Skim Coat Over It for a Smoother, Modern Look
- 3) Add a Thin Drywall Layer for a Brand-New Ceiling (Without Scraping)
- 4) Cover It with Ceiling Tiles (Yes, Faux Tin Counts)
- 5) Install Beadboard or Paneling for Instant Charm
- 6) Use a Track-and-Clip System for Planks or Tiles (A “Ceiling Over Ceiling” Hack)
- 7) Camouflage It with Faux Beams/Battens + Better Lighting
- How to Pick the Best Cheap Fix for Your Home
- Common Questions (Because Everyone Asks These)
- Real-World Experiences: What People Learn the Hard Way (So You Don’t Have To)
- Wrap-Up
Popcorn ceilings are like that one relative who still uses a flip phone: they were “a thing” for a reason (hiding flaws, dampening sound), but now they mostly make rooms feel dated. The good news? You don’t have to take out a loanor take out the whole ceilingto make yours look dramatically better.
This guide covers seven budget-friendly fixes ranging from “weekend warrior” to “I’d rather not create a snowstorm of ceiling crumbs.” You’ll also get realistic cost ranges, what each method is best for, and the most common mistakes people make (so you can skip the part where you mutter, “Why did I think this was a good idea?”).
Before You Touch Anything: A Quick Safety Reality Check
If your home is older, popcorn ceiling texture can contain asbestos. You can’t confirm that by eyeballing ittesting is the reliable way to know. If there’s any chance your ceiling contains asbestos, the safest “inexpensive” choice is often not disturbing it and choosing a cover-up/encapsulation method instead.
- If you suspect asbestos: avoid scraping, sanding, drilling, or dry sweeping dust. Consider hiring a qualified pro for testing and guidance.
- If you don’t suspect asbestos: you still want to minimize dust and protect your lungs/eyes while doing ceiling work.
- If you’re a teen DIYer: ceiling projects often involve ladders, overhead work, dust, and toolsget an adult to help and supervise.
Choose Your “Ceiling Rescue Plan”
- Paint it the right way (not the “snowfall” way)
- Skim coat over it for a smoother look
- Add a thin drywall layer for a brand-new ceiling
- Cover it with ceiling tiles (faux tin included)
- Install beadboard or paneling for instant charm
- Use a track-and-clip system for planks/tiles
- Camouflage it with beams/battens + better lighting
1) Paint It the Right Way (Not the “Snowfall” Way)
Best for: Popcorn ceilings that are in decent shape (not flaking off), but look dingy, stained, or just… aggressively beige.
Budget ballpark: Low. Usually the cheapest visual upgrade per dollar.
Why it works
A fresh coat of paint can make popcorn texture look more uniform, brighter, and cleanerespecially if you use the right nap roller and a ceiling-friendly paint. It won’t make the texture disappear, but it can make it feel intentional instead of accidental.
Do this for better results
- Clean first, gently: Dust with a vacuum brush attachment or a soft duster. Popcorn texture is fragilethink “butterfly wings,” not “garage floor.”
- Prime stains: If you have water marks or nicotine staining, a stain-blocking primer helps prevent bleed-through.
- Use a thick-nap roller: Popcorn needs a roller that can reach into the texture. A thin nap roller can leave missed spots and drag pieces off.
- Work in small sections: Overworking a wet area can loosen texture and create visible lap marks.
Common mistake (and how to avoid it)
Mistake: Pressing hard to “force” paint into the texture.
Fix: Load the roller well and use lighter pressurelet the nap do the work.
Pro tip: If your ceiling has cracks, stains, or peeling spots, it may need spot repairs or sealing before paint will look its best. Painting over problems is like putting deodorant on a broken AC unit: optimistic, but not a plan.
2) Skim Coat Over It for a Smoother, Modern Look
Best for: People who want a smoother ceiling without the mess of scraping.
Budget ballpark: Low-to-moderate (materials are inexpensive; labor is the “cost,” even if that labor is you).
Why it works
Skim coating covers the texture with joint compound (drywall mud), creating a flatter surface that looks more like a modern ceiling. It’s a popular “cover, don’t uncover” strategy.
What to expect
- Multiple passes: Most ceilings need more than one thin coat to look genuinely smooth.
- Dry time + sanding: Plan for drying and light sanding between coats.
- Dust management: Even “light sanding” can create a surprising amount of dustseal doorways, protect vents, and clean with wet methods or a HEPA vacuum.
How to keep it inexpensive
- Use standard joint compound and simple tools (trowel/drywall knives).
- Focus on “good enough smooth” for living areas; perfection belongs to museum ceilings and people who iron their socks.
Pro tip: If you’re not aiming for perfectly flat, you can skim coat to soften the popcorn and then finish with a subtle knockdown or orange-peel look. That hides minor imperfections while still looking more current than popcorn.
3) Add a Thin Drywall Layer for a Brand-New Ceiling (Without Scraping)
Best for: Ceilings with heavy texture, patchy repairs, or “mystery bumps” you’d rather never meet.
Budget ballpark: Moderate (drywall sheets + fasteners + finishing materials). Still often cheaper than full removal and re-texture.
Why it works
Instead of fighting the popcorn, you cover it with new drywall attached to joists. Done well, it gives you the cleanest “new ceiling” look of any cover-up method.
Smart material choice
Thin drywall can be tempting, but very thin sheets may flex and telegraph imperfections. Many DIY guides recommend going thicker for a flatter finisheven though it’s heavier to lift and hold overhead.
What to plan for
- Ceiling height: You’ll lose a small amount of height (usually not dramatic, but noticeable in very low rooms).
- Fixture adjustments: Light boxes and ceiling fans may need adjustments so everything sits flush and safely.
- Finishing: Taping/mudding seams is where the “nice” part happensrushing this is how people end up with a ceiling that looks like it’s wearing shapewear.
Pro tip: If your popcorn might contain asbestos, covering with drywall can be a less disturbing option than removalstill, talk to a qualified professional about best practices for your home and local rules.
4) Cover It with Ceiling Tiles (Yes, Faux Tin Counts)
Best for: Anyone who wants an immediate style upgradeespecially in dining rooms, offices, hallways, and powder rooms.
Budget ballpark: Low-to-moderate (varies by tile material).
Why it works
Ceiling tiles hide texture fast and can add character. Depending on the product, tiles can be glued up, nailed up, or installed through a mounting system. Faux tin tiles are popular because they look fancy without requiring a “historic mansion” budget.
Tile styles that stay budget-friendly
- Foam or PVC tiles: Lightweight and often easier to cut.
- Glue-up decorative tiles: A quick visual transformation, but prep matters.
- Simple square/rectangular patterns: Usually easier to align and make look crisp.
Common mistake (and how to avoid it)
Mistake: Sticking tiles directly onto dusty, unstable popcorn and hoping it holds forever.
Fix: Prep is non-negotiable: remove dust, stabilize loose areas, and follow the tile manufacturer’s recommended adhesive and surface requirements.
Pro tip: If you want the look but fear commitment, consider tiles installed via a mounting system rather than direct glue. It’s often cleaner and more forgiving.
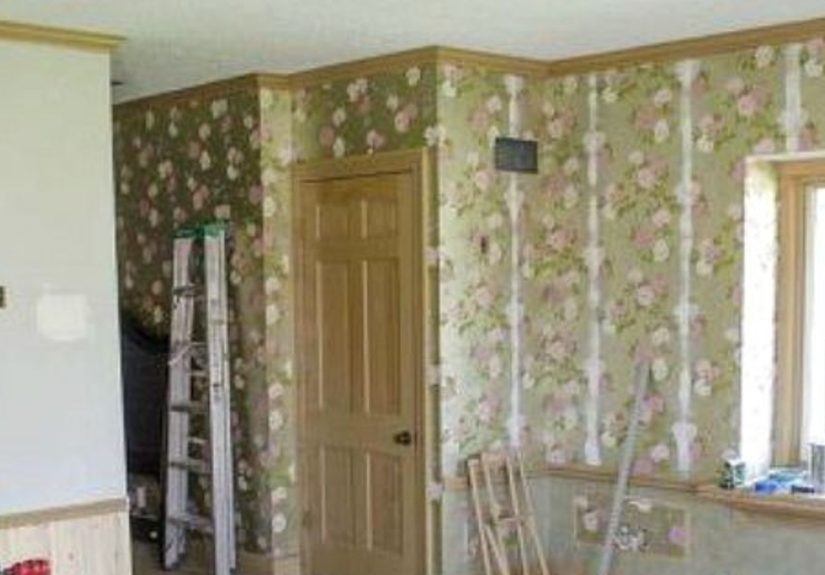
5) Install Beadboard or Paneling for Instant Charm
Best for: Cottage, coastal, farmhouse, or “cozy and intentional” vibeswithout the “I own a rustic chicken statue” requirement.
Budget ballpark: Moderate, often affordable per square foot (especially with pre-primed panels).
Why it works
Beadboard (or other panel styles) creates a clean, repeating pattern that distracts the eye from texture. It also makes ceilings feel designed rather than ignored.
Ways to keep the cost down
- Use pre-primed panels: Less paint work and faster finishing.
- Pick lightweight options: MDF or other light panels can be easier to install overhead.
- Simple trim plan: Keep trim minimal and clean so it looks intentional and not like you’re hiding a crime scene.
Where this shines
Bedrooms, home offices, kitchens, and entrywaysanywhere you want warmth and a finished look. Bonus: panel ceilings pair beautifully with modern lighting upgrades.
6) Use a Track-and-Clip System for Planks or Tiles (A “Ceiling Over Ceiling” Hack)
Best for: People who want a plank or tile ceiling without attaching everything directly to popcorn texture.
Budget ballpark: Moderate (system + planks/tiles), but can still be less than a full tear-out.
Why it works
Track-and-clip systems (like Armstrong’s EASY UP) attach to joists and create a stable base for surface-mount planks or tiles. The big advantage: you can avoid relying on bumpy popcorn texture for adhesion.
Why it can be worth it
- More predictable finish: A uniform ceiling plane is easier to achieve than direct-to-popcorn installs.
- Design flexibility: You can choose different plank/tile lookswood, painted, faux metal, and more.
- DIY-friendly concept: Still overhead work, but the system is designed for residential installs.
Cost-saving tip: Use the system where it matters most (main living space), and choose a simpler option (paint or skim coat) in secondary rooms.
7) Camouflage It with Faux Beams/Battens + Better Lighting
Best for: Anyone who wants a high-impact change without covering every inch of the ceiling.
Budget ballpark: Low-to-moderate (depends on materials and how elaborate you go).
Why it works
Popcorn ceilings look worst when the ceiling is the only “feature” in the room. Add intentional architectural elementslike faux beams, simple battens, or trimand suddenly the ceiling isn’t “ugly popcorn,” it’s “designed overhead.” Lighting helps even more because harsh shadows can exaggerate texture.
Budget-friendly ideas
- Faux beams: Lightweight beam wraps or faux wood beams can create a focal point.
- Batten grid: A simple, evenly spaced batten layout can give a subtle coffered look.
- Upgrade lighting: Replace harsh fixtures with designs that diffuse light (and don’t spotlight every bump like a police helicopter).
- Paint strategy: A clean ceiling white + slightly warmer walls can visually lift the room and reduce “texture drama.”
Pro tip: If you’re not ready to renovate, start with lighting. It’s one of the quickest ways to make popcorn ceilings fade into the background.
How to Pick the Best Cheap Fix for Your Home
If you want the lowest cost
Start with cleaning + painting. It’s the best “bang for the buck” when the ceiling is stable and you just want it to look fresher.
If you want the most modern look on a budget
Skim coating is often the sweet spot: inexpensive materials, big visual upgrade, and no scraping needed.
If you want a total reset
Drywall overlay delivers the cleanest blank-slate ceiling, especially if the existing surface is uneven or patched.
If you want personality and design impact
Tiles, beadboard/paneling, or planks add characterperfect for rooms where you want the ceiling to be part of the décor.
Common Questions (Because Everyone Asks These)
Will painting make popcorn ceilings “worse”?
Painting can make the texture slightly heavier and harder to remove later, but it can also make the ceiling look cleaner and more uniform now. If you’re leaning toward removal someday, consider cover-up options that don’t lock you inor at least go in with eyes open.
Do I really need to worry about asbestos?
If your home is older, it’s worth taking seriously. The safest approach is to avoid disturbing suspect materials and get reliable guidance through proper testing and qualified help.
What’s the least messy option?
Typically: covering (tiles, planks, beadboard) is less messy than removal. Painting can be clean if the texture is stable. Skim coating and drywall finishing involve dust, but it’s manageable with good prep.
Real-World Experiences: What People Learn the Hard Way (So You Don’t Have To)
Here’s the part nobody tells you when you’re staring at the ceiling thinking, “How hard can it be?”a popcorn ceiling project is rarely difficult in a single dramatic way. It’s more like a bunch of tiny surprises wearing a trench coat. These are common experiences homeowners share after tackling budget-friendly popcorn ceiling fixes.
1) The “Painted Popcorn Plot Twist.” Many people start with painting because it’s affordable and feels straightforward. Then they realize popcorn has a personality. The first roller pass can loosen small bits, especially in older rooms where the texture is already fragile. The lesson: gentle cleaning first, the right roller nap, and not pressing like you’re trying to roll dough. When it goes well, the room looks brighter and newer in a single dayalmost suspiciously improved.
2) The Stain That Wouldn’t Quit. Water stains and old smoke discoloration often bleed through a regular coat of ceiling paint. Homeowners who skip primer usually end up repainting twice and wondering why the stain is “still judging them.” The fix is boring but effective: stain-blocking primer where needed. Bonus experience: stains sometimes reveal a bigger issue (old roof leak, bathroom humidity). It’s annoying, but it’s better to discover that now than after installing a brand-new ceiling system over it.
3) The “Skim Coat Confidence Dip.” Skim coating feels amazing on papercheap materials, smooth result. In real life, the first coat can look rough, and that’s normal. People often panic after coat one and assume they ruined everything. The consistent takeaway from DIYers: patience wins. Thin coats, letting it dry properly, and expecting at least two rounds is what gets you from “lumpy frosting” to “nice modern ceiling.”
4) The Adhesive Reality Check. With glue-up tiles, the dream is “stick and done.” The reality: dust, uneven surfaces, and the wrong adhesive can lead to corners that lift later. Homeowners who have the best outcomes tend to spend more time prepping than installingcleaning, stabilizing loose texture, and following product directions. It’s not glamorous, but it’s the difference between “beautiful ceiling” and “gravity’s slow-motion victory.”
5) The “Wait, My Ceiling Is Lower?” Moment. Drywall overlays and track systems can make ceilings feel noticeably lower in already-short rooms. It’s usually not dramatic, but people who are tall (or have tall family members) notice it more. A common workaround is using lighter ceiling finishes and thoughtful lighting to keep the room feeling open. Homeowners also recommend doing one room first (like a bedroom) before committing to a whole-house approach.
6) The Design Upgrade Nobody Regrets: Lighting. Even homeowners who don’t fully fix the texture often say better lighting made the room feel instantly more modern. Soft, diffuse fixtures can reduce harsh shadows that highlight bumps. It’s one of those upgrades that feels like a cheat code: you’re not changing the ceiling, you’re changing how it reads.
Bottom line: The “best” inexpensive fix is the one that fits your ceiling’s condition, your tolerance for mess, and your goal. If you want quick improvement, paint. If you want modern, skim coat. If you want a total reset, drywall overlay. If you want character, go tiles/planks/paneling. And if you want the ceiling to stop stealing the spotlight, add design elements and lighting that tell your eyes where to look.
Wrap-Up
You don’t need a full demolition (or a second job) to escape the popcorn ceiling era. Pick one of these seven budget-friendly approaches based on your room, your timeline, and how much mess you’re willing to tolerate. And remember: the cheapest fix is the one you only have to do once.


