Table of Contents >> Show >> Hide
- Why This DIY Works So Well
- Before You Start: Pick the Right Table and Paper
- Materials and Tools You’ll Need
- Step-by-Step: Coffee Table ReVamp Using Wrapping Paper and Mod Podge
- 1) Clean the Table Like You Mean It
- 2) Sand for Adhesion and Smoothness
- 3) Decide Whether to Paint the Base First
- 4) Measure and Cut the Wrapping Paper
- 5) Apply Mod Podge in Thin, Even Sections
- 6) Lay Down the Wrapping Paper and Smooth It
- 7) Let It Dry Before Trimming
- 8) Seal the Top with Additional Mod Podge Coats
- 9) Add a Protective Topcoat for Heavy Use (Optional but Smart)
- How to Avoid Wrinkles, Bubbles, and “Why Is This Happening?” Moments
- Design Ideas for a Custom Coffee Table Look
- Durability, Maintenance, and Realistic Expectations
- Mistakes to Avoid in a Coffee Table Mod Podge DIY
- Is This Project Worth It?
- Experience Notes: What This Project Is Like in Real Life (500+ Words)
- Conclusion
Let’s be honest: some coffee tables are not “vintage,” they’re just tired. You know the typescratched top, mysterious ring marks, one leg that seems emotionally unavailable. The good news? You can give that table a dramatic glow-up without buying a new one, learning advanced woodworking, or summoning a carpenter.
One of the most budget-friendly and surprisingly stylish ways to transform a coffee table is with wrapping paper and Mod Podge. This is basically decoupage for grown-ups who also want their living room to look expensive. Done right, it can create a custom designer lookfloral, modern geometric, vintage map, marble-inspired, chinoiserie, abstract, even holiday-seasonal if you like to change décor.
In this guide, you’ll learn exactly how to prep, apply, smooth, seal, and protect your tabletop so it looks intentional (not “I fought a glue bottle and lost”). I’ll also walk through common mistakes, durability tips, design ideas, and real-life experience notes at the end.
Why This DIY Works So Well
A coffee table revamp with wrapping paper and Mod Podge works because it combines three things DIYers love: low cost, high visual impact, and forgiving technique. Wrapping paper gives you endless patterns at a fraction of the price of wallpaper or custom prints. Mod Podge acts as a glue, sealer, and finish, making it perfect for decoupage furniture projects.
Best Reasons to Try It
- Budget-friendly: A stylish makeover can cost far less than replacing the table.
- Beginner-friendly: Flat tabletops are one of the easiest surfaces for decoupage.
- Custom design: You choose the pattern, color palette, and finish sheen.
- Great for upcycling: Ideal for thrifted or hand-me-down furniture.
- Fast transformation: The visual change is immediate (drying time is the only real patience test).
Before You Start: Pick the Right Table and Paper
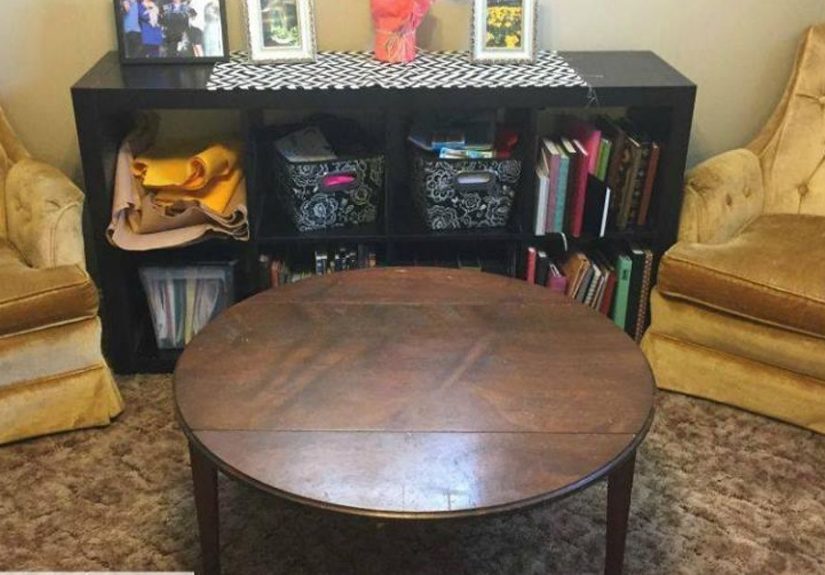
Not every coffee table needs the same treatment. The easiest candidates are tables with a flat top and minimal texture. Deep grooves, chipped veneer, and warped surfaces can still work, but they need more prep.
Good Coffee Table Candidates
- Wood or MDF tables with a flat top
- Laminate tables (with proper sanding and primer where needed)
- Painted tables that are structurally sound
- Thrift-store finds with ugly tops but sturdy legs
Choosing Wrapping Paper for Decoupage Furniture
Wrapping paper is fantastic, but quality matters. Ultra-thin paper can wrinkle more easily, while thicker paper is easier to handle but may be less flexible around edges.
- Matte wrapping paper: Easier to work with and often shows fewer bubbles.
- Glossy wrapping paper: Beautiful, but can be trickier and may show imperfections more.
- Heavier paper: Better for beginners because it resists tearing.
- Busy patterns: Great for hiding tiny flaws and seams.
- Geometric prints: Stunning, but alignment mattersmeasure carefully.
Pro tip: Buy an extra roll. It’s insurance for miscuts, test pieces, or the moment you realize your “eyeballing” skills are not legally recognized.
Materials and Tools You’ll Need
- Coffee table (clean and dry)
- Wrapping paper (extra roll recommended)
- Mod Podge (matte, gloss, or hard coat/furniture-friendly formula)
- Foam brush or soft synthetic brush
- Brayer, plastic scraper, or old gift card (for smoothing)
- Scissors and/or craft knife
- Measuring tape or ruler
- Pencil
- Fine-grit sandpaper (and medium grit if needed for heavier prep)
- Tack cloth or microfiber cloth for dust removal
- Mild cleaner/degreaser
- Optional primer/paint (for the base, legs, or edges)
- Optional clear topcoat for extra durability (water-based polycrylic/polyurethane-compatible finish)
- Drop cloth, gloves, and good ventilation
Step-by-Step: Coffee Table ReVamp Using Wrapping Paper and Mod Podge
1) Clean the Table Like You Mean It
Dust, wax, and greasy residue are the enemies of adhesion. Wipe the table thoroughly with a mild cleaner or degreaser, then let it dry fully. If the table has years of polish buildup, clean twice. Your paper and sealer need a clean surface to bond properly.
2) Sand for Adhesion and Smoothness
If your tabletop is glossy, slick, or has rough spots, lightly sand it. You’re not always stripping it to bare woodyou’re often just scuffing the surface so primer, paint, or Mod Podge can grip better.
- Use medium grit for rough patches or peeling finish.
- Use fine grit to smooth and scuff the top.
- Wipe away dust completely (tack cloth or microfiber works well).
If the top has dents or chips, fill them first and sand smooth. Wrapping paper is decorative, not magicalit will not hide crater-sized damage.
3) Decide Whether to Paint the Base First
If your paper doesn’t wrap over the edges or you want a contrasting frame, paint the table base or edges before decoupaging. A black base with botanical paper looks dramatic. White with blue print feels fresh and coastal. Natural wood legs with vintage-style paper? Chef’s kiss.
Let any paint dry fully before moving on. Rushing this step can cause tackiness, smudging, or a weird “why is my brush dragging old paint into the glue” moment.
4) Measure and Cut the Wrapping Paper
Measure the tabletop precisely. Then cut the wrapping paper with:
- Exact fit if you want clean edges and no wraparound
- Extra overhang if you plan to wrap the edges for a seamless look
Dry-fit the paper on the table before opening the Mod Podge. Check pattern direction, centering, and symmetry. If you’re using stripes or a repeating motif, line it up nowbecause once the glue is on, your paper will become surprisingly committed to bad decisions.
5) Apply Mod Podge in Thin, Even Sections
Brush a thin, even layer of Mod Podge onto part of the tabletop. Don’t flood it. Too much product can increase wrinkles and dry cloudy longer than expected.
For larger tables, work in sections so you can place and smooth the paper before the adhesive starts setting. This also helps reduce trapped air bubbles.
6) Lay Down the Wrapping Paper and Smooth It
Place the paper carefully, starting from one side and easing it down across the surface. Then smooth from the center outward using your hand, a brayer, or a plastic scraper/gift card.
- Work slowly and gently.
- Push air outward toward the edges.
- Lift and reposition carefully if needed (before it grabs too hard).
- Don’t overwork thin paper or it may tear.
Tiny bubbles may flatten as the project dries, so don’t panic over every microscopic bump. Save your panic for situations that deserve it, like stepping on a LEGO.
7) Let It Dry Before Trimming
This step matters more than people think. If you trim too early, the paper can drag, tear, or create jagged edges. Let the adhesive dry first, then use a sharp craft knife to trim cleanly along the edge.
Use a metal ruler for straight cuts if needed. Replace dull blades oftenclean cuts are the difference between “custom furniture look” and “kindergarten scissors energy.”
8) Seal the Top with Additional Mod Podge Coats
Once the paper is adhered and dry, brush a thin coat of Mod Podge over the top to seal it. Let it dry, then add more thin coats as needed for protection and a more finished look.
- Use long, even strokes in one direction.
- Avoid brushing back over partially dried sections.
- Let each coat dry before adding the next.
- For a smoother finish, lightly sand between coats with very fine grit (optional).
Usually, multiple thin coats look better than one thick coat. Thick coats can dry unevenly and highlight brush marks.
9) Add a Protective Topcoat for Heavy Use (Optional but Smart)
If your coffee table gets real life thrown at itmugs, remotes, game nights, snacks, kids’ homework, dramatic houseplantsconsider adding a tougher clear topcoat after the Mod Podge layers have dried sufficiently.
A compatible water-based clear finish can improve scratch resistance and make the tabletop easier to clean. Always test on a sample first, especially with printed papers and decorative finishes.
How to Avoid Wrinkles, Bubbles, and “Why Is This Happening?” Moments
Common Causes of Wrinkles
- Too much Mod Podge under the paper
- Paper laid down too quickly without smoothing
- Overly thin wrapping paper
- Aggressive brushing after the paper is already wet
- Humidity or rushing drying time
How to Get a Smoother Finish
- Use thin, even coats of Mod Podge
- Work in sections on larger tabletops
- Smooth from the center outward with a brayer or plastic card
- Let coats dry fully before the next one
- Lightly sand between top coats (very fine grit) if needed
- Remove all sanding dust before sealing
And yes, patience helps. I know. Terrible news for all of us.
Design Ideas for a Custom Coffee Table Look
1) Boutique Floral Look
Use a large-scale floral wrapping paper with a soft matte finish. Pair it with painted black or deep green legs for a high-contrast designer look.
2) Modern Graphic Tabletop
Choose a black-and-white geometric or grid pattern. Keep the base simple in white, charcoal, or natural wood tones. Great for contemporary apartments.
3) Vintage Travel Vibe
Try wrapping paper with maps, script text, postcards, or old-world prints. Distress the painted edges lightly for a curated flea-market feel.
4) Faux Luxe Marble
Marble-print wrapping paper can mimic a stone top from across the room. Use a glossy seal for a polished finish and pair with gold-painted legs or hardware accents.
5) Seasonal Swap Strategy
If you love changing décor, use this technique on a tray insert or removable panel instead of the whole table. You can rotate designs for holidays or seasons without redoing the furniture each time.
Durability, Maintenance, and Realistic Expectations
Let’s talk honestly: Mod Podge furniture makeovers can be durable, but they still need proper curing time and reasonable careespecially on a high-touch surface like a coffee table.
- Use coasters for hot mugs and cold drinks (condensation is sneaky).
- Avoid dragging heavy décor across the surface.
- Clean with a soft damp cloth, not harsh scrubbers.
- Avoid soaking the surface or using strong chemical cleaners.
- Let the project cure fully before regular use.
If you have a busy household, a protective clear topcoat is worth the extra step. Think of it as giving your beautiful paper design a bodyguard.
Mistakes to Avoid in a Coffee Table Mod Podge DIY
- Skipping prep: Dirt and gloss cause adhesion problems.
- Using too much adhesive: More is not better here.
- Trimming while wet: This is how jagged edges are born.
- Rushing coats: Tacky layers trap frustration (and lint).
- Ignoring dust: Sanding dust under a clear finish is a heartbreak you can prevent.
- No test piece: Always test paper + Mod Podge + topcoat compatibility first.
Is This Project Worth It?
Absolutelyespecially if you love affordable home décor upgrades with personality. A coffee table revamp using wrapping paper and Mod Podge is one of those DIY projects that looks far more expensive than it is. It’s creative, practical, and a great entry point into upcycled furniture design.
You don’t need perfect technique on your first try. You just need a good surface, a design you love, and the willingness to let things dry before “just touching it real quick.” (We’ve all been there.)
Experience Notes: What This Project Is Like in Real Life (500+ Words)
If you’ve never done a wrapping paper furniture makeover before, the biggest surprise is how quickly the table starts looking different. Not finisheddifferent. The transformation happens in stages. First, the table looks worse while you sand it. Then it looks confusing when the paper goes on and you can see bubbles. Then, after the first seal coat dries, it suddenly looks like a real design choice. That moment is the magic.
A common beginner experience goes like this: you pick a beautiful wrapping paper, cut it a little too small, and spend ten minutes pretending the gap near the back edge is “intentional.” Don’t worry. That’s why experienced DIYers buy an extra roll and dry-fit before gluing. Once you do this project once, your measuring discipline improves dramatically. It’s basically craft school, but your homework lives in your living room.
Another real-life lesson is that paper personality matters. Thin paper can wrinkle if you even look at it too intensely. Heavier wrapping paper feels much easier because it gives you a few extra seconds to align and smooth. Busy prints (florals, abstract patterns, vintage collage styles) are very forgiving and hide tiny imperfections beautifully. Clean stripes and checker patterns look amazing, but they will expose every misalignment like a brutally honest friend.
Many people also discover that the project turns into a mini room makeover. Once the coffee table looks good, suddenly the old tray looks tired. Then the lamp feels wrong. Then you’re online looking at throw pillows at midnight. This is normal. DIY projects rarely stay in their lane.
In households with kids or pets, the experience is less “peaceful art studio” and more “protect the wet table at all costs.” One of the smartest moves is setting up a drying zone where nobody will set down a cup, a backpack, or a cat. A freshly sealed tabletop has an almost magical ability to attract fingerprints. If possible, finish the project at a time when the table can sit untouched for a day or two.
People who love this technique usually mention one thing: it makes thrift-store furniture feel personal. A plain $20 table can end up looking like a boutique piece because the pattern choice reflects your style. Botanical prints feel collected and cozy. A bold graphic print can make a neutral room look more modern. Vintage-inspired papers make great conversation starters because guests often assume the top is hand-painted or a specialty finish.
There’s also a confidence boost that comes with finishing this project. Decoupage sounds fancy, but once you do it, you realize it’s a very practical skill. After a coffee table, you start seeing possibilities everywhereside tables, trays, drawer fronts, desk insets, bookshelf backs, even serving carts. It’s one of those DIY techniques that teaches you how to combine creativity with surface prep and finishing discipline.
The final real-world takeaway: perfection is overrated, but prep and drying time are not. Most disappointment in this project comes from rushingrushing the cleaning, rushing the sanding, rushing the trim, rushing the cure. If you slow down for those parts, the decorative step becomes fun instead of stressful. And when the table is done, you’ll have a custom piece that cost less than a trendy store version and comes with a better backstory: “I made it.”
Conclusion
A coffee table makeover with wrapping paper and Mod Podge is a smart, stylish way to upgrade your space without overspending. With the right prep, careful smoothing, and enough drying time, you can create a durable tabletop that looks custom-made for your room. Whether you prefer bold patterns, soft florals, or faux-luxe finishes, this DIY gives you a lot of design payoff for a small budgetand a very satisfying weekend project.