
Table of Contents >> Show >> Hide
- Why DIY Popsicle Stick Décor Is So Popular
- What You Need Before You Start
- How to Make Popsicle Sticks Look Better Than Plain Wood
- 7 Stunning DIY Popsicle Stick Décor Ideas to Try
- Design Tips That Make Handmade Décor Look More Expensive
- The Dos and Don’ts of DIY Popsicle Stick Décor
- How to Style Popsicle Stick Décor in Your Home
- What the Experience of Making Popsicle Stick Décor Really Feels Like
- Conclusion
If you have ever looked at a humble pile of popsicle sticks and thought, “Well, that seems aggressively ordinary,” good news: that tiny stack of wood is secretly a budget-friendly decorating powerhouse. With a little paint, glue, and creative nerve, craft sticks can become wall art, mini planters, rustic ornaments, photo frames, garlands, and even pieces that look surprisingly chic for something that began life next to a freezer pop.
DIY popsicle stick décor works because it checks every box. It is affordable, lightweight, easy to customize, and beginner-friendly without feeling boring. You can stain it for a rustic farmhouse look, paint it in bright modern colors, wrap it in twine for texture, or add beads, florals, mirrors, and metallic finishes if you want your project to feel a little less “summer camp” and a little more “boutique craft fair where everyone suddenly knows what a curated vignette is.”
In this guide, you will learn how to turn simple craft sticks into stylish home décor, which tools matter most, which design ideas are worth trying first, and how to avoid the common mistakes that make handmade décor look more chaotic than charming.
Why DIY Popsicle Stick Décor Is So Popular
The best DIY décor projects are the ones that feel accessible but still leave room for personality. Popsicle stick crafts nail that balance. The material is easy to cut, glue, layer, paint, and arrange into geometric shapes. Because the sticks are uniform, beginners can create clean lines without needing expensive tools or advanced woodworking skills.
Another reason these projects work so well is versatility. A single pack of craft sticks can become boho wall art, a tiny hanging shelf, a holiday ornament, a decorative sign, a frame for a mirror, or a mini accent piece for a bookshelf. If you love budget home décor, this is one of the easiest ways to make something custom without spending real furniture money.
And yes, it is also wildly satisfying. There is something delightfully rebellious about making beautiful décor from an item most people associate with kindergarten glue disasters.
What You Need Before You Start
Basic Supplies
- Popsicle sticks or jumbo craft sticks
- Hot glue gun and glue sticks
- Wood glue for stronger long-term bonds
- Acrylic paint or wood stain
- Foam brushes or small detail brushes
- Fine-grit sandpaper
- Scissors or craft knife
- Ruler and pencil
- Twine, ribbon, beads, faux greenery, or small embellishments
- Clear sealer, decoupage medium, or matte top coat
Optional Upgrades
If you want your DIY popsicle stick décor to look a little more polished, add a few optional extras: mini mirrors, peel-and-stick gems, scrapbook paper, washi tape, wood beads, magnetic strips, tiny hooks, and metallic paint pens. These are the details that take a project from cute to “wait, you made that?”
How to Make Popsicle Sticks Look Better Than Plain Wood
The biggest difference between a charming handmade piece and something that looks unfinished is preparation. Before painting or gluing, lightly sand rough edges. Craft sticks are smooth already, but a quick pass with fine-grit sandpaper helps them feel cleaner and more intentional.
If you plan to use bright paint, especially white, blush, sage, or other lighter colors, consider priming first. Bare wood can absorb paint unevenly, which leads to patchy coverage. For a rustic look, you can skip primer and let some grain show through. For a modern look, smoother is better.
Choose your adhesive based on the project. Hot glue is fast and excellent for lightweight decorative pieces. Wood glue is stronger for structural projects like boxes, layered frames, or anything that needs to stay square and sturdy over time. The patient crafter with drying time often wins the prettier result.
Finally, seal the finished piece. A matte top coat keeps painted craft sticks from scuffing too easily, while a glossy finish adds brightness for colorful seasonal décor. It is a small step that makes your project look more complete and last longer.
7 Stunning DIY Popsicle Stick Décor Ideas to Try
1. Sunburst Mirror Wall Accent
This is one of the best beginner projects if you want something stylish. Start with a small round mirror as the center. Arrange craft sticks around it in alternating lengths to create a sunburst effect. Paint the sticks gold for glam décor, black for modern contrast, or natural oak tones for mid-century-inspired charm.
This type of craft stick wall art looks great in entryways, bedrooms, or above a small desk. The trick is symmetry. Lay out the pattern before gluing anything so the finished piece feels balanced instead of suspiciously lopsided.
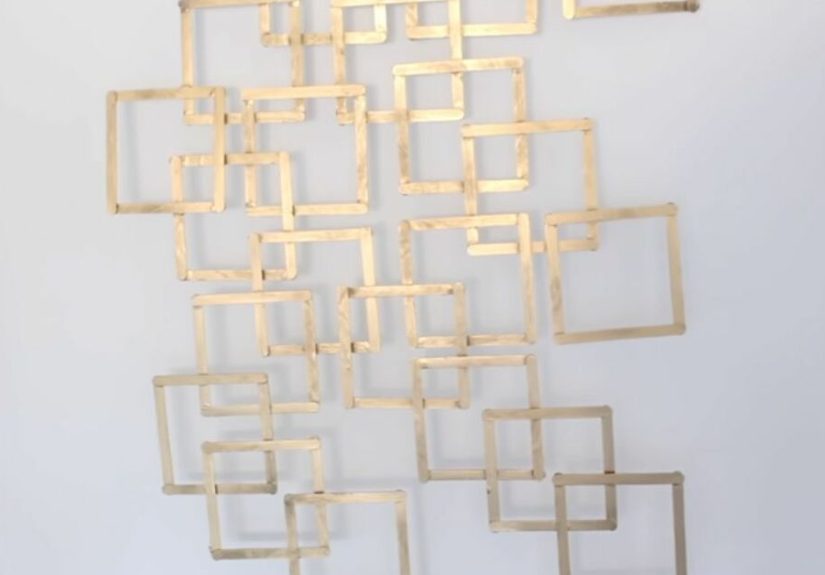
2. Layered Wall Hanging
If you like geometric décor, create a wall hanging by forming diamonds, hexagons, or overlapping triangles with painted popsicle sticks. Glue the shapes together, then add tassels, beads, or faux eucalyptus for texture. Neutral tones work beautifully for boho spaces, while terracotta, mustard, and muted green create a warm handmade feel.
This is an easy way to make DIY wall décor on a budget, and it works especially well in apartments where you want light pieces that are simple to hang.
3. Mini Planter Wraps
Plastic nursery pots are useful, but let us be honest: they rarely elevate the room. A popsicle stick planter wrap can fix that fast. Measure the height of the pot, cut the sticks if needed, then glue them vertically around the outside like a tiny fence. You can leave them natural for a clean Scandinavian vibe, whitewash them for farmhouse style, or paint them in happy colors for a playful shelf display.
These also make cute gift ideas. Add a small herb or succulent and suddenly your inexpensive craft project looks weirdly thoughtful and expensive.
4. Handmade Photo Frames
Popsicle stick picture frames are classic for a reason, but they do not have to look childish. Instead of using primary colors and glitter explosions, try layered stained sticks, muted paint, decoupage paper, or a minimalist black-and-wood combination. Add a magnet to the back for refrigerator art or attach twine for a hanging frame gallery.
If you want to create seasonal décor, use frames to display pressed flowers in spring, family vacation snapshots in summer, mini printable quotes in fall, and holiday sayings in winter.
5. Decorative Garland or Word Art
Craft sticks can be painted, stamped, or lettered to create charming garlands for mantels, shelves, and party tables. Spell out a word like “HOME,” “HELLO,” “JOY,” or “GATHER,” then link the pieces with twine, ribbon, or small jump rings. For a more polished look, keep the palette limited and repeat the same finish across all pieces.
This project is excellent for holiday decorating because you can swap out colors and sayings without rebuilding the entire piece. Your mantel gets a fresh look, and your wallet gets to keep its dignity.
6. Seasonal Ornaments and Wreath Details
Popsicle sticks are ideal for small holiday décor because they are lightweight and easy to shape into stars, sleds, mini trees, snowflakes, and simple layered wreath accents. You can make ornaments for Christmas, stars for the Fourth of July, hearts for Valentine’s Day, or mini signs for fall décor.
Use paint, metallic markers, buttons, ribbon, and tiny bells to personalize them. A batch made in coordinated colors can decorate a tree, a wreath, a gift package, or even a tiered tray.
7. Fairy Garden and Shelf Accents
If you enjoy whimsical decorating, craft sticks are perfect for miniature benches, little fences, tiny signs, faux garden gates, and shelf accessories. These are charming in plant corners, kids’ rooms, reading nooks, or indoor fairy gardens. The small scale makes them quick to build, which is great for impatient crafters and people who like the thrill of finishing a project before dinner.
Design Tips That Make Handmade Décor Look More Expensive
Stick to a Clear Color Palette
The fastest way to make a DIY project look polished is to limit your colors. Choose two or three tones and repeat them. Neutrals with one accent color usually look cleaner than using every paint bottle you own like it is a creative emergency.
Use Texture on Purpose
Twine, beads, faux greenery, linen ribbon, and matte paint finishes add dimension without clutter. A simple craft stick base paired with the right texture can turn into beautiful rustic décor or soft boho décor in minutes.
Mix Finishes
Try combining natural wood with painted details, or matte paint with metallic edges. Contrast makes even basic materials feel intentional. A sunburst mirror with gold-tipped sticks or a black frame with exposed wood grain instantly reads more stylish.
Repeat Shapes
If your décor includes triangles, arches, stars, or hexagons, repeat those shapes throughout the project. Repetition creates visual harmony and helps your design feel curated rather than random.
The Dos and Don’ts of DIY Popsicle Stick Décor
Do
- Lay out your design before gluing
- Sand rough edges for a neater finish
- Use wood glue when strength matters
- Let paint and glue dry fully between steps
- Seal projects that will be handled often or displayed for a long time
Don’t
- Use too many embellishments at once
- Skip measuring on geometric designs
- Assume one coat of paint will always be enough
- Glue first and hope the shape works itself out later
- Forget that “handmade” should still look intentional
How to Style Popsicle Stick Décor in Your Home
The beauty of popsicle stick home décor is that it works best in small doses. Use a handmade frame in a gallery wall, a mini planter on a windowsill, a garland across a mantel, or a wall hanging above a reading chair. These pieces shine as accents rather than dominant room features.
For a modern home, keep shapes simple and colors muted. For farmhouse décor, lean into stained wood, cream paint, and twine. For playful spaces, use cheerful colors and layered textures. If your style is eclectic, congratulations: this is your Olympics.
Group handmade items with a few store-bought pieces so the space feels balanced. A popsicle stick project next to a ceramic vase, stacked books, or a woven basket looks more elevated than if it stands alone shouting, “Look at me, I was made from freezer dessert lumber!”
What the Experience of Making Popsicle Stick Décor Really Feels Like
One of the most enjoyable parts of making DIY popsicle stick décor is how quickly a plain material starts to feel full of possibility. At first, the sticks look repetitive and a little uninspiring. Then you line up a few shapes, test a color palette, add some glue, and suddenly the project begins to take on personality. That transformation is genuinely satisfying. It reminds you that good décor is not always about expensive materials. Sometimes it is about paying attention to proportion, color, texture, and detail.
There is also a surprising amount of freedom in working with such a low-pressure supply. Because popsicle sticks are inexpensive, you do not feel terrified of making a mistake. You can try a sunburst pattern, hate it, pull it apart, and build something completely different without that dramatic inner monologue that usually follows ruining a pricey craft kit. That freedom makes experimentation easier, and experimentation is usually where the best design ideas happen.
The experience can also be oddly relaxing. Repeating small actions like painting edges, arranging rows, wrapping twine, or gluing layers has a calm rhythm to it. It is the kind of project you can do on a quiet weekend afternoon with music on in the background and a beverage nearby, feeling extremely pleased with yourself for being both productive and creative. Even when the glue strings are everywhere and one stick refuses to stay straight, the overall process still feels approachable rather than frustrating.
Another thing people often notice is how quickly these projects teach design instincts. You begin to understand balance, spacing, and restraint. You learn that not every piece needs glitter. You see how one matte finish can look better than five competing embellishments. You notice that repeating a color makes the whole project feel more intentional. In other words, popsicle stick décor is not just a craft. It is a tiny workshop in visual styling.
There is also a real sense of accomplishment in turning a simple material into something display-worthy. A finished wall hanging, planter wrap, or frame can make a shelf or corner feel more personal because it carries your choices in every detail. Store-bought décor can be beautiful, of course, but handmade décor adds a story. It says you made time to shape something yourself, and that energy changes how the piece feels in your space.
Best of all, these projects tend to spark more ideas. Once you finish one, you start spotting possibilities everywhere. A leftover mirror becomes a sunburst centerpiece. Extra beads become embellishments for a garland. A plain pot suddenly looks like it needs a decorative wrap. That momentum is part of the fun. DIY popsicle stick décor is easy to begin, forgiving to learn, and satisfying to finish, which is exactly why it keeps winning over crafters, decorators, and anyone who enjoys making something lovely out of almost nothing.
Conclusion
DIY popsicle stick décor proves that beautiful home accents do not have to be complicated or expensive. With a small stash of craft sticks, a few reliable supplies, and a clear design plan, you can create wall art, mini planters, garlands, ornaments, frames, and seasonal accents that feel personal and stylish. The magic is not in the material alone. It is in how you paint it, layer it, balance it, and finish it.
Start simple, keep your palette focused, and do not underestimate the power of small details. A little sanding, a smart adhesive choice, and a clean finish can turn a basic project into something truly display-worthy. And if one project goes sideways, relax. It is a popsicle stick, not a mortgage. Try again and make it better.


