Table of Contents >> Show >> Hide
- Introduction: A Clean Gas Fireplace Is Cozy, Safe, and Much Less Embarrassing
- Before You Start: Safety Comes First
- How to Clean a Gas Fireplace: 11 Steps
- Step 1: Turn Off the Fireplace Completely
- Step 2: Let the Fireplace Cool Fully
- Step 3: Protect the Floor and Surrounding Area
- Step 4: Remove the Front Screen or Access Panel
- Step 5: Remove the Glass Carefully
- Step 6: Clean the Fireplace Glass
- Step 7: Photograph the Log Layout Before Touching Anything
- Step 8: Dust the Logs, Embers, and Interior Gently
- Step 9: Vacuum the Firebox and Burner Area Carefully
- Step 10: Clean the Exterior, Mantel, Hearth, and Vents
- Step 11: Reassemble the Fireplace and Test It
- How Often Should You Clean a Gas Fireplace?
- Common Gas Fireplace Cleaning Mistakes to Avoid
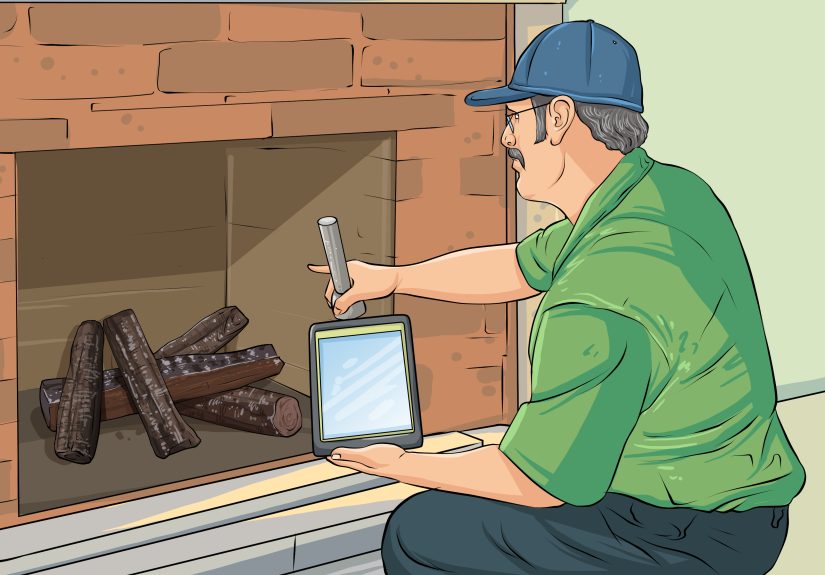
- Signs Your Gas Fireplace Needs Professional Service
- Best Products for Cleaning a Gas Fireplace
- Extra Experience-Based Tips for Cleaning a Gas Fireplace
- Conclusion: Clean It Gently, Inspect It Regularly, Enjoy It Often
- SEO Tags
Note: This guide is for routine homeowner cleaning only. If you smell gas, see damaged parts, notice a weak or unusual flame, or are unsure how to shut off the unit safely, stop and call a qualified gas fireplace technician.
Introduction: A Clean Gas Fireplace Is Cozy, Safe, and Much Less Embarrassing
A gas fireplace is one of those home features that feels almost magical. Flip a switch, press a remote, or turn a knob, and suddenly your living room looks like it belongs in a winter lifestyle magazine. No chopping wood, no ash bucket, no dramatic battle with damp logs. Lovely.
But “low maintenance” does not mean “no maintenance.” A gas fireplace still collects dust, pet hair, cloudy film on the glass, lint around vents, and sometimes soot on logs or burner areas. Left alone long enough, that buildup can make the fireplace look tired, smell odd, burn less beautifully, or even hide problems that deserve professional attention.
The good news: learning how to clean a gas fireplace is very doable when you follow a calm, safety-first process. You are not rebuilding a spaceship. You are turning off the unit, letting it cool, cleaning the glass, dusting the logs carefully, vacuuming the firebox, checking the vents, and making sure everything goes back exactly where it belongs.
This in-depth guide walks you through 11 practical steps to clean a gas fireplace, plus helpful maintenance tips, common mistakes to avoid, and real-world experience-based advice at the end. Your fireplace should come out looking clearer, brighter, and less like it has been quietly collecting living-room confetti since last winter.
Before You Start: Safety Comes First
Gas fireplaces are cleaner than wood-burning fireplaces, but they are still fuel-burning appliances. That means you should treat them with respect. Before cleaning, always read your owner’s manual if you have it. Different models have different glass latches, log arrangements, pilot systems, venting styles, and cleaning recommendations.
Also, keep this rule in mind: routine cleaning is a homeowner task; gas-line repair, burner adjustment, pilot assembly repair, sensor replacement, and combustion testing are professional tasks. If the fireplace smells like gas, produces a strange flame, leaves heavy soot, shuts off unexpectedly, or triggers a carbon monoxide alarm, do not “DIY your way through it.” Call a qualified technician.
Basic Supplies You Will Need
- Microfiber cloths or lint-free towels
- Fireplace glass cleaner or a manufacturer-approved non-abrasive cleaner
- Soft-bristle paintbrush or small detail brush
- Vacuum with hose attachment
- Drop cloth, towel, or cardboard for protecting the floor
- Small bowl of warm water
- Mild dish soap, if approved by the manufacturer
- Work gloves
- Owner’s manual or a photo of the log layout
Avoid harsh cleaners, oven cleaner, abrasive pads, metal brushes, and regular ammonia-heavy glass sprays unless your manual specifically allows them. Gas fireplace glass can be ceramic glass, and the wrong product may leave residue, cause odors, or damage the surface over time.
How to Clean a Gas Fireplace: 11 Steps
Step 1: Turn Off the Fireplace Completely
Start by turning the fireplace off at the switch, remote, or control panel. If your fireplace has a standing pilot light and the manual allows homeowner access, turn the pilot off too. Some units also have an electrical power source for blowers, ignition systems, or lights. If your manual recommends disconnecting power before service, do that as well.
The goal is simple: no flame, no heat, no active ignition, and no surprises. Gas fireplaces are friendly when used correctly, but nobody wants a cleaning session that turns into a tiny indoor action movie.
Step 2: Let the Fireplace Cool Fully
Do not clean a hot fireplace. Let the glass, metal frame, logs, burner, and surrounding surfaces cool completely. Even when the flames are off, fireplace glass and metal trim can stay hot longer than expected.
For best results, wait at least several hours after use. Many homeowners prefer cleaning the fireplace in the morning after it has been off overnight. This gives you a safer workspace and helps prevent cleaner from evaporating too quickly on warm glass.
Step 3: Protect the Floor and Surrounding Area
Place a towel, drop cloth, or piece of cardboard in front of the fireplace. This protects flooring from dust, cleaner drips, and the glass panel if you need to remove it. If your fireplace has decorative stones, tile, brick, or a painted mantel nearby, keep cleaning products away from those surfaces unless the label says they are safe.
This step feels boring until you skip it and discover that fireplace dust has the survival instincts of glitter. A little floor protection saves cleanup time later.
Step 4: Remove the Front Screen or Access Panel
Many modern gas fireplaces have a safety screen, decorative front, louvers, or trim panel. Remove these parts according to the owner’s manual. Some lift off easily; others have clips, screws, tabs, or hinges.
Set all parts on a soft surface. Keep screws or clips in a small cup so they do not disappear into the mysterious household dimension where missing batteries, Allen wrenches, and remote controls go to retire.
Step 5: Remove the Glass Carefully
If your model allows homeowner glass removal, unlatch or unscrew the glass assembly exactly as directed. Gas fireplace glass is often held in place by spring-loaded clips, latches, or brackets. Do not force it. If it does not move easily, stop and check the manual.
Place the glass on a towel with the dirty side facing up. Inspect it for cracks, chips, loose gasket material, or damaged seals. If the glass is cracked or the gasket looks worn, do not use the fireplace until it has been checked. A properly sealed glass front is important for safe and efficient operation on many gas fireplace models.
Step 6: Clean the Fireplace Glass
Spray or apply a fireplace glass cleaner to a microfiber cloth or directly to the glass, depending on the product directions. Wipe gently in circular motions, focusing on cloudy white film, soot marks, and fingerprints. Let the cleaner sit briefly if the label recommends it, then buff the glass dry with a clean cloth.
For light film, a damp microfiber cloth may be enough. For stubborn haze, a dedicated fireplace glass cleaner usually works better than ordinary household window cleaner. Avoid abrasive pads, razors, and harsh scraping. The glass may look tough, but scratches are forever, and replacement panels are not exactly “fun money.”
Clean both sides of the glass. The inside surface usually has the most film, but the outside collects fingerprints, dust, and the occasional nose print from curious pets or children who believe fireplaces are basically television for flames.
Step 7: Photograph the Log Layout Before Touching Anything
Before removing or adjusting ceramic logs, embers, or decorative media, take several clear photos. Gas logs are not random decorations. Their placement affects flame pattern, airflow, and combustion. If logs are placed incorrectly, the fireplace may produce soot, burn poorly, or operate unsafely.
If your manual says not to remove the logs, do not remove them. If it allows gentle cleaning, work slowly and put every log back in the exact same position. When in doubt, take more photos than you think you need. Future you will be grateful.
Step 8: Dust the Logs, Embers, and Interior Gently
Use a soft-bristle paintbrush or microfiber cloth to remove dust from ceramic logs and decorative elements. Be gentle. Ceramic logs can chip, crack, or shed small particles if handled roughly. Do not wash logs aggressively unless your owner’s manual says it is safe.
If the logs have light dust, brushing is usually enough. If there is heavy soot, black streaking, or recurring buildup, that may signal incorrect log placement, a burner issue, poor airflow, or another problem that needs professional service.
Also look for cobwebs or dust around the burner area. Spiders and insects sometimes treat unused fireplaces like luxury apartments. Unfortunately, their web design skills are not approved for gas appliance performance.
Step 9: Vacuum the Firebox and Burner Area Carefully
Use a vacuum hose attachment to remove loose dust, lint, pet hair, and debris from the firebox floor. Keep the nozzle slightly away from delicate parts such as pilot assemblies, thermocouples, thermopiles, sensors, wires, and ember material.
If your vacuum has a soft brush attachment, that is ideal for the floor and corners. Do not jab the burner ports or shove the nozzle into mechanical components. You are cleaning, not excavating an archaeological site.
For burner openings, use only methods recommended by the manufacturer. Some manuals allow compressed air or a soft brush; others recommend professional cleaning. If you notice corrosion, cracked parts, loose wiring, or anything that looks burned in a strange way, stop and call a technician.
Step 10: Clean the Exterior, Mantel, Hearth, and Vents
Wipe the exterior frame, mantel, hearth, and nearby surfaces with a slightly damp cloth. Dry everything afterward. Dust and pet hair around the fireplace can get pulled toward warm air currents, so keeping the surrounding area clean helps the whole unit stay fresher.
Next, check visible vents and air openings. Clear lint, dust, leaves, or debris from accessible areas. If your gas fireplace vents through an exterior wall, inspect the outside terminal from a safe position. Make sure shrubs, leaves, snow, nests, or outdoor clutter are not blocking airflow.
Do not take apart sealed venting or internal components unless your manual specifically tells you to. Venting problems should be handled by a trained professional because they can affect combustion and carbon monoxide safety.
Step 11: Reassemble the Fireplace and Test It
Once everything is clean and dry, put the logs, embers, glass, panels, trim, and screen back exactly as directed. Make sure the glass is seated properly and latched securely. Replace every screw, clip, or bracket that came off.
Turn the fireplace back on according to the manufacturer’s instructions. Watch the flame for a few minutes. A healthy gas fireplace flame is usually steady and consistent, though the exact look depends on the model. If the flame is weak, unusually tall, overly yellow, noisy, smoky, or causing soot to appear quickly on the glass, turn the unit off and schedule service.
Finally, test your smoke alarms and carbon monoxide alarms according to their instructions. A clean fireplace is great. A safe home is better.
How Often Should You Clean a Gas Fireplace?
Most homeowners should clean the visible parts of a gas fireplace at least once per heating season. If you use the fireplace often, have pets, live in a dusty area, or notice cloudy glass, you may want to clean it every few months during colder seasons.
A professional inspection should be scheduled at least once a year. A technician can check gas connections, burner performance, ignition components, safety sensors, venting, seals, and overall combustion. That is different from wiping the glass and vacuuming dust. Think of homeowner cleaning as brushing your teeth and professional service as the dental checkup. Both matter, and neither one is improved by pretending the other does not exist.
Common Gas Fireplace Cleaning Mistakes to Avoid
Using Regular Window Cleaner on Fireplace Glass
Ordinary glass cleaner may leave residue that creates odor or film when the fireplace heats up. Some products can also be too harsh for ceramic fireplace glass. Use a cleaner labeled for fireplace glass or one approved by the manufacturer.
Moving the Logs Without a Reference Photo
Gas logs must sit in specific positions. Moving them casually can change the flame pattern and cause soot. Always photograph the layout first and follow the manual.
Cleaning While the Fireplace Is Warm
Hot glass and cleaning liquids are a bad combination. The cleaner may streak, evaporate, or behave unpredictably. Worse, you can burn yourself. Wait until the fireplace is completely cool.
Ignoring White Film on the Glass
A light cloudy film can be normal over time, but letting it sit for months may make it harder to remove. Regular cleaning keeps the glass clearer and helps you spot unusual soot patterns earlier.
Skipping the Annual Inspection
A clean-looking fireplace can still have venting issues, sensor problems, burner concerns, or worn seals. Annual service is a smart safety habit, especially before heavy winter use.
Signs Your Gas Fireplace Needs Professional Service
Routine cleaning can improve appearance, but it cannot fix mechanical or combustion issues. Call a qualified professional if you notice any of the following:
- A gas smell before, during, or after operation
- Heavy soot on the glass, logs, or walls of the firebox
- Cracked glass or damaged gasket material
- Burner flames that look unusual for your model
- The pilot light will not stay lit
- The fireplace shuts off unexpectedly
- Clicking, booming, rattling, or delayed ignition
- Rust, corrosion, loose wires, or damaged components
- A carbon monoxide alarm warning
Do not keep relighting a fireplace that is behaving strangely. That is the appliance equivalent of saying, “Maybe this suspicious noise will become a feature.” It will not.
Best Products for Cleaning a Gas Fireplace
You do not need a giant cleaning kit to maintain a gas fireplace, but the right tools make the job easier. A dedicated fireplace glass cleaner is usually the most important product. Look for a non-abrasive cleaner designed for fireplace or stove glass. Pair it with microfiber cloths to reduce streaks and scratches.
A soft paintbrush is excellent for ceramic logs, corners, louvers, and small dusty areas. A vacuum with a hose attachment helps remove loose debris from the firebox floor. For the exterior, a damp cloth is often enough. If your fireplace surround is stone, brick, tile, or metal, use a cleaner suitable for that material and test in an inconspicuous spot first.
Skip steel wool, stiff wire brushes, harsh chemical sprays, oven cleaner, bleach, and abrasive powders. Gas fireplace cleaning is a gentle job. If you feel like you are scrubbing a barbecue grill after a summer cookout, you are probably being too aggressive.
Extra Experience-Based Tips for Cleaning a Gas Fireplace
After cleaning a few gas fireplaces, one lesson becomes obvious: the glass tells a story. A small amount of cloudy residue is common, especially after regular use. But dark soot that returns quickly after cleaning is worth investigating. In many cases, soot appears because logs or embers are out of position, burner ports are dirty, airflow is restricted, or the unit needs adjustment. Cleaning the soot without addressing the cause is like mopping the floor while the sink is still overflowing. It looks productive, but the problem is still waving at you.
Another practical tip is to clean the fireplace before the first cold week of the season. Many people wait until the first chilly night, then discover the glass is cloudy, the remote batteries are dead, and the fireplace smells dusty when turned on. Cleaning in early fall is much more pleasant. You can work slowly, schedule professional service if needed, and avoid the annual “why did we wait until it was freezing?” household debate.
It is also smart to keep a small fireplace maintenance folder. This can be digital or physical. Include the owner’s manual, model number, serial number, service records, photos of the log layout, and notes about the cleaner you used. If a technician visits, you can show them the history instead of explaining, “It made a weird noise sometime around that weekend when we made chili.” Specific information saves time.
When cleaning the glass, patience beats pressure. Apply the cleaner, let it work for a short time if the label allows, then buff gently. Many cloudy deposits come off in layers. A second gentle pass is safer than one angry scrubbing session. Use clean cloths, too. A dirty rag can smear residue around and make you think the cleaner is failing when the real villain is the cloth.
Pet owners should pay special attention to vents and the lower front area of the fireplace. Fur travels. It drifts into corners, clings to mesh screens, and gathers around warm appliances like it has a tiny map. A quick vacuum around the fireplace every week during heating season can reduce dust smells and keep airflow areas cleaner.
Homeowners with decorative media, such as fire glass, stones, or ceramic embers, should be extra careful about placement. These materials are not always interchangeable, and more is not better. Adding extra embers or moving fire glass into the wrong area can affect flame performance. Use only approved media for your specific model, and follow the placement diagram.
If your fireplace has a blower, expect dust. Blowers move warm air, and moving air carries lint. Clean accessible intake areas gently and replace or clean filters only if your model has them and the manual explains how. A dusty blower can create a burnt-dust smell at the start of the season. Sometimes that smell fades after the unit runs briefly, but strong, persistent, or unusual odors deserve professional attention.
Finally, do not underestimate the value of simply observing the fireplace after cleaning. Sit nearby for a few minutes during the first test burn. Watch the flame. Listen to the ignition. Notice whether odors fade quickly or grow stronger. Check that the glass stays clear and the flame pattern looks normal for your unit. Good maintenance is not just wiping surfaces; it is paying attention. A fireplace is happiest when it is clean, correctly assembled, and not being asked to operate while packed with dust bunnies.
Conclusion: Clean It Gently, Inspect It Regularly, Enjoy It Often
Cleaning a gas fireplace is not complicated, but it does require care. Turn the unit off, let it cool fully, remove panels and glass carefully, clean with non-abrasive products, dust logs gently, vacuum loose debris, check vents, and reassemble everything exactly as the manufacturer intended.
The biggest lesson is simple: treat your gas fireplace like a real heating appliance, not just a pretty flame box. Regular cleaning keeps the glass clear and the room looking polished. Annual professional service helps confirm that the burner, venting, safety components, and gas connections are working as they should.
Do that, and your fireplace can keep delivering the cozy glow you love without the dusty haze, mystery smells, or “should we be worried about that?” moments. Your living room gets the ambiance. You get peace of mind. Everybody wins, including the dog, who probably claimed the warmest spot fifteen minutes ago.