
Table of Contents >> Show >> Hide
- Why You Don’t Need Formal Classes to Learn Drawing
- What You Need to Get Started
- The 12-Step No-Class Drawing Plan
- Step 1: Commit to a Tiny Daily Drawing Habit
- Step 2: Warm Up Your Hand and Eyes
- Step 3: Learn to See and Draw Basic Shapes
- Step 4: Draw Simple Everyday Objects
- Step 5: Practice Gesture Drawing to Capture Movement
- Step 6: Understand Light and Shadow (Values)
- Step 7: Use Reference Images the Smart Way
- Step 8: Study Proportion and Simple Measurement
- Step 9: Build Drawings in Layers (From Loose to Detailed)
- Step 10: Experiment with Different Styles and Subjects
- Step 11: Build Your Own “At-Home Art Course”
- Step 12: Track Progress and Stay Playful
- How the “With Pictures” Part Fits In
- Extra: Real-World Experiences of Learning to Draw Without Classes
- Conclusion
You don’t need a fancy art school, a mysterious “gift,” or a teacher who only wears black turtlenecks to learn how to draw. You can absolutely teach yourself to draw from home, using simple tools, a bit of structure, and lots of curiosity. In fact, many modern drawing courses and blogs are built for self-taught artists and follow the same fundamentals you can practice right at your kitchen table.
This guide walks you through 12 practical steps to learn how to draw without taking classes. Think of it as your personal drawing curriculum: easy to start, flexible for your schedule, and designed to grow with you. We’ll also include “picture ideas” for each step so you can imagine what you’d see in a step-by-step tutorial or create your own reference photos.
Why You Don’t Need Formal Classes to Learn Drawing
Drawing is a skill, not a magical talent. Research-based drawing resources and online art schools emphasize the same things: basic shapes, values (light and shadow), observation, and consistent practice. None of those require a physical classroom.
Self-taught artists typically build their skills in three ways:
- They practice regularly (even 10–20 minutes a day).
- They study fundamentals in small chunks (shapes, light, gesture, perspective).
- They use referencesphotos, real objects, or other artto see how things really look.
The 12 steps below turn those ideas into an easy path you can follow, even if your last “art class” was coloring dinosaurs in kindergarten.
What You Need to Get Started
You don’t have to spend much money to begin. Most beginner drawing guides recommend keeping your tools simple so you can focus on skills, not supplies.
- Pencils: A basic HB pencil is fine to start; add a softer 2B or 4B later.
- Eraser: A kneaded or soft eraser for gentle corrections.
- Paper or sketchbook: Any unlined paper works. A cheap sketchbook lets you keep everything in one place.
- Optional: Ruler, blending stump, and a phone or tablet to store reference photos.
That’s it. No $200 supply list, no special studio. Just you, a pencil, and a plan.
The 12-Step No-Class Drawing Plan
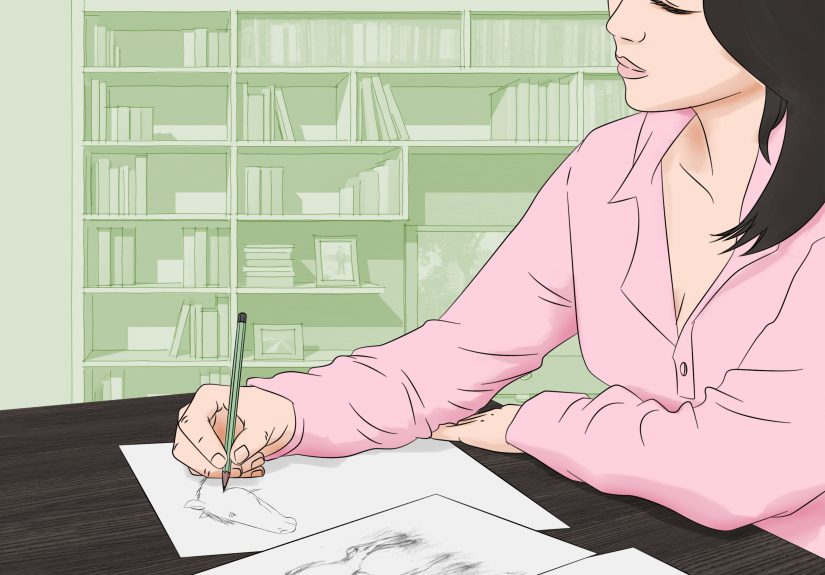
Step 1: Commit to a Tiny Daily Drawing Habit
Your first job isn’t to draw perfectlyit’s to show up. Many self-taught drawing guides recommend a daily routine because consistency beats occasional marathon sessions.
Start ridiculously small: 10 minutes a day. Set a timer, doodle anything, and stop when the timer goes off. Over time, your “10 minutes” will quietly turn into 20 or 30 because you’ll get absorbed in your sketch.
Picture idea: A simple photo of a person drawing at a small desk with a phone timer runningjust to show that a tiny routine counts.
Step 2: Warm Up Your Hand and Eyes
Before you dive into a “real” drawing, warm up like an athlete. Beginner sketching tutorials often start with lines, circles, and scribbles to build hand-eye coordination and loosen your wrist.
- Fill a page with straight linesvertical, horizontal, diagonal.
- Add circles, ovals, spirals, and S-curves.
- Practice connecting dots with a single clean line.
This feels simple, but it dramatically improves control and line confidence, which you’ll need for everything else.
Picture idea: A page filled with neat rows of lines and circles, like a “handwriting sheet for drawing.”
Step 3: Learn to See and Draw Basic Shapes
Every complex object can be broken down into simple shapescircles, boxes, cylinders, triangles. Professional drawing teachers and guides repeat this rule constantly because it works: if you can draw basic shapes, you can build almost anything.
Practice exercises like:
- Drawing a mug as a cylinder with an attached curved handle.
- Breaking a house into rectangles and triangles.
- Turning a cat into circles and wedges before adding fur and details.
Picture idea: Side-by-side images: a photo of a simple object (like a mug) and a sketch version made of basic shapes.
Step 4: Draw Simple Everyday Objects
Once you’re comfortable with basic shapes, start drawing small objects around you: a spoon, a pair of glasses, a plant, or your phone. This builds observation skills without the stress of drawing detailed faces or full characters.
Tips:
- Lightly sketch the basic shapes first, then refine edges and details.
- Use soft, light lines at the start so you can erase and adjust easily.
- Don’t worry if it looks awkward; awkward is normal at this stage.
Picture idea: A small collage: photo of an apple, then three stages of sketching itshapes, refined lines, light shading.
Step 5: Practice Gesture Drawing to Capture Movement
Gesture drawing is a fast way to sketch the “energy” and movement of a pose instead of stressing about details. It’s widely used in figure drawing classes but perfect for self-taught artists too.
How to try it:
- Find photos of people walking, dancing, or playing sports.
- Set a timer for 30–60 seconds per pose.
- Use flowing lines to capture the main action and posture, not the small details.
Gesture drawing helps you avoid stiff, “robotic” figures and trains your eye to see the big picture of a pose quickly.
Picture idea: A page with multiple quick stick-figure-style sketches showing different poses.
Step 6: Understand Light and Shadow (Values)
Shading is what makes your drawings look 3D. Learning how light works is a game-changer, and many art educators treat value (light and dark) as a core skill, just like drawing shapes.
Try these exercises:
- Draw a simple value scale: small boxes going from very light to very dark.
- Place a ball or egg near a lamp and sketch the light, shadow, and reflected light.
- Shade your basic shapes (cube, sphere, cylinder) so they feel solid.
Picture idea: A sphere drawing with arrows pointing to “light,” “shadow,” “core shadow,” and “highlight.”
Step 7: Use Reference Images the Smart Way
Drawing from reference is not cheatingit’s how artists learn accurate proportions, perspective, and details. Guides on using references stress that what matters is how you use them: study, simplify, and reinterpret instead of tracing blindly.
Good reference habits:
- Choose clear, well-lit photos.
- Ask: “What are the main shapes? Where is the light coming from?”
- Do quick studies (small drawings) instead of one huge, precious piece.
- Change somethingangle, expression, backgroundso you’re not copying exactly.
Picture idea: A reference photo of a hand, next to two or three simplified sketches of that hand from slightly different angles.
Step 8: Study Proportion and Simple Measurement
At some point, you’ll want your drawings of people, faces, or objects to feel “right.” Learning basic proportion rules and simple measuring tricks (like comparing lengths with your pencil) helps a lot.
For example, when drawing a face:
- The eyes usually sit around the vertical halfway point of the head.
- The space between the eyes is roughly the width of one eye.
- The bottom of the nose is about halfway between the eyes and the chin.
These aren’t rigid rules, but they give you a starting point, especially when you’re learning.
Picture idea: A front-view head with simple guidelines showing the halfway mark and eye/nose/mouth placement.
Step 9: Build Drawings in Layers (From Loose to Detailed)
One of the biggest mistakes beginners make is trying to draw the final outline perfectly on the first try. Many professional tutorials recommend a “lay-in” process: start loose and simple, then gradually refine.
Try this approach:
- Loose shapes: Very light circles, boxes, or lines of action.
- Refined structure: Adjust proportions, angles, and overlaps.
- Details and texture: Add features, patterns, and small edges.
- Final lines and shading: Darken important edges and shade.
Picture idea: Four small versions of the same drawing labeled “Shape,” “Structure,” “Details,” and “Shading.”
Step 10: Experiment with Different Styles and Subjects
As you gain confidence, explore cartoons, realism, stylized portraits, landscapeswhatever seems fun. Many beginner-friendly art platforms encourage trying multiple styles to discover what you enjoy and to build flexible skills.
Rotate themes weekly:
- Week 1: Household objects.
- Week 2: Plants and nature.
- Week 3: Animals and simple characters.
- Week 4: Faces, hands, and people.
The goal isn’t perfection. It’s building a broad visual vocabulary.
Step 11: Build Your Own “At-Home Art Course”
You don’t have an official teacherbut you can still have a structured curriculum. Self-taught artists often collect free or low-cost resources and follow them in a logical order: shapes, perspective, gesture, anatomy, rendering.
Create a simple plan:
- Month 1: Lines, shapes, and everyday objects.
- Month 2: Gesture drawing and basic anatomy.
- Month 3: Light, shadow, and shading practice.
- Month 4: Faces, hair, and expressions.
Treat YouTube demos, blogs, and free lesson sites as your “guest teachers,” and your sketchbook as the classroom.
Step 12: Track Progress and Stay Playful
Art can get stressful if you only see what’s wrong. Make it a habit to track your progress and keep things playful.
Ideas:
- Repeat the same subject every month (like a self-portrait) and compare.
- Keep a “fail page” where you deliberately make messy drawings with zero pressure.
- Celebrate small wins: cleaner lines, better shading, or poses that finally feel alive.
Remember: every artist you admire has a pile of “ugly” drawings somewhere. You just don’t see those on Instagram.
How the “With Pictures” Part Fits In
Even if you’re not following a visual step-by-step class, you can still create your own “with pictures” experience:
- Take phone photos of objects and scenes you want to draw.
- Screenshot gesture poses or free reference libraries and practice from them.
- Save progress shots of your own drawings so you can flip through the stages later.
Over time, you’ll end up with your own picture-rich, personalized drawing guidebuilt from your actual progress.
Extra: Real-World Experiences of Learning to Draw Without Classes
So what does it really feel like to teach yourself to draw? Here’s a snapshot of the emotional and practical side of this journeypulled from common stories shared by self-taught artists and blended into a realistic, everyday experience.
At first, it’s awkward. You sit down with a pencil, full of enthusiasm, and your first drawing looks like something your younger cousin would proudly stick on the fridge. That’s normal. Many self-taught artists say the hardest hurdle isn’t lack of skillit’s the shock of seeing how far their first attempts are from what’s in their head.
The breakthrough usually comes when you stop expecting every drawing to be “good.” Instead, you treat each sketch like a tiny experiment. One day you’re testing how hard you can press on the pencil before the line looks muddy. Another day you’re trying to capture the pose of your friend’s dog before it wiggles away. None of these sketches are masterpieces, but together they build real comfort with your tools and subjects.
A lot of self-taught artists also talk about how liberating it is to control the pace. Without a classroom schedule, you can spend an entire week just drawing hands if they drive you crazy, or you can bounce between faces and landscapes to keep things fun. You might follow a structured online lesson in the morning and then freestyle doodles in the evening.
There will be “plateau weeks” where everything feels stuck. Your lines look clumsy, your shading is patchy, and you’re convinced you were secretly better last month. This is usually a sign that your eye has improved faster than your hand. You’re seeing more flaws because your sense of quality is rising. That’s frustratingbut it’s also proof that you’re leveling up.
One powerful habit many self-taught artists swear by is the “before and after” page. Once a month, they redraw something they attempted early on: a self-portrait, a favorite character, or a still life. When you put the old and new versions side by side, the improvement is often shockingcleaner proportions, more confident lines, better shading. It’s easy to lose sight of progress when you’re zoomed in on one day at a time; those side-by-side comparisons zoom you out.
And of course, there’s the social side. You might not have classmates, but you can still find community. Posting your work online, joining drawing challenges, or sharing progress with a friend makes the process far less lonely. You’ll see other people struggle with the same issuescrooked eyes, stiff poses, shaky linesand realize you’re not uniquely “bad”; you’re just in the normal middle of the learning curve.
The biggest emotional payoff comes the first time someone says, “Wait, you drew that?” and you get to answer, “Yep. I taught myself.” It doesn’t mean you’ve “finished” learning (no artist ever has), but it’s proof that your quiet daily efforts, your messy sketchbook pages, and your decision to tryeven without classeshave all stacked up into real, visible skill.
If you stick with your small drawing habit, follow the 12 steps above, and stay curious instead of perfectionistic, you’ll eventually look at your old drawings and laughin the best possible way. They’ll remind you how far you’ve come, one sketch at a time.
Conclusion
You don’t need a classroom to become someone who can draw. With a simple daily habit, a focus on fundamentals (shapes, gesture, light, proportion), and smart use of references, you can build real drawing skills from home.
The 12 steps in this guide give you a roadmap, but you’re the one holding the pencil. Keep your sessions short and consistent, track your progress, and keep your curiosity bigger than your fear of “bad” drawings. Your future sketchbooksand future selfwill thank you.


