
Table of Contents >> Show >> Hide
- Before You Start: Know Which Pitcher Plant You’re Growing
- How to Grow Pitcher Plants: 9 Steps
- Step 1: Start with a Nursery-Propagated Plant
- Step 2: Give It Full Sun, Not “Bright Indirect Optimism”
- Step 3: Use the Right Container or Build a Mini Bog
- Step 4: Plant It in Acidic, Nutrient-Poor Soil
- Step 5: Water with Rainwater, Distilled Water, or Reverse Osmosis Water
- Step 6: Do Not Fertilize Like a Regular Garden Plant
- Step 7: Keep Air Flow Good and Heat Stress Low
- Step 8: Respect Winter Dormancy
- Step 9: Repot, Divide, and Clean Up at the Right Time
- Common Mistakes That Make Pitcher Plants Miserable
- Conclusion
- Real-World Growing Experiences: What Gardeners Notice After a Full Season
Pitcher plants are the drama queens of the bog garden in the best possible way. They look exotic, eat bugs, and somehow manage to be both gorgeous and slightly unhinged. But despite their reputation, growing pitcher plants is not wizardry. It is mostly about giving them the right conditions and then resisting the very human urge to “help” them to death with tap water, fertilizer, or a mystery chunk of lunch meat.
This guide focuses on American pitcher plants, also called Sarracenia, because they are the ones most home gardeners in the United States can grow successfully outdoors or in patio containers. If you have ever wanted a plant that looks like it belongs in a botanical garden and a sci-fi movie at the same time, welcome to the bog.
Here is exactly how to grow pitcher plants in 9 practical steps, plus the real-world lessons gardeners usually learn after one season of trial, error, and staring proudly at a tube-shaped leaf.
Before You Start: Know Which Pitcher Plant You’re Growing
Not every plant called a “pitcher plant” wants the same thing. American pitcher plants are temperate bog plants. That means they like bright sun, acidic soil, lots of moisture, and a cold winter rest. Tropical pitcher plants, such as Nepenthes, are a different story entirely. They prefer warmer, more humid, better-drained conditions and do not want to sit in a tray of water like a swamp-loving Sarracenia.
So if your goal is a straightforward, backyard-friendly setup, go with American pitcher plants. Good beginner-friendly choices include Sarracenia purpurea, Sarracenia flava, Sarracenia leucophylla, and well-grown nursery hybrids. They are easier to manage, stunning in containers, and much more forgiving than people think, as long as you stop treating them like a normal houseplant.
How to Grow Pitcher Plants: 9 Steps
Step 1: Start with a Nursery-Propagated Plant
The first step is not glamorous, but it matters: buy your pitcher plant from a reputable grower. Do not dig one from the wild. Wild pitcher plants are threatened in many places, and wild collection damages already fragile habitats. Nursery-grown plants are healthier, easier to establish, and less likely to arrive with stress, shock, or a sad backstory.
For most beginners, buying a live plant instead of starting from seed is the smart move. Seeds can work, but they are slow. Very slow. “I hope you packed a snack and several years of patience” slow. A well-rooted nursery plant gives you a faster start and lets you focus on learning care instead of waiting for germination drama.
Step 2: Give It Full Sun, Not “Bright Indirect Optimism”
If pitcher plants could talk, they would probably say, “Please stop putting us in dim corners and expecting greatness.” American pitcher plants want strong light, ideally at least six hours of direct sun a day, and often more. Full sun helps them make sturdy pitchers, rich color, and better overall growth.
Too little light leads to floppy pitchers, weak coloration, and a generally disappointed-looking plant. In very hot regions, some species appreciate a bit of afternoon relief, but the overall rule is simple: sunny is better. A south-facing patio, open deck, bright bog planter, or unobstructed garden spot is usually perfect.
If you try growing them indoors, know that success is harder. They generally perform best outdoors because they need both stronger light and seasonal cues. Indoors, they often stretch, sulk, or simply refuse to become the bug-eating supermodel you had in mind.
Step 3: Use the Right Container or Build a Mini Bog
Pitcher plants are not fussy about luxury, but they are fussy about environment. A plastic pot, glazed container, or dedicated bog planter works well because it helps retain moisture and avoids mineral leaching. Unglazed clay can dry out too fast and may not be the best long-term choice.
If you are growing one plant, choose a container with enough depth for the roots and rhizome to settle in comfortably. A pot around 8 inches deep or more is a nice starting point. If you want a more dramatic display, build a mini bog in a larger container with drainage holes placed on the sides slightly above the bottom. That setup holds moisture while still preventing stagnant swamp soup.
A tray or saucer underneath the pot is also helpful during the growing season. It keeps the medium evenly moist and makes care easier, especially in summer. Think of it as a shallow personal marsh for your plant, which is exactly the kind of sentence pitcher plants would approve of.
Step 4: Plant It in Acidic, Nutrient-Poor Soil
This is where many gardeners accidentally go wrong. Pitcher plants do not want regular potting soil, compost-rich blends, or anything labeled “feeds for months.” To a normal perennial, that sounds lovely. To a pitcher plant, that sounds like a chemical ambush.
The best pitcher plant soil is acidic, low in nutrients, and moisture-retentive. Common mixes include peat moss with sharp sand, peat moss with perlite, or a combination of peat, sand, and perlite. Some growers use a 50/50 ratio; others prefer a mix closer to three parts peat and one part sand. The key is not the exact percentage so much as the goal: hold moisture, stay airy enough for roots, and contain almost no fertilizer.
Before planting, moisten the mix thoroughly. Dry peat moss can be stubborn and repel water at first, which is not charming. It is just annoying. Once it is evenly damp, plant the rhizome at about the same depth it was growing before, with the crown positioned so it is not buried too deeply.
Step 5: Water with Rainwater, Distilled Water, or Reverse Osmosis Water
Pitcher plants are absolute snobs about water, and for once, the snobbery is justified. Their roots are sensitive to dissolved minerals and salts, which means ordinary tap water can cause trouble over time. If you want healthy pitchers, use rainwater, distilled water, reverse osmosis water, or other low-mineral water.
During the active growing season, keep the soil consistently moist to wet. A shallow tray with water under the pot works beautifully for container-grown plants. The growing medium should never turn bone-dry. These plants come from boggy habitats, not from the “oops, I forgot to water for nine days” school of gardening.
That said, constant moisture is not the same as deep, stagnant flooding. The soil should stay wet, but the crown should not sit submerged for long periods. Think marshy, not drowned.
Step 6: Do Not Fertilize Like a Regular Garden Plant
Pitcher plants evolved in nutrient-poor habitats for a reason. They catch insects to supplement what the soil does not provide. So the usual gardening instinct to fertilize early and often is exactly the wrong move here.
For beginners, the safest rule is simple: skip fertilizer. If your plant grows outdoors, it will catch what it needs on its own. If it is healthy, colorful, and making pitchers, do not fix what is not broken. And definitely do not stuff meat, cheese, pet food, or random kitchen scraps into the pitchers. That is not feeding; that is starting a rot experiment.
Advanced growers sometimes use highly diluted fertilizer in very controlled ways, especially on young plants, but this is optional and easy to overdo. If you are just learning how to grow pitcher plants, let the plant do the hunting and keep your fertilizer hand in your pocket.
Step 7: Keep Air Flow Good and Heat Stress Low
Pitcher plants love sunshine, but they do not enjoy being baked in stagnant, scorching conditions. Outdoors, this is usually easy because natural air movement helps. In containers, especially in hot regions, watch for the medium drying out too quickly or pitchers scorching during brutal heat waves.
If the weather turns intensely hot and dry, refill the water tray more often and make sure the plant is not cooking beside reflective brick, metal railings, or dark containers that trap heat. Good airflow helps the plant stay vigorous and reduces stress. In very hot climates, some growers move containers slightly as the season changes so the plant still gets strong light without the harshest afternoon blast.
This is also a good reason container growing is popular: it gives you flexibility. Your pitcher plant is dramatic, yes, but at least it is portable.
Step 8: Respect Winter Dormancy
This is the step many new growers miss, and it is often the difference between a plant that thrives for years and one that slowly fizzles out. American pitcher plants need winter dormancy. They are temperate perennials, not tropical houseplants. As days shorten and temperatures cool, older pitchers may brown and die back. That is normal.
Do not panic and declare a plant funeral too early. Dormancy is part of the annual cycle. In many climates, the easiest method is to leave the plant outdoors in a protected location for winter. In colder areas, you can sink the pot into the ground up to the rim, mulch lightly, or move the container to an unheated garage, cold frame, or similarly cool sheltered space.
During dormancy, keep the medium just moist, not sopping. The plant still must not dry out, but it does not need the same tray-full-of-water setup it enjoys in summer. Then, when spring returns, move it back into full sun and let the new season begin. If you want your plant to come back strong, winter is not optional. It is the reset button.
Step 9: Repot, Divide, and Clean Up at the Right Time
Pitcher plants do not need constant fussing, but they do benefit from periodic maintenance. Every few years, or whenever the rhizome crowds the pot, repot the plant into fresh medium. Early spring is a great time for this, just before active growth kicks off. Some experienced growers also divide in early fall, but spring is easier for many home gardeners.
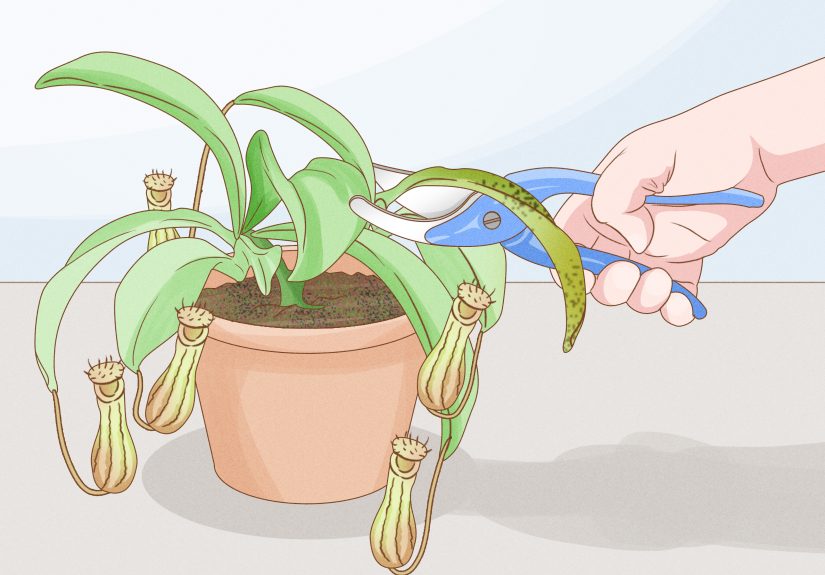
When repotting, trim only dead foliage and leave healthy tissue alone. In late winter or early spring, remove browned pitchers to make room for fresh growth and flowers. If the plant has formed multiple crowns or rosettes, you can divide the rhizome carefully to create new plants.
This is one of the most satisfying moments in pitcher plant care. One plant becomes two. Two becomes a small colony. Before long, you are rearranging patio space and explaining to visitors why your “swamp tube collection” is actually an elegant carnivorous display.
Common Mistakes That Make Pitcher Plants Miserable
- Using tap water: Minerals build up and stress the roots.
- Planting in regular potting soil: Too rich, too heavy, and often fatal.
- Growing in too little sun: Weak pitchers, poor color, and low vigor follow.
- Skipping dormancy: A common reason plants decline after the first year.
- Overfeeding: Pitchers are not tiny trash cans.
- Letting the soil dry out: Bog plants do not do well with surprise droughts.
- Collecting from the wild: Bad for conservation and usually bad for success.
If you avoid those mistakes, you are already ahead of a surprising number of first-time growers.
Conclusion
Learning how to grow pitcher plants comes down to one big idea: imitate the bog, not the average flower pot. Give them full sun, acidic nutrient-poor soil, low-mineral water, steady moisture, and a real winter dormancy. Do that, and these strange, beautiful carnivorous plants become much less intimidating and much more rewarding.
They are not hard once you understand their rules. They are just very specific. And honestly, that is part of the charm. A healthy pitcher plant does not merely sit there looking green. It glows, flares, curves, traps, and turns your porch or garden into something that feels a little wild and wonderfully alive.
Real-World Growing Experiences: What Gardeners Notice After a Full Season
One of the most common real-world experiences with pitcher plants is that the first month feels almost suspiciously uneventful. New growers expect instant bug-catching theatrics, dramatic growth spurts, or some kind of daily transformation. Instead, the plant often settles in quietly, especially after transplanting. Then, once the light is right and the roots adjust, the plant starts behaving like it suddenly remembered who it is. New pitchers emerge firmer, taller, and more colorful than the older ones that came home from the nursery.
Another thing gardeners often notice is how much sunlight changes everything. A plant that looked merely green in a mediocre spot can develop bold veining, deeper reds, brighter hoods, and stronger form after moving into fuller sun. It is one of those satisfying gardening moments where the answer is not more products or more fussing. It is just better placement. Pitcher plants are excellent at teaching restraint: when they are unhappy, the fix is usually environmental, not chemical.
Water is the next big lesson. Many growers say the tray method feels almost too simple at first, but it quickly proves its worth in hot weather. During summer, the difference between “kept evenly wet” and “allowed to dry once or twice” can be dramatic. A healthy plant keeps pushing new pitchers. A stressed plant stalls. The experience teaches you to monitor moisture proactively, especially in containers, because bog plants do not offer much forgiveness for neglect.
Winter is where the emotional growth happens for the gardener. The plant starts browning, pitchers collapse, and beginners are convinced they have failed. Then spring arrives, and suddenly new flowers or fresh pitchers appear from a rhizome that looked half asleep and half offended. After seeing that cycle once, most gardeners become much more confident. They realize dormancy is not decline. It is part of the plan.
Repotting also changes how people view these plants. Once you lift an older pitcher plant from its pot and see the rhizome structure, the plant stops feeling mysterious and starts feeling understandable. You can see where new growth points form. You can tell when the medium is breaking down. You can divide the clump and literally multiply your collection. That experience turns a cautious beginner into someone who starts thinking, “Maybe I do have room for one more bog pot.”
Finally, there is the simple joy factor. Pitcher plants become conversation starters fast. Guests notice them. Kids are fascinated by them. Pollinators still visit the flowers, while unlucky insects investigate the pitchers. Even gardeners with large landscapes often say these plants draw attention out of proportion to their size. A single healthy container can become the most talked-about planting on a deck or patio. That is a rare thing in gardening: a plant that is educational, ornamental, weird, and genuinely beautiful all at once.
So the real experience of growing pitcher plants is not just about keeping a carnivorous plant alive. It is about learning a more habitat-based kind of gardening. You stop asking, “What fertilizer should I add?” and start asking, “What conditions does this plant actually come from?” That shift makes you a better grower, not just of pitcher plants, but of everything else in your garden too.


