
Table of Contents >> Show >> Hide
- Why Etched Glass Is So Good for Painting
- Best Paint for Etched Glass
- Tools and Supplies You Will Need
- How to Paint Etched Glass: 12 Easy Steps
- Step 1: Decide on the Final Look Before You Open the Paint
- Step 2: Wash the Glass Thoroughly
- Step 3: Wipe It Down With Alcohol
- Step 4: Lightly Plan and Mask the Design
- Step 5: Test the Paint First
- Step 6: Apply Thin, Even Coats
- Step 7: Let the First Coat Dry Fully
- Step 8: Add a Second or Third Coat if Needed
- Step 9: Remove Tape or Stencils at the Right Time
- Step 10: Clean Up Small Mistakes
- Step 11: Cure the Finish Properly
- Step 12: Seal, Style, and Use It Smartly
- Common Mistakes to Avoid When Painting Etched Glass
- Best Project Ideas for Painted Etched Glass
- Real Experiences and Lessons From Painting Etched Glass
- Conclusion
- SEO Tags
Etched glass has a way of looking fancy even when it came from a discount store and cost less than your coffee order. That soft, frosted finish catches light beautifully, hides smudges better than plain glass, and somehow makes a simple vase feel like it belongs in a boutique with dramatic lighting and very calm music. The good news is that painting etched glass is not reserved for professional crafters with magical wrists and suspiciously clean workspaces. With the right prep, the right paint, and a little patience, you can turn etched glass into custom home décor, holiday pieces, gifts, or small business products that actually look polished.
This guide walks you through 12 easy steps for painting etched glass the smart way. Along the way, you will learn how to choose the best paint for etched glass, prep the surface without sabotaging adhesion, avoid common streaky disasters, and finish the project so it lasts longer than your last “quick DIY.” Whether you are painting etched wine glasses, frosted candle holders, decorative jars, window panels, or faux-etched designs made with spray paint, these steps will help you get a clean, durable finish.
Why Etched Glass Is So Good for Painting
Before diving into the process, it helps to know why painted etched glass can look so striking. Unlike slick, perfectly smooth glass, etched glass has a slightly textured surface. That texture diffuses light and gives paint something a little friendlier to grip. It also softens brush lines and can make translucent or frosted colors look richer and more layered.
That does not mean you can skip prep. Not even close. Dust, skin oils, cleaner residue, and leftover adhesive can still interfere with the finish. But once the surface is properly cleaned, etched glass is a terrific candidate for decorative painting, especially when you want a soft, upscale look rather than a super glossy one.
Best Paint for Etched Glass
If you are wondering what paint to use on etched glass, the safest answer is: use a product labeled for glass painting, acrylic enamel, or a multi-surface acrylic specifically approved for glass. These options are made to bond better and hold up more reliably than plain craft paint. For a frosted or faux-etched look on clear glass, frosted glass spray paint is also popular. For decorative details, glass paint markers can be wonderfully precise.
Here is the quick cheat sheet:
1. Acrylic enamel paint
Great for hand-painted designs, brushwork, and decorative pieces. It usually offers strong adhesion and a more durable finish than standard acrylic paint.
2. Multi-surface acrylic paint for glass
A good beginner option. It is easy to find, easy to brush, and comes in lots of colors.
3. Glass paint or translucent glass paint
Perfect when you want color that still lets light through, especially on candle holders, ornaments, and sun-catching décor.
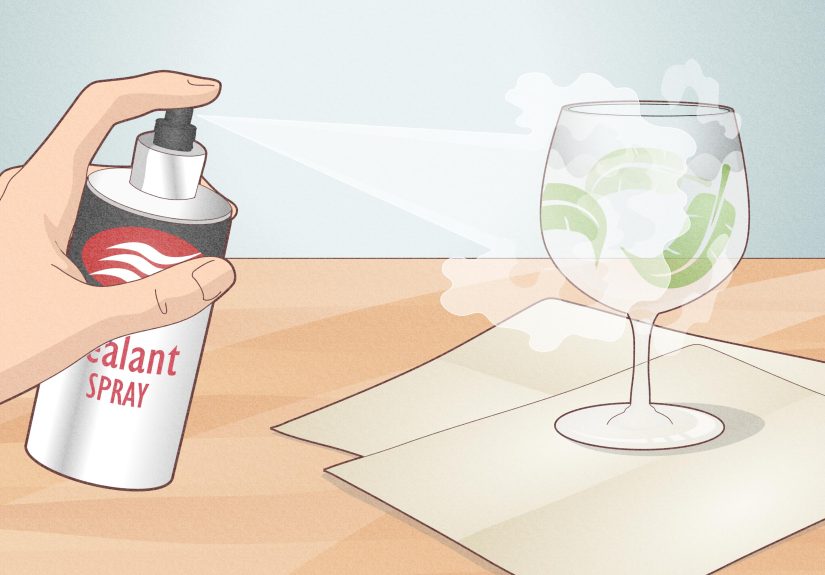
4. Frosted glass spray paint
Ideal if you want to create or refresh an etched look with stencils, stripes, or privacy-style coverage.
One important reality check: not every painted glass item is safe for direct food contact, and not every product becomes dishwasher safe just because it dried overnight. Always check the label. If you are painting glasses, mugs, or serving pieces, keep the design on the outside surface and away from rims and food-contact zones unless the manufacturer clearly says otherwise.
Tools and Supplies You Will Need
- Etched glass item or clear glass item with an etched finish
- Glass-safe paint, acrylic enamel, or frosted glass spray paint
- Rubbing alcohol or isopropyl alcohol
- Mild soap and water
- Lint-free cloth or paper towels
- Disposable gloves
- Painter’s tape, masking tape, or adhesive stencil
- Soft paintbrushes, foam pouncer, sponge, or spray paint
- Palette or disposable plate
- Cotton swabs for cleanup
- Craft knife or old credit card for smoothing stencils
- Optional sealer or curing oven, depending on the paint
How to Paint Etched Glass: 12 Easy Steps
Step 1: Decide on the Final Look Before You Open the Paint
Start with the end in mind. Do you want a full-color floral vase, a simple monogram, frosted stripes, metallic accents, or a stained-glass-inspired pattern? Etched glass already has texture and visual softness, so complicated designs are not always necessary. In fact, simple shapes often look more expensive.
This is the moment to choose between opaque paint, translucent paint, or a layered look that combines both. Sketching your idea on paper first can save you from the classic DIY plot twist: realizing halfway through that your “minimalist design” looks more like a confused jellyfish.
Step 2: Wash the Glass Thoroughly
Give the piece a proper bath with warm water and mild dish soap. This removes dust, grease, and any warehouse mystery residue. If the item is recycled or thrifted, spend extra time removing labels, sticky glue, and fingerprints. Rinse well and dry completely with a lint-free cloth.
Do not rush this step. Paint is many things, but a miracle worker that hides grime is not one of them. On glass, every speck seems to volunteer for a starring role.
Step 3: Wipe It Down With Alcohol
After washing, wipe the surface with rubbing alcohol or isopropyl alcohol. This cuts through lingering oils and helps create a cleaner painting surface. Wear disposable gloves from this point forward if possible, because your fingers can quietly redeposit oils while you work. It is rude, but hands are like that.
If you are painting a large panel or mirror-like piece, use a lint-free cloth and let the alcohol evaporate fully before moving on.
Step 4: Lightly Plan and Mask the Design
If your project includes patterns, borders, lettering, or negative space, now is the time to tape or stencil it off. Painter’s tape works well for stripes, geometric shapes, and clean edges. Adhesive vinyl stencils are excellent for monograms, botanical motifs, and detailed designs.
Smooth every edge carefully with a flat tool such as an old credit card. This matters more than people think. One tiny lifted edge can turn a crisp line into a paint-bleed tragedy that makes you say, “It’s handmade,” with forced confidence.
Step 5: Test the Paint First
Before painting the actual project, test your paint on a similar glass scrap or on an inconspicuous area. This helps you see the color, transparency, texture, and drying behavior. Some paints appear nearly invisible when wet and deepen as they dry. Others dry lighter, flatter, or more opaque than expected.
This little test can also tell you whether your brush leaves marks, whether your sponge gives a softer finish, and whether you need one coat or several. In short, it saves you from learning important lessons on the front of the vase.
Step 6: Apply Thin, Even Coats
Now the fun begins. Apply the first coat in thin, even layers. If you are using a brush, use a soft brush and avoid scrubbing the paint back and forth. If you are using a sponge or foam pouncer, dab gently for a more even texture. If you are spray painting, work in a well-ventilated area and use smooth, overlapping passes.
Thin coats are the secret to a cleaner result. Thick coats can puddle, streak, and take forever to dry. They also love to creep under tape when nobody is looking. Start lighter than you think you need. You can always add more.
Step 7: Let the First Coat Dry Fully
Do not stack fresh paint on top of tacky paint unless you are actively auditioning for peeling, dragging, and lint collection. Follow the product’s dry-time instructions and give the first coat enough time to settle. Drying times vary widely depending on the paint type, thickness, temperature, and humidity.
This pause is not wasted time. It is the difference between a finish that looks layered and intentional and one that looks like it got dressed in the dark.
Step 8: Add a Second or Third Coat if Needed
Most etched glass paint projects look better with at least two light coats, especially if you want strong color, a frosted effect, or crisp stencil work. Build color slowly. Additional thin coats give better control, better adhesion, and a smoother finish than one thick coat.
If you want dimension, try layering finishes. For example, use frosted coverage as the base, then add metallic dots, painted leaves, or a monogram over the top once the base is dry. Etched glass responds beautifully to layered texture because the background already softens the overall look.
Step 9: Remove Tape or Stencils at the Right Time
Timing matters here. In many cases, tape should be removed once the paint is set but not rock-hard, because that reduces the chance of lifting an edge. Pull slowly and at an angle. If you wait too long and the paint bridges over the tape, score the edge lightly with a craft knife before removing it.
For detailed stencil work, patience wins. Do not yank like you are starting a lawn mower. Peel carefully and let the design reveal itself with dignity.
Step 10: Clean Up Small Mistakes
If you catch a mistake early, a cotton swab lightly dampened with alcohol can often erase a wobble, smudge, or overpainted edge. If the paint is already dry, you may need to use a razor carefully on flat glass or touch up around the area with a small detail brush.
This is also where etched glass can be forgiving. Because the texture diffuses light, tiny imperfections are less obvious than they would be on plain glossy glass. So if your line is 98 percent perfect, welcome to the club of functioning humans.
Step 11: Cure the Finish Properly
Dry is not the same as cured. Many glass paints need several days to fully harden. Some brands can also be baked, but only if the piece is oven-safe and the label allows it. A typical method for certain glass paints involves air-curing for several days, then placing the piece in a cool oven, heating it gradually, and letting it cool inside the oven after baking.
Do not improvise with curing instructions. Read the label like it is the final chapter in a mystery novel. The durability of your project depends on it.
Step 12: Seal, Style, and Use It Smartly
Some painted etched glass projects do not need an extra sealer. Others benefit from one, especially if the paint manufacturer recommends it for decorative pieces. Again, the product label rules the kingdom. Once cured, style your piece thoughtfully. Painted etched glass looks beautiful as shelf décor, centerpieces, candle holders, ornaments, window accents, seasonal signs, and handmade gifts.
When washing, hand-washing is the safest default unless the paint specifically says otherwise. Avoid soaking, scrubbing with abrasive pads, or exposing decorative spray-painted pieces to repeated water contact if the product warns against it. Pretty projects deserve a little respect.
Common Mistakes to Avoid When Painting Etched Glass
Skipping surface prep
This is the number one cause of poor adhesion. Clean first. Then clean again like you mean it.
Using the wrong paint
Standard craft paint may look fine for a minute and disappointing later. Use paint formulated for glass or multi-surface use.
Painting too thickly
Thin coats outperform heavy ones almost every time.
Ignoring ventilation
If you use spray paint or strong chemical products, work with good airflow and protect nearby surfaces.
Painting food-contact areas
Stay away from rims, interiors, and serving surfaces unless the label explicitly says the product is suitable there.
Best Project Ideas for Painted Etched Glass
- Etched glass vases with white botanical patterns
- Holiday candle holders with metallic stars
- Monogrammed wedding glasses painted on the outer bowl only
- Decorative privacy panels with frosted stencil borders
- Faux stained glass frames for sunlit windows
- Seasonal jars for centerpieces or shelf styling
Real Experiences and Lessons From Painting Etched Glass
One of the most interesting things about painting etched glass is how quickly it humbles overconfident beginners and rewards patient ones. Many people start with the assumption that glass is just glass, so the process must be the same no matter what. Then they paint over fingerprints, skip the alcohol wipe, slap on a thick coat, and wonder why the finish looks streaky, gummy, or weirdly allergic to tape. Etched glass teaches a gentler lesson: the surface may be beautiful, but it still expects respect.
A common first experience is surprise at how different the paint looks once it dries on a frosted or etched finish. Colors can appear softer, a little dustier, and much more elegant than they did in the bottle. This often works in your favor. A plain white floral design on etched glass can look high-end in a way it might not on clear glass. Metallic accents also tend to look richer because the diffused background keeps them from becoming too shiny or loud.
Another lesson people learn quickly is that tools matter. A stiff brush can leave visible lines. A soft brush feels smoother. A sponge can create a beautiful even coat but may also absorb more paint than expected. Paint markers are wonderful for lettering, but on heavily textured surfaces they may need slower, more deliberate strokes. Most crafters eventually find a favorite tool not because it is objectively superior, but because it fits the finish they like most.
Masking is another area where experience changes everything. The first time someone uses painter’s tape on glass, they often assume sticking it down is enough. Then the paint sneaks under one tiny corner and suddenly the line looks like it made a run for it. After that, people become devoted stencil smoothers. Old gift cards, scraper tools, even a fingernail wrapped in cloth start to feel like secret weapons. Clean lines are rarely an accident.
Patience with curing is perhaps the biggest maturity milestone in this craft. Freshly painted glass can look done long before it is ready to be handled, washed, wrapped, or displayed. Many disappointing results come from touching too soon, stacking too soon, or cleaning too soon. Experienced painters know that the prettiest finish often comes from simply leaving the project alone and letting chemistry do its quiet work.
There is also a creative confidence that grows with repetition. Once people paint one etched glass vase successfully, they start seeing possibilities everywhere: thrifted candle holders, old cabinet glass, holiday ornaments, plain mirrors, windowpanes, and wedding décor. The material stops feeling intimidating and starts feeling full of potential. That shift is one of the best parts of the process. Painting etched glass is not just about decoration. It changes the way you look at ordinary objects. Suddenly, that dusty jar at the back of a cabinet is not junk. It is a future centerpiece waiting for a better personality.
And maybe that is why this craft has such staying power. It is practical, affordable, forgiving, and surprisingly elegant. You do not need a giant workshop, an art degree, or mystical crafting powers. You just need the right prep, the right paint, and the willingness to let thin coats and patience do the heavy lifting. The etched glass handles the glamour part on its own.
Conclusion
Learning how to paint etched glass is really about mastering a few smart habits: clean thoroughly, choose the right paint, mask carefully, build color in thin coats, and cure the finish properly. Once you do that, the project becomes much less intimidating and much more fun. Etched glass gives you a naturally refined surface, so even simple designs can look custom and expensive. Whether you are updating home décor, creating gifts, or experimenting with decorative glass painting for the first time, these 12 easy steps will help you get results that look intentional, durable, and delightfully not like a last-minute craft emergency.


