
Table of Contents >> Show >> Hide
- Before You Start: Don’t Destroy the Plastic
- Method 1: Warm Soapy Water (The Gentle First Try)
- Method 2: Use Heat to Loosen the Adhesive
- Method 3: Vinegar Solution for Sticky Residue
- Method 4: Cooking Oils for Gooey Adhesive
- Method 5: Rubbing Alcohol or Hand Sanitizer
- Method 6: Baking Soda Paste for Stuck-On Residue
- Method 7: Specialty Adhesive Removers (Goo Gone, WD-40 & Friends)
- What Not to Use on Plastic
- Quick Cheat Sheet: Best Method by Situation
- How to Remove Sticker Residue from Different Plastic Items
- Real-Life Experiences & Extra Tips (Bonus Section)
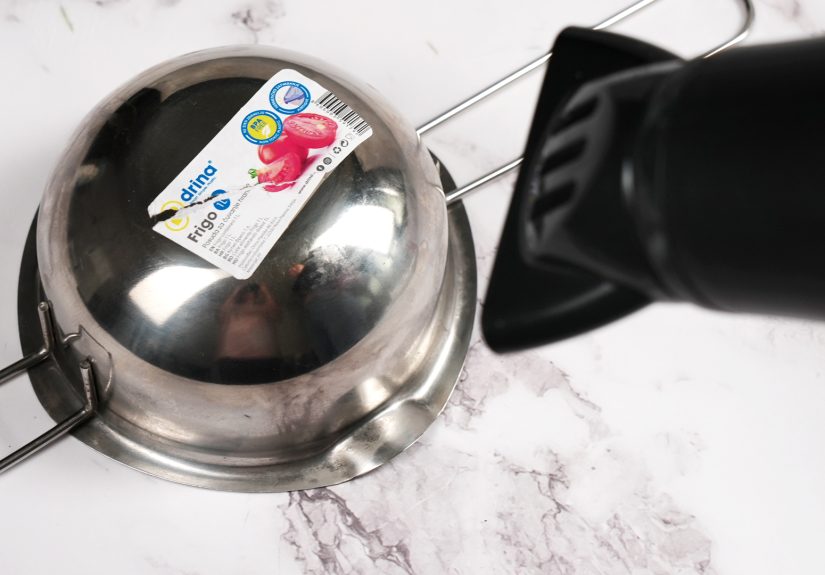
Few things ruin the joy of a brand-new storage bin, kitchen container, or gadget faster than a
stubborn sticker welded to the plastic. You peel, it shreds. You scratch, the glue smears. And
now your “new” thing looks like it’s survived a small disaster.
The good news? You can remove a sticker from plastic (and all that sticky residue)
without wrecking the surface. With a few common household products and a little patience, those
annoying labels don’t stand a chance.
In this guide, you’ll learn quick and easy methods to remove stickers from plastic using
warm soapy water, vinegar, oils, rubbing alcohol, baking soda, and specialty removers. We’ll also
walk through what not to use so you don’t accidentally melt or discolor your stuff.
Before You Start: Don’t Destroy the Plastic
Not all plastics are created equal. Some are tough (like many food-storage containers), while others
are surprisingly delicate (like certain toys, electronics housings, or glossy decorative plastics).
Before you go to war with that sticker, keep a few safety rules in mind.
1. Test in a Hidden Spot
Whatever product you useoil, alcohol, vinegar, or a commercial adhesive removeralways
test on a small, hidden area first. If the plastic dulls, discolors, or gets tacky, that
method is too harsh for that item.
2. Avoid Acetone on Plastic
Nail polish remover that contains acetone is fantastic at dissolving adhesivesbut it’s also
fantastic at dissolving or clouding many plastics. On some surfaces, it can leave permanent
white marks or a melted look. Reserve acetone for glass and metal, not your favorite plastic
storage bins or laptop case.
3. Peel the Paper First if Possible
Most labels have a paper layer on top and adhesive underneath. If you can, peel off as much of the
paper sticker as possible first. That way, you’re just dealing with the sticky residue, not a
soggy mess of paper fibers.
4. Gather Your Basic Tools
For nearly every method below, these simple tools make the job easier:
- A soft cloth or microfiber towel
- Cotton balls or cotton pads
- An old credit card or plastic scraper (never metal on delicate plastic)
- Mild dish soap
- Warm water
- Paper towels
Method 1: Warm Soapy Water (The Gentle First Try)
Before you reach for anything fancy, start with the simplest: warm water and dish soap.
It’s safe, cheap, and often all you need for brand-new or lightly stuck stickers.
Best For
- Food storage containers
- New plastic bins and organizers
- Kids’ toys (without batteries)
- Any item you can safely submerge
How to Do It
-
Fill a sink or basin with warm (not boiling) water and add a generous squirt of
dish soap. -
Submerge the plastic item so the sticker is underwater. Let it soak for
10–20 minutes. -
Check the sticker. Often, the paper will bubble or loosen. Try to peel it off gently with your
fingernail or a plastic scraper. - If residue remains, rub it with a soapy cloth or sponge. Rinse well and dry.
If the sticker barely budges after soaking, no worriesmove on to the next method. You’ve at least
softened the adhesive, which will make the stronger methods more effective.
Method 2: Use Heat to Loosen the Adhesive
Many sticker adhesives soften when warmed. A simple hair dryer is often all it takes
to turn a stubborn label into an easy peel.
Best For
- Hard, non-warping plastics (bins, organizers, cases)
- Price tags on plastic packaging
- Stickers on plastic furniture or decor
How to Do It
-
Set a hair dryer to low or medium heat. High heat can warp thin plastics, so start
gentle. - Hold it a few inches away from the sticker and heat for about 30–60 seconds.
-
Use your fingernail or a plastic card to lift one edge of the sticker. If it resists, heat for
another 30 seconds. -
Once the sticker starts to peel, pull slowly at a low angle. The goal is to lift the
sticker and its adhesive in one piece. - If any residue remains, follow up with one of the liquid methods below.
Pro tip: move the dryer constantly instead of blasting one spot. You want to warm the adhesive,
not bake the plastic.
Method 3: Vinegar Solution for Sticky Residue
White vinegar is an MVP in the cleaning world. Its mild acidity helps break down sticker
glue without harsh fumes or strong chemicals, and it’s generally safe for most plastics.
Best For
- Food containers and jars
- Kitchen bins and organizers
- Plastics that feel a little greasy or grimy
How to Do It
-
Mix a solution of warm water, white vinegar, and a drop of dish soap. Roughly
equal parts water and vinegar works well. - Soak a cloth or paper towel in the mixture and place it over the sticker or residue.
- Let it sit for about 5–10 minutes to soften the glue.
- Rub the area with the cloth, then scrape gently with a plastic card if needed.
- Rinse with clean water and dry.
If the sticker still won’t budge, repeat the process or combine vinegar with heat: warm the sticker
with a hair dryer first, then apply the vinegar-soaked cloth.
Method 4: Cooking Oils for Gooey Adhesive
When the paper is gone and you’re left with clear, sticky residue, oils can be incredibly
effective. They don’t dissolve the plasticthey just help loosen the adhesive.
Good Oil Options
- Olive oil
- Vegetable or canola oil
- Baby oil
- Mineral oil
- Even peanut butter in a pinch (the oils do the work!)
How to Do It
-
Apply a few drops of oil directly to the sticky area. If you’re using peanut butter, spread a
thin layer on top. - Let it sit for 10–15 minutes. This gives the oil time to seep into the adhesive.
- Rub the area with a soft cloth in small circles to lift the residue.
- Scrape gently with a plastic card if needed.
- Wash the plastic with warm soapy water to remove any greasy film, then rinse and dry.
Oils are especially handy for items that come in contact with food, because you’re using
food-safe products. Just be sure to wash thoroughly afterward.
Method 5: Rubbing Alcohol or Hand Sanitizer
Rubbing alcohol (isopropyl alcohol) or an alcohol-based hand sanitizer is great for
breaking down adhesives, especially on harder plastics and electronics housings where you can’t
soak the item.
Best For
- Plastic electronics cases (laptops, tablets, game consoles)
- Plastic phone stands, chargers, or accessories
- Stickers that are mostly gone but leave a tacky feel
How to Do It
- Dampen a cotton ball, cotton pad, or corner of a soft cloth with rubbing alcohol or hand sanitizer.
- Press it onto the sticky area and let it sit for about 1 minute.
- Rub gently in small circles. The adhesive should start to roll up or wipe away.
- For stubborn spots, repeat and gently scrape with a plastic card.
- Wipe the area with a clean, slightly damp cloth to remove any leftover alcohol.
Alcohol evaporates quickly and usually doesn’t leave a film, which makes it a favorite for
electronics and glossy plastics. Still, test firstsome printed logos or low-quality finishes can
be sensitive.
Method 6: Baking Soda Paste for Stuck-On Residue
When you’re dealing with sticky residue that laughs at soap and water but you don’t want to use
stronger chemicals, baking soda is a great middle ground. It adds a bit of gentle
scrubbing power without being overly abrasive.
How to Make and Use the Paste
-
Mix baking soda with just enough water or cooking oil to form a spreadable paste.
(Oil makes it extra effective on very sticky adhesives.) - Apply the paste to the sticky area and let it sit for 5–10 minutes.
-
Rub gently with a soft cloth or your fingers. You’re using the fine grit of the baking soda to
help lift the glue. - Rinse or wipe clean with warm, soapy water and dry.
Avoid scrubbing aggressively on very soft or shiny plastic, as too much friction can cause
micro-scratches. Gentle pressure is enoughyou’re not sanding a piece of wood.
Method 7: Specialty Adhesive Removers (Goo Gone, WD-40 & Friends)
When home remedies aren’t cutting it, commercial adhesive removers can come to the rescue.
Products like Goo Gone and certain cleaning sprays are designed to dissolve sticker gunk fast.
Goo Gone–Style Products
These are often citrus- or petroleum-based formulas that soften adhesives quickly.
- Apply a small amount to a cloth or directly to the residue (follow the label directions).
- Let it sit for a minute or two.
- Wipe or scrape off the softened residue.
- Wash the area with warm, soapy water to remove any oily film.
WD-40
Surprisingly, WD-40 also works well on sticker residue. It’s especially helpful on tough glue
where oils alone aren’t enough.
- Spray a small amount onto a soft cloth (not directly on sensitive items).
- Rub the sticky area until the residue lifts.
- Immediately wash the surface with soap and water to remove any remaining WD-40.
Always use specialty products with good ventilation and keep them away from food surfaces unless
the label specifically says they’re food-safe. And of coursetest on a hidden spot first.
What Not to Use on Plastic
When you’re desperate, it’s tempting to try anything under the sink. But some products can do
more harm than good.
Avoid or Use Extreme Caution With:
- Acetone or strong nail polish remover – Can cloud, discolor, or soften many plastics.
- Paint thinners or strong solvents – Often too harsh for household plastics.
- Metal razor blades – Can gouge, scratch, or leave permanent marks.
- Very abrasive scrubbing pads – May leave dull spots or fine scratches.
If you wouldn’t trust a product on a pair of nice sunglasses or your phone screen, you probably
shouldn’t use it on delicate plastic either.
Quick Cheat Sheet: Best Method by Situation
-
New storage bin with a big label: Start with warm soapy water, then vinegar or oil
if needed. -
Electronics sticker (like a laptop spec label): Use a hair dryer on low, peel slowly,
then clean with rubbing alcohol. -
Food container with price tag: Soak in warm soapy water, then use oil or a baking
soda paste for remaining residue. -
Really stubborn, old sticker on hard plastic: Heat + oil or baking soda paste, then
a small amount of Goo Gone or WD-40 if safe for that item.
How to Remove Sticker Residue from Different Plastic Items
1. Food Containers and Jars
For plastic food containers, prioritize food-safe methods first: soapy water, vinegar, and
cooking oils. Avoid strong chemical removers unless you’re certain you can fully wash them off
afterward. Rubbing alcohol is usually fine on the outside, but rinse well.
2. Kids’ Toys
Use warm soapy water, vinegar, or a tiny amount of oil. Avoid intense heat, harsh solvents, or
strong-smelling chemicals that might linger. If the toy has electronics or batteries, stick to
surface-only methods like alcohol on a clothno soaking.
3. Electronics and Gadgets
For laptops, tablets, controllers, or chargers, never soak them. Use a hair dryer on low to loosen
the sticker, then rubbing alcohol on a cloth to remove remaining residue. Work slowly and avoid
letting liquid run into seams or ports.
4. Car Interior Plastics
For stickers on dashboards or interior trim, use mild methods: a hair dryer on low, a little oil or
WD-40 on a cloth (not sprayed directly), and gentle wiping. Immediately follow with a clean, damp
cloth and then dry to prevent shininess or slick spots.
Real-Life Experiences & Extra Tips (Bonus Section)
Once you’ve removed a few stickers from plastic, you start to develop a sixth sense for which
method will work where. Here are some “lived-in” lessons people often discover the hard wayso
you don’t have to.
The “I Regret Using Acetone” Story
A classic mistake: someone buys a gorgeous new plastic organizer for their office, then attacks
the barcode sticker with acetone nail polish remover. The sticker comes off, surebut now there’s a
hazy white patch where the surface is permanently dulled.
That cloudy mark isn’t dirt. It’s the plastic itself being dissolved and re-dried in a rougher,
damaged form. Once that happens, there’s no going back. This is why “test first” isn’t just a cute
suggestionit can literally save the appearance of your item.
Discovering the Power of Oil by Accident
Another common story: someone tries everythingscrubbing, soap, elbow greaseand that sticky ring
on the bottom of a plastic jar just won’t quit. Frustrated, they’re cooking, spill a bit of olive
oil on it, and ten minutes later, the residue wipes off almost effortlessly.
Once you see how oils soften adhesive, you’ll never look at a sticky label the same way again.
Cooking oil, baby oil, and even peanut butter become low-key cleaning tools just hanging out in
your kitchen or bathroom cabinet.
The Zero-Waste Jar Collector’s Routine
People who love reusing plastic food containers and jars often develop a routine that goes like
this:
- As soon as a container is empty, it goes into a sink of hot, soapy water.
-
After a soak, most labels peel right off. Anything left gets treated with a bit of oil or a
baking soda paste. -
Final step: a quick scrub with vinegar or dish soap to remove any leftover residue or oily
feeling.
The key lesson: the sooner you tackle labels, the easier they are to remove. Fresh adhesive is
softer; old, sun-baked glue is much more stubborn.
Electronics: Slow and Steady Wins
With electronics, people often learn the “slow and steady” rule the hard way. Yank a sticker off
a laptop palm rest too aggressively and you can stretch the plastic coating, chip a corner, or
leave a torn patch of sticker that’s harder to remove than the original label.
A better approach:
- Use a hair dryer on low to gently warm the sticker.
- Peel slowly at a low angle, not straight up.
- Finish with a bit of rubbing alcohol on a microfiber cloth.
Taking an extra minute or two saves you from looking at a scarred palm rest for the next five
years.
Why Having a “Sticker Kit” Is Weirdly Smart
If you’re constantly organizing, labeling, and buying new bins or gadgets, it can be surprisingly
helpful to keep a little “sticker removal kit” together. It doesn’t have to be fancy. A small
caddy with:
- A travel bottle of rubbing alcohol
- A mini bottle of cooking oil or baby oil
- A small container of baking soda
- A plastic scraper or old credit card
- A soft cloth or microfiber towel
Suddenly, sticky price tags, barcode labels, and brand stickers are just minor speed bumps instead
of full-on annoyances. A few minutes of gentle, methodical work and your plastic looks clean,
smooth, and truly “yours.”
The Big Takeaway
Removing stickers from plastic doesn’t require brute force or harsh chemicals. The winning
formula is almost always:
- Soften the adhesive (with warm water, heat, vinegar, or oil).
- Lift the sticker or residue gently (with your fingers or a plastic card).
- Clean the surface afterward (with soap and water) so it looks and feels new.
Once you understand how adhesives behave, you’ll stop dreading those stubborn labels. And the next
time you bring home a plastic bin covered in stickers, you’ll know exactly how to send them
packingquickly, easily, and without harming the plastic underneath.


