
Table of Contents >> Show >> Hide
- Why Photoshop CS6 Is Still Good for Background Removal
- Before You Start: Set Yourself Up for Success
- Method 1: Remove a Simple Background with Magic Wand or Magic Eraser
- Method 2: Remove the Background with Quick Selection, Refine Edge, and a Layer Mask
- Method 3: Use the Pen Tool for Hard, Clean Edges
- Method 4: Use the Background Eraser for Fine Detail
- How to Fix Halos, Fringing, and Ugly Edges
- How to Save the Image with a Transparent Background
- Common Mistakes to Avoid in Photoshop CS6
- Real-World Experiences with Removing Backgrounds in Photoshop CS6
- Final Thoughts
- SEO Tags
If you are still using Photoshop CS6, first of all, respect. Second of all, good news: you can absolutely remove the background from an image in CS6 and get clean, professional-looking results. No shiny one-click AI button. No magical “please fix my messy edges” command. Just classic Photoshop tools, a little patience, and the satisfaction of knowing you did the work instead of outsourcing it to a robot with commitment issues.
This guide walks you through the best ways to remove an image background in Photoshop CS6, including the easiest method for simple backgrounds, the most accurate method for portraits and products, and the safest way to preserve transparency. By the end, you will know when to use Magic Wand, when to switch to the Pen Tool, when to lean on Refine Edge, and when to stop clicking randomly and start working like a pro.
Why Photoshop CS6 Is Still Good for Background Removal
Photoshop CS6 may be older software, but it still gives you a strong set of tools for cutting out subjects and removing backgrounds. The secret is choosing the right tool for the image in front of you. A white studio background needs a different approach than curly hair against a cloudy sky. CS6 gives you enough control to handle both, as long as you work methodically.
The biggest advantage of CS6 is precision. Instead of relying on automatic background removal, you can build a selection, refine it, and hide the background with a layer mask. That means you can edit the edges later instead of deleting pixels and crying softly into your keyboard.
Before You Start: Set Yourself Up for Success
Before removing any background, do these three things:
1. Duplicate or unlock the background layer
If your image opens as a locked Background layer, convert it to a regular layer or duplicate it. This allows transparency and keeps your original image safe. In plain English: do not perform surgery on your only copy.
2. Zoom in
Background removal is all about edges. Zoom in close enough to see what is really happening around hair, clothing, product corners, and shadows. At 25%, every cutout looks brilliant. At 200%, the truth comes out.
3. Decide what kind of edge you are dealing with
Ask yourself one question: is the edge hard or soft? Hard edges include boxes, phones, furniture, and logos. Soft edges include hair, fur, feathers, smoke, and semi-transparent fabric. Your answer tells you which tool belongs at the party.
Method 1: Remove a Simple Background with Magic Wand or Magic Eraser
This is the fastest way to remove a background in Photoshop CS6 when the backdrop is mostly a single color, like white, gray, blue, or green. Product photos and scanned graphics are perfect candidates.
When to use this method
Use Magic Wand or Magic Eraser when the subject is clearly separated from the background and the colors do not overlap much. If your subject is wearing a white shirt on a white background, this method will become a comedy sketch.
How to do it
Start by selecting the Magic Wand Tool. Click on the background. Photoshop will select pixels based on similar tone and color, so adjust the Tolerance setting if too much or too little gets selected. A lower tolerance is stricter. A higher tolerance is more generous. Think of it as Photoshop deciding how picky it wants to be.
If the selection misses areas, hold Shift and click additional background spots. If it grabs part of your subject, hold Alt on Windows or Option on Mac to subtract those areas from the selection.
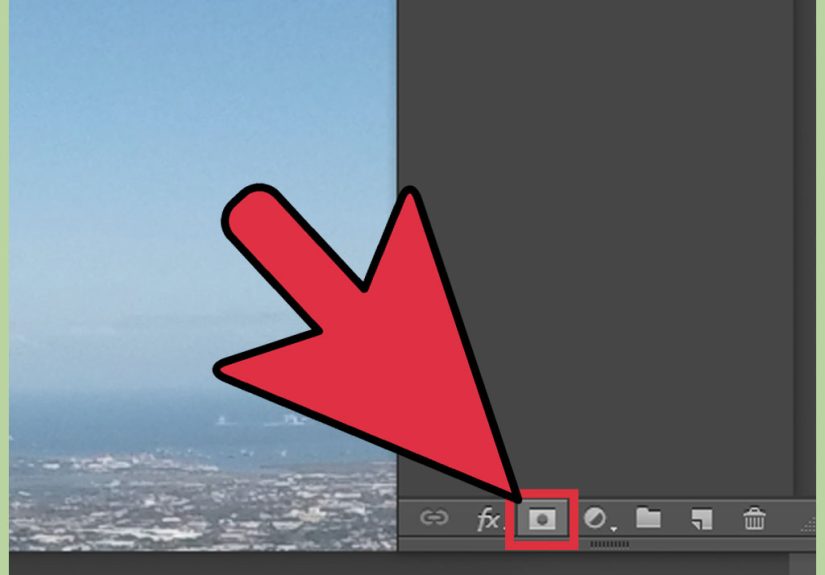
Once the background is selected, press Delete if you are working on a normal layer, or better yet, click the Add Layer Mask button to hide the background non-destructively.
You can also use the Magic Eraser Tool for flat backgrounds. Click once on the unwanted background, and Photoshop converts matching areas into transparency. It is quick, but it is also destructive, so this is best for simple images or disposable copies.
Best use case
A logo on white. A mug on a seamless backdrop. A product photo that behaves itself. Basically, any image that does not look like it was designed to test your patience.
Method 2: Remove the Background with Quick Selection, Refine Edge, and a Layer Mask
This is the best all-around method in Photoshop CS6. It works especially well for people, clothing, lifestyle images, and products with a mix of clean and slightly messy edges.
Step 1: Make a rough selection
Choose the Quick Selection Tool and paint over your subject. Photoshop analyzes edges as you brush. The goal here is not perfection. You just want a solid starting selection around the main subject.
If Quick Selection grabs too much, hold Alt/Option to subtract unwanted areas. Work around the whole subject until the selection outline is reasonably close.
Step 2: Open Refine Edge
With an active selection, click Refine Edge from the top options bar or go to Select > Refine Edge. In CS6, this is where the magic gets practical. Refine Edge helps you clean up rough outlines and improve difficult areas like hair, fur, and textured fabric.
Step 3: Improve the edge
Inside the Refine Edge dialog box, switch between different view modes so you can actually see what is happening. On white, on black, and overlay views are especially useful.
Then adjust these controls carefully:
Radius: Helps Photoshop detect complex edges.
Smart Radius: Useful when your subject has a mix of hard and soft edges.
Smooth: Reduces jagged edges.
Feather: Softens the edge slightly.
Contrast: Sharpens the edge after feathering.
Shift Edge: Pulls the selection inward or outward. A slight negative shift often helps reduce halos.
For hair, use the refine brush around the outer strands. Do not paint over the whole head like you are frosting a cake. Focus only on the messy edge where background and subject overlap.
Step 4: Output to a layer mask
Instead of deleting the background, choose Output To: Layer Mask. This hides the unwanted background while preserving the original pixels underneath. Non-destructive editing is your best friend in Photoshop. It never judges you for changing your mind.
Step 5: Clean up manually
Click the mask thumbnail in the Layers panel. Use a soft or medium brush and paint with black to hide more of the background, white to reveal parts of the subject, and gray for partial transparency. This is one of the most important layer mask rules in Photoshop CS6, and once it clicks, it clicks for life.
Best use case
Portraits, fashion photos, pets, and everyday product images. If you only learn one background-removal workflow in Photoshop CS6, make it this one.
Method 3: Use the Pen Tool for Hard, Clean Edges
If your subject has crisp, well-defined edges, the Pen Tool is often the cleanest option. This is the go-to method for objects like bottles, shoes, electronics, furniture, packaging, and anything else with curves and sharp boundaries.
Why the Pen Tool works so well
The Pen Tool creates a path, not a fuzzy pixel guess. You trace the subject, convert the path into a selection, and then apply a layer mask. That means the result is controlled, polished, and much less likely to look like it was cut out with safety scissors.
How to do it
Select the Pen Tool and trace around the object by placing anchor points. Use fewer points than you think you need. Clean curves come from smart point placement, not from covering the screen with dots like confetti.
Once you finish the path, save it in the Paths panel. Then convert the path into a selection. From there, add a layer mask to hide the background.
If needed, feather the selection slightly before creating the mask, but use a very small amount. Hard-edged products usually look best with minimal softness.
Best use case
Catalog product photography, marketing images, packaging shots, and objects with obvious geometric edges. The Pen Tool takes more time up front, but it can save you from thirty minutes of sloppy edge cleanup later.
Method 4: Use the Background Eraser for Fine Detail
The Background Eraser Tool is one of Photoshop’s classic CS6 tools for removing detailed backgrounds, especially around trees, hair, and other complicated edges. It samples the color under the crosshair and erases matching pixels as you drag.
Why it is useful
This tool can be great when the background color is different from the subject and you need to preserve fine detail. For example, blue sky behind green leaves. In that situation, the Background Eraser can remove the sky while leaving the leaves mostly intact.
Why you should still be careful
The Background Eraser is destructive. It deletes pixels. Once you go too far, you can undo, but if you save over your file and realize the subject’s ear is missing later, that is a bad afternoon.
How to use it wisely
Work on a duplicate layer. Choose a brush size that fits the edge area. Keep the crosshair on the color you want to remove, not on the subject. Harder brush edges often reduce leftover background junk. Move slowly around the outline and zoom in often.
Best use case
Trees, hair against a contrasting backdrop, and irregular natural edges. It is a specialty tool, not a universal answer.
How to Fix Halos, Fringing, and Ugly Edges
Even after a decent cutout, you may notice a light outline or leftover background color around the subject. This usually happens when the old background spills into the edge pixels.
To fix it, go back to the layer mask and paint the edge tighter. You can also use a slight negative Shift Edge in Refine Edge to pull the mask inward. In some cases, brushing along the edge on the mask is faster than fighting every slider in the dialog box like it owes you money.
If the original background color still contaminates the edges, try adding a slight adjustment or painting on a new layer to neutralize the fringe. This is especially common with white, green, or bright studio backgrounds.
How to Save the Image with a Transparent Background
Removing the background is only half the job. Saving it correctly is the other half, and it is the half that loves ruining people’s day.
Best formats
PSD: Best if you want to keep layers and masks editable.
PNG: Best for web use when you need transparency preserved.
Avoid this mistake
Do not save as JPEG if you need a transparent background. JPEG does not support transparency. It will replace that nice see-through background with a solid color, and suddenly your “clean cutout” is sitting on an accidental white box like it never left 2009.
Common Mistakes to Avoid in Photoshop CS6
Deleting instead of masking
Deleting pixels feels fast until you need them back. Masks are safer and smarter.
Using the wrong tool for the edge
Magic Wand is not a hair expert. The Pen Tool is not ideal for fluffy fur. Match the tool to the edge.
Ignoring zoom
If you never zoom in, you are editing on vibes alone. Vibes are not a precision tool.
Saving only one version
Save a layered PSD first. Then export a PNG. Future you will be extremely grateful.
Real-World Experiences with Removing Backgrounds in Photoshop CS6
One of the most useful lessons people learn from Photoshop CS6 is that background removal is rarely about finding one perfect tool. It is usually about combining several tools in the right order. In real projects, a clean product cutout might begin with the Pen Tool for the bottle shape, switch to Quick Selection for a label edge, and end with a layer mask for final cleanup. That hybrid workflow is normal. In fact, it is usually the difference between an image that looks polished and one that looks suspiciously homemade.
Portrait editing in CS6 teaches another truth: hair is humble pie. At first, many users expect a perfect selection with one drag of the Quick Selection Tool. Then they zoom in and discover a forest of flyaways, transparent strands, and tiny edge halos. That is where experience changes your expectations. Instead of chasing instant perfection, experienced editors make a rough selection, open Refine Edge, improve the soft boundary, output to a mask, and finish the last 10% by hand. It is not glamorous, but it works. And once you see how much better the result looks, hand-finishing the mask feels less like punishment and more like craft.
Another common experience involves white backgrounds. New users often assume white means easy. Sometimes it does. Sometimes it absolutely does not. A white mug on a white seamless background may be simple. A wedding dress on a bright white backdrop is a different beast entirely because the edge contrast is low. In that case, the Magic Wand can select too much or too little, and the cutout may lose detail in fabric folds or lace. Editors who have done this a few times know to slow down, lower tolerance, build the selection gradually, and protect delicate detail with a mask rather than a hard delete.
CS6 also teaches patience with shadows. If you remove a background too aggressively, you can lose natural shadow detail that makes a product or person feel grounded. Many users only notice this after dropping the cutout onto a new background and wondering why it looks like it is floating in midair. The more experienced approach is to preserve subtle shadows when possible or recreate them intentionally later. A believable image is not just about cutting out the subject. It is about keeping the little visual cues that make the subject belong somewhere.
Finally, long-time Photoshop CS6 users often develop a healthy respect for the PSD file. They know that the “finished” version is rarely final. A client wants a softer edge. A designer wants a PNG instead of a JPEG. Someone notices a tiny fringe around the hairline two days later. If you saved the layered PSD with the mask intact, you are a hero. If you flattened the image and called it a day, you are reopening the project with the emotional energy of a person who just stepped on a Lego. Real experience in Photoshop CS6 is not just about removing a background. It is about building a workflow that lets you revise, refine, and rescue your work without starting over.
Final Thoughts
If you want to remove the background of an image using Photoshop CS6, the best method depends on the image. For simple, solid-color backgrounds, Magic Wand or Magic Eraser can get the job done quickly. For most photos, Quick Selection plus Refine Edge and a layer mask gives the best balance of speed and control. For hard-edged products, the Pen Tool is still a champion. And for tricky detail like hair, the Background Eraser and careful mask work can save the day.
The real skill is not memorizing one “best” tool. It is learning how to read an image, pick the right method, and refine the result until the cutout looks natural. Photoshop CS6 may be old-school, but it still rewards good technique. And honestly, there is something satisfying about making a perfect cutout the classic way. No AI shortcut. No mystery button. Just you, Photoshop, and a very serious relationship with the Zoom tool.


