
Table of Contents >> Show >> Hide
- Before You Start: Prep Like a Pro (So You Don’t Regret It Later)
- How to Remove Wallpaper Border 4 Ways
- Method 1: Dry Peel (Best First Try)
- Method 2: Heat (Hair Dryer Method)
- Method 3: Spray Solution (Water, Vinegar, Fabric Softener, or Commercial Remover)
- Method 4: Steam (Fastest for Tough, Stubborn Borders)
- How to Choose the Right Method (Without Wasting Your Whole Saturday)
- Troubleshooting Common Problems
- After the Border Is Off: Prep the Wall the Right Way
- Mistakes to Avoid
- Conclusion
- DIY Experiences: What People Commonly Run Into When Removing Wallpaper Border (About )
- SEO Metadata (JSON)
If your home still has a wallpaper border circling the room like it’s holding onto 1997 for dear life, don’t worryyou are not alone, and you are definitely not doomed. The good news is that removing wallpaper border is usually a very doable DIY project. The less-fun news? Some borders peel off in one satisfying strip, while others behave like they were installed with pure spite.
This guide walks you through how to remove wallpaper border 4 ways: dry peeling, heat, spray solution, and steam. You’ll also learn how to avoid damaging paint or drywall, what to do with leftover adhesive, and how to choose the right method for your wall type. The goal is simple: get that border off without turning your wall into a patching project.
Before You Start: Prep Like a Pro (So You Don’t Regret It Later)
1) Figure out what you’re removing
Wallpaper border can be installed on painted drywall, plaster, or even on top of wallpaper. That matters. A border on painted drywall may come off fairly easily. A border on top of older wallpaper requires a gentler touch, because you don’t want to tear the layer underneath. If the border has been painted over, expect more scraping and some wall repair afterward.
2) Protect the room
- Move furniture away from the wall.
- Cover floors and nearby furniture with drop cloths or plastic sheeting.
- Turn off power and cover outlets/switch plates if you’ll be spraying liquid nearby.
- Open windows or use a fan for ventilation (especially with vinegar, fabric softener, or commercial removers).
3) Gather basic tools
- Plastic or rounded putty knife / wallpaper scraper
- Spray bottle or sponge
- Warm water
- Clean rags or sponge
- Step ladder
- Gloves and safety glasses
Optional but helpful: hair dryer, wallpaper scoring tool, wallpaper steamer, commercial wallpaper remover, dish soap, vinegar, and fabric softener.
4) Always test a small area first
Pick a hidden section (behind a door is perfect) and test the least aggressive method first. This helps you see how strong the adhesive is and whether the wall finish underneath is likely to lift.
How to Remove Wallpaper Border 4 Ways
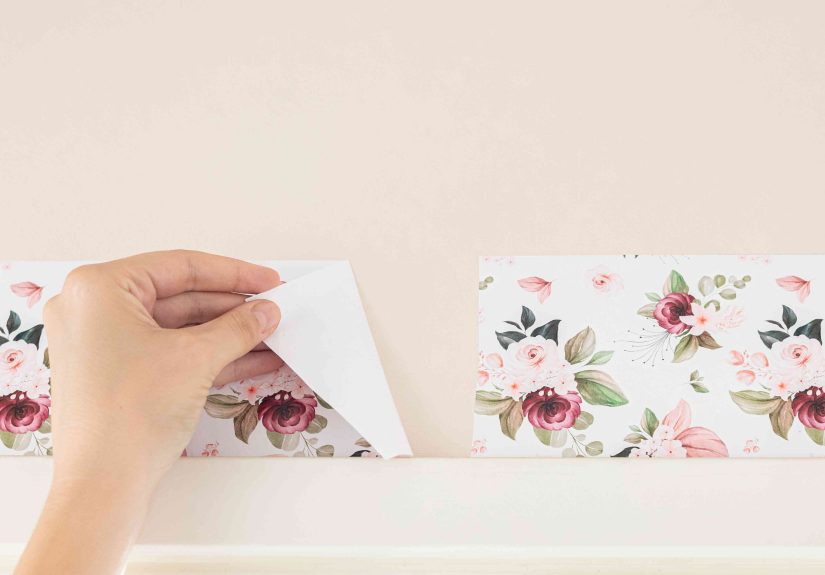
Method 1: Dry Peel (Best First Try)
Best for: newer borders, peelable/strippable material, or borders that are already lifting at seams.
This is the easiest method and should always be your first attempt. Sometimes the border will come off with minimal effort and zero moisture. When that happens, enjoy the rare DIY miracle.
Steps
- Find a seam or corner. Look along the border for a loose edge, seam, or end point.
- Lift gently. Use your fingernail or the edge of a plastic scraper/rounded putty knife to lift the corner.
- Pull slowly and evenly. Try to remove the border in a long strip instead of yanking. Fast pulling usually causes tearing.
- Use the scraper only when needed. If a section sticks, slide the scraper underneath carefully. Don’t dig into drywall paper.
Why this method works
Some wallpaper borders are designed to be more removable, and some just loosen over time due to age, heat, or humidity. Starting dry reduces the risk of oversaturating drywall or damaging paint.
When to stop and switch methods
If the border tears into tiny strips, leaves heavy glue behind, or won’t lift without force, move on to Method 2 or 3. This is not a “win by stubbornness” situation.
Method 2: Heat (Hair Dryer Method)
Best for: borders on painted walls, stubborn adhesive, and situations where you want to avoid soaking the wall.
Heat softens the adhesive so the border can peel off more cleanly. A hair dryer is often enough for wallpaper border removal and is gentler than a heat gun.
Steps
- Set the hair dryer to medium or high heat. Start with medium if you’re worried about the paint finish underneath.
- Heat a small section. Work in 6- to 12-inch sections. Hold the dryer a few inches away and move it continuously.
- Lift and peel. As the adhesive softens, peel with your fingers or a scraper. Keep the dryer moving along the section that’s still stuck.
- Repeat in sections. Don’t heat the entire room at once. The adhesive cools quickly.
- Remove residue. Wipe leftover glue with warm water and a sponge, or use a mild wallpaper remover solution if needed.
Heat method tips
- Use a plastic scraper first if the wall is painted and you want to reduce scratching.
- Don’t park the dryer in one spot too longyou can blister paint or scorch delicate finishes.
- If the border starts to lift in one piece, celebrate quietly and keep going. Loud celebration may break the streak.
Method 3: Spray Solution (Water, Vinegar, Fabric Softener, or Commercial Remover)
Best for: most standard wallpaper borders, especially older or stubborn adhesive.
This is the go-to method for many DIYers because moisture helps loosen glue without requiring specialized equipment. Start with the gentlest solution and step up only if needed.
Solution Options
- Warm water (start here)
- Vinegar + warm water (common DIY mix, often 1:1)
- Fabric softener + warm water (many guides suggest diluted mixes; follow your preferred recipe and test first)
- Commercial wallpaper remover (good for stubborn glue; follow label directions)
Do you need to score the border first?
Maybe. If the border has a vinyl coating or the liquid is beading up instead of soaking in, lightly score the surface using a wallpaper scoring tool. Use a light handyou want shallow perforations in the border, not cuts into the drywall face paper.
Steps
- Test for absorbency. Spray a small section. If it soaks in, great. If not, lightly score first.
- Apply the solution. Spray or sponge on enough liquid to saturate the border surface (damp, not dripping everywhere).
- Let it soak. Wait about 10 to 15 minutes. For stubborn adhesive, reapply to keep the area damp.
- Lift a seam and peel. Start at an edge or seam, then peel slowly while scraping under resistant spots.
- Repeat as needed. Most difficult borders require multiple rounds of spray, wait, peel.
Pro tips for better results
- Work in small sections so the solution doesn’t dry before you peel.
- Keep the wall damp, not floodedtoo much liquid can damage drywall.
- For residue, do another short soak on glue spots before scraping.
Method 4: Steam (Fastest for Tough, Stubborn Borders)
Best for: old borders, multiple layers, thick adhesives, or when spray solutions barely make a dent.
A wallpaper steamer uses hot steam to penetrate and soften adhesive. It can be very effective, but it also requires more cautionespecially when working overhead near the ceiling line where wallpaper borders usually live.
Steps
- Fill and heat the steamer according to the manufacturer’s instructions.
- Steam in short sections. Hold the steam plate against the border long enough to soften the glue, then move on.
- Peel and scrape. Lift a seam and peel while the adhesive is warm.
- Repeat down the wall. Continue section by section until the entire border is removed.
- Clean residual glue. Wipe with warm water and a sponge/scouring pad as needed.
Steam safety matters
- Wear gloves and safety glasses.
- Steamers can drip hot wateravoid standing directly underneath the steam head.
- Use extra care on delicate surfaces or older walls.
How to Choose the Right Method (Without Wasting Your Whole Saturday)
- Border lifts easily at the seam? Start with Dry Peel.
- Border is stuck but wall is painted? Try Heat next.
- Border is tearing and glue is stubborn? Use Spray Solution (and score lightly if needed).
- Nothing works or it’s very old/multi-layered? Bring in Steam.
In real life, many projects use a combination: dry peel first, spray for stubborn spots, then steam the nightmare sections above the sink. That’s normal.
Troubleshooting Common Problems
The border keeps tearing into tiny pieces
The adhesive probably isn’t soft enough yet. Reapply your solution, wait longer, and keep the area damp. If it’s vinyl-coated, lightly score before spraying.
I’m removing a border over existing wallpaper
Use the gentlest method first (dry peel, then minimal moisture). Avoid heavy soaking and aggressive heat, which can damage the wallpaper underneath.
The wall surface is peeling too
Stop and reassess. Switch to a gentler scraper, reduce force, and try heat or a milder spray method. If drywall paper is torn, plan to patch with joint compound and prime before painting.
There’s still sticky glue on the wall
That’s common. Wash with warm water and a sponge. For stubborn residue, use a wallpaper-removal solution or a vinegar/water mix, then wipe clean. Let the wall dry completely before repair, priming, or painting.
After the Border Is Off: Prep the Wall the Right Way
- Wash off adhesive residue.
- Let the wall dry completely.
- Inspect for nicks, gouges, or torn drywall paper.
- Patch with joint compound if needed.
- Sand smooth (lightly).
- Prime before painting. Primer helps seal repaired areas and any trace adhesive so paint goes on evenly.
Skipping the cleaning/priming step is one of the biggest DIY mistakes. Leftover adhesive can cause paint to look patchy, peel, or feel weirdly tacky later.
Mistakes to Avoid
- Using too much force too soon: You’ll gouge the wall and still have the border.
- Over-scoring: Deep cuts can damage drywall and create repair work.
- Oversaturating drywall: Damp is good; soggy is a future problem.
- Working huge sections at once: The adhesive cools or dries before you get there.
- Painting over residue: It looks fine… until it doesn’t.
Conclusion
If you’re wondering how to remove wallpaper border 4 ways, the winning strategy is simple: start gentle, then level up only if the border fights back. Begin with dry peeling, move to heat, use a spray solution for stubborn adhesive, and save steam for the toughest jobs. Work slowly, protect your walls, and clean the residue before painting.
In other words: don’t wage war on the border. Outsmart it.
DIY Experiences: What People Commonly Run Into When Removing Wallpaper Border (About )
One of the most common experiences homeowners report is this: they walk into a room, spot an outdated wallpaper border, and think, “I’ll knock that out in 20 minutes before lunch.” Then, two hours later, they’re standing on a ladder holding a spray bottle, a scraper, and a new respect for whoever invented patience. If that sounds familiar, you’re in excellent company.
A typical first experience goes like this: one corner lifts easily, which creates false confidence. The first 18 inches peel off beautifully. Then the next section tears into confetti-sized strips and leaves a sticky glue line that seems personally offended by your efforts. That contrast is normal. Adhesive strength often varies across a room because of humidity, sun exposure, cooking grease, previous paint touch-ups, or differences in how the border was originally installed.
Another common experience is discovering that the border is actually layered. The decorative top layer may peel off first, leaving a paper backing and adhesive still attached to the wall. Many DIYers think they’re “almost done” at this point, but the backing is where the real work starts. This is usually the moment when switching to a spray solution or steam makes a huge difference. The project becomes less about brute force and more about softening the glue thoroughly.
People also frequently mention that method mixing works better than sticking to one technique. For example, they may use a hair dryer to loosen a dry, brittle section near a doorway, then use a vinegar-and-water spray in a long stretch over drywall, and finally bring out a steamer for the stubborn area above a sink or stove. That’s not “doing it wrong”that’s being smart. Different sections of the same wall can behave differently.
One especially relatable experience is the “I scraped too hard” moment. It usually happens when the border is nearly off and frustration kicks in. A quick, aggressive scrape can tear the drywall face paper or leave gouges that require patching. The fix is manageablejoint compound, sanding, primerbut it adds time. Experienced DIYers often say the same thing afterward: lighter pressure and more soaking would have been faster than aggressive scraping.
There’s also the oddly satisfying side of the project. Once you find the right method for your wall, border removal can suddenly become smooth and almost therapeutic. Long strips peel away. The room looks cleaner. The wall line feels taller and more modern. Even before paint goes on, the space often looks dramatically updated. It’s one of those DIY jobs where visible progress can be surprisingly motivating.
Finally, many people say the biggest lesson is that prep and cleanup matter as much as the removal itself. Protecting floors, keeping a trash bag nearby, wiping glue residue thoroughly, and letting walls dry before painting all make the final result look professional. In short: the border removal is the headline, but the wall prep is what makes the makeover actually look good.


