
Table of Contents >> Show >> Hide
- What You’ll Need (and What You Should Definitely Not Need)
- Before You Start: Two Key Ideas That Make Testing Easy
- Step 1: Confirm the Problem Really Points to the Heating Element
- Step 2: Shut Off Power and Prove It’s Off (Yes, Really)
- Step 3: Access the Heating Element and Isolate It
- Step 4: Set Your Multimeter Correctly (So the Reading Means Something)
- Step 5: Measure Resistance Across the Element Terminals
- Step 6: Check for a Short to Ground (The “Sneaky Failure” Test)
- Step 7: Reassemble, Then Decide the Next Smart Move
- Troubleshooting Cheat Sheet: Common Meter Readings
- FAQ: Quick Answers That Save Time
- Experience Notes: The Stuff People Only Learn After the Third Screw-Up (Extra)
- Conclusion
A heating element is basically a tough little metal “toaster wire” (sometimes coiled, sometimes hidden inside a metal sheath)
that turns electricity into heat. When it fails, your dryer tumbles but stays cold, your oven takes a nap instead of baking,
or your water heater delivers “lukewarm sadness.”
The good news: you can often test a heating element in under 20 minutes with a multimeterno magic, no guessing, and
no “I replaced three parts and now it’s haunted” situations. The better news: once you learn the pattern (power off,
isolate the part, measure resistance, check for shorts), you can apply it to lots of appliances.
What You’ll Need (and What You Should Definitely Not Need)
- Digital multimeter with resistance (Ω) and ideally continuity (beep) mode
- Screwdriver (or nut driver) to remove access panels
- Work gloves (sheet metal edges are rude)
- Phone camera for “before” photos of wire locations
- Optional but smart: non-contact voltage tester
What you should not need: bravery, luck, or a second life. Electricity doesn’t care how confident you feelso
we’ll do this safely and methodically.
Before You Start: Two Key Ideas That Make Testing Easy
1) Resistance is the element’s “fingerprint”
Heating elements are resistive loads. A healthy element usually shows a stable resistance value (measured in ohms, Ω).
If the element is broken internally, the meter often reads “OL” (open loop) or infinite resistance. If it’s shorted,
the meter may read near 0 Ω (or beep like it’s thrilled about bad news).
2) Your expected ohms depend on wattage and voltage
The most reliable way to know what “good” looks like is to use the rating label (volts and watts) and Ohm’s Law:
R = V² ÷ P.
- Example (water heater): 240V and 4500W → R = 240×240 ÷ 4500 = 57,600 ÷ 4,500 = 12.8 Ω
- Example (120V space heater): 120V and 1500W → R = 14,400 ÷ 1,500 = 9.6 Ω
If you don’t know the wattage, you can still test for “obvious failure” (open circuit or short to ground), but having
the specs makes diagnosis much cleaner.
Step 1: Confirm the Problem Really Points to the Heating Element
Testing is faster when you start with symptoms. Heating elements commonly fail in a few predictable ways:
- Dryer: runs and tumbles but no heat; sometimes trips a thermal fuse after overheating
- Oven/range: preheats forever, bakes unevenly, or won’t heat in bake/broil mode
- Dishwasher: dishes come out wet/cool; drying performance drops
- Water heater: not enough hot water, or hot water runs out quickly (one element may be out)
Quick reality check
A bad heating element is common, but it’s not the only suspect. Thermostats, control boards, relays, thermal fuses,
and wiring can also stop heat. That’s why we test instead of playing “parts roulette.”
Step 2: Shut Off Power and Prove It’s Off (Yes, Really)
This step is non-negotiable. Unplug the appliance when possible. For hardwired units (like many water heaters and some
baseboard heaters), shut off the correct breaker.
How to verify power is off
- Use a non-contact voltage tester near the wiring (helpful first check).
- Use a multimeter set to AC voltage to confirm there’s 0 volts where you’ll be working.
In U.S. homes, normal 120V circuits often measure roughly in the neighborhood of 120V (commonly around 114–126V).
Seeing anything near that range where you’re about to touch means you’re not ready to proceed.
Safety bonus points: avoid damp areas, keep your hands dry, and don’t work alone if you can help it. (Your future self
will thank you.)
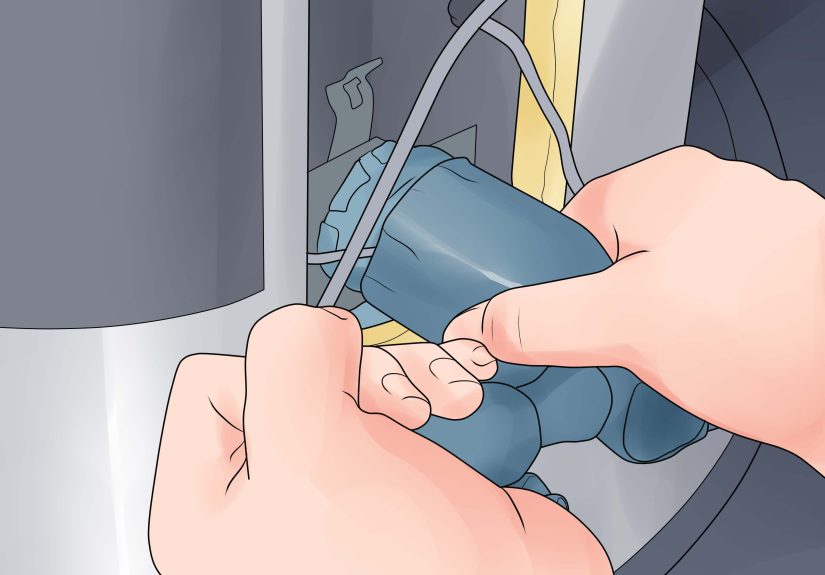
Step 3: Access the Heating Element and Isolate It
Locate the heating element and remove the access panel. Thenthis is the part people skipdisconnect at least one wire
from the element terminal(s). Why? Because if the element is still connected to the rest of the circuit, your meter may read through
other components and give you misleading results.
Pro move: take a photo first
Snap a clear photo of the wiring before you remove anything. It’s the easiest insurance policy you’ll ever buy (and it’s free).
Appliance notes
- Dryer: element is often in a metal housing; edges can be sharp.
- Oven: bake element terminals are usually accessible from the back panel or inside the oven cavity (varies by model).
- Dishwasher: the heater may be at the bottom; access often requires removing lower panels.
- Water heater: remove the access cover and insulation to reach the element terminals.
Step 4: Set Your Multimeter Correctly (So the Reading Means Something)
Plug the black lead into COM and the red lead into the VΩ port. Set the dial to:
- Continuity mode (often a sound-wave symbol): quick pass/fail “beep test”
- Resistance (Ω): for the actual ohms value
Quick meter sanity check
Touch the probes together. In resistance mode you should see a very low number close to 0 Ω (some meters show a tiny
value because of probe resistance). In continuity mode, you should hear a beep.
If your meter has ranges (instead of auto-ranging), pick a low resistance range like 200 Ω for many appliance elements.
If the meter instantly reads “OL,” try a higher rangebut don’t panic: “OL” can also mean the element is open (broken).
Step 5: Measure Resistance Across the Element Terminals
Place one probe on each heating element terminal (the two screws/tabs the wires connect to). You’re measuring the element’s
internal resistance.
How to interpret the number
- Steady reading in a reasonable range: element may be okay
- OL / infinite resistance: element is open (failed)
- Near 0 Ω: element may be shorted (failed)
Real-world “reasonable ranges” (examples)
These aren’t universal, but they’re useful reference points:
- Electric water heater elements (240V): often land roughly in the 5–25 Ω neighborhood; common wattages can read around
~15–16 Ω (3500W), ~12–13 Ω (4500W), or ~10–11 Ω (5500W). - Electric dryer heating element: many read around the mid-teens in ohms (varies by design).
- Dishwasher heating element: often reads in the teens to a few dozen ohms, depending on model.
- Oven bake elements (240V): commonly fall in a broad range depending on wattage; calculating expected ohms from the rating
is the cleanest approach.
Use the rating plate for a confident verdict
If the element (or appliance) label says something like “240V 3000W,” your target is:
240×240 ÷ 3000 = 57,600 ÷ 3,000 = 19.2 Ω.
If you measure something wildly different (or OL), you’ve found your culprit.
Tip: resistance can shift slightly with temperature, but it shouldn’t be chaotic. If your reading jumps around a lot,
check for poor probe contact, corrosion on terminals, or a wire still connected somewhere it shouldn’t be.
Step 6: Check for a Short to Ground (The “Sneaky Failure” Test)
A heating element can sometimes look fine on the resistance test but still be unsafe or nonfunctional because it’s shorting
to the metal housing (ground). This can trip breakers, blow fuses, or cause erratic heating.
How to do the ground test
- Keep the power OFF and the element wires disconnected.
- Place one probe on an element terminal.
- Place the other probe on the metal frame/housing (or the element’s metal base, depending on design).
- Repeat for the other terminal.
What you should see
- Good: OL / infinite resistance (no continuity to ground)
- Bad: any measurable resistance or a continuity beep (indicates a short path to ground)
If you get continuity to the frame, stop there and plan for replacement or professional servicethis isn’t the kind of
“character flaw” you want in an electrical part.
Step 7: Reassemble, Then Decide the Next Smart Move
If the element tested bad (open or shorted), replacement is typically the fixbut always match parts to your exact model.
If the element tested good, don’t worry: you didn’t “waste time.” You just eliminated the most common suspect and saved yourself
from buying a part you didn’t need.
If the element tests good, what else should you check?
- Thermal fuse / high-limit switch: common in dryers and dishwashers; if open, it can cut power to heat
- Thermostat: can fail open and prevent heating commands
- Relays/control board: may not be sending voltage to the element even if the element is fine
- Wiring/connectors: loose or burned terminals can mimic a bad element
Water heater specific “don’t skip this” note
Never energize an electric water heater unless the tank is completely full of water. Running an element “dry” can burn it out quickly.
If your elements test fine but hot water still stinks (literally or figuratively), sediment buildup can reduce performance,
and periodic flushing is commonly recommended as maintenance.
Troubleshooting Cheat Sheet: Common Meter Readings
- OL across terminals: element is broken/open → replace
- 0.0 Ω (or nearly zero) across terminals: element shorted → replace
- Normal-ish Ω across terminals, OL to ground: element likely okay → check controls/fuses/wiring
- Any Ω to ground / continuity beep to frame: grounded element → replace and inspect related damage
FAQ: Quick Answers That Save Time
Can I test a heating element without removing it?
Often, yesif you can access the terminals and disconnect at least one wire to isolate it. Full removal is usually only
needed for replacement or if access is terrible.
Should I use continuity mode or resistance mode?
Use continuity for a fast “is it open?” check, and resistance mode for the real diagnostic valueespecially when you want
to compare against the expected ohms from the rating.
My reading is “kind of close.” Is that good enough?
If it’s close to the calculated target and stable, it’s usually fine. If it’s far off (or drifting wildly), suspect
poor probe contact, corrosion, a still-connected wire path, or an element that’s failing under load.
When should I call a pro?
If the unit is hardwired and you’re not comfortable verifying voltage, if you see burned wiring, if breakers trip repeatedly,
or if testing requires disassembling gas components (for gas appliances), it’s time for a qualified technician.
Experience Notes: The Stuff People Only Learn After the Third Screw-Up (Extra)
If you hang around DIY forums long enough, you’ll notice a pattern: most “my multimeter says the element is fine, but it still won’t heat”
stories aren’t about broken physicsthey’re about tiny process mistakes. Here are the most common real-world experiences people report,
plus how to avoid the facepalm moment.
The #1 classic: testing without isolating the element
Someone puts probes on the terminals, gets a plausible ohms number, and declares victory… only to discover later the reading was traveling
through a control board, relay coil, or another circuit path. The fix is boring but effective: disconnect at least one wire from the element
before testing. If you do that every time, your meter stops “telling stories” and starts telling the truth.
The “OL panic” that turns into a settings issue
Another common experience: the meter shows “OL,” and the homeowner assumes the element is deadthen they realize the multimeter is set to
the wrong mode or range. This happens a lot on manual-range meters. The quick habit that prevents it: touch the probes together before the
test. If the meter can’t show near-zero Ω (or can’t beep in continuity), it’s not ready to diagnose anything except your patience.
Probe contact matters more than people expect
Heating element terminals can be oxidized, dusty, or slightly loose. Many DIYers report “jumping numbers” that disappear when they press the
probes firmly on clean metal (or lightly scrape corrosion off the terminal). A stable reading is what you want. If it’s jittery, treat that
as a clue: either the contact is bad, or the part is failing in a way that isn’t consistentboth are worth addressing.
The “it tested good, so I’m done” trap
Plenty of people test a water heater element and get a reasonable resistance readingthen stop, even though the shower is still cold.
The next chapter is usually one of these: a thermostat isn’t closing, a thermal cutoff is open, a control board isn’t sending voltage,
or a wire connector is heat-damaged. The experience lesson is simple: testing the element answers one question“is this coil intact and not
grounded?”not every question about the heating system.
Dryer vents: the villain in the background
Dryer heating elements often fail for a reason. A super-common field experience: restricted airflow (clogged vent, crushed hose, lint-packed duct)
leads to overheating, which can trip safety devices or cook the element over time. People replace the element, it works briefly, then fails again.
The smarter experience-based routine is: if you’re diagnosing dryer heat, treat airflow as part of the test. A clean lint screen isn’t the same
thing as a clear vent run.
Water heaters and the “dry fire” heartbreak
Many homeowners only make this mistake once: restoring power to an electric water heater before the tank is completely full. The element heats in
air, runs extremely hot, and can burn out quickly. The experience tip is: after any drain/refill work, open a hot faucet and let it run until the
flow is steady (no spitting air), then restore power. It’s a small ritual that saves you from buying a brand-new element you didn’t need to sacrifice.
Bottom line: testing a heating element is straightforward, but the best results come from a consistent routinepower off, verify, isolate, measure,
ground-check, and only then decide what’s next. Do it that way, and your multimeter becomes less of a mysterious gadget and more of a very honest friend
(the kind who tells you the truth even when you don’t want to hear it).
Conclusion
Testing a heating element doesn’t require guessworkjust a safe process and a multimeter set to the right mode. Once you isolate the element,
measure resistance across its terminals, and confirm there’s no short to ground, you’ll know whether the element is truly the problem or whether
the issue lies upstream (thermostats, fuses, wiring, or controls). The payoff is big: faster fixes, fewer unnecessary parts, and a lot less
“why is my laundry still damp?” energy.


