
Table of Contents >> Show >> Hide
- What a Laser Level Really Does (and What It Doesn’t)
- Pick the Right Laser Level for the Job
- Before You Turn It On: A Quick Setup Checklist
- Step-by-Step: How to Use a Laser Level for Perfectly Straight Lines
- Step 1: Decide What “Perfect” Means for This Project
- Step 2: Choose a Reference Height (Measure Twice, Laser Once)
- Step 3: Mount the Laser Level Securely
- Step 4: Unlock the Pendulum (If Your Model Has One) and Power On
- Step 5: Let the Laser Self-Level (and Watch for Warnings)
- Step 6: Fine-Tune the Position Without Changing the Height
- Step 7: Mark the Line the Smart Way (Center It)
- Step 8: Work Off the LaserDon’t Chase It
- Real-World Project Examples (Where Laser Levels Pay for Themselves)
- Common Mistakes (and How to Fix Them Fast)
- How to Check Accuracy (Calibration) Before Big Layout Jobs
- Care, Storage, and Keeping Your Laser Level Happy
- Experience Notes (Extra ): Lessons People Learn After the First Few Projects
- Conclusion
If you’ve ever tried to draw a “perfectly straight” line with a pencil, a tape measure, and pure confidence… you already know how this ends:
the line looks great until you step back, squint, and realize it’s doing a gentle little wave like it’s greeting the neighbors.
A laser level is the cure for that kind of heartbreak.
Whether you’re hanging a gallery wall, setting cabinets, running wainscoting, laying tile, or marking studs for shelves,
a laser level gives you a crisp reference line that doesn’t get tired, doesn’t blink, and doesn’t “eyeball it” after lunch.
Use it correctly, and your projects look clean, intentional, and suspiciously professional.
What a Laser Level Really Does (and What It Doesn’t)
A laser level projects a straight beam of light that acts like a floating guideline. Depending on the model, you might get:
a horizontal line (level), a vertical line (plumb), a cross (both), multiple 360-degree planes, or dots for transferring points.
Here’s the important part: the laser is only as honest as its setup. If the tool is out of calibration, sitting on a wobbly tripod,
or flashing because it’s outside its self-leveling range, the laser will confidently project a straight line that is also confidently wrong.
(We love confidence. We love accuracy more.)
Pick the Right Laser Level for the Job
Line and Cross-Line Lasers (Most DIY-Friendly)
These project one line or a cross (horizontal + vertical). They’re excellent for hanging pictures, shelves, mirrors,
aligning cabinet runs, or setting tile layout lines. If you’re working mostly indoors, this is the sweet spot for value and simplicity.
360-Degree Line Lasers (When You Want the Line to Wrap the Room)
A 360-degree laser projects a full plane around the roomgreat for chair rail, wainscoting, drop ceilings,
consistent outlet heights, or leveling across multiple walls without constantly moving the tool.
Dot / Plumb-Point Lasers (Point Transfer Specialists)
These project dots instead of lines. They shine (pun fully intended) for transferring a point from floor to ceiling,
squaring layouts, and plumbing up/down when you don’t need a long continuous line.
Rotary Lasers (Bigger Sites and Outdoor Work)
Rotary lasers spin to create a level plane across long distances. They’re common for grading, decks, fences, and foundations.
Outdoors, you usually pair them with a laser detector/receiver because bright daylight can wash out the beam.
Red vs. Green Lasers (Visibility Matters)
Green beams are generally easier to see, especially in brighter conditions. If you’re working near windows, under strong work lights,
or outside, a green-beam model can feel like a cheat code. If you’re in a dim hallway hanging frames, red is usually fine.
Before You Turn It On: A Quick Setup Checklist
- Power check: fresh batteries or a fully charged pack (weak power can reduce visibility and reliability).
- Mounting: tripod, pole, magnetic base, wall bracket, or a stable flat surface.
- Marking tools: pencil, painter’s tape, measuring tape, and a notepad (yes, really).
- Visibility helpers: target plate, laser-enhancing card, or a detector for outdoor/long-distance work.
- Safety sanity check: keep the beam away from eye level and avoid aiming toward reflective surfaces.
Pro organizer tip: put painter’s tape where you plan to mark. Pencil marks show up better, and you won’t “accidentally” decorate your wall
with twelve practice ticks that look like a squirrel took the SAT.
Step-by-Step: How to Use a Laser Level for Perfectly Straight Lines
Step 1: Decide What “Perfect” Means for This Project
“Perfectly straight” usually means one of three things:
level (horizontal), plumb (vertical), or aligned (straight relative to another featurelike a countertop edge or tile pattern).
Pick the reference you actually need before you start projecting light everywhere like you’re auditioning for a sci-fi movie.
Step 2: Choose a Reference Height (Measure Twice, Laser Once)
Mark a starting point at the height you wanttop of a shelf, centerline of a picture row, height of cabinet bottoms, or the first tile course.
Use a tape measure to get that point accurate, because the laser will faithfully extend whatever you decide… including mistakes.
Step 3: Mount the Laser Level Securely
The best laser line is the one that doesn’t jiggle when you breathe. Tripods are great for this.
If you’re using a wall mount or magnetic base, confirm it’s solid and won’t slowly slide down like a sad elevator.
- Tripod: best for rooms, long runs, and repeatable setups.
- Wall bracket/pins: great for picture hanging or quick wall layouts.
- Magnetic base: handy on metal studs, corner bead, or steel track.
- Flat surface: works in a pinch, but check for wobble.
Step 4: Unlock the Pendulum (If Your Model Has One) and Power On
Many self-leveling lasers use a pendulum mechanism that must be unlocked to self-level. When locked, some models can project lines for angled layouts,
but they won’t self-level. Translation: great for stair rail angles; terrible if you’re trying to make cabinets actually level.
Step 5: Let the Laser Self-Level (and Watch for Warnings)
A self-leveling laser needs a moment to settle. If the unit is too far out of level, many models flash the beam to warn you.
If you see flashing, don’t “trust the vibes.” Adjust the tripod legs or move to a flatter surface until the laser stabilizes.
Step 6: Fine-Tune the Position Without Changing the Height
Once the beam is at the correct height, rotate or slide the laser until the line hits your reference mark.
Many mounts have micro-adjust knobsuse them. This is how you avoid the classic move of nudging the laser and accidentally shifting it
up 1/8 inch, which is the DIY equivalent of stepping on a LEGO.
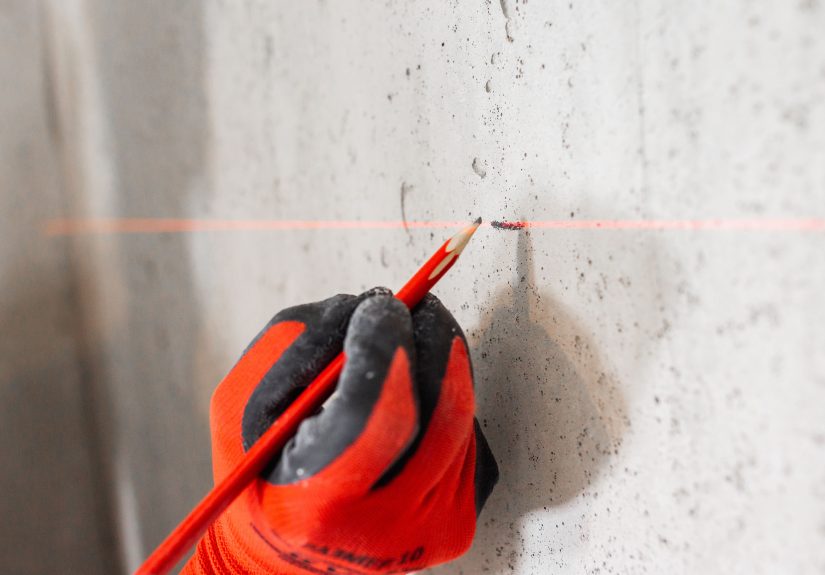
Step 7: Mark the Line the Smart Way (Center It)
Laser lines can look thicker at distance or on textured walls. When marking, aim for the center of the beam, not the fuzzy edge.
If your model projects a cross, mark the intersection point where neededcrosshairs are your friend.
Step 8: Work Off the LaserDon’t Chase It
Keep the laser in place and install/align your material to the line. If you move the laser mid-task,
re-check the reference mark before continuing. Your future self will thank you, and your trim will stop whispering “crooked” at night.
Real-World Project Examples (Where Laser Levels Pay for Themselves)
Hanging Pictures in a Straight Row (or a Gallery Wall Grid)
Decide the visual anchor: top edges aligned, centers aligned, or bottom edges aligned.
Project a horizontal line at that height. Mark frame positions with small tape flags on the line,
then measure equal spacing between frames. Hang hardware, then align frames to the laser line for final placement.
Installing Wall Shelves That Don’t Look “Tired”
Project a level line where the shelf should sit. If you’re installing multiple shelves,
mark bracket hole locations along the line. Use the laser line to keep both ends consistent while you drill and mount.
Bonus: project a vertical line too, so you can keep brackets plumb and symmetrical.
Setting Kitchen Cabinets Like You Mean It
Use a horizontal laser line to establish a consistent “cabinet baseline” across the wall.
The laser lets you spot a floor that slopes or a wall that bowsbefore you permanently attach anything.
Once you have the baseline, shim and adjust cabinets to match the line, rather than trusting an old house to behave.
(Old houses are charming. They are not obedient.)
Tile Layout for Backsplashes and Shower Walls
A laser makes it much easier to keep tile courses straight and aligned, especially over long runs.
Project a level line for your starting course or your feature band. Then use a vertical line to keep grout joints stacked and straight.
Work in manageable sections and keep checking that your tile edges track the laser lines.
Chair Rail, Wainscoting, and Long Trim Runs
For trim that wraps around the room, a laser line beats measuring every stud bay.
Choose your rail height, set a 360-degree line if available (or reposition a cross-line carefully), and mark reference points around the room.
Install trim to the line and you’ll avoid the “it looks fine on one wall but climbs Everest on the next wall” effect.
Checking a Door Jamb for Plumb
A vertical laser line can help you verify plumb on door jambs. Place the laser a few inches off the jamb,
use tape marks at hinge locations, and compare the distance from the laser line to the jamb at each point.
Shim until the measurements match and the jamb is plumb.
Common Mistakes (and How to Fix Them Fast)
“The Laser Line Is Flashing. Is That… Bad?”
Flashing usually means the tool can’t self-level because it’s outside its leveling range.
Fix: adjust the tripod legs, move to a flatter surface, or re-mount the tool so it’s closer to level.
“My Line Looks Thick and Fuzzy.”
Distance, surface texture, and bright light can make lines look wider. Fix: dim the lights, close blinds, use a target plate,
and mark the center of the beam.
“It Was Perfect… Until I Bumped the Tripod.”
This is why pros love sturdy tripods and secure mounts. Fix: re-check your original reference mark and re-align before continuing.
If you’re mid-install (like tile), pause and verify alignment before the thinset sets your fate in stone.
“I Used It Yesterday and Today It’s Off.”
Drops, hard knocks in the truck, and temperature swings can affect accuracy. Fix: do a quick calibration check (below) before starting critical layout work.
How to Check Accuracy (Calibration) Before Big Layout Jobs
You don’t need a lab to do a basic accuracy checkyou need space, patience, and the willingness to mark a wall and then trust math over optimism.
Always follow your manufacturer’s instructions, but here are practical approaches used in many manuals and jobsite routines.
Quick Cross-Line Check (Two-Wall Method)
- Set the laser on a tripod or stable surface near one wall.
- Turn it on in cross-line mode and let it self-level.
- Mark the cross point on the near wall.
- Rotate the laser 180 degrees (without moving its position) and mark the cross point again.
- If the points differ beyond your model’s stated tolerance, the unit may need service or recalibration.
Plumb Dot / Vertical Check (Floor-to-Ceiling, Rotate 180°)
If your laser has plumb points (up and down dots), you can check plumb by marking a floor point,
centering the down dot on it, then marking where the up dot lands on the ceiling. Rotate the tool 180 degrees and repeat.
Compare the ceiling marks. If the difference exceeds the tolerance listed by your manufacturer, the unit is out of calibration.
If you’re doing finish work where 1/8 inch matters (hello, tile and cabinets), it’s worth doing these checks regularly.
A 3-minute calibration check is cheaper than redoing a backsplash.
Care, Storage, and Keeping Your Laser Level Happy
- Lock it for transport: if your model has a pendulum lock, use it before moving or storing the tool.
- Use a case: lasers are more sensitive than a framing hammer. A padded case prevents accidental recalibration-by-drop.
- Remove batteries for long storage: helps prevent corrosion.
- Keep lenses clean: dust on the emitter window can make the beam dim or distorted.
- Don’t “test” the beam with your eyes: keep it below eye level and avoid reflective surfaces.
Experience Notes (Extra ): Lessons People Learn After the First Few Projects
Laser levels are one of those tools that feel almost too easyuntil you use one for real work and discover the small “gotchas”
that separate a clean install from a weekend-long mystery novel titled Why Is This Not Lining Up?
The good news: most of the learning curve is just developing a few habits.
One of the biggest early realizations is that mounting matters more than you expect. People start by balancing the laser on a paint can,
a stack of scrap wood, or whatever object in the room seems emotionally stable. Then they wonder why the line drifts when someone walks by.
A decent tripod (or a solid wall mount) turns the laser from “neat gadget” into “layout superpower.”
Another common “aha” moment: laser visibility is a lighting battle. Bright rooms with daylight pouring in can wash out the line,
especially with red lasers. The workaround isn’t complicatedclose the blinds, dim the lights, and use a target plate or laser card.
For longer distances or outdoor work, people quickly fall in love with laser detectors/receivers because suddenly the beam is “visible” again
through beeps and readings, even when your eyes can’t pick it up.
There’s also a universal rite of passage: marking the wrong part of the beam. Laser lines aren’t razor-thin on every surface.
Texture, distance, and angle can make them look wide. A lot of DIYers mark the edge of the line, then mark the other edge somewhere else,
and then get a result that’s technically straight but slightly off. The fix is simple: consistently mark the center of the beam,
or use the brightest center point as your “true” reference.
People also learn to respect the flashing. When a self-leveling laser flashes, it’s not being dramaticit’s telling you it can’t level itself.
The first instinct is to ignore it and keep going (because you’re already in “project mode”), but that’s how you end up installing a shelf that looks fine
until you put books on it and realize the whole thing is doing a gentle downhill ski slope. When it flashes, adjust the base until the line becomes solid.
And finally, experienced users develop a little routine: they do a quick accuracy check before “no-mistakes-allowed” work.
Hanging one picture? You can probably proceed. Installing cabinets, tile, or trim that wraps an entire room? A quick calibration check is cheap insurance.
Once you’ve had to redo a long run because the laser took a hit in the toolbox, you become a believerfast.
The overall vibe from people who use laser levels regularly is consistent: the tool doesn’t just make lines straight,
it makes decisions easier. You stop second-guessing, stop re-measuring in three different ways, and start building with a reference you can trust.
That’s when your projects stop looking “DIY” and start looking “done.”
Conclusion
A laser level is one of the fastest ways to upgrade your resultsbecause it replaces guesswork with a clear, consistent reference line.
Mount it securely, let it self-level, mark the center of the beam, and use the laser as your guide while you install.
Add quick calibration checks and smart storage habits, and you’ll get perfectly straight lines that stay perfectly straight.


