
Table of Contents >> Show >> Hide
- Why Winterizing Your Home Matters
- Start With a Whole-Home Winter Inspection
- Seal Air Leaks Around Windows and Doors
- Improve Attic Insulation and Air Sealing
- Service Your Heating System Before the First Freeze
- Protect Pipes From Freezing
- Clean Gutters and Prevent Ice Dams
- Prepare the Fireplace, Chimney, and Wood Stove
- Check Smoke and Carbon Monoxide Alarms
- Winterize the Basement, Crawlspace, and Garage
- Prepare for Power Outages and Winter Storms
- Protect Outdoor Equipment and Landscaping
- Create a Simple Winter Home Maintenance Schedule
- Common Winterizing Mistakes to Avoid
- Experience-Based Tips: What Winterizing Teaches You After a Few Cold Seasons
- Conclusion
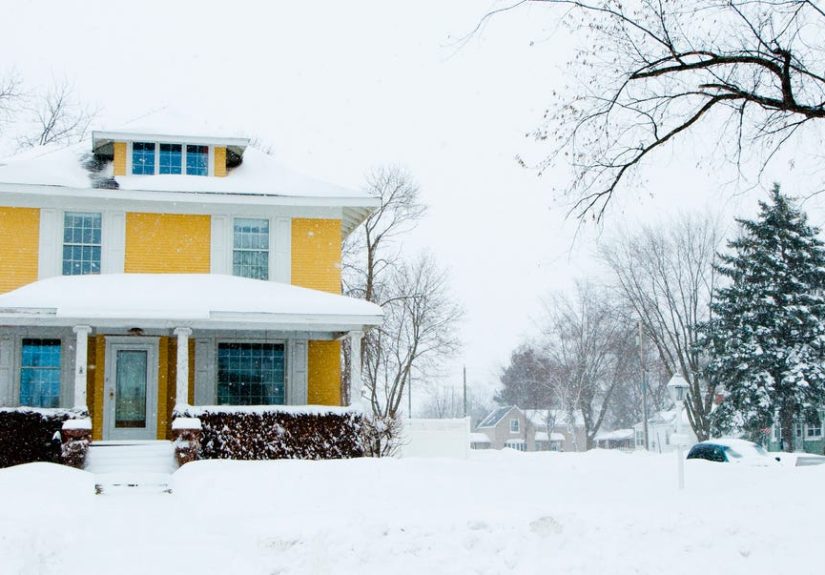
Winter has a funny way of showing up like an uninvited guest with icy boots, a dramatic wind machine, and a talent for finding every tiny crack in your house. One week you are casually admiring fall leaves; the next, your living room feels like a walk-in freezer and your heating bill appears to have joined a luxury gym. That is why learning how to winterize your home is not just a seasonal choreit is a smart way to protect your comfort, your budget, and the pipes that quietly keep modern life from turning into a soggy disaster.
Winterizing a home means preparing it for cold temperatures, snow, ice, high winds, power outages, and moisture problems before the worst weather arrives. The goal is simple: keep warm air in, keep cold air and water out, help your heating system work efficiently, and reduce the risk of expensive damage. Whether you live in a snowy northern state, a mild climate that occasionally gets surprise freezes, or a place where winter means “cold enough to complain but not cold enough for a sled,” a good winter home maintenance checklist can make a major difference.
This guide walks through practical, homeowner-friendly steps to winterize your housefrom sealing drafts and protecting pipes to cleaning gutters, servicing your furnace, preparing emergency supplies, and making your home safer during storms. Think of it as a winter coat for your home, except with fewer zippers and more caulk.
Why Winterizing Your Home Matters
Cold weather is not just uncomfortable. It can put stress on almost every part of a home: the roof, gutters, plumbing, heating equipment, windows, doors, foundation, attic, and exterior walls. Small problems that seem harmless in October can become expensive in January. A loose piece of weather stripping becomes a draft. A clogged gutter becomes an ice dam. An uninsulated pipe becomes a burst pipe. A neglected furnace becomes a very chilly phone call to an HVAC technician during the busiest week of the year.
Winterizing your home also helps reduce energy waste. When warm air leaks through gaps around windows, doors, attics, recessed lights, and ductwork, your heating system has to work harder. That means more energy use, higher bills, and rooms that never quite feel comfortable no matter how many blankets you deploy. A well-prepared home holds heat better, feels more even from room to room, and is less likely to surprise you with midwinter repairs.
Start With a Whole-Home Winter Inspection
Before you buy supplies, walk around your home with a notebook or your phone. Look at it from the perspective of cold air, rain, snow, and pests. Where could they get in? Where could water collect? Which areas already feel drafty? The best winterization plan starts with observation.
Check the Exterior First
Walk around your house and inspect siding, foundation vents, hose bibs, exterior doors, windows, roof edges, and gutters. Look for cracks, gaps, peeling caulk, missing shingles, loose trim, damaged screens, and places where utility lines enter the home. Even tiny openings can let in cold air, moisture, and occasionally mice who believe your pantry is a winter resort.
Pay special attention to areas where different materials meet: brick and wood, siding and foundation, pipes and walls, window frames and trim. These seams often shrink, crack, or separate over time. Seal small gaps with exterior-grade caulk, expanding foam, or appropriate weatherproof sealant. For larger structural cracks, damaged flashing, or suspicious foundation issues, call a qualified professional.
Inspect the Interior for Drafts
Inside the house, check around baseboards, electrical outlets on exterior walls, attic hatches, basement rim joists, fireplaces, doors, and windows. On a windy day, you may be able to feel drafts with your hand. You can also hold a lightweight tissue near suspected areas and watch for movement. If the tissue flutters like it just heard gossip, you have found a leak.
Drafts do more than make a room uncomfortable. They create temperature swings that force your heating system to cycle more often. Sealing these leaks is one of the most practical ways to winterize your home because it improves comfort immediately and supports long-term energy efficiency.
Seal Air Leaks Around Windows and Doors
Windows and doors are classic cold-weather trouble spots. Even newer units can leak air if the caulk has aged, the weather stripping is compressed, or the door sweep no longer reaches the threshold.
Use Weather Stripping and Door Sweeps
Weather stripping is affordable, easy to install, and surprisingly satisfying. Apply it around door frames and operable windows where you see gaps or feel drafts. For exterior doors, install or replace door sweeps at the bottom. A good door sweep should lightly touch the threshold without making the door difficult to open.
If you can see daylight around a closed door, that is not charming natural lightingit is money leaving the building. Seal it before winter arrives.
Caulk Window and Door Trim
Use paintable interior caulk for gaps around interior trim and exterior-grade caulk for outside joints exposed to weather. Remove loose or cracked old caulk first, clean the surface, and apply a smooth bead. Caulking is not glamorous, but neither is wearing a coat indoors while paying for heat.
Consider Window Insulation Film
For older windows, temporary plastic window insulation film can add another layer of protection. These kits are usually applied with double-sided tape and tightened with a hair dryer. They are not a replacement for efficient windows, but they can reduce drafts in bedrooms, basements, rental homes, and older houses where full window replacement is not in the budget.
Improve Attic Insulation and Air Sealing
If your house had a winter energy report card, the attic would probably be the teacher’s note written in red ink. Warm air rises, and if your attic is poorly sealed or under-insulated, heat escapes upward. That can increase heating costs, create uncomfortable rooms, and contribute to roof snow melting unevenly, which may lead to ice dams.
Seal Before You Insulate
Many homeowners think insulation alone fixes everything. Insulation is important, but air sealing should usually come first. Seal gaps around plumbing penetrations, wiring holes, chimneys, attic hatches, recessed lights, and top plates where walls meet the attic floor. Use fire-rated materials where required, especially around chimneys, flues, and heat-producing fixtures.
Once air leaks are sealed, insulation can do its job more effectively. Otherwise, warm air simply sneaks around it like a kid avoiding chores.
Check Insulation Levels
Attic insulation should be even, dry, and deep enough for your climate zone. If you can easily see the tops of ceiling joists, your attic may need more insulation. Common attic insulation types include fiberglass batts, blown-in fiberglass, cellulose, and spray foam in certain applications. If you notice wet insulation, mold, animal activity, or poor ventilation, solve those problems before adding more material.
Service Your Heating System Before the First Freeze
Your heating system is the star employee of winter. Do not wait until the coldest night of the year to discover it has been quietly planning retirement. Schedule professional service for your furnace, boiler, or heat pump before peak season. A technician can inspect safety controls, burners, heat exchangers, electrical components, filters, vents, and overall performance.
Replace or Clean Filters
Dirty filters restrict airflow, reduce efficiency, and make heating equipment work harder. Check filters monthly during heavy use and replace or clean them according to the manufacturer’s instructions. Homes with pets, dust, or frequent HVAC use may need more frequent changes.
Clear Vents and Registers
Make sure furniture, rugs, curtains, toys, and laundry piles are not blocking supply or return vents. Air needs room to move. A blocked vent is like asking your heating system to run a marathon while wearing a scarf over its face.
Test Your Thermostat
Before winter fully arrives, switch the thermostat to heat and confirm the system responds. If you have a programmable or smart thermostat, set a schedule that balances comfort and savings. Lowering the temperature while you sleep or when the house is empty can help reduce energy use, but avoid setting it too low during freezing conditions, especially if pipes run through exterior walls, crawlspaces, or unheated areas.
Protect Pipes From Freezing
Frozen pipes are one of winter’s most expensive tricks. When water freezes, it expands. That pressure can crack pipes or fittings, and when the ice thaws, water may pour into walls, ceilings, cabinets, or basements. Preventing frozen pipes is much easier than cleaning up after one.
Insulate Vulnerable Pipes
Focus on pipes in unheated or poorly heated areas, such as basements, crawlspaces, garages, attics, exterior walls, and under sinks. Foam pipe insulation sleeves are inexpensive and easy to install. For very cold areas, heat tape or heat cable may be appropriate, but it must be used exactly as directed by the manufacturer to reduce fire risk.
Disconnect Garden Hoses
Before freezing weather, disconnect garden hoses, drain them, and store them indoors. Shut off interior valves that supply outdoor faucets if your home has them, then open the outdoor faucet to let remaining water drain. Add insulated faucet covers for extra protection.
Know Your Main Water Shutoff
Every household member old enough to understand basic safety should know where the main water shutoff valve is and how to use it. If a pipe bursts, fast action can limit damage. Label the valve clearly. Practice turning it off before there is an emergency, not while water is auditioning for an indoor waterfall feature.
Let Faucets Drip During Extreme Cold
During severe cold snaps, allowing a small trickle of water from vulnerable faucets can help keep water moving. Open cabinet doors under sinks on exterior walls so warmer room air can reach the pipes. Keep the home heated consistently, especially overnight and when you are away.
Clean Gutters and Prevent Ice Dams
Gutters are not decorative roof jewelry. They move water away from your home. When gutters clog with leaves, twigs, and roof grit, meltwater can back up, freeze, and contribute to ice dams. Ice dams form when snow melts on a warm part of the roof and refreezes near the colder edge. Water trapped behind the ice can seep under shingles and into the house.
Clear Gutters and Downspouts
Clean gutters after most leaves have fallen, and check downspouts to make sure water flows freely away from the foundation. Add downspout extensions if water drains too close to the house. Poor drainage can lead to basement moisture, foundation problems, and slippery walkways.
Address the Root Causes of Ice Dams
Ice dams are often linked to heat escaping into the attic. Better attic air sealing, proper insulation, and balanced roof ventilation can help reduce uneven roof temperatures. In snowy climates, a roof rake may help remove heavy snow from roof edges, but use caution from the ground and avoid damaging shingles. For serious ice-dam issues, consult a roofing or insulation professional.
Prepare the Fireplace, Chimney, and Wood Stove
A fireplace can make winter feel cozy, but it needs maintenance. Have chimneys and flues inspected and cleaned as recommended, especially if you burn wood. Creosote buildup can increase fire risk, and blocked chimneys can create dangerous ventilation problems.
Use a sturdy fireplace screen, keep flammable items away, and dispose of ashes in a metal container with a tight-fitting lid. Store the container outside, away from the house, garage, deck, or anything combustible. Warm ashes can remain dangerous longer than many people expect.
Check Smoke and Carbon Monoxide Alarms
Winter brings increased use of furnaces, fireplaces, space heaters, generators, and other fuel-burning equipment. That makes smoke alarms and carbon monoxide alarms essential. Install alarms in appropriate locations, test them regularly, and replace batteries or units according to manufacturer instructions.
Carbon monoxide is especially dangerous because it is colorless and odorless. Never use a gas oven to heat your home. Never run a generator, grill, camp stove, or gasoline-powered tool inside a house, garage, basement, crawlspace, porch, or near windows. Portable generators belong outside, far from openings, with exhaust directed away from the home.
Winterize the Basement, Crawlspace, and Garage
Basements, crawlspaces, and garages often contain plumbing, ductwork, water heaters, electrical panels, and storage. They are also common entry points for cold air and pests.
Seal Rim Joists and Foundation Gaps
The rim joist areathe wooden band around the top of the foundationis a frequent source of drafts. Sealing and insulating this area can improve comfort, especially in rooms above basements or crawlspaces. Use materials appropriate for moisture and fire-code requirements.
Protect Garage Plumbing
If you have water lines in or near the garage, keep the garage door closed during cold weather. Insulate exposed pipes and consider adding weather stripping to the garage door. Attached garages can lose heat quickly, and pipes in adjacent walls may be more vulnerable than you think.
Prepare for Power Outages and Winter Storms
Winter storms can bring power outages, blocked roads, and delayed repairs. A basic emergency kit helps your household stay safer and more comfortable until conditions improve.
Build a Winter Emergency Kit
Include flashlights, extra batteries, phone chargers or power banks, bottled water, nonperishable food, blankets, a first-aid kit, essential medications, pet supplies, hygiene items, and a battery-powered or hand-crank radio. Keep snow shovels, ice melt, and warm gloves accessiblenot buried in the back of the garage behind summer beach chairs and that mysterious box labeled “misc.”
Plan for Safe Backup Power
If you use a generator, follow all safety instructions carefully. Keep it outside, far from windows, doors, and vents. Use outdoor-rated extension cords in good condition, and never plug a generator directly into a household outlet unless a properly installed transfer switch is in place. When in doubt, call a licensed electrician.
Protect Outdoor Equipment and Landscaping
Winterizing your home also includes the yard. Drain and store hoses, shut down sprinkler systems, clean and cover patio furniture, and store garden tools. If you have an irrigation system, follow the manufacturer’s winterization process or hire a professional to blow out the lines.
Trim tree branches that hang over the roof, driveway, or power lines if they appear weak or damaged. Heavy snow and ice can bring branches down. For large trees or anything near electrical lines, hire a qualified arborist or contact the utility company.
Create a Simple Winter Home Maintenance Schedule
Winterizing feels easier when it is broken into stages. In early fall, inspect the home, schedule heating service, and plan bigger projects like insulation or roof repairs. In mid-fall, seal drafts, clean gutters, protect outdoor faucets, and test alarms. Before the first hard freeze, insulate pipes, store hoses, check emergency supplies, and confirm snow-removal tools are ready.
During winter, keep monitoring. After storms, check for ice buildup, blocked vents, fallen branches, gutter problems, and signs of leaks. Keep furnace vents, dryer vents, and exhaust pipes clear of snow. A little attention after each storm can prevent a small issue from becoming a “why is the ceiling dripping?” situation.
Common Winterizing Mistakes to Avoid
One common mistake is waiting too long. Contractors get busy, supplies sell out, and the weather rarely checks your calendar before freezing. Another mistake is sealing a home without thinking about ventilation. Air sealing is valuable, but fuel-burning appliances need proper venting, and homes need healthy airflow. If you are making major changes, especially in an older house, consider an energy audit or professional evaluation.
Homeowners also sometimes forget about vacant homes. If you leave for an extended winter trip, keep the heat at a safe level, shut off water if appropriate, arrange for someone to check the property, and make the home look occupied. A smart thermostat, leak detector, and trusted neighbor can be a very helpful trio.
Experience-Based Tips: What Winterizing Teaches You After a Few Cold Seasons
After you have lived through a few winters in a house, you start to learn its personality. Every home has one. Some houses are quiet and efficient. Some whistle at the windows. Some have one bedroom that turns into an ice cave every December. Winterizing becomes easier when you stop treating your home like a generic checklist and start paying attention to its habits.
One useful experience is to walk through your home on the first truly cold, windy night of the season. Not a sunny fall afternoon. Not a mild day when the house is behaving politely. Choose the night when the wind is making dramatic movie sound effects. That is when drafts reveal themselves. You may find cold air near the attic hatch, along baseboards, under the front door, or around outlets on exterior walls. Mark those spots with painter’s tape, then fix them when you have time and supplies.
Another lesson: the cheapest fixes often make the house feel better fast. A door sweep, a roll of weather stripping, foam outlet gaskets, a tube of caulk, and pipe insulation can improve comfort without turning your weekend into a construction documentary. Many homeowners assume winterizing means expensive upgrades, but small improvements can stack up. Sealing one drafty door may not change your life, but sealing five drafty spots can make a room feel noticeably calmer and warmer.
Pay attention to rooms above garages, rooms with many windows, and bathrooms or kitchens on exterior walls. These spaces often need extra help. If a sink sits against an outside wall, open the cabinet doors during deep freezes. If a room over the garage is always cold, check garage door seals and insulation. If one window collects condensation every morning, look at indoor humidity, ventilation, and air leaks around the frame.
Gutters are another area where experience quickly becomes wisdom. Cleaning gutters is not glamorous, but ignoring them can create expensive drama. A homeowner may skip it one fall and get away with it. Then one winter, leaves block the downspout, meltwater freezes, and suddenly there is ice hanging from the roof like a villain’s chandelier. Clean drainage is boring in the best possible way: when it works, nothing exciting happens.
Heating systems also reward routine. Replace filters before they look like ancient carpet samples. Learn the sound your furnace or heat pump normally makes so you can notice when something changes. Keep the area around equipment clear. Do not store paint cans, cardboard boxes, or holiday decorations against the furnace. Your heating system deserves breathing room, even if the holiday inflatable snowman does not agree.
Finally, winterizing teaches humility. You can do many things right and still get surprised by weather. That is why emergency supplies matter. A flashlight that works, a charged power bank, bottled water, extra blankets, pet food, and a snow shovel near the door can turn a stressful storm into a manageable inconvenience. Winter does not require panic. It rewards preparation, common sense, and the ability to laugh when you realize you stored the ice melt behind the lawn mower.
Conclusion
Winterizing your home is one of the smartest seasonal habits a homeowner can build. It protects your comfort, reduces energy waste, lowers the risk of frozen pipes, helps prevent water damage, and makes your household better prepared for storms. Start with the basics: seal drafts, improve insulation, service the heating system, protect plumbing, clean gutters, test alarms, and build an emergency kit. Then personalize your checklist based on your home’s age, climate, layout, and past trouble spots.
The best time to winterize is before winter arrives, but the second-best time is before the next cold snap. Your home does not need perfection. It needs attention. Give it that, and winter becomes less of a threat and more of a season you can handlewith warm socks, lower stress, and fewer surprise repair bills.


