
Table of Contents >> Show >> Hide
- Why Season a Red Copper Pan Matters
- Easy Ways to Season a Red Copper Pan: 12 Steps
- 1. Wash the pan before you do anything else
- 2. Dry it completely
- 3. Choose a simple oil
- 4. Apply a very thin layer to the inside cooking surface
- 5. Wipe off the extra oil
- 6. Preheat your oven to 300°F
- 7. Place the pan in the oven for 20 minutes
- 8. Use oven mitts when removing the pan
- 9. Let the pan cool completely
- 10. Wipe the surface one more time
- 11. Start cooking with low to medium heat
- 12. Re-season when performance starts slipping
- Best Habits After Seasoning Your Red Copper Pan
- Mistakes That Can Ruin Your Seasoning
- How Often Should You Season a Red Copper Pan?
- Quick FAQ About Red Copper Pan Care
- Conclusion
- Real-World Experiences With Seasoning a Red Copper Pan
If your Red Copper pan has gone from “look how beautifully this egg slides” to “why is breakfast glued on like a legal contract,” it probably needs a little attention. The good news is that seasoning a Red Copper pan is not a mysterious chef ritual performed only under a full moon. It is a simple maintenance step that helps your ceramic nonstick surface perform better and last longer.
Unlike raw cast iron, a Red Copper pan does not need a heavy-duty, smoke-filled seasoning saga. This is more of a quick conditioning routine: wash, dry, apply a very light coating of oil, heat it, cool it, and wipe away the extra. That’s it. No dramatic speeches. No pan therapy. Just smart care.
In this guide, you’ll learn exactly how to season a Red Copper pan in 12 easy steps, why it matters, what mistakes to avoid, and how to keep that slick cooking surface working like it has something to prove. If you have been searching for how to season a Red Copper pan, how to care for Red Copper cookware, or how to restore ceramic nonstick performance, you’re in the right kitchen.
Why Season a Red Copper Pan Matters
A Red Copper pan is designed with a ceramic nonstick cooking surface, which means it is meant to release food more easily than traditional uncoated cookware. But even a good nonstick surface can lose some of its easy-release charm over time. Heat, residue, cooking sprays, aggressive scrubbing, and plain old everyday use can all make the surface less cooperative.
Seasoning helps refresh that surface. In practical terms, it leaves behind a very light film of oil that supports smoother cooking and may improve release, especially for foods that love to cause drama, like eggs, pancakes, and fish. It also helps after a deep cleaning or any point when your pan starts acting less nonstick and more personally offended.
The most important thing to understand is this: seasoning a Red Copper pan works best when it is part of a bigger care routine. If you season the pan beautifully and then blast it over high heat, spray it with aerosol cooking spray, scrape it with a metal spatula, and dunk it into cold water while it is still hot, the pan will not send you a thank-you note. Good seasoning and good daily habits work together.
Easy Ways to Season a Red Copper Pan: 12 Steps
-
1. Wash the pan before you do anything else
Before first use, or before re-seasoning a pan that has been sitting in the cabinet collecting mystery dust, wash it with warm water, mild dish soap, and a soft sponge or dishcloth. This removes packaging residue, grease, old food film, and anything else you do not want baked onto the cooking surface.
-
2. Dry it completely
This step sounds boring because it is boring. It is also important. Water and oil do not make a good team here, and any lingering moisture can interfere with creating an even, light coating. Use a soft towel and make sure the inside surface is fully dry before moving on.
-
3. Choose a simple oil
For a Red Copper pan, keep it uncomplicated. Vegetable oil works well and is the classic choice for seasoning this type of cookware. A neutral, high-smoke-point oil also makes sense if that is what you already use in your kitchen. This is not the time for a thick pour of butter or a fancy finishing oil. Your pan is being seasoned, not auditioning for a cooking show.
-
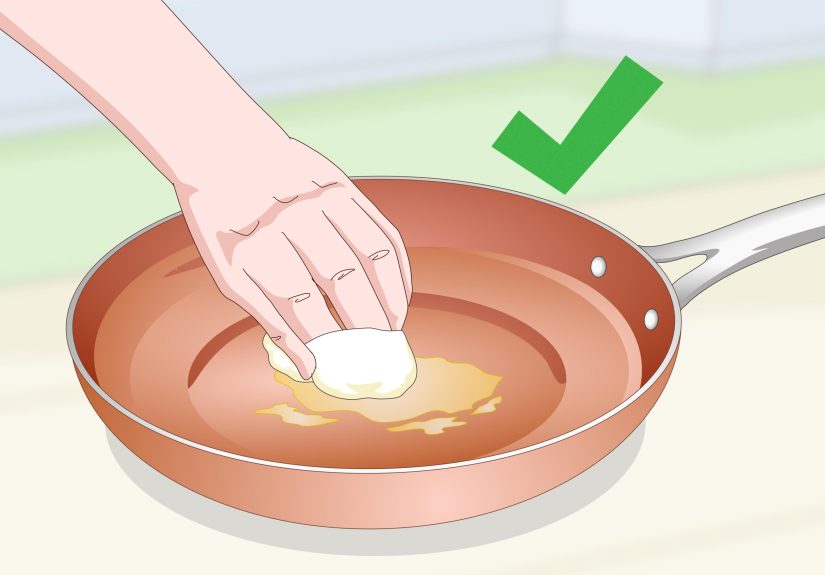
4. Apply a very thin layer to the inside cooking surface
Put a small amount of oil on a paper towel or soft cloth and spread it over the entire inside surface of the pan. Cover the bottom and the sides of the cooking area with a light, even film. The keyword here is light. If the pan looks drenched, you have gone too far.
-
5. Wipe off the extra oil
This is the step many people skip, and then they wonder why the pan feels sticky later. After coating the interior, take a clean paper towel and wipe away the excess. You want a whisper of oil, not a puddle. Think polished, not greasy. If oil is pooling anywhere, keep wiping.
-
6. Preheat your oven to 300°F
For Red Copper seasoning, 300°F is the sweet spot because it is the temperature commonly given in the pan’s first-use directions. Let the oven fully preheat so the seasoning process is even from the start. A half-heated oven leads to half-committed results, and your pan deserves better than that.
-
7. Place the pan in the oven for 20 minutes
Set the pan in the preheated oven and let it heat for about 20 minutes. This gives the light oil layer time to condition the cooking surface. You do not need to turn this into a two-hour project. This is a short, practical maintenance task, not an endurance sport.
-
8. Use oven mitts when removing the pan
This may sound painfully obvious, but hot cookware has a way of humbling even confident home cooks. Use oven mitts and remove the pan carefully. Red Copper cookware can get very hot, including the handle, so do not test your reflexes for entertainment.
-
9. Let the pan cool completely
Do not rush this part. Set the pan aside and allow it to cool naturally. Cooling completely helps the conditioning process finish properly, and it also keeps you from wiping a blazing-hot surface while making the exact face everyone makes when they realize they got impatient.
-
10. Wipe the surface one more time
Once the pan is cool, use a clean cloth or paper towel to wipe away any remaining excess oil. The surface should feel smooth, not gummy. If it feels sticky, too much oil was used. In that case, wash gently, dry thoroughly, and repeat the process with a thinner layer.
-
11. Start cooking with low to medium heat
After seasoning, do not immediately punish the pan with roaring high heat. Ceramic nonstick cookware generally performs best over low to medium heat, and Red Copper pans are no exception for everyday cooking. Eggs, grilled sandwiches, vegetables, and delicate proteins are all happier in that zone. High heat is often where nonstick performance begins to fade faster.
-
12. Re-season when performance starts slipping
You do not need to season the pan every time you use it. But if food starts sticking more than usual, or after a thorough cleaning, repeat the process. For many cooks, seasoning a Red Copper pan a couple of times a year is enough. If you use it constantly, you may need to do it more often. Listen to the pan’s behavior. If your omelet suddenly needs negotiations, it is time.
Best Habits After Seasoning Your Red Copper Pan
Seasoning works better when your daily pan habits are not sabotaging it behind the scenes. The biggest rule is to use the pan gently. That means silicone, nylon, wood, or bamboo utensils instead of metal ones. A metal fork or sharp spatula can scratch the surface, and once that happens, the nonstick performance usually does not get better with age.
It also helps to avoid aerosol cooking sprays. They seem convenient, but they can leave behind sticky residue that is surprisingly stubborn and can make the pan perform worse over time. A small amount of oil or butter added the normal way is usually a better choice.
Another smart move is to avoid overheating an empty pan. Ceramic cookware tends to hold heat efficiently, so you rarely need to crank the burner all the way up. Preheat briefly, add your cooking fat, then add the food. That approach is kinder to the coating and easier on your dinner.
Finally, let the pan cool before washing it. Taking a hot pan straight from the stove and plunging it into cold water is one of those kitchen habits that feels efficient for about three seconds, right before it risks warping or shocking the surface. Patience is cheaper than replacing cookware.
Mistakes That Can Ruin Your Seasoning
Using too much oil
A thick coat of oil does not create a better result. It usually creates a sticky one. A light film is enough. If the pan looks shiny in a slick, heavy way, wipe it again before heating.
Cooking on high heat all the time
Many people assume high heat means better performance, but with ceramic nonstick cookware, it often means faster wear. For most everyday recipes, medium or even medium-low heat is plenty. Your pan is not lazy. It is just efficient.
Using metal utensils
This one is simple. Metal utensils can scratch the surface. Use silicone, wood, nylon, or bamboo instead.
Using cooking spray
Sprays can build up residue that makes the pan feel sticky and less nonstick. A small pour of oil on a paper towel, a brush, or straight into the pan is a better long-term move.
Cleaning too aggressively
Steel wool, harsh scouring pads, and aggressive cleaners are not your friends here. A soft sponge, mild soap, and warm water will do the job in most cases. For stubborn residue, soak briefly and clean gently.
How Often Should You Season a Red Copper Pan?
There is no universal kitchen alarm that goes off and announces, “Attention, your fry pan requests a spa appointment.” In real life, you season based on performance. If food starts sticking more than it used to, the pan looks dull, or cleanup suddenly becomes annoying, re-season it.
For light users, once or twice a year may be enough. For people who use the pan several times a week, more frequent seasoning may help maintain the best results. It is especially useful after a deep clean, after accidentally overheating the pan, or after cooking something that leaves behind stubborn residue.
Quick FAQ About Red Copper Pan Care
Can you season a Red Copper pan on the stovetop?
You may see general nonstick and ceramic seasoning advice that uses the stovetop, but for a Red Copper pan, the oven method at 300°F for 20 minutes is the clearest and most product-specific approach.
What oil is best for seasoning?
Vegetable oil is a safe, simple choice. Neutral oils with a reasonably high smoke point also work well. The main goal is a thin, even coating, not a luxury oil experience.
Should you season it after every wash?
No. That would be like repainting your front door every time someone rings the bell. Season when needed, not after every routine cleaning.
Can a Red Copper pan go in the dishwasher?
Even if some cookware claims dishwasher compatibility, hand-washing is the safer habit when you want to protect nonstick performance over time. Gentle care usually equals longer life.
Conclusion
If you want the easiest way to season a Red Copper pan, the formula is refreshingly simple: wash it, dry it, rub on a very thin coat of vegetable oil, heat it in a 300°F oven for 20 minutes, let it cool, and wipe away the extra oil. That process does not take long, but it can make a real difference in how your pan cooks and cleans.
Just as important, keep up good habits after seasoning. Use low to medium heat, skip aerosol sprays, avoid metal utensils, and wash the pan gently after it cools. When you combine proper seasoning with smart everyday care, your Red Copper pan has a much better chance of staying slick, useful, and far less likely to turn scrambled eggs into a rescue mission.
Real-World Experiences With Seasoning a Red Copper Pan
One of the most common experiences people have after seasoning a Red Copper pan is surprise at how little oil it actually takes. A lot of home cooks start out thinking more oil must equal better seasoning. Then they learn the hard way that a thick coating can leave the pan tacky, dull, and weirdly sticky. Once they switch to a thin film and wipe off the excess properly, the result is usually much better. The pan feels smoother, food releases more easily, and cleanup becomes less of a post-dinner grudge match.
Another common experience is realizing that the pan did not really “fail” overnight. In many kitchens, the decline in nonstick performance happens gradually. First, an egg sticks a little in one corner. Then pancakes need extra nudging. Then roasted vegetables leave behind browned patches that seem suspiciously clingy. At that point, many people assume the pan is simply worn out. In reality, it may just need a careful cleaning and a fresh seasoning cycle. That small reset often makes the pan feel more cooperative again.
People also tend to notice that daily habits matter just as much as the seasoning step itself. A cook may season the pan correctly, then use high heat every morning because they are in a hurry and caffeine has not kicked in yet. A week later, the surface starts acting tired again. The same thing happens when someone reaches for a metal spatula out of convenience or sprays the pan with aerosol oil because it seems faster. The lesson usually arrives in a very practical way: when the surface is treated gently, it performs better for longer.
There is also a confidence factor. The first time many people season cookware, they overthink every step. Is this enough oil? Is the oven too hot? Should the pan stay in longer? Did I ruin it? By the second or third time, the process feels routine. Wash it, dry it, coat lightly, bake briefly, cool it, wipe it down. Done. It stops feeling like technical cookware maintenance and starts feeling more like basic kitchen common sense.
Then there is the cooking payoff. The most satisfying experience people report is not abstract at all. It is visual. It is the egg that slides instead of clings. It is the grilled cheese that browns beautifully without leaving a crusted cheese halo welded to the pan. It is the fish fillet that lifts cleanly instead of shredding into a sad seafood puzzle. Those small wins are exactly why seasoning a Red Copper pan is worth doing. It is not glamorous, but it is useful. And in a busy kitchen, useful beats glamorous almost every time.


