
Table of Contents >> Show >> Hide
- Why Proper pH Meter Calibration Matters
- What You Need Before You Start
- How to Calibrate and Use a pH Meter in 12 Steps
- Step 1: Inspect the meter and probe
- Step 2: Hydrate the electrode if needed
- Step 3: Prepare fresh buffer solutions in separate containers
- Step 4: Match temperature before calibration
- Step 5: Rinse and blot the probe correctly
- Step 6: Calibrate the first point, usually near neutral
- Step 7: Rinse, blot, and calibrate additional points
- Step 8: Verify the calibration with a fresh buffer
- Step 9: Prepare the sample properly
- Step 10: Measure the pH and wait for stability
- Step 11: Rinse between samples and check for drift
- Step 12: Clean and store the electrode the right way
- Common pH Meter Mistakes to Avoid
- Troubleshooting Tips for Unstable pH Readings
- Real-World Experiences: What Using a pH Meter Actually Teaches You
- Conclusion
- SEO Tags
A pH meter is one of those tools that looks wonderfully scientific until it starts behaving like a moody houseplant. One minute it gives you a crisp, confident number. The next minute it drifts, stalls, or acts like pH 7.00 is a personal insult. The good news is that most pH meter problems are not dramatic laboratory mysteries. They usually come down to calibration, temperature, contamination, storage, or plain old probe neglect.
If you want accurate pH readings in a lab, kitchen, brewery, hydroponic setup, aquarium room, classroom, or field project, you need more than a quick dip-and-guess routine. You need a method. This guide breaks the process into 12 practical steps so you can calibrate and use a pH meter the right way, without treating the electrode like a magic wand. Because it is not magic. It is glass, chemistry, and consequences.
Why Proper pH Meter Calibration Matters
pH meters work by measuring electrical potential and converting that signal into a pH value. That means small errors in the probe, buffer solutions, temperature input, or handling can turn into misleading readings. If your meter is not calibrated correctly, you may adjust a nutrient tank to the wrong level, misjudge a food product, misread a water sample, or waste time chasing a problem that is really just a tired probe.
Good calibration does three big jobs. First, it aligns the meter with known standards. Second, it confirms the probe is responding normally across the pH range you care about. Third, it gives you confidence that the reading on the screen is not fiction wearing a lab coat.
What You Need Before You Start
- A clean, working pH meter and electrode
- Fresh buffer solutions, usually pH 4.01, 7.00, and 10.01
- Deionized or distilled water for rinsing
- Small clean beakers or cups for each buffer and sample
- A lint-free tissue or wipe for blotting
- Storage solution recommended for your electrode
- Temperature probe or automatic temperature compensation if your meter uses it
- A notebook or digital log for recording calibration and sample details
One important note before we get into the steps: never calibrate straight from the original buffer bottle. Pour out a small amount into clean containers. That way, your expensive standard does not become a soup of rinse water, mystery ions, and regret.
How to Calibrate and Use a pH Meter in 12 Steps
Step 1: Inspect the meter and probe
Start with a visual check. Make sure the glass bulb is intact, the cable is secure, the connector is clean, and the reference junction does not look crusty, dry, or clogged. If you are using a refillable electrode, confirm the fill solution level is where it should be. If the probe has been stored dry or has visible residue on it, deal with that first. Calibrating a neglected probe is like aligning a crooked ruler. You can do it, but you will not like the result.
Step 2: Hydrate the electrode if needed
A dry pH electrode often responds slowly and drifts more than it should. If the probe has dried out or has been stored for a while, soak it in the manufacturer’s recommended storage solution before calibration. Some electrodes may also allow short conditioning in an appropriate buffer, but storage solution is the safest default. Do not try to resurrect a dry probe by parking it in deionized water for long-term storage. That is a classic mistake and an excellent way to shorten electrode life.
Step 3: Prepare fresh buffer solutions in separate containers
Pour fresh pH 4, pH 7, and pH 10 buffers into separate clean beakers. Use enough volume to fully cover the sensing bulb and reference junction. If you expect the sample to be acidic, a two-point calibration with pH 7 and pH 4 is often enough. If you expect an alkaline sample, pH 7 and pH 10 usually make more sense. If you do not know where the sample will land, or you want the best accuracy across a wider range, use all three.
The golden rule is simple: choose buffer solutions that bracket the expected sample pH. If your sample is likely around pH 8.5, calibrating only with pH 4 and pH 7 is not ideal. Make the meter work in the neighborhood where you will actually measure.
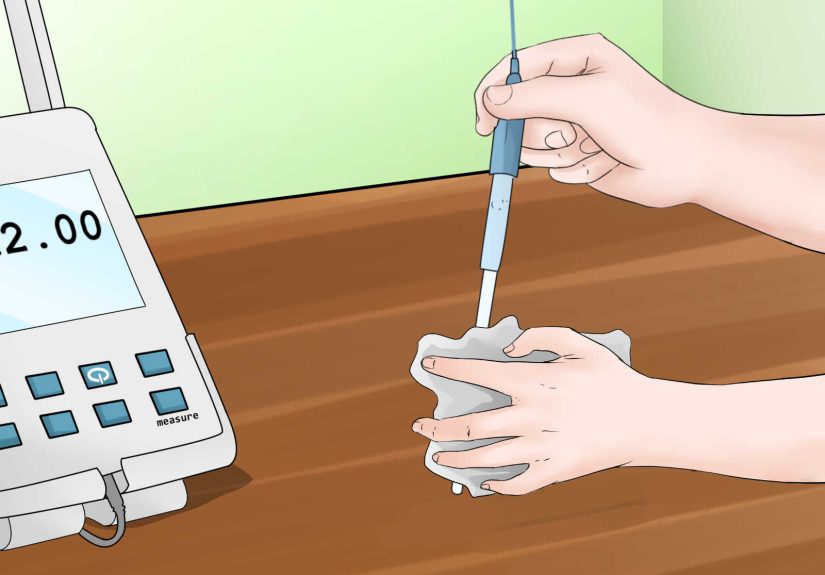
Step 4: Match temperature before calibration
Temperature affects both the electrode response and the actual value of buffer solutions. Let the buffers, probe, and meter settle to roughly the same temperature before you calibrate. If your meter has automatic temperature compensation, make sure it is enabled and working. If it uses manual temperature entry, enter the correct temperature. Skipping this step can quietly introduce error even when everything else looks tidy.
Step 5: Rinse and blot the probe correctly
Before placing the probe into the first buffer, rinse it with deionized or distilled water. Then blot it gently with a lint-free wipe. Blot, do not wipe. Wiping can create static and may also drag contamination across the glass surface. Think gentle pat, not aggressive windshield cleaning.
Step 6: Calibrate the first point, usually near neutral
Place the probe into the first buffer, usually pH 7.00 for a standard lab setup. Make sure the sensing bulb and reference junction are fully immersed. Do not let the electrode rest on the bottom or sides of the beaker. Gently stir or swirl the solution to remove air bubbles and improve contact around the sensor. Wait for the reading to stabilize, then confirm or save that calibration point according to your meter’s instructions.
On many meters, pH 7 is used to establish the offset. That is one reason it is often included in two-point and three-point calibration routines. Even when meters can accept buffer points in different orders, starting around neutral is still a comfortable and practical habit.
Step 7: Rinse, blot, and calibrate additional points
Remove the probe, rinse it, blot it, and place it into the next buffer. Repeat the process with pH 4.01 or pH 10.01 depending on your expected sample range. For the best overall accuracy, add the third point as well. Each point helps the meter define how the electrode behaves across the scale, which is especially helpful when the probe is aging or when the sample range is broad.
If your meter displays slope or offset values, check them. Readings that fall well outside the manufacturer’s acceptable range can signal contamination, aging, incorrect buffers, or a damaged electrode. In other words, the meter may be politely telling you that the probe needs help.
Step 8: Verify the calibration with a fresh buffer
Once calibration is complete, test the meter in a fresh portion of buffer. This step is often skipped by impatient people and later regretted by those same people. Verification tells you whether the meter actually reads a known standard correctly after calibration, not just whether you successfully pressed the right buttons.
If the result is off more than your acceptable tolerance, recalibrate. If it still misses, clean the probe, check your buffers, and consider whether the electrode is nearing retirement.
Step 9: Prepare the sample properly
Pour the sample into a clean container rather than measuring in a storage bottle or shared vessel. If possible, avoid measuring in the original process container when contamination matters. The sample should be mixed enough to be representative, but not whipped into a foamy tornado. If the sample contains solids, oils, proteins, or sticky residues, use an electrode suitable for that application and clean it promptly afterward.
For water samples and other time-sensitive materials, measure as soon as possible after collection. pH can change when a sample warms up, cools down, degasses, or reacts with the air. The number you get later may describe your countertop more accurately than your original sample.
Step 10: Measure the pH and wait for stability
Rinse and blot the probe again, then place it into the sample. Make sure the bulb and reference junction are fully immersed. Stir gently or move the probe slightly to avoid stagnant liquid around the sensor. Then wait. A stable pH reading is worth more than a fast wrong one.
Many modern meters indicate when the value has stabilized. If yours does not, watch for the reading to settle rather than bounce around. Record the pH and the temperature, especially if the measurement will be used for quality control, troubleshooting, or comparison later.
Step 11: Rinse between samples and check for drift
If you are measuring multiple samples, rinse and blot the probe between each one to reduce carryover. For longer measurement sessions, check the meter against a known buffer every so often, especially after several hours, after dirty samples, or whenever readings start looking suspicious. pH drift is not always dramatic. Sometimes it is subtle, sneaky, and fully capable of ruining your afternoon.
If you see sluggish response, unstable numbers, or a verification failure, stop and troubleshoot before collecting more data. Continuing with a drifting meter does not count as productivity.
Step 12: Clean and store the electrode the right way
After use, rinse the electrode thoroughly. If the probe touched oily, protein-rich, dirty, or coated samples, clean it with the appropriate cleaning solution recommended by the manufacturer. Then store the electrode in the proper storage solution. Keep the glass bulb hydrated. Do not store the probe dry, and do not leave it soaking long-term in deionized or distilled water unless the manufacturer specifically says otherwise for that electrode type.
Proper storage is boring, which is exactly why it works. It is also one of the biggest differences between a probe that lasts and a probe that becomes an expensive paperweight with a cable.
Common pH Meter Mistakes to Avoid
- Using old, contaminated, or expired buffer solutions
- Calibrating with buffers that do not bracket the sample range
- Ignoring temperature differences between buffers and samples
- Wiping the electrode instead of blotting it
- Letting the probe dry out between uses
- Storing the electrode in deionized water
- Measuring without waiting for the reading to stabilize
- Skipping verification after calibration
- Using the same dirty beaker for every step like it is a lucky charm
Troubleshooting Tips for Unstable pH Readings
If the reading drifts
Check the probe for dryness, contamination, air bubbles, and temperature mismatch. Rehydrate if needed, clean the electrode, and recalibrate with fresh buffers.
If the meter calibrates poorly
Confirm that the buffers are correct, fresh, and at the right temperature. Inspect the electrode slope and offset if your meter shows them. A weak slope often points to aging or fouling.
If the response is slow
Clean the electrode, remove any bubbles, stir gently, and confirm the junction is not clogged. Old probes can also become slow simply because they are old. Sadly, chemistry does not offer immortality.
If readings differ from one sample to the next for no clear reason
Look for carryover, inconsistent sample mixing, poor rinsing, or sample-specific fouling such as oils, proteins, or solids coating the sensor.
Real-World Experiences: What Using a pH Meter Actually Teaches You
The first practical lesson most people learn is that a pH meter rewards patience and punishes shortcuts. In a classroom, the meter seems simple enough: rinse, dip, record, done. Then real life enters the chat. A student rushes from pH 4 buffer into pH 10 buffer without blotting. A brewer measures warm wort with a cold probe. A hydroponics grower calibrates perfectly in the morning and wonders why evening readings look weird after the cap was left off and the probe dried out on the bench. Suddenly the meter becomes less of a gadget and more of a relationship.
In food work, the biggest surprise is how quickly residue can sabotage performance. Thick sauces, dairy, and protein-rich samples love to coat the bulb and junction. The reading might still appear, but it arrives slowly and acts uncertain, like it needs coffee first. Operators who clean immediately after use usually keep their probes alive much longer. Operators who say, “I’ll rinse it later,” often end up buying new electrodes sooner than expected.
Hydroponics users often discover a different lesson: pH is not static just because the display has numbers on it. Nutrient solutions shift, temperature changes matter, and tiny adjustments can have outsized effects. People who check calibration regularly tend to trust their nutrient management. People who calibrate once, sometime in the distant past, often spend days blaming fertilizers, lights, water, or the moon before realizing the probe was the problem.
Aquarium keepers and water testers usually learn that sampling technique matters more than they expected. If the sample sits around, warms up, or is exposed to air for too long, the reading can change. Measuring promptly and consistently makes comparison more meaningful. It also keeps you from making dramatic corrective moves based on a number that no longer reflects the actual tank or source water.
Home brewers tend to become pH meter philosophers after one or two brew days. They learn that the fancy meter is only as smart as the person using fresh buffers, matching temperatures, and storing the probe correctly. They also learn that “close enough” is not always close enough when mash performance, flavor, and consistency are involved.
Across all these settings, the experience is remarkably similar. Accurate pH measurement comes from habits, not luck. The people who get dependable results are usually the ones who prepare clean buffers, slow down during calibration, verify before trusting, and store the electrode like it matters. Because it does. A pH meter is not difficult to use well, but it does ask for respect. Treat it like a precision instrument instead of a kitchen thermometer with attitude, and it will usually return the favor.
Conclusion
If you want reliable pH readings, the formula is refreshingly unglamorous: use fresh buffers, calibrate with the right points, account for temperature, rinse and blot between steps, verify your work, and store the electrode properly. That is the whole game. Once you build those habits, a pH meter stops feeling temperamental and starts feeling trustworthy.
So yes, calibrating and using a pH meter takes a little care. But compared with the chaos of wrong readings, mystery drift, and premature probe death, a careful 12-step routine is a bargain. Your data will be cleaner, your adjustments will be smarter, and your probe will be much less likely to stage a tiny glass rebellion.


