
Table of Contents >> Show >> Hide
- What “Painting a Car” Actually Means
- Beginner Reality Check: Should You DIY the Whole Job?
- Tools and Materials: The Safe, High-Level Checklist
- Step-by-Step: A Beginner-Friendly Process (Without the Dangerous Guesswork)
- Step 1: Decide the scope (full respray vs. panel vs. blend)
- Step 2: Plan your workspace like you’re fighting dust in a boss battle
- Step 3: Wash, decontaminate, and “reset” the surface
- Step 4: Remove or protect what you don’t want painted
- Step 5: Repair damage and level the surface
- Step 6: Sand for adhesion and smoothness (the “boring” step that makes the job)
- Step 7: Clean again (yes, again)
- Step 8: Apply primer/sealer for a consistent foundation
- Step 9: Check your work before color
- Step 10: Apply the color coat (basecoat or single-stage) with consistency
- Step 11: Apply clearcoat for gloss and protection
- Step 12: Cure time: let chemistry do its job
- Step 13: Finish work (optional): defect correction and polishing
- Common Paint Problems (and What They Usually Mean)
- Cost, Time, and Expectations
- Safety and Compliance: Don’t Skip the Grown-Up Part
- Beginner Pro Tips (That Don’t Require Superpowers)
- of Real-World Beginner Experiences (What Usually Happens)
- Conclusion
Painting a car looks deceptively simple on video: a few smooth passes, a glossy finish, and suddenly your tired sedan is giving “fresh-from-the-showroom”
energy. In real life, a quality paint job is less about “painting” and more about prep, safety, and patience. The color you see is the final
reward for dozens of smaller decisions: how clean the surface is, how straight the bodywork is, how controlled the environment is, and whether the coating
system is applied exactly as designed.
One important note up front: automotive coatings and reducers can be hazardous (some contain isocyanates and other chemicals). If you’re a beginnerespecially
if you’re under 18treat this as a supervised project or consider having a professional shop spray the car after you do the safe parts
(like cleaning, disassembly, and non-chemical prep). Your lungs are not “replaceable parts,” and the return policy is… not great.
What “Painting a Car” Actually Means
Most modern paint jobs use a layered system. Think of it like a fancy cake (but please don’t eat it):
- Primer/sealer: helps adhesion and creates an even base.
- Basecoat (color): the pigment layersolid, metallic, pearl, or tri-coat systems.
- Clearcoat: protection and gloss, plus UV resistance.
Some projects use single-stage paint (color + gloss in one layer), but basecoat/clearcoat is common for durability and appearance on most
modern vehicles.
Beginner Reality Check: Should You DIY the Whole Job?
A full DIY respray can be done, but the difficulty curve is steep. Here’s a beginner-friendly approach that keeps your sanity intact:
- Start small: practice on a spare panel, a trunk lid, or a bumper cover.
- Pick a “nice driver” goal: aim for “looks great from 5 feet,” not “Pebble Beach concours.”
- Consider a hybrid plan: you handle disassembly and surface prep; a shop sprays the base/clear in a controlled booth.
The biggest secret in auto refinishing is that prep is the paint job. Spraying is the final act, not the whole play.
Tools and Materials: The Safe, High-Level Checklist
You’ll see long shopping lists online, but beginners do best when they think in categories instead of brand names. Exact choices should come from
the paint manufacturer’s technical sheets and safety data sheets.
Prep and masking
- Quality automotive wash supplies and lint-free towels
- Masking materials designed for automotive refinishing
- Clean workspace supplies (plastic sheeting, lighting, dust control)
- Basic hand tools for removing trim and hardware
Surface correction
- Abrasives and sanding blocks (types vary by step)
- Body repair materials as needed (for dents, chips, and rust repair)
- Guide coat products (optional but helpful for learning)
Paint system
- Primer/sealer, basecoat (or single-stage), clearcoatmatched as a system
- Mixing/measurement tools per product instructions
Safety gear (non-negotiable)
- Eye protection and chemical-resistant gloves
- Protective clothing to prevent skin exposure
- Appropriate respiratory protection and ventilation for automotive coatings (follow product guidance; don’t guess)
If you’re tempted to “wing it” on safety because it’s inconvenient, remind yourself: paint mistakes can be sanded and redone. Breathing mistakes are a
much pricier upgrade.
Step-by-Step: A Beginner-Friendly Process (Without the Dangerous Guesswork)
This process explains what happens at each stage and why it matters. For exact application windows, coat counts, mixing, and cure times,
always follow the manufacturer’s product sheets. That’s not legal fine printit’s the recipe.
Step 1: Decide the scope (full respray vs. panel vs. blend)
A full repaint is the hardest option because every flaw is multiplied across the whole car. Beginners often get better results by painting a single panel
or doing a partial refinish with blending. Also decide whether you’re changing color (more disassembly and edge work) or staying with the factory color.
Step 2: Plan your workspace like you’re fighting dust in a boss battle
Dust and uncontrolled airflow are the villains of DIY paint jobs. Your goal is a clean, well-lit area where you can keep debris off the surface during
critical stages. If you can’t control the environment, consider stopping at prep and hiring a booth for the spraying portion.
Step 3: Wash, decontaminate, and “reset” the surface
Paint hates oils, silicone, and mystery residue. Thorough cleaning before any sanding helps prevent adhesion issues and defects like fisheyes. Think of it
as deleting the car’s “old vibes” before installing the new look.
Step 4: Remove or protect what you don’t want painted
Beginners usually under-estimate how much time masking and trim removal takes. Removing badges, lights, mirrors, weatherstrips, and certain trims can lead
to a cleaner result than trying to mask every edge. If you do mask, use automotive-grade materials and take your time on edges and transitions.
Step 5: Repair damage and level the surface
Chips, dents, cracks, and rust don’t disappear under fresh paint. They become more visiblelike putting a spotlight on your mistakes. Repair the substrate
first so your paint layers aren’t trying to do a bodywork job they were never hired for.
Step 6: Sand for adhesion and smoothness (the “boring” step that makes the job)
Sanding is how you create a stable surface for coatings to grip and how you flatten transitions. Use the right method for your surface type (factory paint,
repaired areas, bare metal, plastic). The goal is uniform texturenot random shiny patches next to aggressive scratches.
Step 7: Clean again (yes, again)
After sanding, dust becomes a full-time employee in your workspace. Remove it thoroughlyespecially from seams, jambs, and panel gapsso it doesn’t drift
into your fresh coatings at the worst possible moment.
Step 8: Apply primer/sealer for a consistent foundation
Primer and sealer choices depend on what you’re painting over (repairs, bare areas, existing paint) and what your topcoat system requires. This layer helps
unify the surface and improve adhesion. Beginners benefit from focusing on an even foundation because it makes color application more predictable.
Step 9: Check your work before color
A quick inspection under bright lighting helps you catch waves, sanding marks, or contamination before color and clear make them permanent roommates. Many
refinishing workflows use a guide technique to reveal highs and lows during prep.
Step 10: Apply the color coat (basecoat or single-stage) with consistency
Color is where beginners get excitedand where the car can start looking “patchy” if the technique is inconsistent. Metallics and pearls especially punish
uneven passes. Keep your approach steady and follow the product guidance for flash and recoat windows. If you’re unsure, practice on a test panel first.
Step 11: Apply clearcoat for gloss and protection
Clearcoat is not just “shine juice.” It’s the protective layer that defends against UV damage, chemicals, and weathering. Many DIY paint jobs fail long-term
because the clear layer wasn’t applied within the correct window or wasn’t allowed to cure properly.
Step 12: Cure time: let chemistry do its job
The hardest step for most humans is doing nothing. But coatings need time to harden and stabilize. Rushing reassembly, washing, or polishing too soon can
cause dull spots, imprints, or edge damage. Give the finish the time it needs according to the product system.
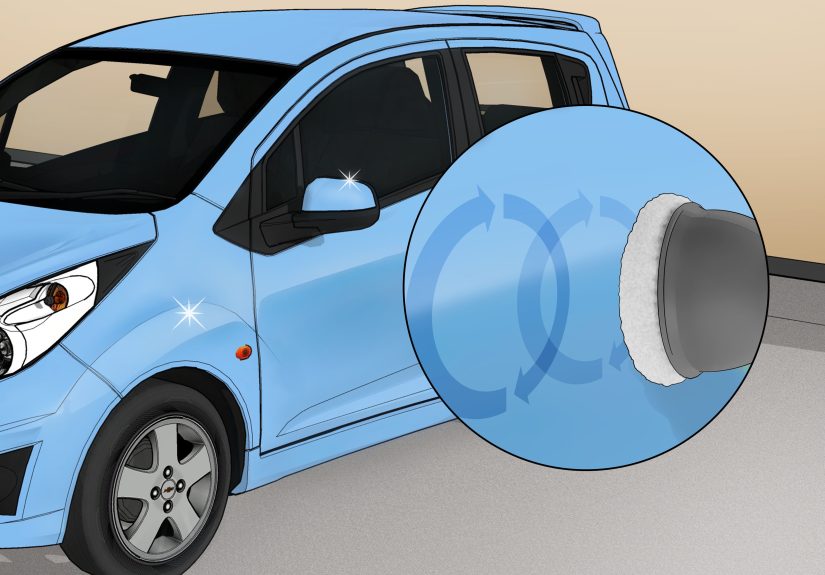
Step 13: Finish work (optional): defect correction and polishing
Even good paint jobs can have minor dust nibs or texture. Corrective finishing can improve gloss and clarity, but it’s also easy to overdo. Beginners should
treat this as a separate skill: learn it on a small area before chasing perfection across the whole hood.
Common Paint Problems (and What They Usually Mean)
Orange peel texture
Often tied to application technique, product selection, temperature, or air movement. Some texture is normal; excessive texture usually means the process
needs better control and consistency.
Runs and sags
Usually caused by applying too much material in one area or poor edge control. The fix is typically better technique and respecting the product system’s
timing and film build guidance.
Fisheyes (small craters)
A classic sign of contaminationoften silicone, oil, or residue. This is why cleaning is repeated so many times you start to feel like you’re washing a car
for a shampoo commercial.
Dust nibs and trash in the finish
Usually the environment: dust in the air, dirty clothing, poor masking, or dust coming out of seams after sanding. Improve cleanup and dust control, and
treat the workspace like a “clean zone” during coating stages.
Color mismatch
Could be the wrong paint code variant, inadequate blending, or inconsistent applicationespecially with metallics. When matching matters, professionals use
variant decks and spray-out cards to verify color before committing to the whole panel.
Cost, Time, and Expectations
A DIY car paint job can cost anywhere from “cheap but risky” to “surprisingly expensive,” depending on how much prep is needed, what paint system you choose,
and whether you already own the equipment. Expect the majority of your time to go into cleaning, sanding, masking, and fixing small issuesnot the spraying.
- Time: Beginners often spend multiple weekends (or longer) doing prep correctly.
- Money: Quality materials and proper safety equipment add up, but they’re cheaper than redoing the job (or harming your health).
- Quality: A “good DIY” finish is totally possibleespecially if you start with a small project and build skill gradually.
Safety and Compliance: Don’t Skip the Grown-Up Part
Automotive refinishing can involve volatile organic compounds (VOCs) and hazardous chemicals. Professional shops in the U.S. often follow specific training
and compliance requirements, and rules exist to reduce harmful emissions. Even for DIYers, it’s smart to understand local regulations, avoid spraying where
it could affect neighbors, and dispose of waste properly. Most importantly, treat safety data sheets as required reading, not optional lore.
Beginner Pro Tips (That Don’t Require Superpowers)
- Practice first: A test panel can save you from an expensive “learning moment.”
- Work in stages: Disassembly and prep one weekend, surface correction the next, and only then coatings.
- Use one system: Mixing random brands and products is a common cause of adhesion and compatibility problems.
- Chase cleanliness: Most defects come from contamination or dust, not from “bad luck.”
- Know when to outsource: If your workspace can’t be controlled, paying for booth time can be cheaper than redoing the whole job.
of Real-World Beginner Experiences (What Usually Happens)
Beginners almost always start with the fun fantasy: “I’ll paint my car in a weekend.” Then reality shows up wearing dusty coveralls and holding a roll of
masking tape that somehow disappears every time you set it down. The first lesson most people learn is that the project expands to fill the time you give it.
You think you’re painting; you’re actually running a small, temporary cleaning company that specializes in removing sanding dust from places dust should never
be able to reach.
A very common first-timer story goes like this: you wash the car, it looks clean, and you feel unstoppable. Then you start sanding and suddenly you see every
tiny dent and wave you never noticed before. Under dull prep lighting, the panel seems fine. Under bright light, it becomes a topographic map. That’s when
beginners realize why experienced painters are obsessed with prep: paint doesn’t hide; it reveals. The more gloss you add, the more your eyes can “read” the
surface.
Another classic experience: you spend hours masking, convinced you’ve created a protective fortress. Later you find a tiny edge that wasn’t sealed well, and
overspray sneaks in like it pays rent. It’s frustratingbut it teaches you to slow down and treat edges as high-priority. Many people end up learning that
removing trim (when possible) can be less stressful than trying to mask complex shapes perfectly.
Then there’s the emotional roller coaster of the first color pass. At first, it looks uneven and you panic. Your brain starts drafting an apology letter to
your vehicle. But as coverage develops, it starts looking like an actual car again, and confidence returns. This is where discipline matters: staying steady,
following product guidance, and resisting the urge to “fix it” with random extra passes. Beginners who get the best results usually aren’t the most talented;
they’re the most consistent.
Clearcoat is often the moment beginners fall in love with the projectbecause gloss is instant gratification. It’s also where people learn patience the hard
way. Touching the surface too soon, reassembling too early, or trying to polish before the finish is ready can create marks that feel deeply personal.
The practical takeaway most beginners share afterward is simple: if you plan for extra cure time and treat the process like a marathon, you’ll enjoy it more
and your finish will reward you. The best “secret” is not a magic techniqueit’s respecting the system, controlling the environment as much as possible, and
giving yourself permission to learn on a smaller piece before going full-car hero mode.
Conclusion
Learning how to paint a car is absolutely possible for beginners, but the smartest path is gradual: master prep, practice on small parts, and treat safety and
product instructions like the blueprint. When you respect the processcleanliness, consistency, curing time, and a compatible paint systemyou can create a
finish that looks great, lasts longer, and makes you proud every time the sun hits it just right.


